
spring boot 如何连接 localhost MySQL
mysqlmysqli database
为此,请使用 application.properties −
spring.datasource.username=yourMySQLUserName
spring.datasource.password=yourMySQLPassword
spring.datasource.url=jdbc:mysql://localhost:3306/yoruDatabaseName
spring.datasource.driver-class-name=com.mysql.cj.jdbc.Driver
为了理解上述语法,让我们创建一个表 −
mysql> create table demo71
−> (
−> id int,
−> name varchar(20)
−> );
Query OK, 0 rows affected (3.81 sec)
使用 insert 命令向表中插入一些记录 −
mysql> insert into demo71 values(100,'John');
Query OK, 1 row affected (0.13 sec)

mysql> insert into demo71 values(101,'David');
Query OK, 1 row affected (0.49 sec)

mysql> insert into demo71 values(102,'Bob');
Query OK, 1 row affected (0.15 sec)
使用 select 语句显示表中的记录 −
mysql> select *from demo71;
这将产生以下输出 −
+------+-------+
| id   | name  |
+------+-------+
| 100  | John  |
| 101  | David |
| 102  | Bob  |
+------+-------+
3 rows in set (0.00 sec)
为了验证上面的application.properties是否与本地MySQL一起工作,你可以编写spring boot应用程序进行测试。
以下是application.properties文件。

以下是控制器类代码。代码如下 −
package com.demo.controller;
import java.util.Iterator;
import java.util.List;
import javax.persistence.EntityManager;
import javax.persistence.Query;
import org.springframework.beans.factory.annotation.Autowired;
import org.springframework.web.bind.annotation.GetMapping;
import org.springframework.web.bind.annotation.RequestMapping;
import org.springframework.web.bind.annotation.ResponseBody;
import org.springframework.web.bind.annotation.RestController;
@RestController
@RequestMapping("/table")
public class TableController {
   @Autowired
   EntityManager entityManager;
   @ResponseBody
   @GetMapping("/demo71")
   public String getData() {
      Query sqlQuery= entityManager.createNativeQuery("select name from demo71");
      List<String> result= sqlQuery.getResultList();
      StringBuilder sb=new StringBuilder();
      Iterator itr= result.iterator();
      while(itr.hasNext()) {
         sb.append(itr.next()+" ");
      }
      return sb.toString();
   }
}
Following is the main class. The Java code is as follows −
package com.demo;
import org.springframework.boot.SpringApplication;
import org.springframework.boot.autoconfigure.SpringBootApplication;
@SpringBootApplication
public class JavaMysqlDemoApplication {
   public static void main(String[] args) {
      SpringApplication.run(JavaMysqlDemoApplication.class, args);
   }
}
要运行上述代码,请转到主类并右键单击并选择"作为 Java 应用程序运行"。成功执行后,您需要点击以下网址。
网址如下 −
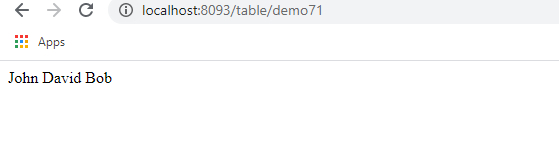
http://localhost:8093/table/demo71
这将产生以下输出 −
相关文章
有用资源
mysql 参考教程 - 该教程包含有关 mysql 的更多信息:https://www.cainiaomax.com/mysql/

