如何使用 Kotlin 在 Android 中创建自定义评分栏?
kotlin apps/applicationsmobile developmentandroid更新于 2026/2/10 2:22:17
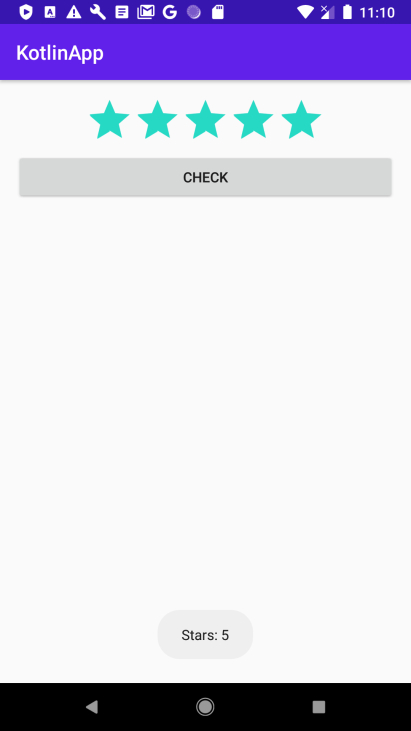
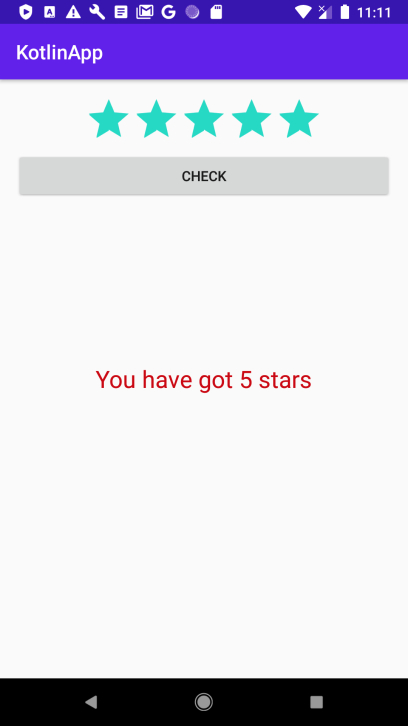
本示例演示了如何使用 Kotlin 在 Android 中创建自定义评分栏。
步骤 1 − 在 Android Studio 中创建一个新项目,前往"文件"->"新建项目",并填写所有必填信息以创建新项目。
步骤 2 − 将以下代码添加到 res/layout/activity_main.xml。
<RelativeLayout xmlns:android="http://schemas.android.com/apk/res/android"
xmlns:tools="http://schemas.android.com/tools"
   android:layout_width="match_parent"
   android:layout_height="match_parent"
   android:padding="16sp"
   tools:context=".MainActivity">
   <RatingBar
      android:id="@+id/ratingBar"
      android:layout_width="wrap_content"
      android:layout_height="wrap_content"
      android:layout_alignParentTop="true"
      android:layout_centerHorizontal="true"
      android:numStars="5"
      android:rating="2.0"
      android:stepSize="1.0" />
   <Button
      android:id="@+id/buttonCheck"
      android:layout_width="match_parent"
      android:layout_height="wrap_content"
      android:layout_below="@id/ratingBar"
      android:layout_centerHorizontal="true"
      android:text="CHECK" />
   <TextView
      android:id="@+id/textView"
      android:layout_width="wrap_content"
      android:layout_height="wrap_content"
      android:layout_centerInParent="true"
      android:textColor="@android:color/holo_red_dark"
      android:textSize="24sp" />
</RelativeLayout>
步骤 3 − 将以下代码添加到 src/MainActivity.kt
import android.os.Bundle
import android.widget.Button
import android.widget.RatingBar
import android.widget.RatingBar.OnRatingBarChangeListener
import android.widget.TextView
import android.widget.Toast
import androidx.appcompat.app.AppCompatActivity
class MainActivity : AppCompatActivity() {
   lateinit var ratingBar: RatingBar
   lateinit var button: Button
   lateinit var textView: TextView
   override fun onCreate(savedInstanceState: Bundle?) {
      super.onCreate(savedInstanceState)
      setContentView(R.layout.activity_main)
      title = "KotlinApp"
      ratingBar = findViewById(R.id.ratingBar)
      ratingBar.numStars = 5
      button = findViewById(R.id.buttonCheck)
      textView = findViewById(R.id.textView)
      ratingBar.onRatingBarChangeListener =
      OnRatingBarChangeListener {
         _, rating, _ ->
         Toast.makeText(
         this@MainActivity, "Stars: " +
         rating.toInt(), Toast.LENGTH_SHORT
         ).show()
      }
      button.setOnClickListener {
         textView.text = "You have got " + ratingBar.rating.toInt()+ " stars"
      }
   }
}
步骤 4 − 将以下代码添加到 androidManifest.xml
<?xml version="1.0" encoding="utf-8"?>
<manifest xmlns:android="http://schemas.android.com/apk/res/android" package="app.com.q11">
   <application
      android:allowBackup="true"
      android:icon="@mipmap/ic_launcher"
      android:label="@string/app_name"
      android:roundIcon="@mipmap/ic_launcher_round"
      android:supportsRtl="true"
      android:theme="@style/AppTheme">
      <activity android:name=".MainActivity">
         <intent-filter>
            <action android:name="android.intent.action.MAIN" />
            <category android:name="android.intent.category.LAUNCHER" />
         </intent-filter>
      </activity>
</application>
让我们尝试运行您的应用程序。假设您已将实际的 Android 移动设备连接到电脑。要从 Android Studio 运行该应用程序,请打开项目的某个活动文件,然后点击工具栏上的"运行"图标 。选择您的移动设备作为选项,然后勾选将显示默认屏幕的移动设备