
在 Matplotlib 中旋转每个子图的轴文本
matplotlibpythondata visualization更新于 2025/4/21 14:04:17
要旋转每个子图的轴文本,我们可以在参数中使用带有旋转的文本。
步骤
创建一个新图形或激活现有图形。
使用 add_subplot() 方法将 '~.axes.Axes' 作为子图排列的一部分添加到图形中。
使用 subplots_adjust() 方法调整子图布局参数。
使用 suptitle() 方法向图形添加居中标题。
设置轴的标题。
设置 x 和 y 标签绘图。
使用一些坐标点创建轴。
使用一些参数(如fontsize、fontweight)向图形添加文本,并添加旋转。
绘制一个点,并用一些文本和箭头注释该点。
要显示图形,请使用show()方法。
示例
from matplotlib import pyplot as plt
plt.rcParams["figure.figsize"] = [7.00, 3.50]
plt.rcParams["figure.autolayout"] = True
fig = plt.figure()
ax = fig.add_subplot()
fig.subplots_adjust(top=0.85)
fig.suptitle('bold figure suptitle', fontsize=14, fontweight='bold')
ax.set_title('axes title')
ax.set_xlabel('xlabel')
ax.set_ylabel('ylabel')
ax.axis([0, 10, 0, 10])
ax.text(3, 8, 'boxed italics text in data coords', style='italic',
   bbox={'facecolor': 'red', 'alpha': 0.5, 'pad': 10})
ax.text(2, 6, r'an equation: $E=mc^2$', fontsize=15)
ax.text(3, 2, 'unicode: Institut für Festkörperphysik')
ax.text(0.95, 0.01, 'colored text in axes coords',
   verticalalignment='bottom', horizontalalignment='right',
   transform=ax.transAxes,
   color='green', fontsize=15)
ax.plot([2], [1], 'o')
ax.annotate('annotate', xy=(2, 1), xytext=(3, 4),
   arrowprops=dict(facecolor='black', shrink=0.05))
plt.show()
输出
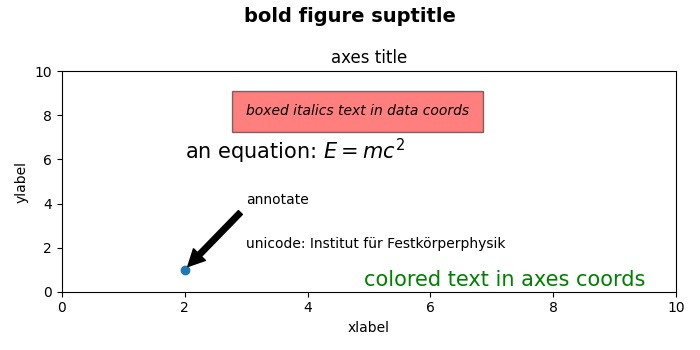
相关文章
有用资源
python 参考教程 - 该教程包含有关 python 的更多信息:https://www.cainiaomax.com/python/

