
WPF - 多点触控
Windows 7 及其更高版本能够接收来自多个触摸感应设备的输入。 WPF 应用程序还可以通过在发生触摸时引发事件来将触摸输入作为其他输入(例如鼠标或键盘)进行处理。
当发生触摸时,WPF 公开两种类型的事件 − 触摸事件和操作事件。 触摸事件提供有关触摸屏上每个手指及其移动的原始数据。 操作事件将输入解释为某些操作。 本节讨论这两种类型的事件。
开发可以响应触摸的应用程序需要以下组件。
- Microsoft Visual Studio 2010 或更高版本。
- Windows 7 或更高版本。
- 支持 Windows Touch 的设备,例如触摸屏。
讨论触摸输入时常用以下术语 −
触摸 − Windows 7 或更高版本中可以识别的用户输入类型。 触摸输入是从触摸屏发起的。
多点触控 − 从多个点同时发生的输入类型。 在 WPF 中,当讨论触摸时,通常指的是多点触摸。
操纵 − 当触摸被推断为应用于对象的物理动作时发生。 在 WPF 中,操作事件将输入解释为平移、扩展或旋转操作。
触摸设备 − 表示产生触摸输入的设备,例如触摸屏上的单个手指。
示例
为了理解所有这些概念,让我们创建一个名为 WPFTouchInput 的新 WPF 项目。
将一个矩形从工具箱拖到设计窗口,并用图像或任何颜色填充矩形。 如果您想使用图像,请不要忘记在您的解决方案中包含该图像,否则程序将无法执行。
以下 XAML 代码使用不同的属性和事件初始化一个矩形。
<Window x:Class = "WPFMultiTouchInput.MainWindow"
   xmlns = "http://schemas.microsoft.com/winfx/2006/xaml/presentation"
   xmlns:x = "http://schemas.microsoft.com/winfx/2006/xaml"
   xmlns:d = "http://schemas.microsoft.com/expression/blend/2008"
   xmlns:mc = "http://schemas.openxmlformats.org/markup-compatibility/2006"
   xmlns:local = "clr-namespace:WPFMultiTouchInput"
   mc:Ignorable = "d" Title = "MainWindow" Height = "350" Width = "604">

   <Window.Resources>
      <MatrixTransform x:Key = "InitialMatrixTransform">
         <MatrixTransform.Matrix>
            <Matrix OffsetX = "200" OffsetY = "200"/>
         </MatrixTransform.Matrix>
      </MatrixTransform>
   </Window.Resources>

   <Canvas>
      <Rectangle Name = "manRect" Width = "321" Height = "241"
         RenderTransform = "{StaticResource InitialMatrixTransform}"
         IsManipulationEnabled = "true" Canvas.Left = "-70" Canvas.Top = "-170">
         <Rectangle.Fill>
            <ImageBrush ImageSource = "Images/DSC_0076.JPG"/>
         </Rectangle.Fill>
      </Rectangle>
   </Canvas>

</Window>
这里是不同操作事件的实现 −
using System.Windows;
using System.Windows.Input;
using System.Windows.Media;
using System.Windows.Shapes;

namespace WPFMultiTouchInput {

   public partial class MainWindow : Window {

      public MainWindow() {
         InitializeComponent();
      }

      void Window_ManipulationStarting(object sender, ManipulationStartingEventArgs e) {
         e.ManipulationContainer = this;
         e.Handled = true;
      }

      void Window_ManipulationDelta(object sender, ManipulationDeltaEventArgs e) {
         Rectangle rectToMove = e.OriginalSource as Rectangle;
         Matrix rectsMatrix = ((MatrixTransform)rectToMove.RenderTransform).Matrix;

         rectsMatrix.RotateAt(e.DeltaManipulation.Rotation, e.ManipulationOrigin.X, e.ManipulationOrigin.Y);

         rectsMatrix.ScaleAt(e.DeltaManipulation.Scale.X, e.DeltaManipulation.Scale.X,
            e.ManipulationOrigin.X, e.ManipulationOrigin.Y);

         rectsMatrix.Translate(e.DeltaManipulation.Translation.X,
            e.DeltaManipulation.Translation.Y);

         rectToMove.RenderTransform = new MatrixTransform(rectsMatrix);
         Rect containingRect = new Rect(((FrameworkElement)e.ManipulationContainer).RenderSize);

         Rect shapeBounds = rectToMove.RenderTransform.TransformBounds(new Rect(rectToMove.RenderSize));

         if (e.IsInertial && !containingRect.Contains(shapeBounds)) {
            e.Complete();
         }

         e.Handled = true;
      }

      void Window_InertiaStarting(object sender, ManipulationInertiaStartingEventArgs e) {
         e.TranslationBehavior.DesiredDeceleration = 10.0 * 96.0 / (1000.0 * 1000.0);
         e.ExpansionBehavior.DesiredDeceleration = 0.1 * 96 / (1000.0 * 1000.0);
         e.RotationBehavior.DesiredDeceleration = 720 / (1000.0 * 1000.0);
         e.Handled = true;
      }

   }
}
当你编译并执行上面的代码时,它将产生以下窗口。
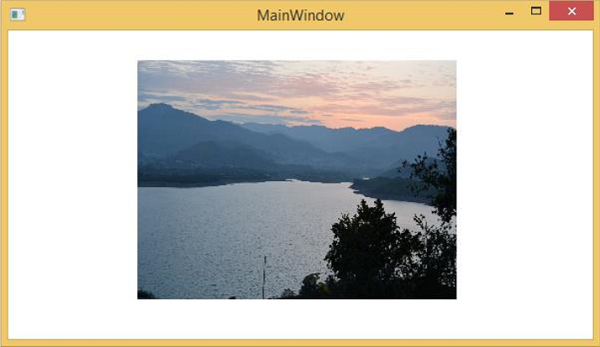
现在您可以用手指在触摸屏上旋转、放大、缩小该图像。

