
如何使用 PowerShell DSC 安装 MSI 包?
powershellmicrosoft technologiessoftware & coding
要使用 DSC 安装 MSI 包,我们需要使用 DSC 资源"Package"。让我们看看此资源有哪些属性。
PS C:\> Get-DscResource -Name Package | Select -ExpandProperty Properties
Name PropertyType IsMandatory Values
---- ------------ ----------- ------
Name [string] True {}
Path [string] True {}
ProductId [string] True {}
Arguments [string] False {}
Credential [PSCredential] False {}
DependsOn [string[]] False {}
Ensure [string] False {Absent, Present}
LogPath [string] False {}
PsDscRunAsCredential [PSCredential] False {}
ReturnCode [UInt32[]] False {}
Name, Path和ProductID参数是此DSC资源的必填项。
获取上述详细信息的最佳方法是在测试机上安装示例软件包,然后获取详细信息。这里我们将使用安装在一台计算机上的 7-Zip MSI 软件包。
Get-Package 7-zip* | fl *
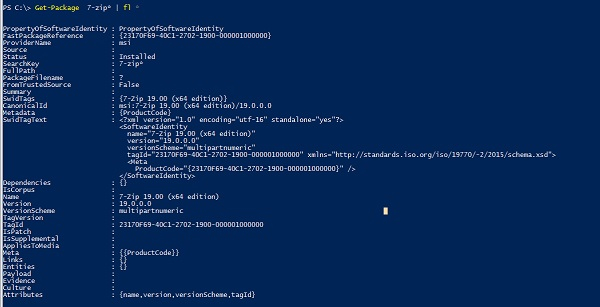
从上面的输出中,我们可以获取安装后的软件包名称和产品ID(即产品代码)。
Configuration Install7zip{
   Node @("LabMachine2k16","AD"){
      Package 7zip{
         Name = '7-Zip 19.00 (x64 edition)'
         ProductId = '23170F69-40C1-2702-1900-000001000000'
         Path = '\ad\shared\7z1900-x64.msi'
         Ensure = 'Present'
      }
   }
}
在上面的示例中,源软件包位于源位置,我们希望在两个节点上安装 7zip。
为了在指定位置生成 MOF 文件,以便我们稍后可以使用它们来启动配置,
Install7zip -OutputPath C:\Temp\7zipInstall -Verbose
输出

MOF 文件生成后,即可开始配置以应用 DSC。
Start-DscConfiguration -Path C:\Temp\7zipInstall -Wait -Force -Verbose
上述命令成功运行后,请使用以下命令检查配置是否已应用。
Test-DscConfiguration -Path C:\Temp\7zipInstall
您应该会看到类似下面的输出,这表明两台服务器都处于预期状态,这意味着 MSI 包已安装。

如果 InDesiredState 属性为 false,则表示服务器缺少配置。

