ASP.NET MVC - 单元测试
在计算机编程中,单元测试是一种软件测试方法,通过测试源代码的各个单元以确定它们是否适合使用。 换句话说,它是一个软件开发过程,其中应用程序的最小可测试部分(称为单元)会单独且独立地进行检查以确保正确运行。
在过程式编程中,单元可以是整个模块,但更常见的是单个函数或过程。 在面向对象编程中,一个单元通常是一个完整的接口,例如一个类,但也可以是一个单独的方法。
单元测试通常是自动化的,但也可以手动完成。
单元测试的目标
单元测试的主要目标是获取应用程序中最小的可测试软件,并确定它的行为是否完全符合您的预期。 每个单元在集成到模块之前都经过单独测试,以测试模块之间的接口。
让我们看一个单元测试的简单示例,其中我们使用单元测试创建一个新的 ASP.NET MVC 应用程序。
步骤 1 − 打开 Visual Studio 并单击 File → New → Project 菜单选项。
打开一个新的项目对话框。
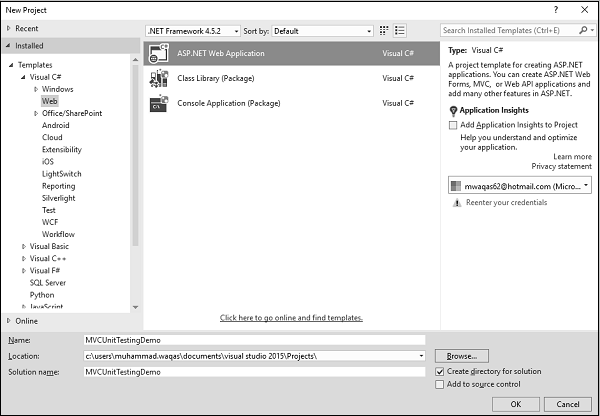
步骤 2 − 从左侧窗格中选择 Templates > Visual C# > Web。
步骤 3 − 在中间窗格中,选择 ASP.NET Web 应用程序。
步骤 4 − 在"名称"字段中输入项目名称"MVCUnitTestingDemo",然后单击"确定"继续。 您将看到以下对话框,要求您设置 ASP.NET 项目的初始内容。
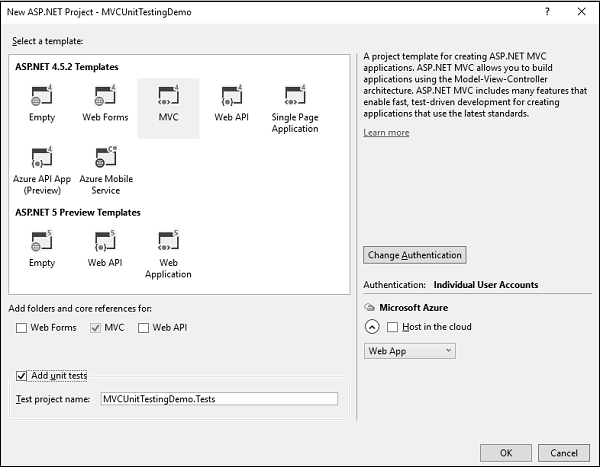
步骤 5 − 选择 MVC 作为模板,不要忘记选中对话框底部的添加单元测试复选框。 您还可以更改测试项目名称,但在本例中我们保留原样,因为它是默认名称。
Visual Studio 创建项目后,您将看到"解决方案资源管理器"窗口中显示许多文件和文件夹。
步骤 6 − 您可以看到解决方案资源管理器中有两个项目。 一个是 ASP.NET Web 项目,另一个是单元测试项目。
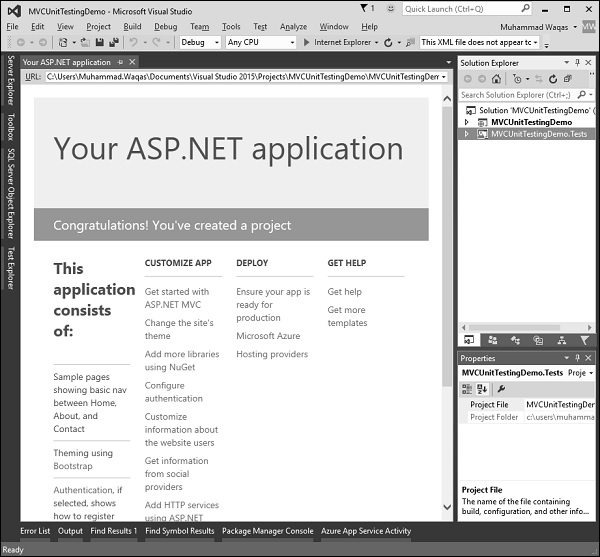
步骤 7 − 运行此应用程序,您将看到以下输出。
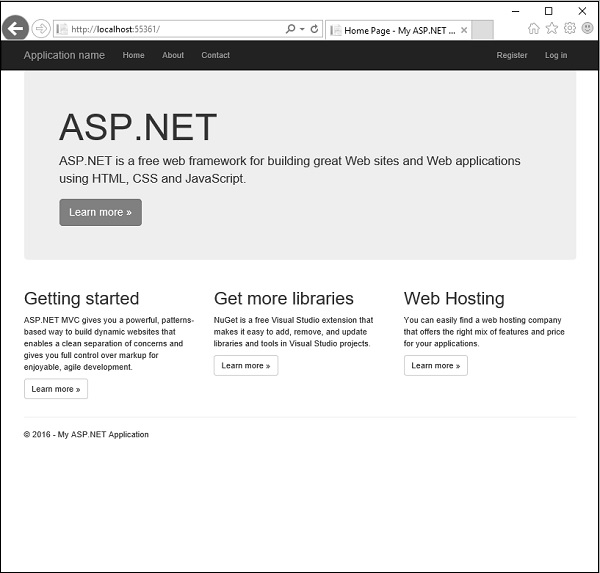
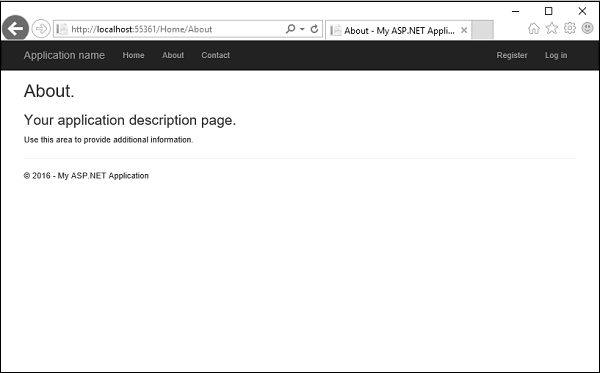
如上图所示,导航栏上有"主页"、"关于"和"联系方式"按钮。 让我们选择"关于",您将看到以下视图。
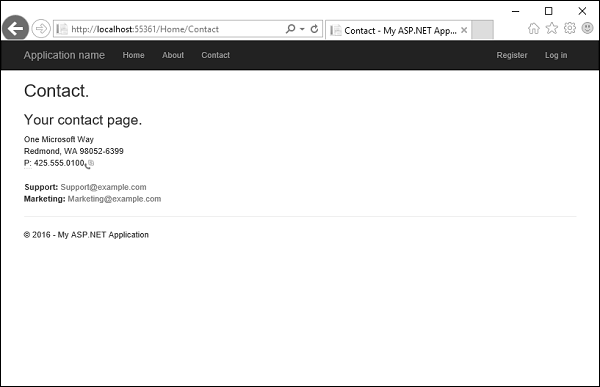
让我们选择"联系人",然后会弹出以下屏幕。
现在让我们展开"MVCUnitTestingDemo"项目,您将在 Controllers 文件夹下看到 HomeController.cs 文件。
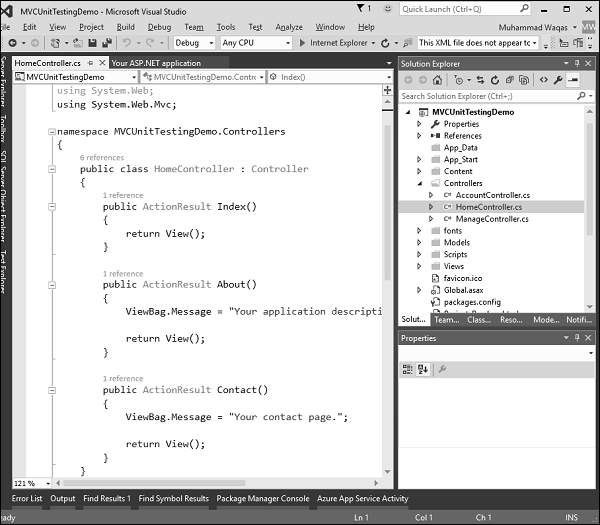
HomeController 包含三个操作方法,如以下代码所示。
using System;
using System.Collections.Generic;
using System.Linq;

using System.Web;
using System.Web.Mvc;

namespace MVCUnitTestingDemo.Controllers {
   public class HomeController : Controller{
      public ActionResult Index(){
         return View();
      }

      public ActionResult About(){
         ViewBag.Message = "Your application description page.";
         return View();
      }

      public ActionResult Contact(){
         ViewBag.Message = "Your contact page.";
         return View();
      }
   }
}
让我们展开MVCUnitTestingDemo.Tests项目,您将在Controllers文件夹下看到HomeControllerTest.cs文件。
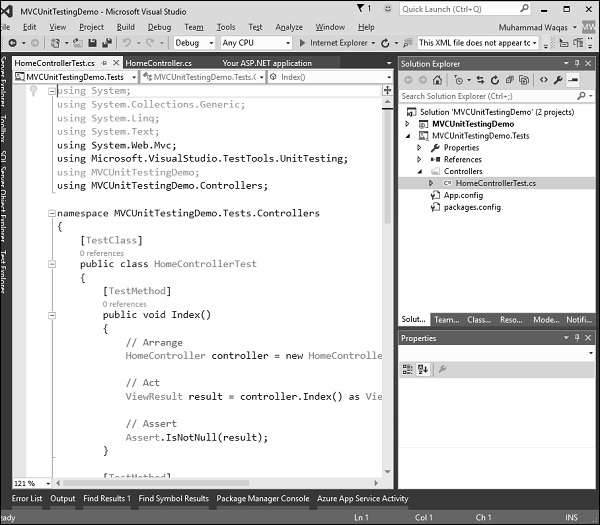
在此 HomeControllerTest 类中,您将看到三个方法,如以下代码所示。
using System;
using System.Collections.Generic;
using System.Linq;
using System.Text;

using System.Web.Mvc;
using Microsoft.VisualStudio.TestTools.UnitTesting;

using MVCUnitTestingDemo;
using MVCUnitTestingDemo.Controllers;

namespace MVCUnitTestingDemo.Tests.Controllers{
   [TestClass]
   public class HomeControllerTest{

      [TestMethod]
      public void Index(){
         // Arrange
         HomeController controller = new HomeController();
         // Act
         ViewResult result = controller.Index() as ViewResult;
         // Assert
         Assert.IsNotNull(result);
      }

      [TestMethod]
      public void About(){
         // Arrange
         HomeController controller = new HomeController();
         // Act
         ViewResult result = controller.About() as ViewResult;
         // Assert
         Assert.AreEqual("Your application description page.", result.ViewBag.Message);
      }

      [TestMethod]
      public void Contact(){
         // Arrange
         HomeController controller = new HomeController();
         // Act
         ViewResult result = controller.Contact() as ViewResult;
         // Assert
         Assert.IsNotNull(result);
      }
   }
}
这三个方法将测试 Index、About 和 Contact 操作方法是否正常工作。 要测试这三种操作方法,请转到"测试"菜单。
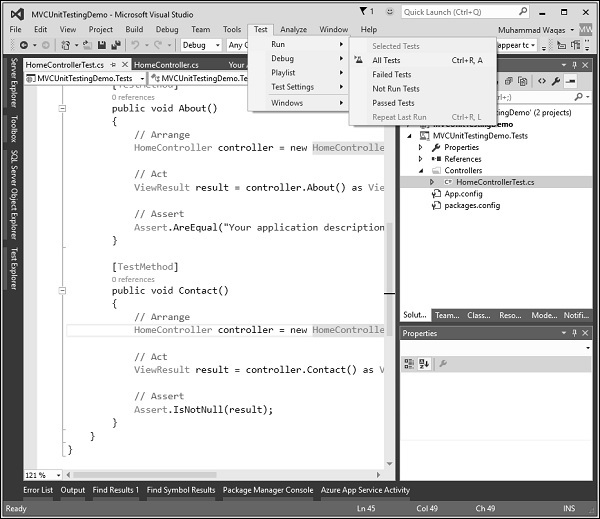
选择 Run → All Tests 来测试这些操作方法。
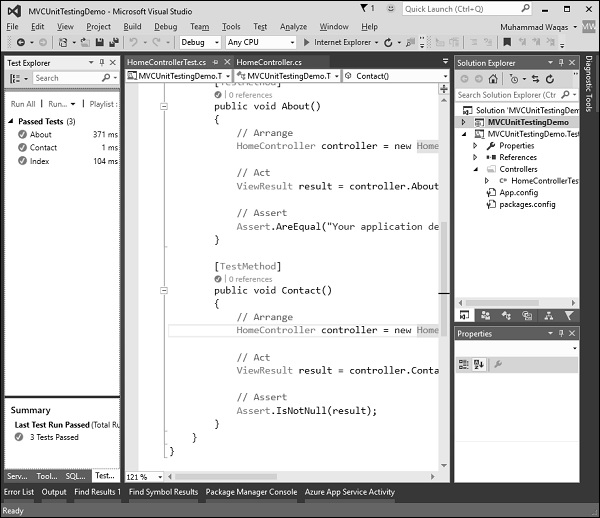
现在您将在左侧看到测试资源管理器,您可以在其中看到所有测试均已通过。 让我们再添加一种操作方法,它将列出所有员工。 首先我们需要在 Models 文件夹中添加一个员工类。
以下是 Employee 类的实现。
using System;
using System.Collections.Generic;
using System.Linq;

using System.Web;

namespace MVCUnitTestingDemo.Models{
   public class Employee{
      public int ID { get; set; }
      public string Name { get; set; }
      public DateTime JoiningDate { get; set; }
      public int Age { get; set; }
   }
}
我们需要添加 EmployeeController。 右键单击解决方案资源管理器中的控制器文件夹,然后选择 Add → Controller。
它将显示“添加控制器”对话框。
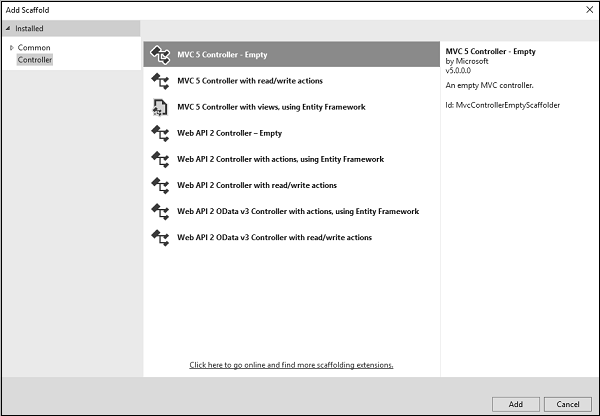
选择 MVC 5 Controller – Empty 选项,然后单击"Add"按钮,将出现"Add Controller"对话框。
将名称设置为 EmployeeController 并单击"添加"按钮。
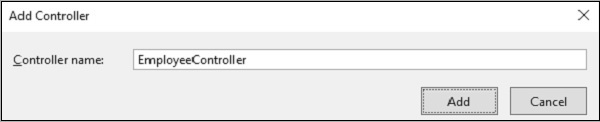
您将在 Controllers 文件夹中看到一个新的 C# 文件"EmployeeController.cs",该文件已打开以在 Visual Studio 中进行编辑。 让我们使用以下代码更新 EmployeeController。
using MVCUnitTestingDemo.Models;
using System;
using System.Collections.Generic;
using System.Linq;

using System.Web;
using System.Web.Mvc;

namespace MVCUnitTestingDemo.Controllers {
   public class EmployeeController : Controller{
      [NonAction]

      public List<Employee> GetEmployeeList(){
         return new List<Employee>{
            new Employee{
               ID = 1,
               Name = "Allan",
               JoiningDate = DateTime.Parse(DateTime.Today.ToString()),
               Age = 23
            },

            new Employee{
               ID = 2,
               Name = "Carson",
               JoiningDate = DateTime.Parse(DateTime.Today.ToString()),
               Age = 45
            },

            new Employee{
               ID = 3,
               Name = "Carson",
               JoiningDate = DateTime.Parse(DateTime.Today.ToString()),
               Age = 37
            },

            new Employee{
               ID = 4,
               Name = "Laura",
               JoiningDate = DateTime.Parse(DateTime.Today.ToString()),
               Age = 26
            },
         };
      }

      // GET: Employee
      public ActionResult Index(){
         return View();
      }

      public ActionResult Employees(){
         var employees = from e in GetEmployeeList()
         orderby e.ID
         select e;
         return View(employees);
      }
   }
}
要添加"Employees 视图"操作方法,请右键单击"Employees"操作并选择"添加视图..."
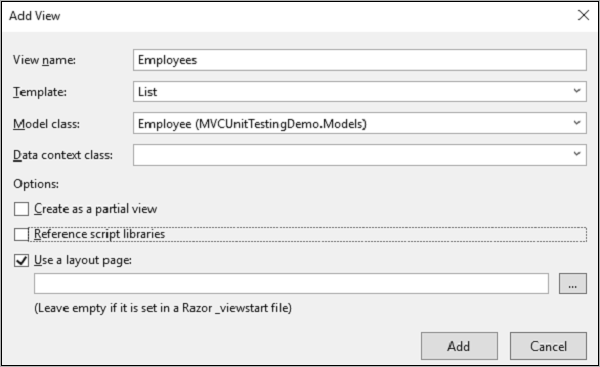
您将看到视图的默认名称。 从模板下拉列表中选择"List",从模型类下拉列表中选择"Employee",然后单击"确定"。
现在我们需要添加员工列表链接,让我们打开 Views/Shared 文件夹下的 _layout.cshtml 文件,并在 Contact 链接下方添加员工列表链接。
<li>@Html.ActionLink("Employees List", "Employees", "Employee")</li>
以下是_layout.cshtml的完整实现。
<!DOCTYPE html>
<html>
   <head>
      <meta charset = "utf-8" />
      <meta name = "viewport" content = "width = device-width, initial-scale = 1.0">
      <title>@ViewBag.Title - My ASP.NET Application</title>
      @Styles.Render("~/Content/css")
      @Scripts.Render("~/bundles/modernizr")
   </head>

   <body>
      <div class = "navbar navbar-inverse navbar-fixed-top">
         <div class = "container">

            <div class = "navbar-header">
               <button type = "button" class = "navbar-toggle" datatoggle =
                  "collapse" data-target = ".navbar-collapse">
                  <span class = "icon-bar"></span>
                  <span class = "icon-bar"></span>
                  <span class = "icon-bar"></span>
               </button>

               @Html.ActionLink("Application name", "Index", "Home", new
                  { area = "" }, new { @class = "navbar-brand" })
            </div>

            <div class = "navbar-collapse collapse">
               <ul class = "nav navbar-nav">
                  <li>@Html.ActionLink("Home", "Index", "Home")</li>
                  <li>@Html.ActionLink("About", "About", "Home")</li>
                  <li>@Html.ActionLink("Contact", "Contact", "Home")</li>
                  <li>@Html.ActionLink("Employees List", "Employees", "Employee")</li>
               </ul>

               @Html.Partial("_LoginPartial")
            </div>

         </div>

      </div>

      <div class = "container body-content">
         @RenderBody()
         <hr />
         <footer>
            <p>© @DateTime.Now.Year - My ASP.NET Application</p>
         </footer>
      </div>

      @Scripts.Render("~/bundles/jquery")
      @Scripts.Render("~/bundles/bootstrap")
      @RenderSection("scripts", required: false)

   </body>
</html>
要从 Employee 控制器测试Employees 操作方法,我们需要在单元测试项目中添加另一个测试方法。 接下来是 EmployeeControllerTest 类,我们将在其中测试Employees 操作方法。
[TestClass]
public class EmployeeControllerTest{
   [TestMethod]
   public void Employees(){
      // Arrange
      EmployeeController controller = new EmployeeController();

      // Act
      ViewResult result = controller.Index() as ViewResult;

      // Assert
      Assert.IsNotNull(result);
   }
}
从"测试"菜单中选择 Run → All Tests 以测试这些操作方法。
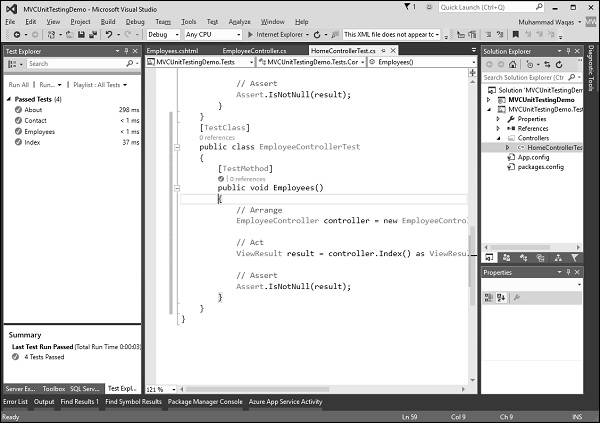
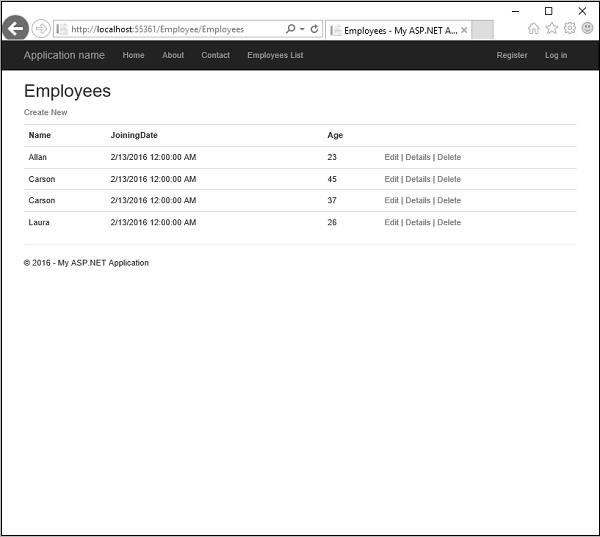
可以看到Employees测试方法现在也通过了。 当您运行该应用程序时,您将看到以下输出。
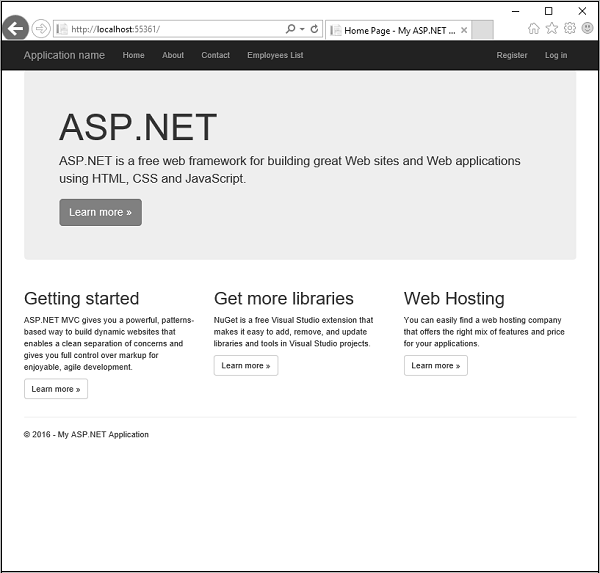
点击导航栏中的"Employee List"选项,您将看到员工列表。