
JSF - f:param
f:param 标签提供将参数传递给组件或传递请求参数的选项。
JSF 标签
将参数传递给 UI 组件
<h:outputFormat value = "Hello {0}!.">
   <f:param value = "World" />
</h:outputFormat>
Pass request parameter
<h:commandButton id = "submit"
   value = "Show Message" action = "#{userData.showResult}">
   <f:param name = "username" value = "JSF 2.0 User" />
</h:commandButton>
标签属性
| S.No | 属性与描述 |
|---|---|
| 1 | id 组件的标识符 |
| 2 | binding 对可在支持 bean 中使用的组件的引用 |
| 3 | name 此参数组件的可选名称 |
| 4 | value 此组件中存储的值 |
示例应用程序
让我们创建一个测试 JSF 应用程序来测试上述标记。
| 步骤 | 描述 |
|---|---|
| 1 | 在 com.tutorialspoint.test 包下创建一个名为 helloworld 的项目,如 JSF - 第一个应用程序 一章中所述。 |
| 2 | 按照以下说明修改 home.xhtml。保持其余文件不变。 |
| 3 | 按照以下说明在 webapps 目录中创建 result.xhtml。 |
| 4 | 按照以下说明在包 com.tutorialspoint.test 下创建 UserData.java 作为托管 bean。 |
| 5 | 编译并运行应用程序以确保业务逻辑按要求运行。 |
| 6 | 最后,以 war 文件的形式构建应用程序并将其部署在 Apache Tomcat Web 服务器中。 |
| 7 | 按照最后一步中的说明,使用适当的 URL 启动您的 Web 应用程序。 |
UserData.java
package com.tutorialspoint.test;

import java.io.Serializable;

import javax.faces.bean.ManagedBean;
import javax.faces.bean.SessionScoped;

@ManagedBean(name = "userData", eager = true)
@SessionScoped
public class UserData implements Serializable {
   private static final long serialVersionUID = 1L;
   public String data = "1";

   public String getData() {
      return data;
   }

   public void setData(String data) {
      this.data = data;
   }

   public String showResult() {
      FacesContext fc = FacesContext.getCurrentInstance();
      Map<String,String> params =
         fc.getExternalContext().getRequestParameterMap();
      data =  params.get("username");
      return "result";
   }
}
home.xhtml
<!DOCTYPE html PUBLIC "-//W3C//DTD XHTML 1.0 Transitional//EN"
   "http://www.w3.org/TR/xhtml1/DTD/xhtml1-transitional.dtd">

<html xmlns = "http://www.w3.org/1999/xhtml">
   <head>
      <title>JSF Tutorial!</title>
   </head>

   <body>
      <h2>f:param example</h2>
      <hr />

      <h:form>
         <h:outputFormat value = "Hello {0}!.">
            <f:param value = "World" />
         </h:outputFormat>
         <br/>

         <h:commandButton id = "submit"
            value = "Show Message" action = "#{userData.showResult}">
            <f:param name = "username" value = "JSF 2.0 User" />
         </h:commandButton>
      </h:form>

   </body>
</html>
result.xhtml
<?xml version = "1.0" encoding = "UTF-8"?>
<!DOCTYPE html PUBLIC "-//W3C//DTD XHTML 1.0 Transitional//EN"
"http://www.w3.org/TR/xhtml1/DTD/xhtml1-transitional.dtd">

<html xmlns = "http://www.w3.org/1999/xhtml"
   xmlns:f = "http://java.sun.com/jsf/core"
   xmlns:h = "http://java.sun.com/jsf/html"
   xmlns:ui = "http://java.sun.com/jsf/facelets">

   <head>
      <title>JSF Tutorial!</title>
   </head>

   <h:body>
      <h2>Result</h2>
      <hr />
      #{userData.data}
   </h:body>
</html>
完成所有更改后,让我们像在 JSF - 第一个应用程序章节中一样编译并运行应用程序。如果您的应用程序一切正常,这将产生以下结果。
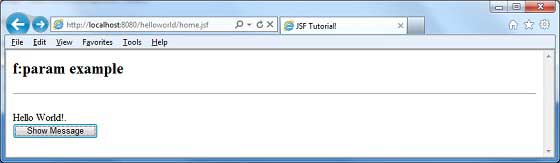
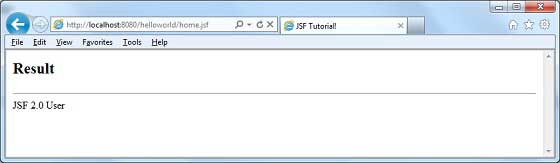
按显示消息按钮,您将看到以下结果。
 jsf_basic_tags.html
