
JSF - 模板标签
Web 应用程序中的模板定义了通用的界面布局和样式。例如,相同的横幅、通用页眉中的徽标以及页脚中的版权信息。JSF 提供以下 facelet 标签来提供标准的 Web 界面布局。
| S.No | 标签和说明 |
|---|---|
| 1 | ui:insert 用于模板文件。它定义要放置在模板中的内容。 ui:define 标签可以替换其内容。 |
| 2 | ui:define 定义要插入模板的内容。 |
| 3 | ui:include 将一个 xhtml 页面的内容包含到另一个 xhtml 页面中。 |
| 4 | ui:composition 使用 template 属性加载模板。它还可以定义一组要插入 xhtml 页面的组件。 |
创建模板
为 Web 应用程序创建模板是一个循序渐进的过程。以下是创建示例模板的步骤。
步骤 1:创建 Header 文件:header.xhtml
使用 ui:composition 标签定义 Header 部分的默认内容。
<ui:composition>
   <h1>Default Header</h1>
</ui:composition>
步骤 2:创建页脚文件:footer.xhtml
使用 ui:composition 标签定义页脚部分的默认内容。
<ui:composition>
   <h1>Default Footer</h1>
</ui:composition>
步骤 3:创建内容文件:contents.xhtml
使用 ui:composition 标签定义内容部分的默认内容。
<ui:composition>
   <h1>Default Contents</h1>
</ui:composition>
步骤 4:创建模板:common.xhtml
使用 ui:insert 和 ui:include 标签将页眉/页脚和内容文件包含在模板文件中。在 ui:insert 标签中命名每个部分。
ui:insert 标签的 name 属性将用于替换相应部分的内容。
<h:body>
   <ui:insert name = "header" >
      <ui:include src = "header.xhtml" />
   </ui:insert>

   <ui:insert name = "content" >
      <ui:include src = "contents.xhtml" />
   </ui:insert>

   <ui:insert name = "footer" >
      <ui:include src = "footer.xhtml" />
   </ui:insert>
</h:body>
步骤 5a:使用具有默认内容的模板:home.xhtml
加载 common.xhtml,这是一个在任何 xhtml 页面中使用 ui:composition 标签的模板。
<h:body>
   <ui:composition template = "common.xhtml">
</h:body>
步骤 5b:使用模板并设置自己的内容:home.xhtml
在任何 xhtml 页面中加载使用 ui:composition 标签的模板 common.xhtml。使用 ui:define 标签覆盖默认值。
<h:body>
<ui:composition template = "templates/common.xhtml">
<ui:define name = "content">
<h:link value = "Page 1" outcome = "page1" />
<h:link value = "Page 2" outcome = "page2" />
</ui:define>
</ui:composition>
</h:body>
示例应用程序
让我们创建一个测试 JSF 应用程序来测试 JSF 中的模板标签。
| 步骤 | 描述 |
|---|---|
| 1 | 在 com.tutorialspoint.test 包下创建一个名为 helloworld 的项目,如 JSF - 第一个应用程序 一章中所述。 |
| 2 | 在 src → 下创建 templates 文件夹main → webapp 文件夹。 |
| 3 | 在 src → main → webapp → templates 文件夹下创建 header.xhtml、footer.xhtml、contents.xhtml 和 common.xhtml 文件。按照下面的说明修改它们。 |
| 4 | 在 src → main → webapp 文件夹下创建 page1.xhtml 和 page2.xhtml 文件。按照下面的说明进行修改。 |
| 5 | 按照下面的说明修改 home.xhtml。保持其余文件不变。 |
| 6 | 编译并运行应用程序以确保业务逻辑按要求运行。 |
| 7 | 最后,以 war 文件的形式构建应用程序并将其部署在 Apache Tomcat Web 服务器中。 |
| 8 | 按照最后一步中的说明,使用适当的 URL 启动您的 Web 应用程序。 |
header.xhtml
<?xml version = "1.0" encoding="UTF-8"?>
<!DOCTYPE html PUBLIC "-//W3C//DTD XHTML 1.0 Transitional//EN"
"http://www.w3.org/TR/xhtml1/DTD/xhtml1-transitional.dtd">

<html xmlns = "http://www.w3.org/1999/xhtml"
   xmlns:ui = "http://java.sun.com/jsf/facelets">

   <body>
      <ui:composition>
         <h1>Default Header</h1>
      </ui:composition>
   </body>
</html>
footer.xhtml
<?xml version = "1.0" encoding = "UTF-8"?>
<!DOCTYPE html PUBLIC "-//W3C//DTD XHTML 1.0 Transitional//EN"
"http://www.w3.org/TR/xhtml1/DTD/xhtml1-transitional.dtd">

<html xmlns = "http://www.w3.org/1999/xhtml"
   xmlns:ui = "http://java.sun.com/jsf/facelets">

   <body>
      <ui:composition>
         <h1>Default Footer</h1>
      </ui:composition>
   </body>
</html>
contents.xhtml
<?xml version = "1.0" encoding = "UTF-8"?>
<!DOCTYPE html PUBLIC "-//W3C//DTD XHTML 1.0 Transitional//EN"
"http://www.w3.org/TR/xhtml1/DTD/xhtml1-transitional.dtd">

<html xmlns = "http://www.w3.org/1999/xhtml"
   xmlns:ui = "http://java.sun.com/jsf/facelets">

   <body>
      <ui:composition>
         <h1>Default Content</h1>
      </ui:composition>
   </body>
</html>
common.xhtml
<?xml version = "1.0" encoding = "UTF-8"?>
<!DOCTYPE html PUBLIC "-//W3C//DTD XHTML 1.0 Transitional//EN"
"http://www.w3.org/TR/xhtml1/DTD/xhtml1-transitional.dtd">

<html xmlns = "http://www.w3.org/1999/xhtml"
   xmlns:h = "http://java.sun.com/jsf/html"
   xmlns:ui = "http://java.sun.com/jsf/facelets">

   <h:head></h:head>
   <h:body>
      <div style = "border-width:2px; border-color:green; border-style:solid;">
         <ui:insert name = "header" >
            <ui:include src = "/templates/header.xhtml" />
         </ui:insert>
      </div>
      <br/>

      <div style = "border-width:2px; border-color:black; border-style:solid;">
         <ui:insert name = "content" >
            <ui:include src = "/templates/contents.xhtml" />
         </ui:insert>
      </div>
      <br/>

      <div style = "border-width:2px; border-color:red; border-style:solid;">
         <ui:insert name = "footer" >
            <ui:include src = "/templates/footer.xhtml" />
         </ui:insert>
      </div>

   </h:body>
</html>
page1.xhtml
<?xml version = "1.0" encoding = "UTF-8"?>
<!DOCTYPE html PUBLIC "-//W3C//DTD XHTML 1.0 Transitional//EN"
"http://www.w3.org/TR/xhtml1/DTD/xhtml1-transitional.dtd">

<html xmlns = "http://www.w3.org/1999/xhtml"
   xmlns:h = "http://java.sun.com/jsf/html"
   xmlns:ui = "http://java.sun.com/jsf/facelets">

   <h:body>
      <ui:composition template = "templates/common.xhtml">
         <ui:define name = "header">
            <h2>Page1 header</h2>
         </ui:define>

         <ui:define name = "content">
            <h2>Page1 content</h2>
             <h:link value = "Back To Home" outcome = "home" />
         </ui:define>

         <ui:define name = "footer">
            <h2>Page1 Footer</h2>
         </ui:define>
      </ui:composition>

   </h:body>
</html>
page2.xhtml
<?xml version = "1.0" encoding = "UTF-8"?>
<!DOCTYPE html PUBLIC "-//W3C//DTD XHTML 1.0 Transitional//EN"
"http://www.w3.org/TR/xhtml1/DTD/xhtml1-transitional.dtd">

<html xmlns = "http://www.w3.org/1999/xhtml"
   xmlns:h = "http://java.sun.com/jsf/html"
   xmlns:ui = "http://java.sun.com/jsf/facelets">

   <h:body>
      <ui:composition template = "templates/common.xhtml">
         <ui:define name = "header">
            <h2>Page2 header</h2>
         </ui:define>

         <ui:define name = "content">
            <h2>Page2 content</h2>
             <h:link value = "Back To Home" outcome = "home" />
         </ui:define>

         <ui:define name = "footer">
            <h2>Page2 Footer</h2>
         </ui:define>
      </ui:composition>

   </h:body>
</html>
home.xhtml
<?xml version = "1.0" encoding = "UTF-8"?>
<!DOCTYPE html PUBLIC "-//W3C//DTD XHTML 1.0 Transitional//EN"
"http://www.w3.org/TR/xhtml1/DTD/xhtml1-transitional.dtd">

<html xmlns = "http://www.w3.org/1999/xhtml"
   xmlns:h = "http://java.sun.com/jsf/html"
   xmlns:ui = "http://java.sun.com/jsf/facelets">

   <h:body>
      <ui:composition template = "templates/common.xhtml">
         <ui:define name = "content">
            <br/><br/>
             <h:link value = "Page 1" outcome = "page1" />
             <h:link value = "Page 2" outcome = "page2" />
            <br/><br/>
         </ui:define>
      </ui:composition>

   </h:body>
</html>
完成所有更改后,让我们像在 JSF - 第一个应用程序章节中一样编译并运行应用程序。如果您的应用程序一切正常,这将产生以下结果。
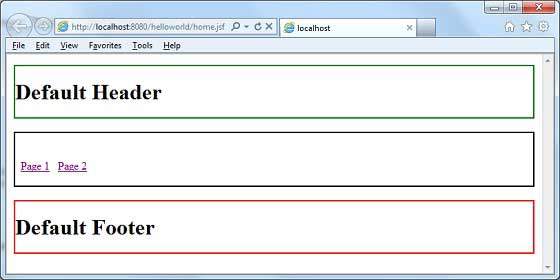
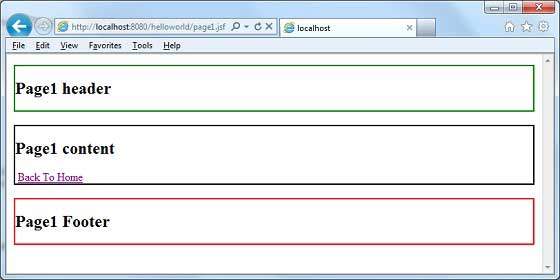
单击 Page1 链接,您将看到以下结果。
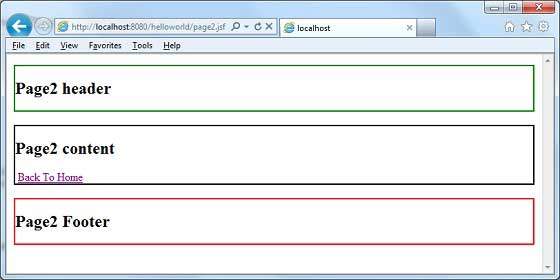
或者单击 Page2 链接,您将看到以下结果。
 jsf_facelets_tags.html
