PhantomJS - 快速指南
PhantomJS - 概述
PhantomJS 被称为 无头浏览器,因为在执行 JavaScript 代码时无需浏览器参与。执行不会在浏览器显示中看到,而是在命令行提示符中看到。CSS 处理、DOM 操作、JSON、Ajax、Canvas、SVG 等功能都将在命令提示符中处理。PhantomJS 没有 GUI,因此,它的所有执行都在命令行中进行。
使用 PhantomJS,我们可以写入文件、读取文件内容或上传文件、进行屏幕截图、将网页转换为 pdf 等等。使用无头浏览器,您可以获得所有浏览器行为,即Cookies、Http 请求方法,即GET /POST、清除 Cookies、删除 Cookies等,重新加载页面,导航到其他页面。
PhantomJS 使用 WebKit,它具有与著名浏览器(Google Chrome、Mozilla Firefox、Safari 等)类似的浏览环境。它还提供了许多 JavaScript API,可帮助截取屏幕截图、上传文件、写入文件、读取文件、与网页交互等。
PhantomJS 不支持 Flash 或视频,因为它需要插件,并且很难在命令行上支持它们。
PhantomJS 的功能
现在让我们了解 PhantomJS 提供的功能。
页面自动化
PhantomJS 允许您在其 API 的帮助下读取页面内容。它可以帮助操作 DOM,使用外部库执行所需的任务。
屏幕截图
PhantomJS 有助于对指定页面进行屏幕截图,并将其保存为 PNG、JPEG、PDF 和 GIF 等各种格式的图像。借助屏幕截图,它可以轻松帮助确保 Web 内容正常。
PhantomJS 提供属性和方法,借助这些属性和方法,开发人员可以调整屏幕截图的大小并指定他们想要捕获的区域。
无头测试
PhantomJS 帮助在命令行上测试 UI。同时,借助屏幕截图,它可以轻松帮助查找 UI 中的错误。PhantomJS 有时无法单独帮助测试。但是,它可以与其他测试库(如 Mocha、Yoeman 等)一起打包。您可以借助 PhantomJS 上传文件并提交表单。
PhantomJS 可用于测试跨站点的登录,并确保安全性不受损害。PhantomJS 可以与其他工具(如 CasperJS、Mocha、Qunit)一起使用,以使测试更加强大。
网络监控
PhantomJS 的重要功能之一是使用可用的 API 监控网络连接。PhantomJS 允许检查网络流量;它适合对网络行为和性能进行各种分析。
PhantomJS 可用于在实时环境中收集有关网页性能的数据。PhantomJS 可以与 Yslow 等工具一起使用,以收集任何网站的性能指标。
PhantomJS - 环境设置
PhantomJS 是一款免费软件,根据 BSD 许可证 分发。它易于安装,并提供多种功能来执行脚本。PhantomJS 可在 Windows、Linux 和 Mac 等多个平台上轻松运行。
要下载 PhantomJS,您可以访问 - http://phantomjs.org/,然后单击下载选项。
适用于 Windows
下载页面显示不同操作系统的下载选项。下载 zip 文件,解压后您将获得可执行文件 phantom.exe。将 PATH 环境变量设置为 phantom.exe 文件的路径。打开新的命令提示符并输入 phantomjs –v。它应该会为您提供正在运行的 PhantomJS 的当前版本。
对于 MAC OS X
下载适用于 MAC OS 的 PhantomJS zip 文件并提取内容。下载内容后,将 PhantomJS 移动到 - /usr/local/bin/。在终端执行 PhantomJS 命令,即 phantomjs –v,它应该会为您提供 PhantomJS 的版本描述。
Linux 64 位
下载适用于 Linux 64 位的 PhantomJS zip 文件并提取内容。下载内容后,将 PhantomJS 文件夹移动到 /usr/local/share/ 并 创建符号链接 −
sudo mv $PHANTOM_JS /usr/local/share
sudo ln -sf /usr/local/share/$PHANTOM_JS/bin/phantomjs /usr/local/bin。
在终端执行 phantomjs –v,它应该会给出 PhantomJS 的版本。
Linux 32 位
下载适用于 Linux 32 位的 PhantomJS zip 文件并提取内容。下载内容后,将 PhantomJS 文件夹移动到 /usr/local/share/ 并创建符号链接 −
sudo mv $PHANTOM_JS /usr/local/share
sudo ln -sf /usr/local/share/$PHANTOM_JS/bin/phantomjs /usr/local/bin。
在终端执行 phantomjs –v,它应该会给出 PhantomJS 的版本。
也可以通过单击以下链接从 git 存储库中获取 PhantomJS 源代码 - https://github.com/ariya/phantomjs/
要在 PhantomJS 中运行脚本,命令如下 −
phantomjs jsfile arg1 arg2…
PhantomJS - Object
在本章中,我们将介绍 PhantomJS 的四个重要对象。它们如下所示 −
- CookiesEnabled
- Cookies
- LibraryPath
- Version
现在让我们详细讨论一下这些对象。
cookiesEnabled
它指示是否启用了 cookie。如果启用,它将返回 true;否则返回 false。
语法
其语法如下 −
phantom.cookiesEnabled
示例
cookieenabled.js
phantom.addCookie ({
   //使用 addcookie 属性添加 cookie
   name: 'c1',
   value: '1',
   domain: 'localhost'
});

console.log("Cookie Enabled value is : "+phantom.cookiesEnabled);
phantom.exit();
输出
命令 − phantomjs cookieenabled.js
Cookie Enabled value is : true
Cookies
它有助于向域添加和设置 cookie。它返回一个对象,其中包含该域可用的所有 cookie。
语法
其语法如下 −
phantom.cookies;
示例
文件名:phantomcookie.js
phantom.addCookie ({
   name: 'c1',
   value: '1',
   domain: 'localhost'
});
phantom.addCookie ({
   name: 'c2',
   value: '2',
   domain: 'localhost'
});
phantom.addCookie ({
   name: 'c3',
   value: '3',
   domain: 'localhost'
});
console.log(JSON.stringify(phantom.cookies));
phantom.exit();
输出
命令 − phantomjs phantomcookie.js
[{"domain":".localhost","httponly":false,"name":"c3","path":"/","secure":false, "
value":"3"},{"domain":".localhost","httponly":false,"name":"c2","path":"/","sec u
re":false,"value":"2"},{"domain":".localhost","httponly":false,"name":"c1","pat h
":"/","secure":false,"value":"1"}]
在上面的例子中,我们向 localhost 域添加了一些 cookie。然后我们使用 phantom.cookies 获取它。它使用 JSON stringify 方法将 JavaScript 对象转换为字符串,返回一个包含所有 cookie 的对象。您还可以使用 foreach 访问 cookie 的名称/值。
LibraryPath
PhantomJS libraryPath 存储 injectJS 方法要使用的脚本路径。
语法
其语法如下 −
phantom.libraryPath
示例
以下是查找版本的示例。
var webPage = require('webpage');
var page = webPage.create();

page.open('http://www.tutorialspoint.com/jquery', function(status) {
   if (status === "success") {
      page.includeJs('http://ajax.googleapis.com/ajax/libs/jquery/1.7.2/jquery.min.js ', function() {
         if (page.injectJs('do.js')) {
            // returnTitle 是从我们的 do.js 文件加载的一个函数 - 见下文
            return returnTitle();
         });

         console.log(title);
         phantom.exit();
      }
   }
});

window.returnTitle = function() {
   return document.title;
};
上述程序生成以下输出。
Jquery Tutorial
Version
它给出正在运行的 PhantomJS 的版本,并在对象中返回详细信息。例如:{"major":2,"minor":1,"patch":1
语法
其语法如下 −
phantom.version
示例
以下是查找版本的示例。
var a = phantom.version;
console.log(JSON.stringify(a));
console.log(a.major);
console.log(a.minor);
console.log(a.patch);
phantom.exit();
上述程序生成以下输出。
{"major":2,"minor":1,"patch":1}
2
1
1
在上面的例子中,我们使用了 console.log 来打印版本。目前,我们正在运行版本 2。它返回包含上述代码块中显示的详细信息的对象。
PhantomJS - 方法
PhantomJS 是一个无需浏览器即可执行 JavaScript 的平台。为此,使用以下方法,这些方法有助于添加 Cookie、删除、清除、退出脚本、注入 JS 等。
我们将在本章中进一步讨论这些 PhantomJS 方法及其语法。类似的方法,即addcookie,injectjs存在于网页模块中,将在后续章节中讨论。
PhantomJS 公开了以下方法,可以帮助我们在没有浏览器的情况下执行 JavaScript −
- addCookie
- clearCookie
- deleteCookie
- Exit
- InjectJS
现在让我们通过示例详细了解这些方法。
addCookie
addcookie 方法用于添加 cookie 并存储在数据中。它类似于浏览器存储它的方式。它接受一个参数,该参数是一个具有 cookie 所有属性的对象,其语法如下所示 −
语法
其语法如下 −
phantom.addCookie ({
   "name" : "cookie_name",
   "value" : "cookie_value",
   "domain" : "localhost"
});
name、value、domain 是必须添加到 addcookie 函数的属性。如果 cookie 对象中缺少任何此属性,此方法将失败。
name − 指定 cookie 的名称。
value − 指定要使用的 cookie 的值。
domain − 将应用 cookie 的域。
示例
以下是 addcookie 方法的示例。
var page = require('webpage').create(),url = 'http://localhost/tasks/a.html';
page.open(url, function(status) {
   if (status === 'success') {
      phantom.addCookie({   //添加名称 cookie1,其值为 1
         name: 'cookie1',
         value: '1',
         domain: 'localhost'
      });
      phantom.addCookie({   // 添加值为 2 的 cookie2
         name: 'cookie2',
         value: '2',
         domain: 'localhost'
      });
      phantom.addCookie({   // 添加值为 3 的 cookie3
         name: 'cookie3',
         value: '3',
         domain: 'localhost'
      });
      console.log('Added 3 cookies');
      console.log('Total cookies :'+phantom.cookies.length);

      // 将输出添加到 url 的 cookie 总数。
   } else {
      console.error('Cannot open file');
      phantom.exit(1);
   }
});
示例
a.html
<html>
   <head>
      <title>Welcome to phantomjs test page</title>
   </head>

   <body>
      <h1>This is a test page</h1>
      <h1>This is a test page</h1>
      <h1>This is a test page</h1>
      <h1>This is a test page</h1>
      <h1>This is a test page</h1>
      <h1>This is a test page</h1>
      <h1>This is a test page</h1>
      <h1>This is a test page</h1>
      <h1>This is a test page</h1>
   </body>
</html>
上述程序生成以下输出。
Added 3 cookies
Total cookies :3
代码注释一目了然。
clearCookies
此方法允许删除所有 cookie。
语法
其语法如下 −
phantom.clearCookies();
此概念的工作原理类似于通过在浏览器菜单中选择来删除浏览器 cookie。
示例
以下是 clearCookies 方法的示例。
var page = require('webpage').create(),url = 'http://localhost/tasks/a.html';
page.open(url, function(status) {
   if (status === 'success') {
      phantom.addCookie({   //添加名称 cookie1,其值为 1
         name: 'cookie1',
         value: '1',
         domain: 'localhost'
      });
      phantom.addCookie({   // 添加值为 2 的 cookie2
         name: 'cookie2',
         value: '2',
         domain: 'localhost'
      });
      phantom.addCookie({   // 添加值为 3 的 cookie3
         name: 'cookie3',
         value: '3',
         domain: 'localhost'
      });
      console.log('Added 3 cookies');
      console.log('Total cookies :'+phantom.cookies.length);
      phantom.clearCookies();
      console.log(
         'After clearcookies method total cookies :' +phantom.cookies.length);

      phantom.exit();
   } else {
      console.error('Cannot open file');
      phantom.exit(1);
   }
});
a.html
<html>
   <head>
      <title>Welcome to phantomjs test page</title>
   </head>

   <body>
      <h1>This is a test page</h1>
      <h1>This is a test page</h1>
      <h1>This is a test page</h1>
      <h1>This is a test page</h1>
      <h1>This is a test page</h1>
      <h1>This is a test page</h1>
      <h1>This is a test page</h1>
      <h1>This is a test page</h1>
      <h1>This is a test page</h1>
   </body>
</html>
上述程序生成以下输出。
Added 3 cookies
Total cookies :3
After clearcookies method total cookies :0
deleteCookie
删除 CookieJar 中任何具有与 cookieName 匹配的"name"属性的 cookie。如果成功删除,它将返回 true;否则返回 false。
语法
其语法如下 −
phantom.deleteCookie(cookiename);
让我们借助示例了解 addcookie、clearcookies 和 deletecookie。
示例
以下是演示 deleteCookie 方法 − 用法的示例。
文件:cookie.js
var page = require('webpage').create(),url = 'http://localhost/tasks/a.html';
page.open(url, function(status) {
   if (status === 'success') {
      phantom.addCookie({   //添加名称 cookie1,其值为 1
         name: 'cookie1',
         value: '1',
         domain: 'localhost'
      });
      phantom.addCookie({   // 添加值为 2 的 cookie2
         name: 'cookie2',
         value: '2',
         domain: 'localhost'
      });
      phantom.addCookie({   // 添加值为 3 的 cookie3
         name: 'cookie3',
         value: '3',
         domain: 'localhost'
      });
      console.log('Added 3 cookies');
      console.log('Total cookies :'+phantom.cookies.length);

      //将输出添加到 url 的 cookie 总数。
      console.log("Deleting cookie2");
      phantom.deleteCookie('cookie2');

      console.log('Total cookies :'+phantom.cookies.length);
      phantom.clearCookies();

      console.log(
         'After clearcookies method total cookies :' +phantom.cookies.length);
      phantom.exit();
   } else {
      console.error('Cannot open file');
      phantom.exit(1);
   }
});
上述程序生成以下输出。
phantomjs cookie.js
Added 3 cookies
Total cookies :3
Deleting cookie2
Total cookies :2
After clearcookies method total cookies :0
Exit
phantom.exit 方法将退出它已启动的脚本。它退出程序并返回值。如果没有传递任何值,则返回 '0'。
语法
其语法如下 −
phantom.exit(value);
如果您未添加 phantom.exit,则命令行会假定执行仍在进行中且不会完成。
示例
让我们看一个例子来了解 exit 方法的用法。
console.log('Welcome to phantomJs'); // 输出 Welcome to phantomJS
var a = 1;
if (a === 1) {
   console.log('Exit 1'); //outputs Exit 1
   phantom.exit(); // Code exits.
} else {
   console.log('Exit 2');
   phantom.exit(1);
}
上述程序生成以下输出。
phantomjs exit.js
Welcome to phantomJs
Exit 1
phantom.exit 之后的任何代码都不会执行,因为 phantom.exit 是结束脚本的方法。
injectJs
InjectJs 用于在 phantom 中添加 addtionaljs 文件。如果在当前 目录 librarypath 中找不到该文件,则 phantom 属性 (phantom.libraryPath) 将用作跟踪路径的附加位置。如果文件添加成功,则返回 true,否则,如果无法找到该文件,则返回 false 以防失败。
语法
其语法如下 −
phantom.injectJs(filename);
示例
让我们看下面的例子来了解injectJs的用法。
文件名:inject.js
console.log("Added file");
文件名:addfile.js
var addfile = injectionJs(inject.js);
console.log(addfile);
phantom.exit();
输出
命令 − C:\phantomjs\bin>phantomjs addfile.js
Added file // coming from inject.js
true
在上面的例子中,addfile.js 使用injectJs调用文件inject.js。执行addfile.js时,inject.js中的console.log将显示在输出中。由于文件inject.js已成功添加,因此addfile变量也显示为true。
PhantomJS - Webpage 网页模块属性
PhantomJS 提供了相当多的属性和方法来帮助我们与网页内的内容进行交互。
require("webpage").create() 命令创建一个网页对象。我们将使用此对象在下面列出的属性和方法的帮助下操作网页。
var wpage = require("webpage").create();
下表列出了我们将要讨论的所有网页属性。
| S.No | 属性和描述 |
|---|---|
| 1 | canGoBack
如果导航历史记录中有上一页,则此属性返回 true;如果没有,则返回 false。 |
| 2 | canGoForward
如果导航历史记录中有下一页,则此属性返回 true;如果不是,则为 false。 |
| 3 | clipRect
clipRect 是一个具有 top、left、width 和 height 值的对象,用于在 render() 方法使用时捕获网页的图像。 |
| 4 | Content
此属性包含网页的内容。 |
| 5 | cookies
使用 cookies,您可以设置/获取 URL 上可用的 cookie。它还将为您提供 URL 上可用的 cookie 以及页面上设置的新 cookie。 |
| 6 | customHeaders
customHeaders 指定将针对页面发出的每个请求发送到服务器的其他 HTTP 请求标头。 |
| 7 | Event
它提供了事件的长列表,即修饰符、键详细信息。 |
| 8 | focusedFrameName
返回当前聚焦框架的名称。 |
| 9 | frameContent
此属性提供活动框架的内容。 |
| 10 | frameName
返回当前聚焦框架的名称。 |
| 11 | framePlainText
此属性还提供当前活动框架的内容,但仅提供没有任何 html 标签的内容。 |
| 12 | frameTitle
提供活动框架的标题。 |
| 13 | frameUrl
此属性将提供当前焦点框架的 url。 |
| 14 | framesCount
提供页面上存在的框架数量。 |
| 15 | framesName
提供框架名称数组。 |
| 16 | libraryPath
此属性具有路径,由page.inectJs 方法。 |
| 17 | navigationLocked
此属性定义是否允许页面导航。如果为 true,它将位于当前页面 URL 上,并且不允许单击页面转到下一页。 |
| 18 | offlineStoragePath
此属性提供使用 window.localStorage 存储数据的路径。可以使用命令行中的 --local-storage-path 更改路径。 |
| 19 | offlineStorageQuota
此属性定义您可以在 window.localStorage 中存储的最大数据量。该值为 5242880 字节,即 5MB。此值可以在命令行中使用以下命令覆盖 --localstorage-quota = size。 |
| 20 | ownsPages
如果网页打开的页面是网页的子页面,ownsPages 将返回 true 或 false。 |
| 21 | pagesWindowName
PagesWindowName 将提供使用 window.open 打开的窗口的名称 |
| 22 | pages
pages 属性将为您提供使用 window.open 在页面中打开的页面数组。如果页面在 URL 中关闭,则不会考虑您引用的页面。 |
| 23 | paperSize
此属性提供大小,即需要将网页转换为 pdf 格式时网页的尺寸。paperSize 包含对象中所需的尺寸。 |
| 24 | plaintext
此属性还提供当前活动框架的内容,但仅提供没有任何 html 标签的内容。 |
| 25 | scrollPosition
这包含指示滚动位置的对象。它提供左侧和顶部。 |
| 26 | settings
当使用 page.open 方法时,此属性将提供网页的设置。一旦页面加载,设置属性中的更改将不会产生任何影响。 |
| 27 | title
此属性将为您提供您正在阅读的页面的标题。 |
| 28 | url
此属性将提供页面 url。 |
| 29 | viewportSize
此属性允许更改窗口显示的大小。它包含宽度和高度,您可以根据需要读取或更改它们。 |
| 30 | windowName
提供窗口的名称。 |
| 31 | zoomFactor
此属性指定 render 和 renderBase64 方法的缩放因子。它有助于缩放页面并在需要时进行屏幕截图。 |
PhantomJS - Webpage 网页模块方法
Webpage 网页模块具有用于Cookie、框架、页面导航、重新加载、渲染和文件上传的方法。
以下是网页上可用的方法。
| S.No | 方法和描述 |
|---|---|
| 1 | addCookie()
addCookie 方法将 cookie 添加到指定页面。 |
| 2 | childFramesCount() |
| 3 | childFramesName() |
| 4 | clearCookies()
将删除指定页面的所有 cookie。 |
| 5 | close()
此方法用于关闭页面并释放使用的内存。一旦调用 close,任何网页方法或属性都将不起作用。 |
| 6 | currentFrameName()
根据 http://phantomjs.org,此方法已弃用。 |
| 7 | deleteCookie()
这将删除名称与给定页面网址的现有 cookie 列表匹配的 cookie。 |
| 8 | evaluateAsync()
在页面内异步评估给定函数,而不阻止当前执行。此函数有助于异步执行某些脚本。 |
| 9 | evaluateJavascript()
EvaluateJavaScript 有助于以字符串形式执行传递给它的函数。请注意,传递的字符串必须只是一个函数。 |
| 10 | evaluate()
Evaluate 将执行传递给它的函数。如果函数包含控制台消息,则不会直接显示在终端中。要显示任何控制台消息,您需要使用 onConsoleMessage 幻像回调。 |
| 11 | getPage()
这将为您提供与 getpage 中传递的窗口名称匹配的子页面。 |
| 12 | goBack()
如果导航未锁定,它会提供导航历史记录中的上一页。 |
| 13 | goForward()
如果导航未锁定,它会在导航历史记录中显示下一页。 |
| 14 | go()
此方法允许您浏览页面。 |
| 15 | includeJs()
Includejs 在页面上执行外部 JS 文件,并在完成后执行回调函数。 |
| 16 | injectJs()
InjectJs 将指定文件中的外部脚本包含到页面中。如果当前目录中没有该文件,则使用 libraryPath 对文件进行额外搜索。如果文件已注入,则返回 true,否则返回 false。 |
| 17 | openUrl()
OpenUrl 打开一个网页,和 PhantomJS 的 open 方法类似,OpenUrl 还有一些额外的参数,包括 httpConf、设置和回调函数。 |
| 18 | open()
Open 用于打开一个网页。 |
| 19 | release()
Release 会释放页面的内存堆使用量,调用 release 后不要再使用页面实例方法。此方法和 close 方法类似,已弃用。而是使用 wpage.close()。 |
| 20 | reload()
Reload 用于重新加载当前使用的页面。 |
| 21 | renderBase64()
此方法获取屏幕截图并以 base46 格式将图像作为字符串提供。Renderbase64 支持 PNG、JPEG 和 JPG 等格式。目前不支持 gif。您可以使用 clipRect 属性来定义图像捕获的部分。 |
| 22 | renderBuffer()
RenderBuffer 将网页捕获到图像缓冲区,可直接发送到服务器。支持的格式包括 PNG、GIF 和 JPEG。 |
| 23 | render()
Render 有助于获取图像缓冲区并按照指定的格式保存。 |
| 24 | sendEvent()
用于向网页发送事件。它们不是 dom 事件。这些事件中的每一个都是根据用户交互发送到网页的。 |
| 25 | setContent()
setcontent 将使用指定的内容更改指定 url 的页面内容。 |
| 26 | stop()
它有助于停止页面加载。 |
| 27 | switchToChildFrame()
不建议使用switchToFrame(); |
| 28 | switchToFocusedFrame()
选择焦点所在的帧。 |
| 29 | switchToFrame()
选择具有指定名称且为当前帧的子帧的帧。 |
| 30 | switchToMainFrame()
选择主框架,即根窗口。 |
| 31 | switchToParentFrame()
它采用当前子框架的父框架。 |
| 32 | uploadFile()
此方法用于处理使用 html 中的表单完成的文件上传。PhantomJS 没有直接使用表单执行此操作的方法,可以使用 uploadFile 方法实现相同的操作。它采用 html 标签选择器来选择文件位置和要复制到的目的地。 |
Webpage 网页模块事件/回调
下表描述了Webpage 网页模块可用的回调。
| S.No | 回调和说明 |
|---|---|
| 1 | onAlert()
当页面上有警报时,将调用此回调;回调接受一个字符串,但不返回任何内容。 |
| 2 | onCallback()
OnCallback 用于将值从网页传递到网页对象,它是使用 window.callPhantom() 方法完成的,该方法在内部调用 onCallback 函数。 |
| 3 | onClosing()
当使用 page.close() 方法或 window.close() 方法关闭窗口时,将调用此方法。 |
| 4 | onConfirm()
当页面上有使用 ok /cancel 调用的确认消息时,将调用此回调。 |
| 5 | onConsoleMessage()
当网页中使用控制台消息时,将使用此回调。 onConsoleMessage 方法采用 3 个参数。 |
| 6 | onError()
当出现 JavaScript 错误时,将调用此回调。 onError 的参数是 msg 和 stack trace,后者是一个数组。 |
| 7 | onFilePicker()
这用于上传文件,当用户想要上传文件时会调用回调。 |
| 8 | onInitialized()
在页面加载前调用此回调。 |
| 9 | onLoadFinished()
当打开的页面完全加载时,会调用此函数。它有一个参数,用于指示加载是成功还是失败。 |
| 10 | onLoadStarted()
页面开始加载时会调用此回调。 |
| 11 | onNavigationRequested()
此回调指示导航事件何时发生。 |
| 12 | onPageCreated()
此回调是当页面打开新的子窗口时调用。 |
| 13 | onPrompt()
当网页调用提示时,会调用此回调。它需要 2 个参数,消息和答案。返回值是一个字符串。 |
| 14 | onResourceError()
当网页无法上传文件时,会调用此回调。 |
| 15 | onResourceReceived()
当收到页面请求的资源时,会调用此回调。 |
| 16 | onResourceRequested()
此函数当页面请求资源时调用。 |
| 17 | onResourceTimeout()
当使用 settings.resourceTimeout 时,请求的资源超时,会调用此回调。 |
| 18 | onUrlChanged()
当使用导航更改当前 URL 时,会调用此回调。它有一个回调参数,即新的 URL targetUrl 字符串。 |
网页子进程模块
Phantomjs 子进程模块有助于与子进程交互,并使用 stdin /stdout/stderr 与它们通信。子进程可用于执行 打印、发送邮件 等任务,或 调用用其他语言编写的程序。要创建子进程模块,您需要引用。
例如 −
var process = require("child_process");
Spawn 方法
使用 spawn 子进程,您可以订阅其 stdout 和 stderr 流以实时获取数据。
语法
其语法如下 −
var spawn = require('child_process').spawn;
示例
让我们看一个 spawn 方法的示例。
var process = require("child_process")
var spawn = process.spawn
var child = spawn("cmd", ['/c', 'dir']);

child.stdout.on("data", function (data) {
   console.log("spawnSTDOUT---VALUE:", JSON.stringify(data))
})
child.stderr.on("data", function (data) {
   console.log("spawnSTDERR:", JSON.stringify(data))
})
child.on("exit", function (code) {
   console.log("spawnEXIT:", code)
})
Output
上述程序生成以下输出。
spawnSTDOUT---VALUE: " Volume in drive C is OS
"
spawnSTDOUT---VALUE: " Volume Serial Number is 7682-9C1B

 Directory of C:
\phantomjs\bin

"
spawnSTDOUT---VALUE: "20-05-2017  10:01
<DIR>          .
20-05-2017  10:01
<DIR>          ..
13-05-2017  20:48   12 a,txt.txt
07-05-2017  08:51
63 a.js
06-05-2017  16:32           120,232 a.pdf
13-05-2017  20:49
spawnEXIT: 0
PhantomJS - 文件系统模块属性
文件系统模块有许多 API 来处理文件和目录。您可以创建/写入和删除文件/目录。要开始使用文件系统模块,您必须引用 fs 模块。
var fs = require('fs');
文件系统模块有两个可用属性:Separator 和 Working Directory。让我们详细了解它们。
分隔符
它告诉您用于文件路径的分隔符。
- 对于 Windows:\
- 对于 Linux:/
语法
其语法如下 −
fs.seperator
示例
var fs = require('fs');
console.log(fs.seperator);
phantom.exit();
上述程序生成以下输出。
undefined
workingDirectory
工作目录是PhantomJS执行的目录。
语法
其语法如下 −
var fs = require('fs');
fs.workingDirectory;
示例
var fs = require('fs');
console.log(fs.workingDirectory);
phantom.exit();
上述程序生成以下输出。
C:/phantomjs/bin
PhantomJS - 文件系统模块方法
下表包含文件系统模块上可用的所有方法及其说明。
| S.No | 方法和描述 |
|---|---|
| 1 | absolute
此方法提供 PhantomJS 运行的绝对路径。 |
| 2 | changeWorkingDirectory
这允许您更改工作目录并返回 true,如果成功,否则返回 false。 |
| 3 | copyTree
copyTree 将目录从一个路径复制到另一个路径。第一个参数是源文件夹,第二个参数是目标文件夹。 |
| 4 | copy
此方法有助于将文件从一个位置复制到另一个位置。它需要两个参数。第一个参数是源文件,第二个参数是要复制的文件路径。如果源文件或目标文件不存在,它将抛出错误。 |
| 5 | exists
它检查系统中是否存在给定的文件路径。如果存在则返回 true,否则返回 false。 |
| 6 | isAbsolute
如果文件路径是绝对路径,则此方法返回 true;如果是相对路径,则返回 false。 |
| 7 | isDirectory
isDirectory 告知给定文件是否为目录。如果是目录,则返回 true,否则返回 false。如果给定路径不存在,则返回 false。 |
| 8 | isExecutable
此方法将告知给定文件是否可执行。如果可执行,则返回 true,否则返回 false。 |
| 9 | isFile
这详细说明了给定的文件路径是否为文件。如果是文件则返回 true,如果不是则返回 false。 |
| 10 | isLink
如果文件路径是符号链接则返回 true,否则返回 false。 |
| 11 | isReadable
检查给定的文件是否可读。如果是,则返回 true,否则返回 false。 |
| 12 | isWritable
它判断给定文件是否可写。如果是,则返回 true,否则返回 false。 |
| 13 | lastModified
提供对文件的最后修改的详细信息。它告诉文件最后修改的日期和时间。 |
| 14 | list
它提供目录中存在的所有文件。 |
| 15 | makeDirectory
创建一个新目录。 |
| 16 | makeTree
makeTree 创建所有必要的文件夹以便能够形成最终目录。如果创建成功则返回 true,否则返回 false。如果目录已经存在,它将返回 true。 |
| 17 | move
它将文件从一个路径移动到另一个路径。 |
| 18 | open
它用于打开文件。 |
| 19 | readLink
这将返回由符号链接(或Windows 上的快捷方式)。如果路径不是符号链接或快捷方式,它将返回一个空字符串。 |
| 20 | read
这将读取给定的文件。 |
| 21 | removeDirectory
这将删除给定的目录。 |
| 22 | removeTree
它将从给定的文件夹中删除所有文件和文件夹,并且最后删除文件夹本身。如果在执行此过程时出现任何错误,它将抛出错误 - "无法删除目录树 PATH"并挂起执行。 |
| 23 | remove
它删除给定的文件。 |
| 24 | size
它给出文件的大小。 |
| 25 | touch
它创建一个给定的文件。 |
| 26 | write
写入给定文件。 |
PhantomJS - 系统模块属性
在本章中,我们将讨论 PhantomJS 的各种系统模块属性。
args
PhantomJS 的系统模块具有不同的属性,有助于传递参数、了解执行的文件等。
args 属性基本上返回在命令行传递的参数。您还可以传递要读取的页面 URL。如果您想要存储屏幕截图 pdf 文件或上传文件,可以将详细信息传递到命令行,并使用 args 属性读取。
让我们找到传递到命令行的每个参数的长度和获取方法。
语法
其语法如下 −
var system = require('system');
system.args;
示例
查看以下示例以了解此属性的工作原理。
var system = require('system');
console.log(system.args.length);

if (system.args.length>0) {
   console.log(JSON.stringify(system.args));
}
phantom.exit();
上述程序生成以下输出。
Command − phantomsjs args.js http://localhost/tasks/request.html
2
["args.js","http://localhost/tasks/request.html"]
第一个值是文件的名称,下一个值是传递的 URL。您可以在命令行中传递更多参数,并使用 system.args 获取相同的参数。
env
env 属性返回系统的详细信息。
语法
其语法如下 −
var system = require('system');
system.env;
示例
var system = require('system');
console.log(JSON.stringify(system.env));
phantom.exit();
上述程序生成以下输出。
{"=::":"::\","=C:":"C:\phantomjs\bin","=ExitCode":"00000000","ALLUSERSPROFILE":
"C:\ProgramData","APPDATA":"C:\Users\UserName\AppData\Roaming","COMPUTERNAME":
"X","ComSpec":"C:\Windows\system32\cmd.exe","CommonProgramFiles":
"C:\Program Files (x86)\Common Files","CommonProgramFiles(x86)":
"C:\Program Files (x86)\Common Files","CommonProgramW6432":
"C:\Program Files\Common Files","FP_NO_HOST_CHECK":"NO","HOMEDRIVE":"C:",
"HOMEPATH":"\Users\UserName","LOCALAPPDATA":
"C:\Users\UserName\AppData\Local","LOGONSERVER":"\\MicrosoftAccount",
"NUMBER_OF_PROCESSORS":"2","OS":"Windows_NT","PATHEXT":".COM;.EXE;.BAT;.CMD;.VBS ;
.VBE;.JS;.JSE;.WSF;.WSH;.MSC","PROCESSOR_ARCHITECTURE":"x86","PROCESSOR_ARCHITEW64 32":
"AMD64","PROCESSOR_IDENTIFIER":"Intel64 Family 6 Model 58Stepping9,GenuineIntel",
"PROCESSOR_LEVEL":"6","PROCESSOR_REVISION":"3a09","PROMPT":
"$P$G","PSModulePath":"C:\Windows\system32\WindowsPowerShell\v1.0\
Modules\" ,"PUBLIC":"C:\Users\Public","Path":
"C:\Program Files\Dell\DW WLAN Card;
c:\Program Files (x86)\Intel\iCLS Client\;c:\Program Files\Intel\iCLSClient\;
C:\Windows\system32;C:\Windows;C:\Windows\System32\ \Wbem;
C:\Windows\System32\WindowsPowerShell\v1.0\;
C:\Program Files\Intel\Intel(R) Management Engine Components\DAL;
C:\Program Files\Intel\Intel(R) Management Engine Components\IPT;
C:\Program Files (x86)\Intel\Intel(R) Management Engine Components\DAL;
C:\Program Files (x86)\Intel\Intel(R)
ManagementEngineComponents\IPT;c:\ProgramFiles\WIDCOMM\BluetoothSoftware\;
c:\ProgramFiles\WIDCOMM\BluetoothSoftware\syswow64;
C:\ProgramFiles(x86)\WindowsLive\Shared;C:\ProgramFiles\nodejs\;
C:\ProgramFiles\Git\cmd;C:\ProgramFiles\ OpenVPN\bin;
C:\ProgramFiles(x86)\Skype\Phone\;C:\Users\UserName\AppData\Roaming
\npm","ProgramData":
"C:\ProgramData","ProgramFiles":"C:\ProgramFiles(x86)",
"ProgramFiles(x86)":"C:\ProgramFiles(x86)","ProgramW6432":
"C:\ProgramFiles","SESSIONNAME":"Console","SystemDrive":
"C:","SystemRoot":"C:\Windows","TEMP":"C:\Users\ \Username~1\AppData\Local\Temp",
"TMP":"C:\Users\Username~1\AppData\Local\Temp",
"USERDOMAIN":"USER","USERDOMAIN_ROAMINGPROFILE":"USER","USERNAME":"X Y","USERPROFILE":
"C:\Users\X Y","windir":"C:\Windows"}
OS
它返回所用操作系统的详细信息。它返回一个包含体系结构、操作系统名称和版本的对象。
语法
其语法如下 −
var system = require('system');
system.os;
示例
var system = require('system');
console.log(JSON.stringify(system.os));
phantom.exit();
上述程序生成以下输出。
{"architecture":"32bit","name":"windows","version":"8.1"}
pid
此属性返回进程 ID。
语法
其语法如下 −
var system = require('system');
system.pid;
示例
让我们看一个 pid 属性的示例。
var system = require('system');
console.log(system.pid);
phantom.exit();
上述程序生成以下输出。
2160
platform
此属性返回我们正在处理的平台。
语法
其语法如下 −
var system = require('system');
system.platform;
示例
var system = require('system');
console.log(system.platform);
phantom.exit();
上述程序生成以下输出。
Phantomjs
PhantomJS - Web 服务器模块属性
PhantomJS 使用名为 mongoose 的嵌入式 Web 服务器。目前,PhantomJS 无法与任何其他生产 Web 服务器连接。就连接而言,它一次可以处理 10 个连接,并且超过 10 个请求将在队列中等待。
要启动 Web 服务器,我们需要使用以下语法 −
var webserver = require ('webserver');
让我们了解 Port 属性,该属性用于侦听发送到 Web 服务器的请求。
port
Web 服务器的 Port 属性用于侦听发送给它的请求。
语法
其语法如下 −
var server = require('webserver').create();
var listening = server.listen(port, function (request, response) {});
示例
让我们举一个例子来了解 port 属性的工作原理。
var webserver = require('webserver');
var server = webserver.create();
var service = server.listen(8080,function(request,response){
});
if(service) console.log("server started - http://localhost:" + server.port);
上述程序生成以下输出。
server started - http://localhost:8080
PhantomJS - Web 服务器模块方法
在本章中,我们将讨论 PhantomJS 的 Web 服务器模块的各种方法。
close
close 方法用于关闭 Web 服务器。
语法
其语法如下 −
var server = require('webserver').create();
server.close();
示例
以下示例展示了如何使用 close 方法。
var webserver = require('webserver');
var server = webserver.create();
var service = server.listen(8080,function(request,response){
});

if(service) console.log("server started - http://localhost:" + server.port);
console.log(server.port);
server.close();
console.log(server.port);
上述程序生成以下输出。
server started - http://localhost:8080
8080
在这里,我们在关闭服务器后对 server.port 进行了控制。因此,由于 Web 服务器已关闭,因此它不会响应。
listen
server.listen 方法采用端口和回调函数以及两个参数,即 - Request Object 和 Response Object。
Request Object 包含以下属性 −
Method − 这定义了方法 GET /POST。
URL − 这显示请求的 URL。
httpVersion − 这显示实际的 http 版本。
Headers −这将显示所有带有键值对的标头。
Post − 请求正文仅适用于 post 方法。
postRaw − 如果 Content-Type 标头设置为"application/x-www-formurlencoded",则帖子的原始内容将存储在此额外属性 (postRaw) 中,然后该帖子将自动使用 URL 解码版本的数据进行更新。
Response Object 包含以下属性 −
Headers − 包含所有 HTTP 标头作为键值对。应在首次调用 write 之前设置它。
SetHeader −这将设置一个特定的标头。
Header (name) − 它返回给定标头的值。
StatusCode − 它设置返回的 HTTP 状态代码。
SetEncoding (encoding) − 它用于转换给定给 write() 的数据。默认情况下,数据将转换为 UTF-8。如果数据是二进制字符串,则指示"二进制"。如果数据是缓冲区(例如来自 page.renderBuffer),则不需要。
Write (data) − 它发送响应主体的数据。可以多次调用。
WriteHead (statusCode, headers) − 它向请求发送响应标头。状态代码是 3 位 HTTP 状态代码(例如 404)。最后的参数和标头是响应标头。
Close − 它关闭 http 连接。
CloseGracefully − 它与 close() 类似,但它确保首先发送了响应标头。
语法
其语法如下 −
var server = require('webserver').create();
var listening = server.listen(8080, function (request, response) {}
示例
让我们举一个例子来了解 listen 方法的工作原理。
var page = require('webpage').create();
var server = require('webserver').create();
var port = 8080;
var listening = server.listen(8080, function (request, response) {
console.log("GOT HTTP REQUEST");
console.log(JSON.stringify(request, null, 4));
// 我们在这里设置标头
response.statusCode = 200;
response.headers = {"Cache": "no-cache", "Content-Type": "text/html"};
// 上面的标头现在将被隐式发送
// 现在我们编写正文
response.write("<html><head><title>Welcone to Phantomjs</title></head>");
response.write("<body><p>Hello World</p></body></html>");
response.close();
});
if (!listening) {
console.log("could not create web server listening on port " + port);
phantom.exit();
}
var url = "http://localhost:" + port + "/foo/response.php";
console.log("sending request to :" +url);
page.open(url, function (status) {
if (status !== 'success') {
console.log('page not opening');
} else {
console.log("Getting response from the server:");
console.log(page.content);
}
phantom.exit();
});
上述程序生成以下输出。
sending request to :http://localhost:8080/foo/response.php
GOT HTTP REQUEST {
   "headers": {
      "Accept": "text/html,application/xhtml+xml,application/xml;q=0.9,*/*;q=0.8",
      "Accept-Encoding": "gzip, deflate",
      "Accept-Language": "en-IN,*",
      "Connection": "Keep-Alive",
      "Host": "localhost:8080",
      "User-Agent": "Mozilla/5.0 (Windows NT 6.2; WOW64) AppleWebKit/538.1
         (KHTML, like Gecko) PhantomJS/2.1.1 Safari/538.1"
   },
   "httpVersion": "1.1",
   "method": "GET",
   "url": "/foo/response.php"
}
Getting response from the server:
<html><head><title>Welcone to Phantomjs</title></head><body><p>Hello World</p></body>
</html>
PhantomJS - 命令行界面
可以使用关键字"phantomjs"和文件名称来执行 PhantomJS。例如,"phantomjs file.js"。
您还可以将参数传递给"file.js",如下所示 −
phantomjs [options] file.js arg1 arg2 ...
让我们来看看命令行中可用的一些选项。
| S.No | 选项 &描述 |
|---|---|
| 1 | --help 或 –h 将显示所有命令行选项。立即停止并且不会运行传递的脚本。 |
| 2 | --version 或 –v 打印正在运行的 PhantomJS 版本。这将停止要运行的脚本的执行。 |
| 3 | --debug[true|false] 打印警告和调试消息。默认情况下,它设置为 false。您也可以使用 [yes|no]。 |
| 4 | --cookies-file = /path/to/cookies.txt 用于存储持久性 cookie 的文件名。 |
| 5 | --diskcache=[true|false] 启用磁盘缓存。它还接受值 [yes|no] |
| 6 | --disk-cahe-path 磁盘缓存的路径。 |
| 7 | --ignore-sslerrors=[true|false] 忽略 SSL 错误。例如 - 过期或自签名证书错误。默认值为 false。它也接受值 [yes|no]。 |
| 8 | --loadimages=[true|false] 加载所有内联图像。默认值为 true。它还需要 [yes|no]。 |
| 9 | --local-storagepath=/some/path 保存 LocalStorage 内容和 WebSQL 内容的路径。 |
| 10 | --local-storagequota=number 允许数据的最大大小。 |
| 11 | --local-url-access 允许使用'file:///' URL(默认为 true)。 |
| 12 | --local-to-remote-urlaccess=[true|false] 允许本地内容访问远程 URL。默认值为 false。它还可以使用值 [yes|no]。 |
| 13 | --max-disk-cachesize=size 限制磁盘缓存的大小(以 KB 为单位) |
| 14 | --offline-storage-path 指定离线存储的位置。 |
| 15 | --offline-storage-quota 设置离线存储的最大大小(以 KB 为单位)。 |
| 16 | --outputencoding=encoding 设置用于终端输出的编码。默认为 utf-8。 |
| 17 | --proxy=address:port 指定要使用的代理服务器(例如 – proxy=192.168.1.1:8080) |
| 18 | --proxytype=[http|socks5|none] 指定代理服务器的类型(默认为 http) |
| 19 | --proxy-auth 代理的身份验证信息。例如 – --proxy-auth=username:password |
| 20 | --scriptencoding=encoding 设置脚本使用的编码。默认为 utf8。 |
| 21 | --script-language 设置脚本语言。 |
PhantomJS - 屏幕截图
PhantomJS 在截取网页屏幕截图和将网页转换为 PDF 方面非常有用。我们在这里给出了一个简单的示例来演示它的工作原理。
示例
var page = require('webpage').create();
page.open('http://phantom.org/',function(status){
    page.render('phantom.png');
    phantom.exit();
});
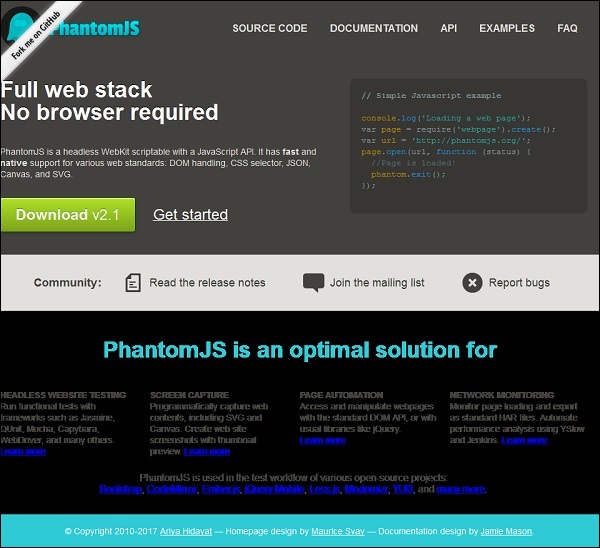
执行上述程序,输出将保存为 phantom.png。
将网页转换为 PDF
PhantomJS 还有助于将网页转换为添加了页眉和页脚的 PDF。请查看以下示例以了解其工作原理。
var wpage = require('webpage').create();
var url = "https://en.wikipedia.org/wiki/Main_Page";
var output = "test.pdf";

wpage.paperSize = {
   width: screen.width+'px',
   height: '1500px',

   margin: {
      'top':'50px',
      'left':'50px',
      'rigtht':'50px'
   },
   orientation:'portrait',
   header: {
      height: "1cm",
      contents: phantom.callback(function(pageNumber, nPages) {
         return "<h5>Header <b>" + pageNumber + " / " + nPages + "</b></h5>";
      })
   },
   footer: {
      height: "1cm",
      contents: phantom.callback(function(pageNumber, nPages) {
         return "<h5>Footer <b>" + pageNumber + " / " + nPages + "</b></h5>";
      })
   }
}
wpage.open(url, function (status) {
   if (status !== 'success') {
      console.log('Page is not opening');
      phantom.exit();
   } else {
      wpage.render(output);
      phantom.exit();
   }
});
上述程序生成以下输出。
The above will convert the page into pdf and will be saved in test.pdf
将 Canvas 转换为图像
Phantomjs 可以轻松将 Canvas 转换为图像。查看以下示例以了解其工作原理。
var page = require('webpage').create();
page.content = '<html><body><canvas id="surface" width="400" height="400"></canvas></body></html>';

page.evaluate(function() {
   var context,e1;
   el = document.getElementById('surface');

   context = el.getContext('2d');
   context.font = "30px Comic Sans MS";
   context.fillStyle = "red";
   context.textAlign = "center";
   context.fillText("Welcome to PhantomJS ", 200, 200);

   document.body.style.backgroundColor = 'white';
   document.body.style.margin = '0px';
});
page.render('canvas.png');
phantom.exit();
上述程序生成以下输出。
 h1>PhantomJS - 页面自动化
PhantomJS 在其网页模块 API 的帮助下,可以操作网页并执行诸如 DOM 操作、单击按钮等操作。
从页面获取图像
以下程序展示了如何使用 PhantomJS 从页面获取图像。
var wpage = require('webpage').create();
wpage.onConsoleMessage = function(str) {
   console.log(str.length);
}
wpage.open("http://phantomjs.org", function(status) {
   console.log(status);
   var element = wpage.evaluate(function() {
      var imgdata =  document.querySelectorAll('img');
      var imgsrc = [];

      if (imgdata) {
         for (var i in imgdata) {
            imgsrc.push(imgdata[0].src);
         }
      }
      return imgsrc;
   });
   console.log(JSON.stringify(element));
});
上述程序生成以下输出。
Success
["http://phantomjs.org/img/phantomjslogo.png","http://phantomjs.org/img/phantom
js-logo.png","http://phantomjs.org/img/phantomjslogo.png","http://phantomjs.org
/img/phantomjs-logo.png"]
可以使用 injectJS 网页方法 在页面中包含外部 JavaScript。有许多属性和方法,可以帮助页面自动化并执行许多其他操作。您可以参考网页模块,其中详细解释了属性和方法。
PhantomJS - 网络监控
借助 PhantomJS,我们可以监控网络并验证特定网页的行为和性能。PhantomJS 中有回调,即 onResourceRequested 和 onResourceReceived,它们有助于监控给定页面的流量。
示例
以下示例展示了如何使用 PhantomJS 监控给定页面的流量。
function createHAR(address, title, startTime, resources) {

   // 此函数格式化来自 onresourcerequest 和 onresourcereceived 的数据
   var entries = [];

   resources.forEach(function (resource) {
      var request = resource.request, startReply = resource.startReply,
         endReply = resource.endReply;

      if (!request || !startReply || !endReply) {
         return;
      }

      // 从 HAR 文件中排除数据 URI,因为
      // 它们未包含在规范中
      if (request.url.match(/(^data:image\/.*)/i)) {
         return;
      }
      entries.push ({
         startedDateTime: request.time.toISOString(),
         time: endReply.time - request.time,

         request: {
            method: request.method,
            url: request.url,
            httpVersion: "HTTP/1.1",
            cookies: [], headers: request.headers,
            queryString: [],
            headersSize: -1,
            bodySize: -1
         },
         response: {
            status: endReply.status,
            statusText: endReply.statusText,
            httpVersion: "HTTP/1.1",
            cookies: [],
            headers: endReply.headers,
            redirectURL: "",
            headersSize: -1,
            bodySize: startReply.bodySize,

            content: {
               size: startReply.bodySize,
               mimeType: endReply.contentType
            }
         },
         cache: {},
         timings: {
            blocked: 0,
            dns: -1,
            connect: -1,
            send: 0,
            wait: startReply.time - request.time,
            receive: endReply.time - startReply.time,
            ssl: -1
         },
         pageref: address
      });
   });
   return {
      log: {
         version: '1.2', creator: {
            name: "PhantomJS",
            version: phantom.version.major + '.' + phantom.version.minor +
               '.' + phantom.version.patch
         },
         pages: [{
            startedDateTime: startTime.toISOString(),
            id: address,
            title: title,

            pageTimings: {
               onLoad: page.endTime - page.startTime
            }
         }],
         entries: entries
      }
   };
}
var page = require('webpage').create(), system = require('system');
var fs = require('fs');

if (system.args.length === 1) {
   console.log('Usage: netsniff.js <some URL>');
   phantom.exit(1);
} else {
   page.address = system.args[1];
   page.resources = [];

   page.onLoadStarted = function () {  // 页面加载时调用
      page.startTime = new Date();
   };
   page.onResourceRequested = function (req) {
      // 当从给定的页面 URL 请求任何文件时调用
      page.resources[req.id] = {
         request: req,
         startReply: null,
         endReply: null
      };
   };
   page.onResourceReceived = function (res) {
      //当收到任何文件时调用。
      if (res.stage === 'start') {
         page.resources[res.id].startReply = res;
      }
      if (res.stage === 'end') {
         page.resources[res.id].endReply = res;
      }
   };
   page.open(page.address, function (status) {  // 打开给定的页面网址
      var har;

      if (status !== 'success') {
         console.log('FAIL to load the address');
         phantom.exit(1);
      } else {
         page.endTime = new Date();

         page.title = page.evaluate(function () { // 获取页面标题
            return document.title;
         });
         har = createHAR(page.address, page.title, page.startTime, page.resources);

        // 使用页面 URL、开始时间和页面资源调用 createHAR 函数。
        // console.log(JSON.stringify(har, undefined, 4));
        fs.write('log.txt', JSON.stringify(har, undefined, 4), 'w');

        // 日志收集在 log.txt 文件中。
        phantom.exit();
      }
   });
}
提供给 HAR 预览的 log.txt 示例
{
   "log": {
      "version": "1.2",
      "creator": {
         "name": "PhantomJS",
         "version": "2.1.1"
      },
      "pages": [
         {
            "startedDateTime": "2017-05-21T13:41:21.824Z",
            "id": "http://www.sample.com",
            "title": "Free Sample Products – Sample.com ≫ Free Samples,
               Free Product Samples, Product Test Marketing",
            "pageTimings": {
               "onLoad": 11081
            }
         }
      ],
      "entries": [
         {
            "startedDateTime": "2017-05-21T13:41:21.815Z",
            "time": 1999,

            "request": {
               "method": "GET",
               "url": "http://www.sample.com/",
               "httpVersion": "HTTP/1.1",
               "cookies": [],

               "headers": [
                  {
                     "name": "Accept",
                     "value": "text/html,application/xhtml+xml,
                        application/xml;q = 0.9,*/*;q = 0.8"
                  },

                  {
                     "name": "User-Agent",
                     "value": "Mozilla/5.0 (Windows NT 6.2; WOW64) AppleWebKit/538.1
                        (KHTML, like Gecko) PhantomJS/2.1.1 Safari/538.1"
                  }
               ],

               "queryString": [],
               "headersSize": -1,
               "bodySize": -1
            },
            "response": {
               "status": 301,
               "statusText": "Moved Permanently",
               "httpVersion": "HTTP/1.1",
               "cookies": [],

               "headers": [
                  {
                     "name": "Date",
                     "value": "Sun, 21 May 2017 13:41:25 GMT"
                  },

                  {
                     "name": "Server",
                     "value": "Apache/2.2.14 (Ubuntu)"
                  },

                  {
                     "name": "Location",
                     "value": "http://sample.com//"
                  },

                  {
                     "name": "Vary",
                     "value": "Accept-Encoding"
                  },

                  {
                     "name": "Content-Encoding",
                     "value": "gzip"
                  },

                  {
                     "name": "Keep-Alive",
                     "value": "timeout = 15, max = 100"
                  },

                  {
                     "name": "Connection",
                     "value": "Keep-Alive"
                  },

                  {
                     "name": "Content-Type",
                     "value": "text/html; charset = iso-8859-1"
                  }
               ],
               "redirectURL": "",
               "headersSize": -1,
               "bodySize": 307,

               "content": {
                  "size": 307,
                  "mimeType": "text/html; charset = iso-8859-1"
               }
            },

            "cache": {},
            "timings": {
               "blocked": 0,
               "dns": -1,
               "connect": -1,
               "send": 0,
               "wait": 1999,
               "receive": 0,
               "ssl": -1
            },
            "pageref": "http://www.sample.com"
         },
      ]
      {
         "startedDateTime": "2017-05-21T13:41:24.898Z",
         "time": 885,

         "request": {
            "method": "GET",
            "url": "http://sample.com/",
            "httpVersion": "HTTP/1.1",
            "cookies": [],

            "headers": [
               {
                  "name": "Accept",
                  "value": "text/html,application/xhtml+xml,
                     application/xml;q = 0.9,*/*;q = 0.8"
               },

               {
                  "name": "User-Agent",
                  "value": "Mozilla/5.0 (Windows NT 6.2; WOW64) AppleWebKit/538.1
                     (KHTML, like Gecko) PhantomJS/2.1.1 Safari/538.1"
               }
            ],
            "queryString": [],
            "headersSize": -1,
            "bodySize": -1
         },
         "response": {
            "status": 200,
            "statusText": "OK",
            "httpVersion": "HTTP/1.1",
            "cookies": [],

            "headers": [
               {
                  "name": "Date",
                  "value": "Sun, 21 May 2017 13:41:27 GMT"
               },

               {
                  "name": "Server",
                  "value": "Apache/2.2.14 (Ubuntu)"
               },

               {
                  "name": "X-Powered-By",
                  "value": "PHP/5.3.2-1ubuntu4.29"
               },

               {
                  "name": "X-Pingback",
                  "value": "http://sample.com/xmlrpc.php"
               },

               {
                  "name": "Link",
                  "value": "<http://sample.com/wp-json/>;
                     rel = \"https://api.w.org/\", <http://wp.me/P6Jj5H-4>;
                     rel = shortlink"
               },

               {
                  "name": "Vary",
                  "value": "Accept-Encoding"
               },

               {
                  "name": "Content-Encoding",
                  "value": "gzip"
               },

               {
                  "name": "Keep-Alive",
                  "value": "timeout = 15, max = 99"
               },

               {
                  "name": "Connection",
                  "value": "Keep-Alive"
               },

               {
                  "name": "Content-Type",
                  "value": "text/html; charset = UTF-8"
               }
            ],

            "redirectURL": "",
            "headersSize": -1,
            "bodySize": 1969,

            "content": {
               "size": 1969,
               "mimeType": "text/html; charset = UTF-8"
            }
         },

         "cache": {},
         "timings": {
            "blocked": 0,
            "dns": -1,
            "connect": -1,
            "send": 0,
            "wait": 869,
            "receive": 16,
            "ssl": -1
         },

         "pageref": http://www.sample.com
      },

      {
         "startedDateTime": "2017-05-21T13:41:25.767Z",
         "time": 388,

         "request": {
            "method": "GET",
            "url": "http://sample.com/wpcontent/themes/samplecom/style.css",
            "httpVersion": "HTTP/1.1",
            "cookies": [],

            "headers": [
               {
                  "name": "Accept",
                  "value": "text/css,*/*;q = 0.1"
               },

               {
                  "name": "Referer",
                  "value": "http://sample.com/"
               },

               {
                  "name": "User-Agent",
                  "value": "Mozilla/5.0 (Windows NT 6.2; WOW64) AppleWebKit/538.1
                     (KHTML, like Gecko) PhantomJS/2.1.1 Safari/538.1"
               }
            ],

            "queryString": [],
            "headersSize": -1,
            "bodySize": -1
         },

         "response": {
            "status": 200,
            "statusText": "OK",
            "httpVersion": "HTTP/1.1",
            "cookies": [],

            "headers": [
               {
                  "name": "Date",
                  "value": "Sun, 21 May 2017 13:41:27 GMT"
               },

               {
                  "name": "Server",
                  "value": "Apache/2.2.14 (Ubuntu)"
               },

               {
                  "name": "Last-Modified",
                  "value": "Fri, 22 Apr 2011 00:32:22 GMT"
               },

               {
                  "name": "ETag",
                  "value": "\"e1d7-1836-4a176fdbbd180\""
               },

               {
                  "name": "Accept-Ranges",
                  "value": "bytes"
               },

               {
                  "name": "Vary",
                  "value": "Accept-Encoding"
               },

               {
                  "name": "Content-Encoding",
                  "value": "gzip"
               },

               {
                  "name": "Keep-Alive",
                  "value": "timeout = 15, max = 98"
               },

               {
                  "name": "Connection",
                  "value": "Keep-Alive"
               },

               {
                  "name": "Content-Type",
                  "value": "text/css"
               }
            ],

            "redirectURL": "",
            "headersSize": -1,
            "bodySize": 3174,

            "content": {
               "size": 3174,
               "mimeType": "text/css"
            }
         },

         "cache": {},
         "timings": {
            "blocked": 0,
            "dns": -1,
            "connect": -1,
            "send": 0,
            "wait": 388,
            "receive": 0,
            "ssl": -1
         },

         "pageref": "http://www.sample.com"
      }
   }
}
Output
上述程序生成以下输出。
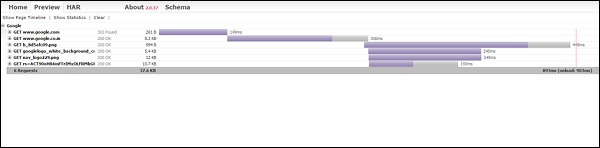
所有日志都收集在 .txt 文件 中,之后使用 HAR 预览将其转换为上述格式,例如 (http://www.softwareishard.com/har/viewer/)
PhantomJS - 测试
PhantomJS 为网页提供了大量 API,可提供所有详细信息。PhantomJS 可用于测试,如获取页面内容、进行屏幕共享、将页面转换为 pdf 等。市场上有许多流行的测试库,可与 PhantomJS 一起使用并用于测试。
一些可与 PhantomJS 配合使用的流行框架如下 −
- Mocha
- Jasmine
- Qunit
- Hiro
- Laika
- Buster.JS
- WebDriver
示例 - PhantomJS 与 Qunit
(function () {
   var url, timeout,args = require('system').args, page = require('webpage').create();
   url = args[1];
   timeout = parseInt(10, 10);

   page.onConsoleMessage = function (msg) {
      //打印所有控制台消息
      console.log(msg);
   };
   page.onInitialized = function () {  // 在页面初始化时调用
      page.evaluate(callqunit);
   };
   page.onCallback = function (message) { // called from
      var result, failed;

      if (message) {
         if (message.name === 'QUnit.done') {
            result = message.data;
            failed = !result || !result.total || result.failed;

            if (!result.total) {
               console.error('No tests were executed');
            }
            pageexit(failed ? 1 : 0);
         }
      }
   };
   page.open(url, function (status) { // opening page
      if (status !== 'success') {
         console.error('Unable to access network: ' + status);
         pageexit(1);

      } else {
         var checkqunit = page.evaluate(function () {
            //评估页面并检查是否为 qunit 对象
               is present on the given page url
            return (typeof QUnit === 'undefined' || !QUnit);
         });

         if (checkqunit) {
            console.error('Qunit scripts are not present on the page');
            pageexit(1);
         }

         //使用 10 秒的超时时间,否则将打印来自控制台的消息。
         setTimeout(function () {
            console.error('The specified timeout of ' + timeout + ' seconds has expired.
               Aborting...');
            pageexit(1);
         }, timeout * 1000);
      }
   });
   function callqunit() {
qunit.html
<!DOCTYPE html>
<html>

   <head>
      <meta charset = "utf-8">
      <meta name = "viewport" content = "width = device-width">
      <title>QUnit Example</title>
      <link rel = "stylesheet" href = "https://code.jquery.com/qunit/qunit-2.3.2.css">
   </head>

   <body>
      <div id = "qunit"></div>
      <div id = "qunit-fixture"></div>
      <script src = "https://code.jquery.com/qunit/qunit-2.3.2.js"></script>
   </body>

</html>
输出
命令 − phantomjs qunit.js http://localhost/tasks/qunit.html
上述程序生成以下输出。
{"passed":3,"failed":2,"total":5,"runtime":23}
Time taken is 23ms to run 5 tests.
3 passed, 2 failed.
PhantomJS - REPL
REPL 代表 Read Eval Print Loop。在 PhantomJS 中,REPL 是一种测试 JavaScript 代码的交互模式。您可以执行与在 Google Chrome Inspector 或 Firebug 中相同的操作,以直接在控制台上执行某些代码。REPL 返回相同的平台来执行脚本。
输入的命令将发送到解释器进行立即解释(EVAL)并提供反馈(PRINT)。在命令行中输入 PhantomJS,它将带您进入交互模式,您可以在其中直接执行代码。
语法
其语法如下 −
Phantomjs
示例
以下示例演示了 REPL 在 PhantomJS 中的工作方式。
phantomjs> console.log("Welcome to phantomjs");
Welcome to phantomjs
Undefined

phantomjs> window.navigator {
   "appCodeName": "Mozilla",
   "appName": "Netscape",
   "appVersion": "5.0 (Windows NT 6.2; WOW64) AppleWebKit/538.1 (KHTML, like Gecko)
      PhantomJS/2.1.1 Safari/538.1",
   "cookieEnabled": true,
   "language": "en-IN",

   "mimeTypes": {
      "length": 0
   },
   "onLine": false,
   "platform": "Win32",

   "plugins": {
      "length": 0
   },
   "product": "Gecko
   "productSub": "20030107",
   "userAgent": "Mozilla/5.0 (Windows NT 6.2; WOW64) AppleWebKit/538.1 (KHTML, like Gecko)
      PhantomJS/2.1.1 Safari/538.1",
   "vendor": "Apple Computer, Inc.",
   "vendorSub": ""
}

phantomjs>
To find the version
phantomjs> phantom.version {
   "major": 2,
   "minor": 1,
   "patch": 1
}
phantomjs>
执行每个命令并显示结果。使用 CTRL+C、CTRL+D 或 phantom.exit() 退出交互模式。
使用 向上/向下 箭头键收听先前输入的命令。
还有另一个称为 自动完成 的功能,它有助于记住命令。只需输入"phantom"并点击"Tab"按钮即可获得可执行的可用命令列表。
输出
上述程序生成以下输出。
phantomjs> phantom.→|
phantomjs> phantom.cookies→|
phantomjs> phantom.exit→|
phantomjs> phantom.version→|
PhantomJS - 示例
在本章中,我们将提供一些更实际的示例来帮助您了解 PhantomJS 的一些重要功能。
示例 1 - 查找页面速度
在此示例中,我们将使用 PhantomJS 查找任何给定页面 URL 的页面速度。
var page = require('webpage').create(),
   system = require('system'),
   t, address;

if (system.args.length === 1) {
   console.log('Usage: loadspeed.js <some URL>');
   phantom.exit(1);
} else {
   t = Date.now();
   address = system.args[1];

   page.open(address, function (status) {
      if (status !== 'success') {
         console.log('FAIL to load the address');
      } else {
         t = Date.now() - t;

         console.log('Page title is ' + page.evaluate(function () {
            return document.title;
         }));
         console.log('Loading time ' + t + ' msec');
      }
      phantom.exit();
   });
}
上述程序生成以下输出。
命令 − phantomjs pagespeed.js http://www.google.com
Page title is Google
Loading time 1396 msec
示例 2 - 向页面发送点击事件
在下面的示例中,我们将使用 PhantomJS 向页面发送 点击事件。
var page = require('webpage').create();
page.onConsoleMessage = function(str) {
   console.log(str);
}
page.open('http://phantomjs.org/api/phantom/', function(status) {
   page.render('beforeclick.png');
   console.log(page.url);

   var element = page.evaluate(function() {
      return document.querySelector('img[src = "http://phantomjs.org/img/phantomjslogo.png"]');
   });
   page.sendEvent('click', element.offsetLeft, element.offsetTop, 'left');

   window.setTimeout(function () {
      console.log(page.url);
      page.render('afterclick.png');
      phantom.exit();
   }, 5000);
   console.log('element is ' + element);
});
上述程序生成以下输出。
http://phantomjs.org/api/phantom/
element is [object Object]
http://phantomjs.org/
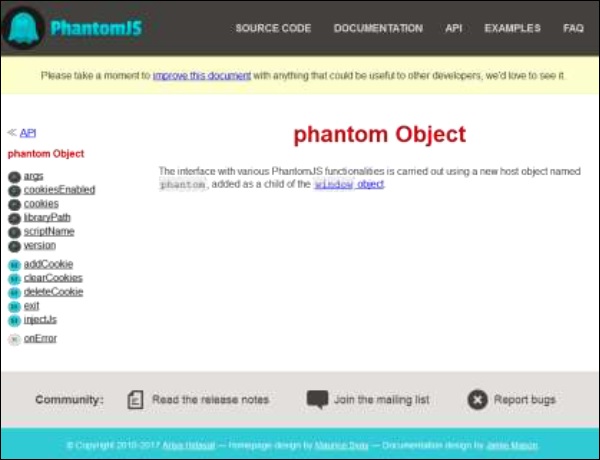
我们的程序将在 bin 文件夹中创建以下两个 png 图像。这两幅图像显示了上述程序执行前后的差异。
示例 3 - 提交表单
以下示例显示如何使用 PhantomJS 提交表单。
var wpage = require('webpage').create();
wpage.open("http://localhost/tasks/submitform.html", function(status) {
   console.log(status);
   wpage.uploadFile('input[name = fileToUpload]', 'output.png');
   wpage.render("sform.png");

   var element = wpage.evaluate(function() {
      return document.querySelector('input[type = "submit"]');
      // 使用 queryselector 获取提交按钮的详细信息。
   });
   wpage.sendEvent('click', element.offsetLeft, element.offsetTop, 'left');

   // sendevent 用于发送点击事件,并给出左侧和顶部
      position of the submit button.

   window.setTimeout(function () {
      console.log(wpage.url);
      wpage.render("submit.png");  // 截图保存在submit.png中
      phantom.exit();
   }, 5000);
   console.log('element is ' + element);
});
submitform.html
以下代码显示如何使用 submitform.html 文件。
<html>
   <head>
      <title>Window 2</title>
   </head>

   <body>
      <form action = "submitform.php" method = "post" enctype = "multipart/form-data"
         id = "form1">
         <input type = "file" name = "fileToUpload" id = "fileToUpload">
         <input type = "submit" value = "Upload Image" name = "submit">
      </form>
   </body>

</html>
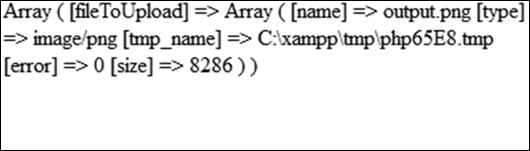
表单提交后,将转到 submitform.php。
submitform.php
submitform.php 仅打印文件的详细信息。
<?php
   print_r($_FILES);
?>
上述程序生成以下输出。
Success
element is [object Object]
http://localhost/tasks/submitform.php
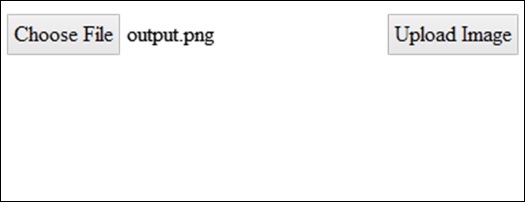
图片
以下是文件上传和表单提交的图片。