Vaadin - 用户界面组件
Vaadin 用于在网页中构建丰富的用户界面组件。在本章中,您将了解 Vaadin 引入的不同用户界面组件,以维护高质量的网页。本章的第一部分讨论了基本的 Web 组件及其用途,而第二部分讨论了在后端绑定组件。
字段组件
字段是用户可以通过 IO 操作操纵的 Web 组件。Vaadin 基于 JAVA,因此在 Vaadin 中,所有 Web 组件都有一个实现的类以及 Vaadin 库函数。下图显示了如何从名为 AbstractField<T> 的基类继承不同的字段组件。
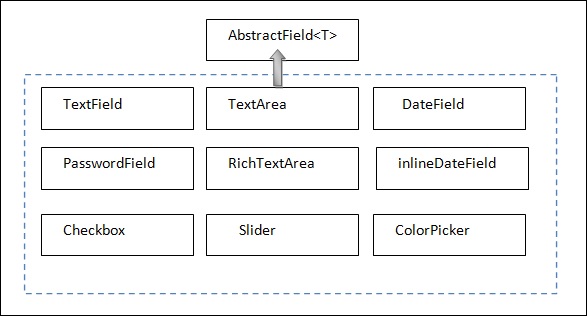
请注意,所有这些模块都与 UI 开发中的模块类似。在 Vaadin 中,我们有单独的类来实现每个模块。您将在接下来的章节中详细了解这些内容。
标签
标签用于提及网页中任何不可编辑的文本。下面给出的示例展示了如何在我们的应用程序中使用标签。请注意,在给定的示例中,我们创建了一个 JAVA 类并将其命名为 LabelExam.javanterface,我们将覆盖其 init() 方法来运行它。
package com.MyTutorials.MyFirstApp;
import javax.servlet.annotation.WebServlet;
import com.vaadin.annotations.VaadinServletConfiguration;
import com.vaadin.server.VaadinRequest;
import com.vaadin.server.VaadinServlet;
import com.vaadin.ui.HorizontalLayout;
import com.vaadin.ui.Label;
import com.vaadin.ui.UI;
//extending UI
public class LabelExam extends UI {
@Override
protected void init(VaadinRequest request) {
final HorizontalLayout hLayout = new HorizontalLayout(); //创建布局
Label l1 = new Label(" Welcome to the World of Vaadin Tutorials.");
Label l2 = new Label("
Happy Learning .." ,ContentMode.PREFORMATTED); // 内容模式告诉 JVM 解释标签中提到的字符串。因此,label2 将在下一行打印,因为"
"。
hLayout.addComponents(l1,l2); // 将标签添加到布局
setContent(hLayout); // 将布局设置为网页的内容。
}
// 控制 URL 的代码
@WebServlet(urlPatterns = "/*", name = "MyUIServlet", asyncSupported = true)
@VaadinServletConfiguration(ui = LabelExam.class, productionMode = false)
public static class MyUIServlet extends VaadinServlet {}
}
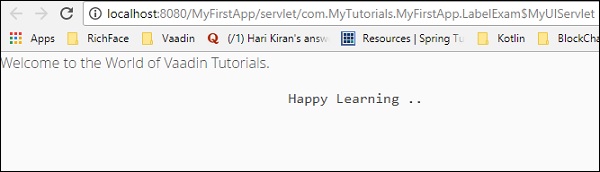
在上面的例子中,我们创建了两个标签,最后我们将该标签添加到我们的布局中。您将在接下来的章节中了解有关布局的更多信息。VaadinServlet 已实现以控制 URL。但是,在实际项目中,您不需要在每个 Java 应用程序中定义 servlet,因为它将相互链接。选择文件并单击 在服务器上运行,上面给出的代码将产生如下所示的输出。
链接
链接可用于实现到其他网站的外部链接。此类的工作原理与 HTML 的超链接标记完全相同。在下面给出的示例中,我们将使用 Link 将用户重定向到另一个网站,具体取决于名为 单击此处 的事件。现在,修改 MyUI.java 类,如下所示。
package com.example.myapplication;

import javax.servlet.annotation.WebServlet;
import com.vaadin.annotations.Theme;
import com.vaadin.annotations.VaadinServletConfiguration;
import com.vaadin.server.ExternalResource;
import com.vaadin.server.VaadinRequest;
import com.vaadin.server.VaadinServlet;
import com.vaadin.shared.ui.ContentMode;

import com.vaadin.ui.Button;
import com.vaadin.ui.HorizontalLayout;
import com.vaadin.ui.Label;
import com.vaadin.ui.Link;
import com.vaadin.ui.TextField;
import com.vaadin.ui.UI;
import com.vaadin.ui.VerticalLayout;

@Theme("mytheme")
public class MyUI extends UI {
   @Override
   protected void init(VaadinRequest vaadinRequest) {
      final VerticalLayout layout = new VerticalLayout();

      final HorizontalLayout hLayout = new HorizontalLayout();

      Link link = new Link("Click Me",new ExternalResource("https://www.tutorialspoint.com/"));
      hLayout.addComponent(link);
      setContent(hLayout);
   }
   @WebServlet(urlPatterns = "/*", name = "MyUIServlet", asyncSupported = true)
   @VaadinServletConfiguration(ui = MyUI.class, productionMode = false)
   public static class MyUIServlet extends VaadinServlet {}
}
在上面的例子中,我们创建了一个指向另一个网站的外部超链接。它将在浏览器中为我们提供以下输出。
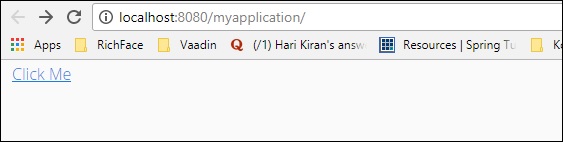
一旦用户点击链接,他们将被重定向到 www.tutorialspoint.com
文本字段
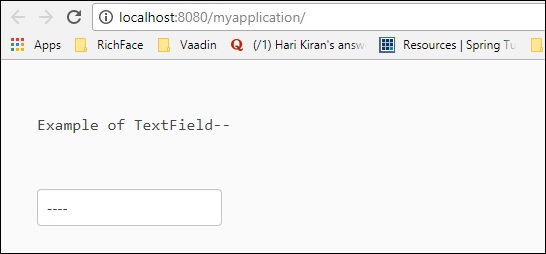
本节讨论如何使用 Vaadin 内置类生成文本字段。为此,请更新您的 MyUI.java 类,如下所示。
package com.example.myapplication;

import javax.servlet.annotation.WebServlet;
import com.vaadin.annotations.Theme;
import com.vaadin.annotations.VaadinServletConfiguration;
import com.vaadin.server.VaadinRequest;

import com.vaadin.server.VaadinServlet;
import com.vaadin.shared.ui.ContentMode;
import com.vaadin.ui.Label;
import com.vaadin.ui.TextField;
import com.vaadin.ui.UI;
import com.vaadin.ui.VerticalLayout;

@Theme("mytheme")
public class MyUI extends UI {
   @Override
   protected void init(VaadinRequest vaadinRequest) {
      final VerticalLayout layout = new VerticalLayout();
      Label l1 = new Label("Example of TextField--
 ",ContentMode.PREFORMATTED);
      TextField text = new TextField();
      text.setValue("----");
      layout.addComponents(l1,text);
      setContent(layout);
   }
   @WebServlet(urlPatterns = "/*", name = "MyUIServlet", asyncSupported = true)
   @VaadinServletConfiguration(ui = MyUI.class, productionMode = false)
   public static class MyUIServlet extends VaadinServlet {}
}
现在,刷新您的项目并进行干净构建。您可以在浏览器中观察下面显示的输出。请记住重新启动浏览器以获取其最近的更改。
文本区域
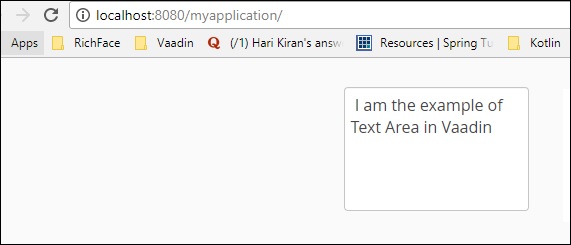
本节向您介绍如何使用 Vaadin 预定义类在浏览器中创建文本区域。例如,请观察下面给出的代码。
package com.example.myapplication;

import javax.servlet.annotation.WebServlet;
import com.vaadin.annotations.Theme;
import com.vaadin.annotations.VaadinServletConfiguration;
import com.vaadin.server.VaadinRequest;
import com.vaadin.server.VaadinServlet;

import com.vaadin.ui.Alignment;
import com.vaadin.ui.TextArea;
import com.vaadin.ui.UI;
import com.vaadin.ui.VerticalLayout;

@Theme("mytheme")
public class MyUI extends UI {
   @Override
   protected void init(VaadinRequest vaadinRequest) {
      final VerticalLayout layout = new VerticalLayout();
      final VerticalLayout hLayout = new VerticalLayout();
      TextArea text = new TextArea();
      text.setValue(" I am the example of Text Area in Vaadin");
      hLayout.addComponent(text);
      hLayout.setComponentAlignment(text,Alignment.BOTTOM_CENTER);
      setContent(hLayout);
   }
   @WebServlet(urlPatterns = "/*", name = "MyUIServlet", asyncSupported = true)
   @VaadinServletConfiguration(ui = MyUI.class, productionMode = false)
   public static class MyUIServlet extends VaadinServlet {}
}
上述代码将在浏览器中产生以下输出 −
日期和时间
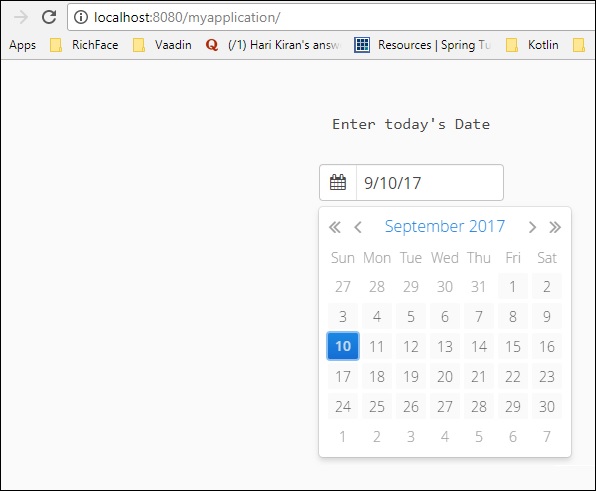
您可以使用日期选择器在浏览器中填充日期和时间。观察下面给出的示例代码。在这里,我们使用 Vaadin 预定义的 Date 类在浏览器中填充日期和时间。
package com.example.myapplication;

import java.time.LocalDate;
import java.util.Locale;
import javax.servlet.annotation.WebServlet;
import com.vaadin.annotations.Theme;
import com.vaadin.annotations.VaadinServletConfiguration;
import com.vaadin.server.VaadinRequest;

import com.vaadin.server.VaadinServlet;
import com.vaadin.shared.ui.ContentMode;
import com.vaadin.ui.Alignment;
import com.vaadin.ui.DateField;
import com.vaadin.ui.Label;
import com.vaadin.ui.UI;
import com.vaadin.ui.VerticalLayout;

@Theme("mytheme")
public class MyUI extends UI {
   @Override
   protected void init(VaadinRequest vaadinRequest) {
      final VerticalLayout layout = new VerticalLayout();
      final VerticalLayout hLayout = new VerticalLayout();
      Label l1 = new Label("Enter today's Date
",ContentMode.PREFORMATTED);
      DateField date = new DateField();
      date.setValue(LocalDate.now());
      date.setLocale(new Locale("en","IND"));
      hLayout.addComponents(l1,date);
      hLayout.setComponentAlignment(l1,Alignment.BOTTOM_CENTER);
      hLayout.setComponentAlignment(date,Alignment.BOTTOM_CENTER);
      setContent(hLayout);
   }
   @WebServlet(urlPatterns = "/*", name = "MyUIServlet", asyncSupported = true)
   @VaadinServletConfiguration(ui = MyUI.class, productionMode = false)
   public static class MyUIServlet extends VaadinServlet {
}
在上面的例子中,我们使用了 Vaadin 预定义的日期函数来填充网页中的日期组件。此代码将为您提供如下图所示的输出 −
按钮
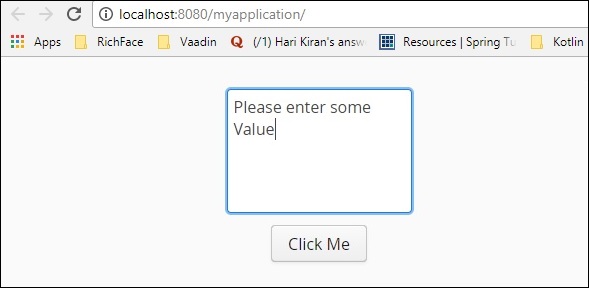
下面给出的代码将向您解释如何在网页中应用按钮。在这里,我们使用了一个名为 Click Me 的按钮。
package com.example.myapplication;

import javax.servlet.annotation.WebServlet;
import com.vaadin.annotations.Theme;
import com.vaadin.annotations.VaadinServletConfiguration;
import com.vaadin.server.ExternalResource;
import com.vaadin.server.VaadinRequest;
import com.vaadin.server.VaadinServlet;
import com.vaadin.shared.ui.ContentMode;
import com.vaadin.ui.Alignment;
import com.vaadin.ui.Button;

import com.vaadin.ui.HorizontalLayout;
import com.vaadin.ui.Label;
import com.vaadin.ui.Link;
import com.vaadin.ui.TextArea;
import com.vaadin.ui.TextField;
import com.vaadin.ui.UI;
import com.vaadin.ui.VerticalLayout;

@Theme("mytheme")
public class MyUI extends UI {
   @Override
   protected void init(VaadinRequest vaadinRequest) {
      final VerticalLayout layout = new VerticalLayout();
      final VerticalLayout hLayout = new VerticalLayout();
      TextArea text = new TextArea();
      text.setValue("Please enter some Value");
      Button b = new Button("Click Me");
      hLayout.addComponent(text);
      hLayout.addComponent(b);
      hLayout.setComponentAlignment(text,Alignment.BOTTOM_CENTER);
      hLayout.setComponentAlignment(b,Alignment.BOTTOM_CENTER);
      setContent(hLayout);
   }
   @WebServlet(urlPatterns = "/*", name = "MyUIServlet", asyncSupported = true)

   @VaadinServletConfiguration(ui = MyUI.class, productionMode = false)
   public static class MyUIServlet extends VaadinServlet {}
}
上述代码将产生如下所示的输出。
复选框
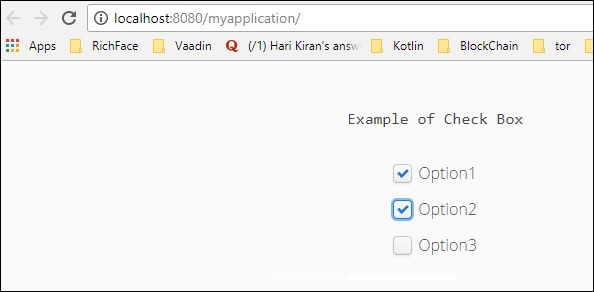
Vaadin 还提供了内置类来在网页中创建复选框。在下面的示例中,我们将使用 Vaadin 富 Web 组件创建一个复选框。
package com.example.myapplication;

import java.time.LocalDate;
import java.util.Locale;
import javax.servlet.annotation.WebServlet;
import com.vaadin.annotations.Theme;
import com.vaadin.annotations.VaadinServletConfiguration;
import com.vaadin.server.VaadinRequest;
import com.vaadin.server.VaadinServlet;
import com.vaadin.shared.ui.ContentMode;
import com.vaadin.ui.Alignment;

import com.vaadin.ui.CheckBox;
import com.vaadin.ui.DateField;
import com.vaadin.ui.Label;
import com.vaadin.ui.UI;
import com.vaadin.ui.VerticalLayout;

@Theme("mytheme")
public class MyUI extends UI {
   @Override
   protected void init(VaadinRequest vaadinRequest) {
      final VerticalLayout layout = new VerticalLayout();
      final VerticalLayout hLayout = new VerticalLayout();
      Label l1 = new Label("Example of Check Box
",ContentMode.PREFORMATTED);
      CheckBox chk1 = new CheckBox("Option1");
      CheckBox chk2 = new CheckBox("Option2");
      CheckBox chk3 = new CheckBox("Option3");
      hLayout.addComponents(l1,chk1,chk2,chk3);
      hLayout.setComponentAlignment(l1,Alignment.BOTTOM_CENTER);
      hLayout.setComponentAlignment(chk1,Alignment.BOTTOM_CENTER);
      hLayout.setComponentAlignment(chk2,Alignment.BOTTOM_CENTER);
      hLayout.setComponentAlignment(chk3,Alignment.BOTTOM_CENTER);
      setContent(hLayout);
   }
   @WebServlet(urlPatterns = "/*", name = "MyUIServlet", asyncSupported = true)
   @VaadinServletConfiguration(ui = MyUI.class, productionMode = false)
   public static class MyUIServlet extends VaadinServlet {}
}
上述代码将在浏览器中产生如下所示的输出。您还可以为用户创建任意数量的复选框。在后续章节中,您将了解在网页中填充复选框的不同方法。
数据绑定
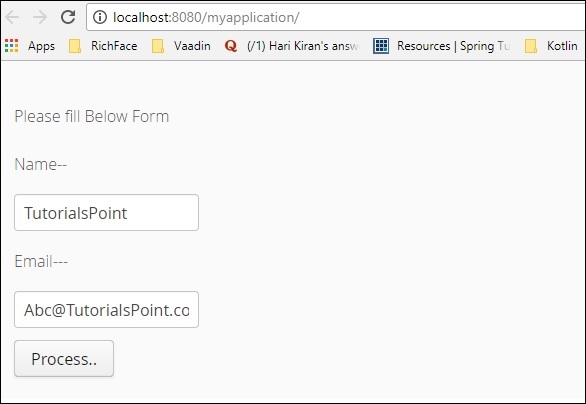
本节介绍如何使用 Vaadin 作为框架将数据从前端绑定到后端。请注意,下面显示的代码使用数据字段从前端获取输入。让我们创建一个 bean 类来绑定数据字段。创建一个 java 类并将其命名为 Employee.java。
package com.example.myapplication;

public class EmployeeBean {

   private String name = "";
   private String Email = " ";
   public EmployeeBean() {
      super();
      // TODO Auto-generated constructor stub
   }
   public EmployeeBean(String name, String email) {
      super();
      this.name = name;
      Email = email;
   }
   public String getName() {
      return name;
   }
   public void setName(String name) {
      System.out.println("asdassd");
      this.name = name;
   }
   public String getEmail() {
      return Email;
   }
   public void setEmail(String email) {
      Email = email;
   }
}
我们必须修改 MyUI.java 类,以便绑定员工类的数据字段。观察修改后的类的以下代码。
package com.example.myapplication;

import javax.servlet.annotation.WebServlet;
import com.vaadin.annotations.PropertyId;
import com.vaadin.annotations.Theme;
import com.vaadin.annotations.VaadinServletConfiguration;
import com.vaadin.data.Binder;
import com.vaadin.server.VaadinRequest;
import com.vaadin.server.VaadinServlet;
import com.vaadin.shared.ui.ContentMode;
import com.vaadin.ui.Alignment;

import com.vaadin.ui.Button;
import com.vaadin.ui.Button.ClickEvent;
import com.vaadin.ui.CheckBox;
import com.vaadin.ui.FormLayout;
import com.vaadin.ui.Label;
import com.vaadin.ui.TextField;
import com.vaadin.ui.UI;
import com.vaadin.ui.VerticalLayout;

@Theme("mytheme")
public class MyUI extends UI {
   @Override
   protected void init(VaadinRequest vaadinRequest) {
      EmployeeBean bean = new EmployeeBean("TutorialsPoint","Abc@TutorialsPoint.com");
      Binder<EmployeeBean> binder = new Binder  <EmployeeBean>();
      final FormLayout form = new FormLayout();
      Label l1 = new Label("Please fill Below Form");
      Label labelName = new Label("Name--");
      TextField name = new TextField();
      binder.bind(name,EmployeeBean::getName,EmployeeBean::setName);
      Label labelEmail = new Label("Email---");
      TextField email = new TextField();
      binder.bind(email,EmployeeBean::getEmail,EmployeeBean::setEmail);
      Button button = new Button("Process..");
      form.addComponents(l1,labelName,name,labelEmail,email,button);
      setContent(form);
      binder.setBean(bean); //auto binding using in built method
   }
   @WebServlet(urlPatterns = "/*", name = "MyUIServlet", asyncSupported = true)
   @VaadinServletConfiguration(ui = MyUI.class, productionMode = false)
   public static class MyUIServlet extends VaadinServlet {
   }
}
上面给出的代码将在浏览器中产生以下输出。
表格
表格是 Vaadin 最有用的功能之一。表格单元格可以包含任何类型的数据。表格组件用于以表格格式显示所有数据,这些数据组织成行和列结构。但是,自 Vaadin 8 发布以来,表格功能已成为绝对功能,并且网格组件已修改了相同的功能。如果您仍在使用旧版本的 Vaadin,那么您可以自由使用表格,如下所示的格式。
/* 创建带有标题的表格。 */
Table table = new Table("This is my Table");
/* 定义列的名称和数据类型。
* "默认值"参数在这里毫无意义。 */

table.addContainerProperty("First Name", String.class, null);
table.addContainerProperty("Last Name", String.class, null);
table.addContainerProperty("Year", Integer.class, null);

/* 在表格中添加几个项目。 */
table.addItem(new Object[] {"Nicolaus","Copernicus",new Integer(1473)}, new Integer(1));
table.addItem(new Object[] {"Tycho", "Brahe", new Integer(1546)}, new Integer(2));
table.addItem(new Object[] {"Giordano","Bruno", new Integer(1548)}, new Integer(3));
table.addItem(new Object[] {"Galileo", "Galilei", new Integer(1564)}, new Integer(4));
table.addItem(new Object[] {"Johannes","Kepler", new Integer(1571)}, new Integer(5));
table.addItem(new Object[] {"Isaac", "Newton", new Integer(1643)}, new Integer(6));
在下一章GRID中,您将了解有关网格创建和使用网格填充数据的更多信息。
Tree
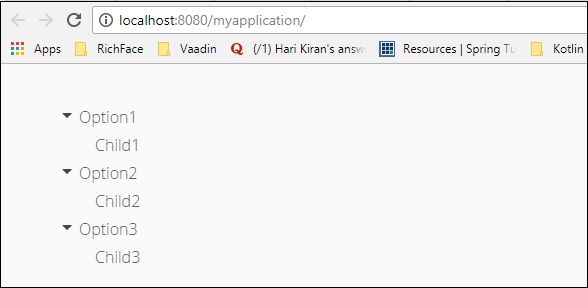
Tree 组件用于填充网站中的目录结构。在本节中,您将学习如何使用 Vaadin 框架在网页中填充树。更新所需的MyUI类,如下所示。
package com.example.myapplication;

import javax.servlet.annotation.WebServlet;
import com.vaadin.annotations.Theme;
import com.vaadin.annotations.VaadinServletConfiguration;
import com.vaadin.data.TreeData;
import com.vaadin.server.VaadinRequest;
import com.vaadin.server.VaadinServlet;
import com.vaadin.ui.Component;
import com.vaadin.ui.Tree;
import com.vaadin.ui.UI;
import com.vaadin.ui.VerticalLayout;

@Theme("mytheme")
public class MyUI extends UI {
   @Override
   protected void init(VaadinRequest vaadinRequest) {
      VerticalLayout layout = new VerticalLayout();
      Tree<String> tree = new Tree<>();
      TreeData<String> treeData =tree.getTreeData();

      // Couple of childless root items
      treeData.addItem(null, "Option1");
      treeData.addItem("Option1", "Child1");
      treeData.addItem(null, "Option2");
      treeData.addItem("Option2", "Child2");

      // Items with hierarchy
      treeData.addItem(null, "Option3");
      treeData.addItem("Option3", "Child3");
      layout.addComponent(tree);
      setContent(layout);
   }
   @WebServlet(urlPatterns = "/*", name = "MyUIServlet", asyncSupported = true)
   @VaadinServletConfiguration(ui = MyUI.class, productionMode = false)
   public static class MyUIServlet extends VaadinServlet {}
}
上述代码将在浏览器中产生以下输出。
菜单栏
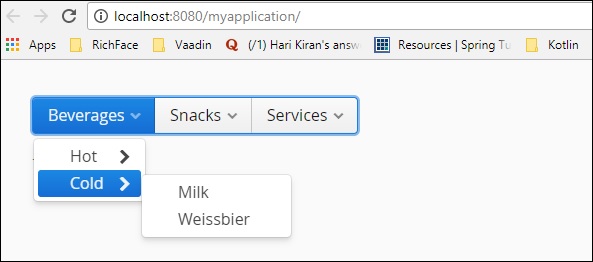
菜单栏组件帮助我们在网站中创建菜单。它可以是动态的,也可以嵌套。以下示例我们使用 Vaadin 菜单栏组件创建了一个嵌套菜单栏。继续修改我们的类,如下所示。
package com.example.myapplication;

import javax.servlet.annotation.WebServlet;
import com.vaadin.annotations.Theme;
import com.vaadin.annotations.VaadinServletConfiguration;
import com.vaadin.data.TreeData;
import com.vaadin.server.VaadinRequest;
import com.vaadin.server.VaadinServlet;

import com.vaadin.ui.Component;
import com.vaadin.ui.Label;
import com.vaadin.ui.MenuBar;
import com.vaadin.ui.MenuBar.MenuItem;
import com.vaadin.ui.Tree;
import com.vaadin.ui.UI;
import com.vaadin.ui.VerticalLayout;

@Theme("mytheme")
public class MyUI extends UI {
   @Override
   protected void init(VaadinRequest vaadinRequest) {
      VerticalLayout layout = new VerticalLayout();
      MenuBar barmenu = new MenuBar();
      layout.addComponent(barmenu);

      // A feedback component
      final Label selection = new Label("-");
      layout.addComponent(selection);

      // Define a common menu command for all the menu items.
      MenuBar.Command mycommand = new MenuBar.Command() {
         public void menuSelected(MenuItem selectedItem) {
            selection.setValue("Ordered a " +
            selectedItem.getText() +
            " from menu.");
         }
      };

      // Put some items in the menu hierarchically
      MenuBar.MenuItem beverages =
      barmenu.addItem("Beverages", null, null);
      MenuBar.MenuItem hot_beverages =
      beverages.addItem("Hot", null, null);
      hot_beverages.addItem("Tea", null, mycommand);
      hot_beverages.addItem("Coffee", null, mycommand);
      MenuBar.MenuItem cold_beverages =
      beverages.addItem("Cold", null, null);
      cold_beverages.addItem("Milk", null, mycommand);
      cold_beverages.addItem("Weissbier", null, mycommand);

      // Another top-level item
      MenuBar.MenuItem snacks =
      barmenu.addItem("Snacks", null, null);
      snacks.addItem("Weisswurst", null, mycommand);
      snacks.addItem("Bratwurst", null, mycommand);
      snacks.addItem("Currywurst", null, mycommand);

      // Yet another top-level item
      MenuBar.MenuItem services =
      barmenu.addItem("Services", null, null);
      services.addItem("Car Service", null, mycommand);
      setContent(layout);
   }
   @WebServlet(urlPatterns = "/*", name = "MyUIServlet", asyncSupported = true)
   @VaadinServletConfiguration(ui = MyUI.class, productionMode = false)
   public static class MyUIServlet extends VaadinServlet {}
}
在上面讨论的示例中,我们创建了一个嵌套菜单栏。运行上面的代码,您可以在浏览器中观察输出,如下所示 −