Apache Tapestry - 内置组件
本章通过适当的示例解释了 Tapestry 的内置组件。 Tapestry 支持超过 65 个内置组件。 您还可以创建自定义组件。 让我们详细介绍一些值得注意的组件。
If 组件
if 组件用于有条件地渲染块。 通过测试参数检查条件。
创建页面IfSample.java如下图 −
package com.example.MyFirstApplication.pages;

public class Ifsample {
   public String getUser() {
      return "user1";
   }
}
现在,创建相应的模板文件,如下 −
<html t:type = "newlayout" title = "About MyFirstApplication"
   xmlns:t = "http://tapestry.apache.org/schema/tapestry_5_4.xsd"
   xmlns:p = "tapestry:parameter">

   <h3>If-else component example </h3>
   <t:if test = "user">
      Hello ${user}
      <p:else>
         <h4> You are not a Tapestry user </h4>
      </p:else>
   </t:if>
</html>
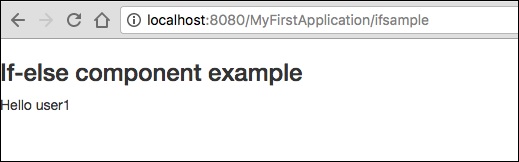
请求页面将呈现如下所示的结果。
结果 − http://localhost:8080/MyFirstApplication/ifsample
unless 和 Delegate 组件
unless 组件 与上面讨论的 if 组件正好相反。 然而,Delegate 组件本身并不进行任何渲染。 相反,它通常将标记委托给块元素。 Unless 和 if 组件可以使用委托和块有条件地交换动态内容。
创建页面Unless.java,如下所示。
package com.example.MyFirstApplication.pages;

import org.apache.tapestry5.Block;
import org.apache.tapestry5.annotations.Property;
import org.apache.tapestry5.ioc.annotations.Inject;
import org.apache.tapestry5.PersistenceConstants;
import org.apache.tapestry5.annotations.Persist;

public class Unless {
   @Property
   @Persist(PersistenceConstants.FLASH)
   private String value;
   @Property
   private Boolean bool;
   @Inject
   Block t, f, n;

   public Block getCase() {
      if (bool == Boolean.TRUE ) {
         return t;
      } else {
         return f;
      }
   }
}
现在,创建相应的模板文件,如下 −
<html t:type = "newlayout" title = "About MyFirstApplication"
   xmlns:t = "http://tapestry.apache.org/schema/tapestry_5_4.xsd"
   xmlns:p = "tapestry:parameter">

   <h4> Delegate component </h4>
   <div class = "div1">
      <t:delegate to = "case"/>
   </div>
   <h4> If-Unless component </h4>

   <div class = "div1">
      <t:if test = "bool">
         <t:delegate to = "block:t"/>
      </t:if>
      <t:unless test = "bool">
         <t:delegate to = "block:notT"/>
      </t:unless>
   </div>

   <t:block id = "t">
      bool == Boolean.TRUE.
   </t:block>

   <t:block id = "notT">
      bool = Boolean.FALSE.
   </t:block>

   <t:block id = "f">
      bool == Boolean.FALSE.
   </t:block>
</html>
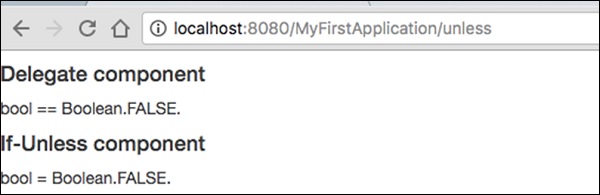
请求页面将呈现如下所示的结果。
结果 − http://localhost:8080/MyFirstApplication/unless
Loop 组件
Loop 组件是循环集合项并为每个值/迭代渲染主体的基本组件。
创建一个循环页面,如下图所示 −
Loop.java
package com.example.MyFirstApplication.pages;

import org.apache.tapestry5.annotations.Property;
public class Loop {
   @Property
   private int i;
}
然后,创建对应的模板Loop.tml
Loop.tml
<html t:type = "newlayout" title = "About MyFirstApplication"
   xmlns:t = "http://tapestry.apache.org/schema/tapestry_5_4.xsd"
   xmlns:p = "tapestry:parameter">

   <p>This is sample parameter rendering example...</p>
   <ol>
      <li t:type = "loop" source = "1..5" value = "var:i">${var:i}</li>
   </ol>
</html>
Loop 组件有以下两个参数 −
source − 采集来源。 1…5是属性扩展,用于创建指定范围的数组。
var − 渲染变量。 用于渲染模板正文中的当前值。
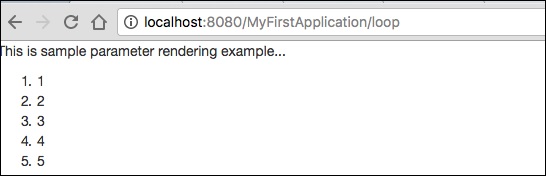
请求页面将呈现如下所示的结果 −
PageLink 组件
PageLink 组件用于将一个页面从一个页面链接到另一个页面。 创建一个PageLink测试页面如下 − PageLink.java.
package com.example.MyFirstApplication.pages;
   public class PageLink {
}
然后,创建对应的模板文件,如下图 −
PageLink.tml
<html t:type = "newlayout" title = "About MyFirstApplication"
   xmlns:t = "http://tapestry.apache.org/schema/tapestry_5_4.xsd"
   xmlns:p = "tapestry:parameter">

   <body>
      <h3><u>Page Link</u> </h3>
      <div class = "page">
         <t:pagelink page = "Index">Click here to navigate Index page</t:pagelink>
         <br/>
      </div>
   </body>

</html>
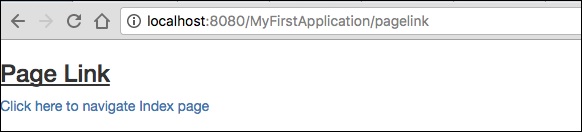
PageLink 组件有一个页面参数,该参数应引用目标 Tapestry 页面。
结果 − http://localhost:8080/myFirstApplication/pagelink
EventLink 组件
EventLink组件通过URL发送事件名称和相应的参数。 创建一个 EventsLink 页面类,如下所示。
EventsLink.java
package com.example.MyFirstApplication.pages;

import org.apache.tapestry5.annotations.Property;
public class EventsLink {
   @Property
   private int x;
   void onActivate(int count) {
      this.x = x;
   }
   int onPassivate() {
      return x;
   }
   void onAdd(int value) {
      x += value;
   }
}
然后,创建相应的"EventsLink"模板文件,如下所示 −
EventsLink.tml
<html t:type = "newlayout" title = "About MyFirstApplication"
   xmlns:t = "http://tapestry.apache.org/schema/tapestry_5_4.xsd"
   xmlns:p = "tapestry:parameter">

   <h3> Event link example </h3>
   AddedCount = ${x}. <br/>
   <t:eventlink t:event = "add" t:context = "literal:1">
      Click here to add count
   </t:eventlink><br/>
</html>
EventLink有以下两个参数 −
Event − EventLink 组件中要触发的事件的名称。 默认情况下,它指向组件的 id。
Context − 它是一个可选参数。 它定义了链接的上下文。
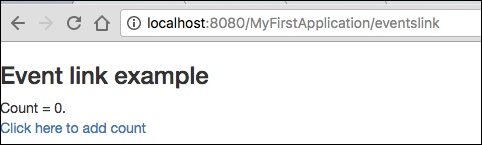
结果 − http://localhost:8080/myFirstApplication/EventsLink
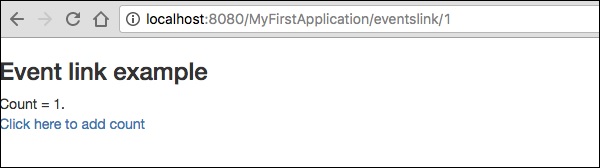
点击计数值后,页面将在 URL 中显示事件名称,如以下输出屏幕截图所示
ActionLink 组件
ActionLink 组件与 EventLink 组件类似,但它只发送目标组件 id。 默认事件名称是action。
创建一个名为"ActivationLinks.java"的页面,如下所示,
ActivationLinks.java
package com.example.MyFirstApplication.pages;

import org.apache.tapestry5.annotations.Property;
public class ActivationLinks {
   @Property
   private int x;
   void onActivate(int count) {
      this.x = x;
   }
   int onPassivate() {
      return x;
   }
   void onActionFromsub(int value) {
      x -= value;
   }
}
现在,创建相应的模板文件,如下所示 −
ActivationLinks.tml
<html t:type = "Newlayout" title = "About MyFirstApplication"
   xmlns:t = "http://tapestry.apache.org/schema/tapestry_5_4.xsd"
   xmlns:p = "tapestry:parameter">

   <div class = "div1">
      Count = ${count}. <br/>
      <t:actionlink t:id = "sub" t:context = "literal:1">
         Decrement
      </t:actionlink><br/>
   </div>

</html>
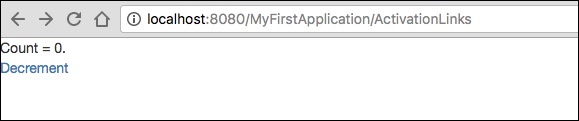
这里,当点击 ActionLink 组件时,将调用 OnActionFromSub 方法。
结果 − http://localhost:8080/myFirstApplication/ActivationsLink
Alert 警报组件
警告对话框主要用于向用户发出警告消息。 例如,如果输入字段需要一些必填文本,但用户没有提供任何输入,那么作为验证的一部分,您可以使用警告框来给出警告消息
创建一个"警报"页面,如以下程序所示。
Alerts.java
package com.example.MyFirstApplication.pages;

public class Alerts {
   public String getUser() {
      return "user1";
   }
}
然后,创建对应的模板文件,如下 −
Alerts.tml
<html t:type = "Newlayout" title = "About MyFirstApplication"
   xmlns:t = "http://tapestry.apache.org/schema/tapestry_5_4.xsd"
   xmlns:p = "tapestry:parameter">

   <h3>Alerts</h3>
   <div class = "alert alert-info">
      <h5> Welcome ${user} </h5>
   </div>

</html>
警报具有三个严重级别,分别是 −
- Info
- Warn
- Error
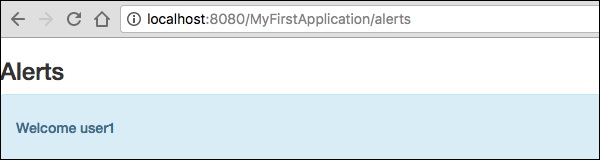
以上模板是使用信息警报创建的。 它被定义为警报信息。 您可以根据需要创建其他严重性。
请求该页面将产生以下结果 −
http://localhost:8080/myFirstApplication/Alerts