
如何在 iOS 中创建带圆角的 TableView?
Table View 是 iOS 应用程序中最重要和最基础的部分之一,每个 iOS 开发者都应该熟悉它。
您在 App Store 中看到的几乎所有应用程序都使用 Table View。
iOS 上的 Table View 显示一列垂直滚动的内容,并分成多行。表格中的每一行都包含应用程序的一部分内容。例如,"通讯录"应用会在单独的行中显示每个联系人的姓名,"设置"应用的主页面会显示可用的设置组。
您可以在此处阅读有关表格视图的更多信息,
https://developer.apple.com/documentation/uikit/uitableview
在本文中,我们将了解如何创建带圆角的表格视图。
那么,让我们开始吧,
步骤 1 − 打开 Xcode → 新建项目 → 单视图应用程序 → 我们将其命名为"TableViewWithRoundedCorner"
步骤 2 −打开 Main.storyboard 并添加 UITableView,如下所示:
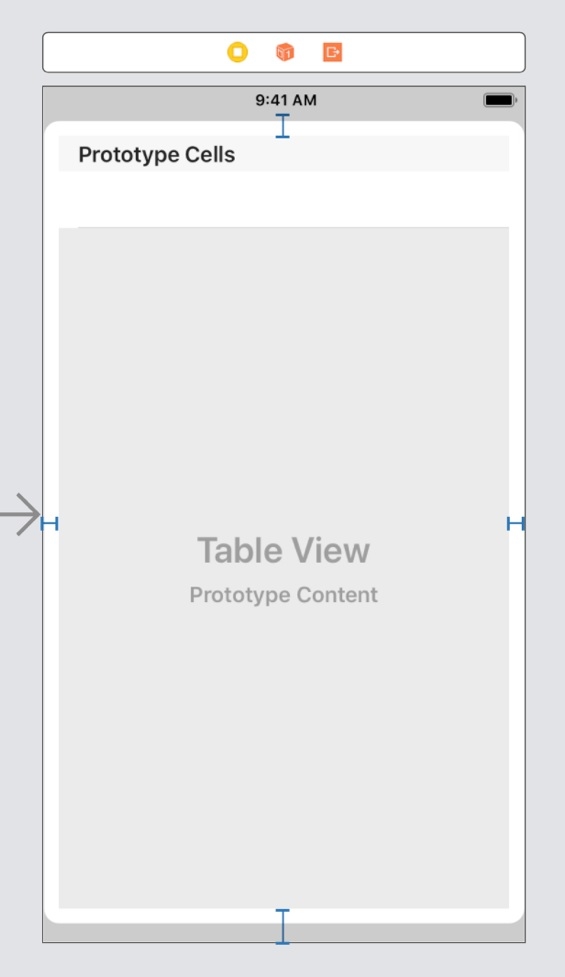
步骤 3 − 现在在 ViewController.swift 中,从 Main.storyboard 创建 tableview 的 @IBoutlet,并将其命名为 tableView。
步骤 4 − 在 ViewController.swift 中的 viewDidLoad 方法中,向 tableView 添加委托和数据源,如下所示:
@IBOutlet var tableView: UITableView!
override func viewDidLoad() {
   super.viewDidLoad()
   tableView.delegate = self
   tableView.dataSource = self
}
步骤 5 − 打开 Main.storyboard 并更改 ViewController 的背景颜色,添加原型单元格并在单元格内添加标签,如图所示。
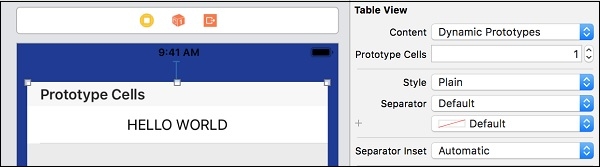
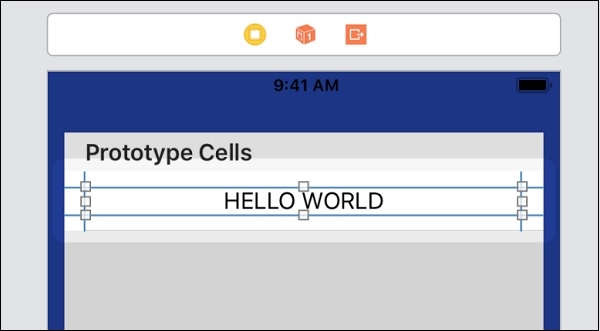
现在为 UITableViewCell 子类型的新 tableview 单元格添加一个文件,并将其添加到同一文件中。
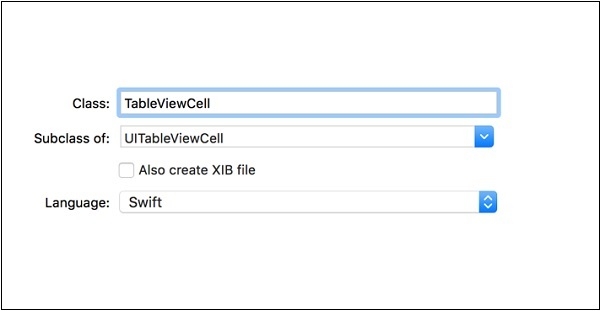
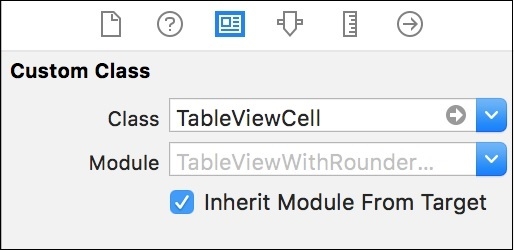
现在打开 ViewController.swift,遵循协议并实现以下委托方法。
extension ViewController: UITableViewDataSource, UITableViewDelegate {
   func tableView(_ tableView: UITableView, numberOfRowsInSection section: Int) -> Int {
      return 2
   }
   func tableView(_ tableView: UITableView, cellForRowAt indexPath: IndexPath) -> UITableViewCell {
      let cell: UITableViewCell = tableView.dequeueReusableCell(withIdentifier: "cell", for: indexPath) as! TableViewCell
      return cell
   }
   func tableView(_ tableView: UITableView, heightForRowAt indexPath: IndexPath) -> CGFloat {
      return 80
   }
}
步骤 6 − 运行项目,但表格视图不会自带圆角,因此,请在 view did load 方法中写入以下代码。
tableView.layer.cornerRadius=10 //在此处设置圆角半径
tableView.layer.backgroundColor = UIColor.cyan.cgColor
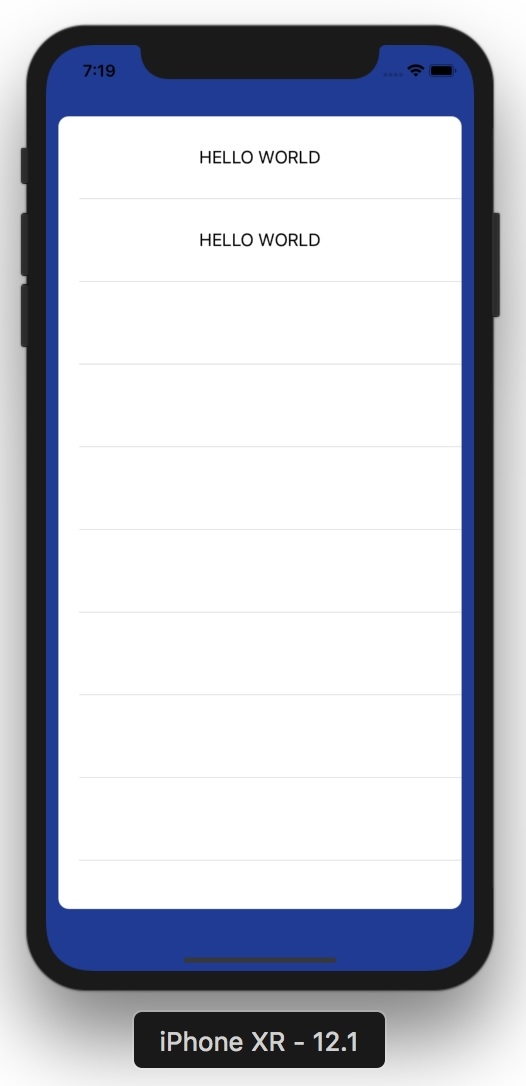
完整代码 −
import UIKit
class ViewController: UIViewController {
   @IBOutlet var tableView: UITableView!
   override func viewDidLoad() {
      super.viewDidLoad()
      tableView.delegate = self
      tableView.dataSource = self
      tableView.layer.cornerRadius=10 //set corner radius here
      tableView.layer.backgroundColor = UIColor.cyan.cgColor
   }
}
extension ViewController: UITableViewDataSource, UITableViewDelegate {
   func tableView(_ tableView: UITableView, numberOfRowsInSection section: Int) → Int {
      return 2
   }
   func tableView(_ tableView: UITableView, cellForRowAt indexPath: IndexPath) → UITableViewCell {
      let cell: UITableViewCell = tableView.dequeueReusableCell(withIdentifier: "cell", for: indexPath) as! TableViewCell
      return cell
   }
   func tableView(_ tableView: UITableView, heightForRowAt indexPath: IndexPath) → CGFloat {
      return 80
   }
}

