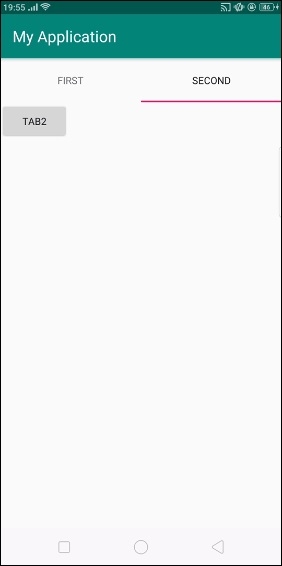
如何在 Android 中使用 tabHost?
androidmobile developmentapps/applications
在开始示例之前,我们应该了解 Android 中的 tab host 是什么。tab host 包含一组 tab。每个 tab 根据项目规范包含 fragment 或 activity。用户可以从左向右或从右向左滚动 tab。
此示例演示了如何在 Android 中使用 tab host。
步骤 1 − 在 Android Studio 中创建一个新项目,转到"文件"->"新建项目",并填写所有必需的详细信息以创建新项目。
步骤 2 − 将以下代码添加到res/layout/activity_main.xml。
<?xml version="1.0" encoding="utf-8"?>
<LinearLayout xmlns:android="http://schemas.android.com/apk/res/android"
   xmlns:app="http://schemas.android.com/apk/res-auto"
   xmlns:tools="http://schemas.android.com/tools"
   android:layout_width="match_parent"
   android:layout_height="match_parent"
   android:orientation="vertical"
   tools:context=".MainActivity">
   <TabHost android:id="@+id/tabhost"
      android:layout_width="match_parent"
      android:layout_height="match_parent" >
      <LinearLayout
         android:orientation="vertical"
         android:layout_width="fill_parent"
         android:layout_height="fill_parent">
         <TabWidget android:id="@android:id/tabs"
            android:layout_width="fill_parent"
            android:layout_height="wrap_content" />
         <FrameLayout android:id="@android:id/tabcontent"
            android:layout_width="fill_parent"
            android:layout_height="fill_parent">
            <LinearLayout
               android:id="@+id/tab1"
               android:layout_width="match_parent"
               android:layout_height="match_parent">
               <Button
                  android:id="@+id/button"
                  android:layout_width="wrap_content"
                  android:layout_height="wrap_content"
                  android:text="tab1" />
            </LinearLayout>
            <LinearLayout
               android:id="@+id/tab2"
               android:layout_width="match_parent"
               android:layout_height="match_parent">
               <Button
                  android:id="@+id/button2"
                  android:layout_width="wrap_content"
                  android:layout_height="wrap_content"
                  android:text="tab2" />
            </LinearLayout>
         </FrameLayout>
      </LinearLayout>
</TabHost>
</LinearLayout>
在上述布局中,我们已将框架布局声明为 Tab 小部件子项(根据 android.com,它需要框架布局作为 Tab 小部件的内容)。
步骤 3 − 将以下代码添加到 src/MainActivity.java
import android.os.Bundle;
import android.support.v7.app.AppCompatActivity;
import android.widget.RadioButton;
import android.widget.TabHost;
public class MainActivity extends AppCompatActivity {
   RadioButton radioButton;
   @Override
   protected void onCreate(Bundle savedInstanceState) {
      super.onCreate(savedInstanceState);
      setContentView(R.layout.activity_main);
      TabHost tabs = (TabHost) findViewById(R.id.tabhost);
      tabs.setup();
      TabHost.TabSpec spec = tabs.newTabSpec("tag1");
      spec.setContent(R.id.tab1);
      spec.setIndicator("First");
      tabs.addTab(spec);
      spec = tabs.newTabSpec("tag2");
      spec.setContent(R.id.tab2);
      spec.setIndicator("second");
      tabs.addTab(spec);
   }
}
步骤 4 减:无需更改 manifest.xml 文件。
让我们尝试运行您的应用程序。假设您已将实际的 Android 移动设备连接到电脑。要从 Android Studio 运行该应用程序,请打开项目的某个 Activity 文件,然后点击工具栏上的"运行"图标  。选择您的移动设备作为选项,然后勾选将显示默认屏幕的移动设备。
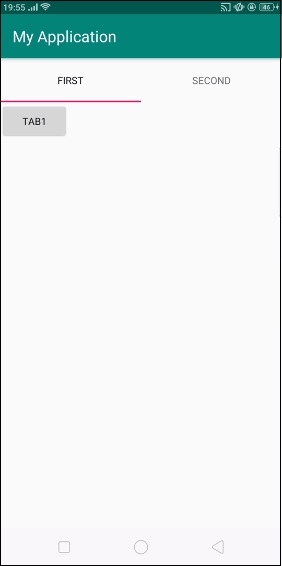
现在点击第二个选项卡。它应该显示如下所示的结果 -