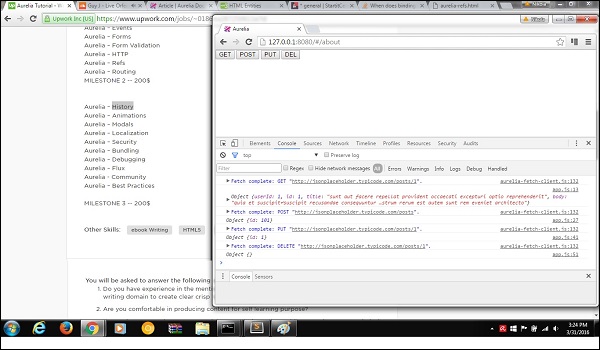
Aurelia - HTTP
在本章中,您将学习如何在 Aurelia 框架中处理 HTTP 请求。
步骤 1 - 创建视图
让我们创建四个按钮,用于向我们的 API 发送请求。
app.html
<template>
   <button click.delegate = "getData()">GET</button>
   <button click.delegate = "postData()">POST</button>
   <button click.delegate = "updateData()">PUT</button>
   <button click.delegate = "deleteData()">DEL</button>
</template>
第 2 步 - 创建视图模型
为了向服务器发送请求,Aurelia 建议使用 fetch 客户端。我们正在为所需的每个请求(GET、POST、PUT 和 DELETE)创建函数。
import 'fetch';
import {HttpClient, json} from 'aurelia-fetch-client';

let httpClient = new HttpClient();

export class App {
   getData() {
      httpClient.fetch('http://jsonplaceholder.typicode.com/posts/1')
      .then(response => response.json())
      .then(data => {
         console.log(data);
      });
   }
   myPostData = {
      id: 101
   }
	postData(myPostData) {
      httpClient.fetch('http://jsonplaceholder.typicode.com/posts', {
         method: "POST",
         body: JSON.stringify(myPostData)
      })

      .then(response => response.json())
      .then(data => {
         console.log(data);
      });
   }
   myUpdateData = {
      id: 1
   }
	updateData(myUpdateData) {
      httpClient.fetch('http://jsonplaceholder.typicode.com/posts/1', {
         method: "PUT",
         body: JSON.stringify(myUpdateData)
      })

      .then(response => response.json())
      .then(data => {
         console.log(data);
      });
   }
   deleteData() {
      httpClient.fetch('http://jsonplaceholder.typicode.com/posts/1', {
         method: "DELETE"
      })
      .then(response => response.json())
      .then(data => {
         console.log(data);
      });
   }
}
我们可以运行应用程序并分别单击GET、POST、PUT和DEL按钮。我们可以在控制台中看到每个请求都成功,并且结果已记录。