
Espresso 测试框架 - Intents
Android Intent 用于打开新活动,无论是内部活动(从产品列表屏幕打开产品详细信息屏幕)还是外部活动(如打开拨号器拨打电话)。内部 Intent 活动由 Espresso 测试框架透明处理,不需要用户端进行任何特定工作。但是,调用外部活动确实是一个挑战,因为它超出了我们的范围,即被测应用程序。一旦用户调用外部应用程序并离开被测应用程序,那么用户按照预定义的操作顺序返回应用程序的机会就会减少。因此,我们需要在测试应用程序之前假设用户的操作。Espresso 提供了两种选项来处理这种情况。它们如下,
intended
这允许用户确保从被测应用程序中打开了正确的意图。
intended
这允许用户模拟外部活动,如从相机拍照、从联系人列表中拨打号码等,并使用预定义的一组值返回应用程序(例如来自相机的预定义图像而不是实际图像)。
设置
Espresso 通过插件库支持意图选项,并且需要在应用程序的 gradle 文件中配置该库。配置选项如下,
dependencies {
   // ...
   androidTestImplementation 'androidx.test.espresso:espresso-intents:3.1.1'
}
intended()
Espresso 意图插件提供特殊匹配器来检查调用的意图是否是预期的意图。提供的匹配器及其用途如下:
hasAction
此方法接受意图操作并返回一个匹配器,该匹配器与指定的意图相匹配。
hasData
此方法接受数据并返回一个匹配器,该匹配器与调用意图时提供给意图的数据相匹配。
toPackage
此方法接受意图包名称并返回一个匹配器,该匹配器与调用意图的包名称相匹配。
现在,让我们创建一个新的应用程序并使用 intended() 测试该应用程序的外部活动,以了解该概念。
启动 Android Studio。
如前所述创建一个新项目并将其命名为 IntentSampleApp。
使用Refactor → Migrate到AndroidX选项菜单将应用程序迁移到AndroidX框架。
通过更改 activity_main.xml 创建一个文本框、一个用于打开联系人列表的按钮以及另一个用于拨打电话的按钮,如下所示,
<?xml version = "1.0" encoding = "utf-8"?>
<RelativeLayout xmlns:android = "http://schemas.android.com/apk/res/android"
   xmlns:app = "http://schemas.android.com/apk/res-auto"
   xmlns:tools = "http://schemas.android.com/tools"
   android:layout_width = "match_parent"
   android:layout_height = "match_parent"
   tools:context = ".MainActivity">
   <EditText
      android:id = "@+id/edit_text_phone_number"
      android:layout_width = "wrap_content"
      android:layout_height = "wrap_content"
      android:layout_centerHorizontal = "true"
      android:text = ""
      android:autofillHints = "@string/phone_number"/>
   <Button
      android:id = "@+id/call_contact_button"
      android:layout_width = "wrap_content"
      android:layout_height = "wrap_content"
      android:layout_centerHorizontal = "true"
      android:layout_below = "@id/edit_text_phone_number"
      android:text = "@string/call_contact"/>
   <Button
      android:id = "@+id/button"
      android:layout_width = "wrap_content"
      android:layout_height = "wrap_content"
      android:layout_centerHorizontal = "true"
      android:layout_below = "@id/call_contact_button"
      android:text = "@string/call"/>
</RelativeLayout>
此外,在 strings.xml 资源文件中添加以下项目,
<string name = "phone_number">Phone number</string>
<string name = "call">Call</string>
<string name = "call_contact">Select from contact list</string>
现在,在主活动 (MainActivity.java) 中的 onCreate 方法下添加以下代码。
public class MainActivity extends AppCompatActivity {
   @Override
   protected void onCreate(Bundle savedInstanceState) {
      // ... code
      // Find call from contact button
      Button contactButton = (Button) findViewById(R.id.call_contact_button);
      contactButton.setOnClickListener(new View.OnClickListener() {
         @Override
         public void onClick(View view) {
            // Uri uri = Uri.parse("content://contacts");
            Intent contactIntent = new Intent(Intent.ACTION_PICK,
               ContactsContract.Contacts.CONTENT_URI);
            contactIntent.setType(ContactsContract.CommonDataKinds.Phone.CONTENT_TYPE);
            startActivityForResult(contactIntent, REQUEST_CODE);
         }
      });
      // Find edit view
      final EditText phoneNumberEditView = (EditText)
         findViewById(R.id.edit_text_phone_number);
      // Find call button
      Button button = (Button) findViewById(R.id.button);
      button.setOnClickListener(new View.OnClickListener() {
         @Override
         public void onClick(View view) {
            if(phoneNumberEditView.getText() != null) {
               Uri number = Uri.parse("tel:" + phoneNumberEditView.getText());
               Intent callIntent = new Intent(Intent.ACTION_DIAL, number);
               startActivity(callIntent);
            }
         }
      });
   }
   // ... code
}
这里,我们编程了一个按钮,id 为 call_contact_button,用于打开联系人列表;一个按钮,id 为 button,用于拨打电话。
在 MainActivity 类中添加一个静态变量 REQUEST_CODE,如下所示,
public class MainActivity extends AppCompatActivity {
   // ...
   private static final int REQUEST_CODE = 1;
   // ...
}
现在,在 MainActivity 类中添加 onActivityResult 方法,如下所示,
public class MainActivity extends AppCompatActivity {
   // ...
   @Override
   protected void onActivityResult(int requestCode, int resultCode, Intent data) {
      if (requestCode == REQUEST_CODE) {
         if (resultCode == RESULT_OK) {
            // Bundle extras = data.getExtras();
            // String phoneNumber = extras.get("data").toString();
            Uri uri = data.getData();
            Log.e("ACT_RES", uri.toString());
            String[] projection = {
               ContactsContract.CommonDataKinds.Phone.NUMBER,
               ContactsContract.CommonDataKinds.Phone.DISPLAY_NAME };
            Cursor cursor = getContentResolver().query(uri, projection, null, null, null);
            cursor.moveToFirst();

            int numberColumnIndex =
               cursor.getColumnIndex(ContactsContract.CommonDataKinds.Phone.NUMBER);
            String number = cursor.getString(numberColumnIndex);

            int nameColumnIndex = cursor.getColumnIndex(
               ContactsContract.CommonDataKinds.Phone.DISPLAY_NAME);
            String name = cursor.getString(nameColumnIndex);
            Log.d("MAIN_ACTIVITY", "Selected number : " + number +" , name : "+name);

            // Find edit view
            final EditText phoneNumberEditView = (EditText)
               findViewById(R.id.edit_text_phone_number);
            phoneNumberEditView.setText(number);
         }
      }
   };
   // ...
}
此处,当用户使用 call_contact_button 按钮打开联系人列表并选择联系人后返回应用程序时,将调用 onActivityResult。调用 onActivityResult 方法后,它将获取用户选择的联系人,找到联系人号码并将其设置到文本框中。
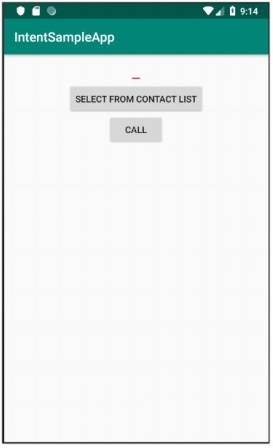
运行应用程序并确保一切正常。Intent 示例应用程序的最终外观如下所示,
现在,在应用程序的 gradle 文件中配置 espresso 意图,如下所示,
dependencies {
   // ...
   androidTestImplementation 'androidx.test.espresso:espresso-intents:3.1.1'
}
单击 Android Studio 提供的 Sync Now 菜单选项。这将下载意图测试库并正确配置它。
打开 ExampleInstrumentedTest.java 文件并添加 IntentsTestRule 而不是通常使用的 AndroidTestRule。IntentTestRule 是处理意图测试的特殊规则。
public class ExampleInstrumentedTest {
   // ... code
   @Rule
   public IntentsTestRule<MainActivity> mActivityRule =
   new IntentsTestRule<>(MainActivity.class);
   // ... code
}
添加两个局部变量来设置测试电话号码和拨号器包名称,如下所示,
public class ExampleInstrumentedTest {
   // ... code
   private static final String PHONE_NUMBER = "1 234-567-890";
   private static final String DIALER_PACKAGE_NAME = "com.google.android.dialer";
   // ... code
}
使用 Android Studio 提供的 Alt + Enter 选项修复导入问题,或者包含以下导入语句,
import android.content.Context;
import android.content.Intent;

import androidx.test.InstrumentationRegistry;
import androidx.test.espresso.intent.rule.IntentsTestRule;
import androidx.test.runner.AndroidJUnit4;

import org.junit.Rule;
import org.junit.Test;
import org.junit.runner.RunWith;

import static androidx.test.espresso.Espresso.onView;
import static androidx.test.espresso.action.ViewActions.click;
import static androidx.test.espresso.action.ViewActions.closeSoftKeyboard;
import static androidx.test.espresso.action.ViewActions.typeText;
import static androidx.test.espresso.intent.Intents.intended;
import static androidx.test.espresso.intent.matcher.IntentMatchers.hasAction;
import static androidx.test.espresso.intent.matcher.IntentMatchers.hasData;
import static androidx.test.espresso.intent.matcher.IntentMatchers.toPackage;
import static androidx.test.espresso.matcher.ViewMatchers.withId;
import static org.hamcrest.core.AllOf.allOf;
import static org.junit.Assert.*;
添加以下测试用例,测试拨号器是否被正确调用,
public class ExampleInstrumentedTest {
   // ... code
   @Test
   public void validateIntentTest() {
      onView(withId(R.id.edit_text_phone_number))
         .perform(typeText(PHONE_NUMBER), closeSoftKeyboard());
      onView(withId(R.id.button)) .perform(click());
      intended(allOf(
         hasAction(Intent.ACTION_DIAL),
         hasData("tel:" + PHONE_NUMBER),
         toPackage(DIALER_PACKAGE_NAME)));
   }
   // ... code
}
此处,hasAction、hasData 和 toPackage 匹配器与 allOf 匹配器一起使用,只有所有匹配器都通过后才会成功。
现在,通过 Android Studio 中的内容菜单运行 ExampleInstrumentedTest。
intending()
Espresso 提供了一种特殊方法 - intending() 来模拟外部意图操作。intending() 接受要模拟的意图的包名称,并提供一种方法 respondWith 来设置模拟意图需要如何响应,如下所示,
intending(toPackage("com.android.contacts")).respondWith(result);
此处,respondWith()接受类型为Instrumentation.ActivityResult的意图结果。我们可以创建新的存根意图并手动设置结果,如下所示,
// 存根意图
Intent intent = new Intent();
intent.setData(Uri.parse("content://com.android.contacts/data/1"));
Instrumentation.ActivityResult result =
new Instrumentation.ActivityResult(Activity.RESULT_OK, intent);
测试联系人应用是否正确打开的完整代码如下,
@Test
public void stubIntentTest() {
    // 存根意图
    Intent intent = new Intent();
    intent.setData(Uri.parse("content://com.android.contacts/data/1"));
    Instrumentation.ActivityResult result =
    new Instrumentation.ActivityResult(Activity.RESULT_OK, intent);
    intenting(toPackage("com.android.contacts")).respondWith(result);

    // 找到按钮并执行点击操作
    onView(withId(R.id.call_contact_button)).perform(click());

    // 获取上下文
    Context targetContext2 = InstrumentationRegistry.getInstrumentation().getTargetContext();

    // 获取电话号码
    String[] projecting = { ContactsContract.CommonDataKinds.Phone.NUMBER,
    ContactsContract.CommonDataKinds.Phone.DISPLAY_NAME };
    Cursor cursor =
    targetContext2.getContentResolver().query(Uri.parse("content://com.android.cont
    actors/data/1"),projection,null,null,null);

    cursor.moveToFirst();
    int numberColumnIndex =
    cursor.getColumnIndex(ContactsContract.CommonDataKinds.Phone.NUMBER);
    String number = cursor.getString(numberColumnIndex);

    // 现在,检查数据
    onView(withId(R.id.edit_text_phone_number))
    .check(matches(withText(number)));
}
在这里,我们创建了一个新意图,并将返回值(调用意图时)设置为联系人列表的第一个条目 content://com.android.contacts/data/1。然后,我们设置了 intending 方法来模拟新创建的意图来代替联系人列表。当调用包 com.android.contacts 并返回列表的默认第一个条目时,它会设置并调用我们新创建的意图。然后,我们触发 click() 操作来启动模拟意图,最后检查调用模拟意图的电话号码和联系人列表中第一个条目的号码是否相同。
如果存在任何缺失的导入问题,则使用 android studio 提供的 Alt + Enter 选项修复这些导入问题,否则包括以下导入语句,
import android.app.Activity;
import android.app.Instrumentation;
import android.content.Context;
import android.content.Intent;
import android.database.Cursor;
import android.net.Uri;
import android.provider.ContactsContract;

import androidx.test.InstrumentationRegistry;
import androidx.test.espresso.ViewInteraction;
import androidx.test.espresso.intent.rule.IntentsTestRule;
import androidx.test.runner.AndroidJUnit4;

import org.junit.Rule;
import org.junit.Test;
import org.junit.runner.RunWith;

import static androidx.test.espresso.Espresso.onView;
import static androidx.test.espresso.action.ViewActions.click;
import static androidx.test.espresso.action.ViewActions.closeSoftKeyboard;
import static androidx.test.espresso.action.ViewActions.typeText;
import static androidx.test.espresso.assertion.ViewAssertions.matches;
import static androidx.test.espresso.intent.Intents.intended;
import static androidx.test.espresso.intent.Intents.intending;
import static androidx.test.espresso.intent.matcher.IntentMatchers.hasAction;
import static androidx.test.espresso.intent.matcher.IntentMatchers.hasData;
import static androidx.test.espresso.intent.matcher.IntentMatchers.toPackage;
import static androidx.test.espresso.matcher.ViewMatchers.withId;
import static androidx.test.espresso.matcher.ViewMatchers.withText;
import static org.hamcrest.core.AllOf.allOf;
import static org.junit.Assert.*;
在测试类中添加以下规则以提供读取联系人列表的权限 −
@Rule
public GrantPermissionRule permissionRule =
GrantPermissionRule.grant(Manifest.permission.READ_CONTACTS);
在应用程序清单文件 AndroidManifest.xml 中添加以下选项 −
<uses-permission android:name = "android.permission.READ_CONTACTS" />
现在,确保联系人列表至少有一个条目,然后使用 Android Studio 的上下文菜单运行测试。

