
Puppeteer - 处理确认警报
Puppeteer 能够处理警报。Selenium、WebdriverIO 等自动化工具会在警报出现在页面上后接受或关闭警报。
然而,在 Puppeteer 中,用户必须在警报出现在页面上之前指示是接受还是关闭警报。为此,必须使用 Puppeteer 触发事件监听器。
处理确认警报的方法
下面列出了一些处理警报的方法 −
accept(): Promise<void> − 此方法用于接受警报。
message(): string −此方法用于产生警报中获得的消息。
type(): DialogType − 此方法用于获取对话框类型。对话框类型可以是提示、确认或提示。
dismiss(): Promise<void> − 此方法用于关闭警报。
在下面给出的图像中,单击"单击 JS 确认"时,将显示确认警报。让我们获取警报上的文本。
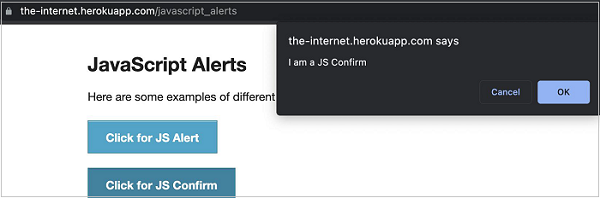
首先,按照 Puppeteer 基本测试章节中的步骤 1 到 2 进行操作,如下所示 −
步骤 1 −在创建 node_modules 文件夹的目录(安装 Puppeteer 和 Puppeteer 核心的位置)内创建一个新文件。
有关 Puppeteer 安装的详细信息,请参阅 Puppeteer 安装一章。
右键单击创建 node_modules 文件夹的文件夹,然后单击新建文件按钮。
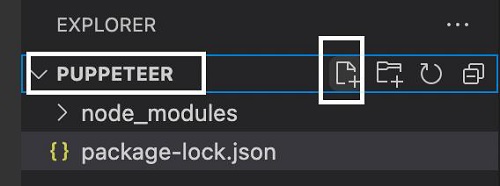
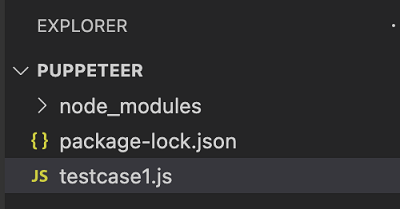
步骤 2 − 输入文件名,例如 testcase1.js。
步骤 3 −在创建的 testcase1.js 文件中添加以下代码。
//Puppeteer 库
const pt= require('puppeteer')
async function confirmAlert(){
    //以 headless 模式启动浏览器
    const browser = await pt.launch()
    //浏览器新页面
    const page = await browser.newPage();
    //触发事件监听器
    page.on('dialog', async dialog => {
        //获取警报消息
        console.log(dialog.message());
        //接受警报
        await dialog.accept();
    })
    //启动 URL
    await page.goto('https://the-internet.herokuapp.com/javascript_alerts')
    //使用 xpath 识别元素然后单击
   const b = (await page.$x("//button[text()='Click for JS Confirm']"))[0]
   b.click()
}
confirmAlert()
步骤 4 − 使用以下命令执行代码。
node <filename>
因此,在我们的示例中,我们将运行下面给出的命令 −
node testcase1.js

命令成功执行后,控制台中会打印确认警报文本 - I am a JS Confirm。

