
处理编辑框和复选框
让我们了解 Puppeteer 如何处理编辑框。
处理编辑框
Puppeteer 能够处理编辑框。编辑框有一个 HTML 标签作为输入,其 type 属性设置为文本值。
下面列出了一些使用编辑框的方法 −
type()
此方法用于将文本输入到编辑框和文本区域中,而不替换已经存在的内容。
语法
type() 的语法如下 −
const n = await page.$("#txt")
await n.type("Puppeteer")
我们可以在编辑框中输入文本并有一定的延迟。这是通过添加参数 {delay:time interval} 来实现的。时间间隔以毫秒为单位。
语法
语法如下 −
await page.type("[class='loc']", "Tutorialspoint", {delay:700})
要删除编辑框中输入的文本,我们必须在字段上执行三次单击事件(使用参数 clickCount),然后按退格键。这类似于选择编辑框中的所有值,然后按退格键。
语法
语法如下 −
const n = await page.$("#txt")
await n.type("Puppeteer")
await n.click({clickCount: 3});
await page.keyboard.press('Backspace')
要获取编辑框中输入的值,我们必须使用 getProperty 方法并将值作为参数传递给此字段。
const v = await (await n.getProperty("value")).jsonValue()
console.log(v)
在下图中,让我们输入文本 Puppeteer,然后清除它。
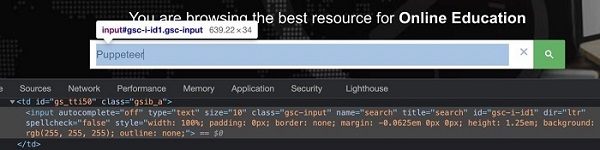
首先,按照 Puppeteer 基本测试章节中的步骤 1 到 2 进行操作,如下所示 −
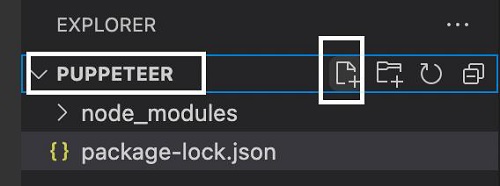
步骤 1 −在创建 node_modules 文件夹的目录(安装 Puppeteer 和 Puppeteer 核心的位置)内创建一个新文件。
有关 Puppeteer 安装的详细信息,请参阅 Puppeteer 安装一章。
右键单击创建 node_modules 文件夹的文件夹,然后单击新建文件按钮。
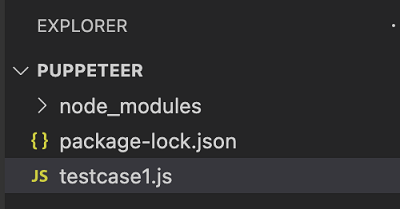
步骤 2 − 输入文件名,例如 testcase1.js。
步骤 3 −在创建的 testcase1.js 文件中添加以下代码。
//Puppeteer 库
const pt= require('puppeteer')
async function enterText(){
    //以 headless 模式启动浏览器
    const browser = await pt.launch()
    //浏览器新页面
    const page = await browser.newPage();
    //启动 URL
    await page.goto('https://www.tutorialspoint.com/index.htm')
    //识别编辑框
    const f = await page.$("#gsc-i-id1")
    //输入文本
    f.type("Puppeteer")
    //清除输入的文本
    await f.click({clickCount: 3})
    //等待一段时间
    await page.waitForTimeout(4000)
    await page.keyboard.press('Backspace')
    //浏览器关闭
   await browser.close()
}
enterText()
步骤 4 − 使用下面给出的命令执行代码 −
node <filename>
因此在我们的示例中,我们将运行以下命令 −
node testcase1.js
处理复选框
我们可以在使用 Puppeteer 自动化测试时处理 UI 中的复选框。复选框在 html 代码中以标签名称作为输入、类型为复选框的方式进行标识。
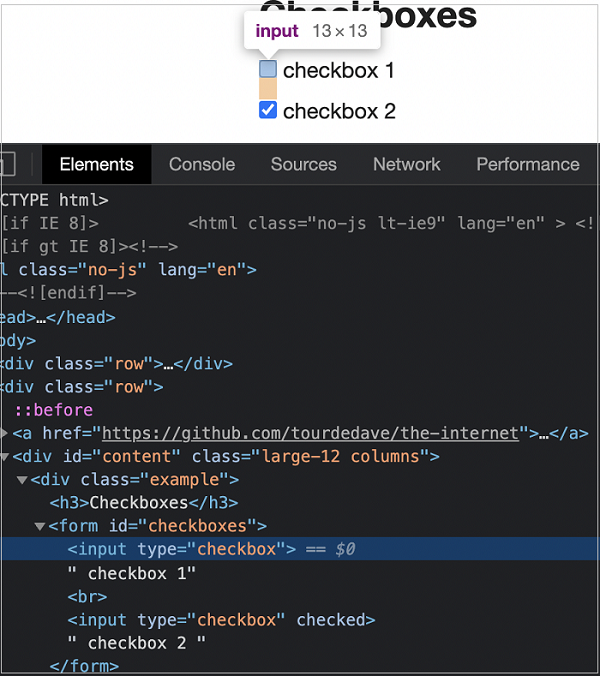
下面给出了一些使用复选框的方法 −
click()
它用于选中和取消选中复选框。此方法是 ElementHandle 类的一部分。
语法
click() 的语法如下 −
const n = await page.$("#txt")
n.click()
要验证复选框是否被选中,我们必须使用 getProperty 方法并将值作为参数传递给此字段。它返回一个布尔值(如果选中则为 true,否则为 false)。
const v = await (await n.getProperty("checked")).jsonValue()
console.log(v)
首先,请按照 Puppeteer 基本测试章节中的步骤 1 到 2 进行操作,如下所示 −
步骤 1 −在创建 node_modules 文件夹的目录(安装 Puppeteer 和 Puppeteer 核心的位置)内创建一个新文件。
有关 Puppeteer 安装的详细信息,请参阅 Puppeteer 安装一章。
右键单击创建 node_modules 文件夹的文件夹,然后单击新建文件按钮。
步骤 2 − 输入文件名,例如 testcase1.js。
步骤 3 −在创建的 testcase1.js 文件中添加以下代码。
//Puppeteer 库
const pt= require('puppeteer')
async function checkBoxHandle(){
    //以 headless 模式启动浏览器
    const browser = await pt.launch()
    //浏览器新页面
    const page = await browser.newPage()
    //启动 URL
    await page.goto('https://the-internet.herokuapp.com/checkboxes')
    //识别元素然后点击
    const n = await page.$("input[type='checkbox']")
    n.click()
    //等待一段时间
    await page.waitForTimeout(4000)
    //验证复选框是否被选中
   const v = await (await n.getProperty("checked")).jsonValue()
   console.log(v)
}
checkBoxHandle()
步骤 4 − 使用下面给出的命令执行代码 −
node <filename>
因此在我们的示例中,我们将运行以下命令 −
node testcase1.js

命令成功执行后,控制台中会打印布尔值 true。这是由 getProperty("checked") 返回的,当复选框被选中时,它会返回 true。

