Watir - Web 元素
在本章中,我们将讨论如何在 Watir − 中使用以下内容
- 使用文本框
- 使用组合
- 使用单选按钮
- 使用复选框
- 使用按钮
- 使用链接
- 使用 Div
使用文本框
语法
browser.text_field id: 'firstname' // 将获取文本框的引用
这里将尝试了解如何在 UI 上使用文本框。
考虑如下所示的 Textbox.html 页面 −
<html>
   <head>
      <title>Testing UI using Watir</title>
   </head>

   <body>
      <script type = "text/javascript">
         function wsentered() {
            console.log("inside wsentered");
            var firstname = document.getElementById("firstname");
            if (firstname.value != "") {
               document.getElementById("displayfirstname").innerHTML =
                  "The name entered is : " + firstname.value;

               document.getElementById("displayfirstname").style.display = "";
            }
         }
      </script>

      <div id = "divfirstname">
         Enter First Name :
         <input type = "text" id = "firstname" name = "firstname" onchange = "wsentered()" />
      </div>
      <br/>
      <br/>
      <div style = "display:none;" id = "displayfirstname"></div>
   </body>
</html>
相应的输出如下所示 −
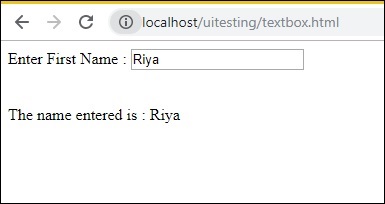
我们有一个文本框,当您输入名称时,会触发 onchange 事件,名称会显示在下面。
现在让我们编写代码,我们将在其中找到文本框并输入名称并触发 onchange 事件。
Watir 代码
require 'watir'
b = Watir::Browser.new :chrome
b.goto('http://localhost/uitesting/textbox.html')
t = b.text_field id: 'firstname'
t.exists?
t.set 'Riya Kapoor'
t.value
t.fire_event('onchange')
我们使用 chrome 浏览器,并将页面网址指定为 http://localhost/uitesting/textbox.html。
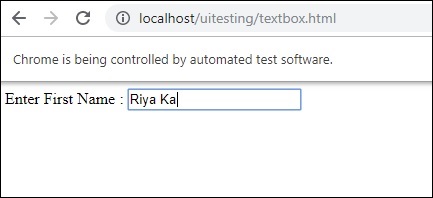
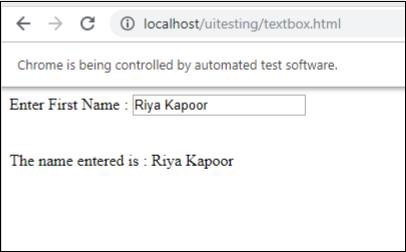
使用 goto api 浏览器将打开页面网址,我们将找到具有 id:firstname 的 text_field。如果存在,我们将值设置为 Riya Kapoor,并使用 fire_event api 触发 onchange 事件。
现在,让我们运行代码以显示如下所示的输出 −
使用组合
语法
browser.select_list id: 'months' // 将获取下拉列表的引用
我们现在要测试的测试页面显示在此处 −
<html>
   <head>
      <title>Dropdown</title>
   </head>

   <body>
      <script type = "text/javascript">
         function wsselected() {
            var months = document.getElementById("months");

            if (months.value != "") {
               document.getElementById("displayselectedmonth").innerHTML =
                  "The month selected is : " + months.value;

               document.getElementById("displayselectedmonth").style.display = "";
            }
         }
      </script>
      <form name = "myform" method = "POST">
         <div>
            Month is :
            <select name = "months" id = "months" onchange = "wsselected()">
               <option value = "">Select Month</option>
               <option value = "Jan">January</option>
               <option value = "Feb">February</option>
               <option value = "Mar">March</option>
               <option value = "Apr">April</option>
               <option value = "May">May</option>
               <option value = "Jun">June</option>
               <option value = "Jul">July</option>
               <option value = "Aug">August</option>
               <option value = "Sept">September</option>
               <option value = "Oct">October</option>
               <option value = "Nov">November</option>
               <option value = "Dec">December</option>
            </select>
         </div>
         <br/>
         <br/>

         <div style = "display:none;" id = "displayselectedmonth">
         </div>
   </body>
</html>
输出
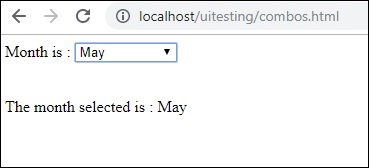
当您从下拉列表中选择月份时,下面会显示相同的内容。
现在让我们使用 Watir 进行测试。
Watir 组合选择代码
require 'watir'
b = Watir::Browser.new :chrome
b.goto('http://localhost/uitesting/combos.html')
t = b.select_list id: 'months'
t.exists?
t.select '九月'
t.selected_options
t.fire_event('onchange')
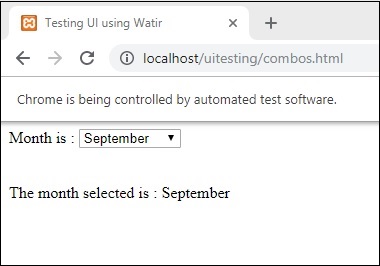
要使用组合,您需要使用 b.select_list api 和下拉列表的 id 来定位选择元素。要从下拉列表中选择值,您需要使用 t.select 和您想要的值。
执行时的输出如下 −
使用单选按钮
语法
browser.radio value: 'female'
// 将获取值为"female"的单选按钮的引用
这是一个我们将用于处理单选按钮的测试页面 −
<html>
   <head>
      <title>Testing UI using Watir</title>
   </head>

   <body>
      <form name = "myform" method = "POST">
         <b>Select Gender?</b>
         <div>
            <br/>
            <input type = "radio" name = "gender" value = "male" checked> Male
            <br/>
            <input type = "radio" name = "gender" value = "female"> Female
            <br/>
         </div>
      </form>
   </body>

</html>
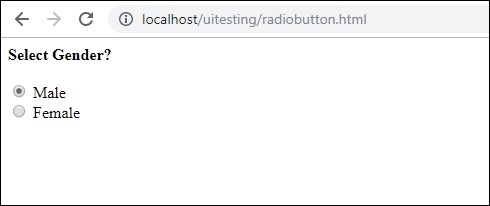
我们将选择值为 Female 的单选按钮,如 Watir 代码中所示 −
require 'watir'
b = Watir::Browser.new
b.goto('http://localhost/uitesting/radiobutton.html')
t = b.radio value: 'female'
t.exists?
t.set
b.screenshot.save 'radiobutton.png'
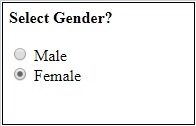
要使用单选按钮,我们需要告诉浏览器我们选择的值,即 b.radio value:"female"
我们还截取屏幕截图并将其保存为 radiobutton.png,并在 − 下方显示相同内容
使用复选框
语法
browser. checkbox value: 'Train'
// 将获取值为"Train"的复选框的引用
这是复选框的测试页面 −
<html>
   <head>
      <title>Testing UI using Watir</title>
   </head>

   <body>
      <form name = "myform" method = "POST">
         <b>How would you like to travel?</b>
         <div>
            <br>
            <input type = "checkbox" name = "option1" value = "Car"> Car<br>
            <input type = "checkbox" name = "option2" value = "Bus"> Bus<br>
            <input type = "checkbox" name = "option3" value = "Train"> Train<br>
            <input type = "checkbox" name = "option4" value = "Air"> Airways<br>
            <br>
         </div>
      </form>
   </body>

</html>
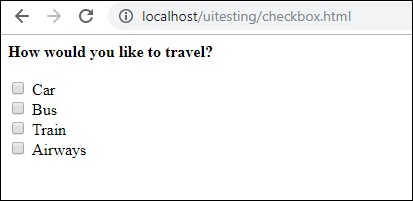
现在,让我们使用 Watir 在浏览器中定位复选框,如下所示 −
require 'watir'
b = Watir::Browser.new
b.goto('http://localhost/uitesting/checkbox.html')
t = b.checkbox value: 'Train'
t.exists?
t.set
b.screenshot.save 'checkbox.png'
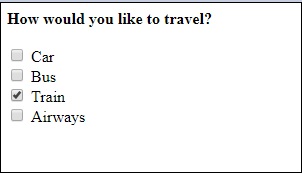
要在浏览器中定位复选框,请使用 b.checkbox 和您要选择的值。
使用按钮
语法
browser.button(:name => "btnsubmit").click
// 将获取对名称为"btnsubmit"的按钮元素的引用
这是按钮的测试页面 −
<html>
   <head>
      <title>Testing UI using Watir</title>
   </head>

   <body>
      <script type = "text/javascript">
         function wsclick() {
            document.getElementById("buttondisplay").innerHTML = "Button is clicked";
            document.getElementById("buttondisplay").style.display = "";
         }
      </script>

      <form name = "myform" method = "POST">
         <div>
            <br>
            <input type = "button" id = "btnsubmit" name = "btnsubmit"
               value = "submit" onclick = "wsclick()"/>
            <br>
         </div>
      </form>
      <br/>

      <div style = "display:none;" id = "buttondisplay"></div>
   </body>

</html>
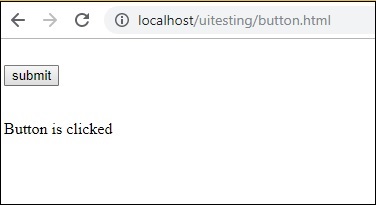
以下是 watir 代码,用于在给定页面上定位按钮 −
require 'watir'
b = Watir::Browser.new
b.goto('http://localhost/uitesting/button.html')
b.button(:name => "btnsubmit").click
b.screenshot.save 'button.png'
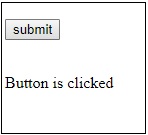
以下是屏幕截图按钮。png
使用链接
语法
browser.link text: 'Click Here'
// 将获取对带有文本"Click Here"的标签的引用
我们将使用以下测试页面来测试链接 −
<html>
   <head>
      <title>Testing UI using Watir</title>
   </head>
   <body>
      <br/>
      <br/>
      <a href = "https://www.google.com">Click Here</a>
      <br/>
   </body>
</html>
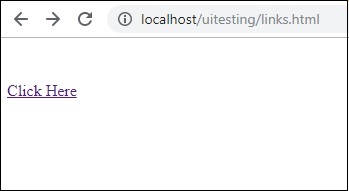
测试链接所需的 Watir 详细信息如下 −
require 'watir'
b = Watir::Browser.new
b.goto('http://localhost/uitesting/links.html')
l = b.link text: 'Click Here'
l.click
b.screenshot.save 'links.png'
输出
使用 Div
语法
browser.div class: 'divtag'
// 将获取对带有类"divtag"的 div 的引用
我们可以测试 div 的测试页面。
<html>
   <head>
      <title>Testing UI using Watir</title>
      <style>
         .divtag {
            color: blue;
            font-size: 25px;
         }
      </style>
   </head>

   <body>
      <br/>
      <br/>
      <div class = "divtag"> UI Testing using Watir </div>
      <br/>
   </body>
</html>
输出
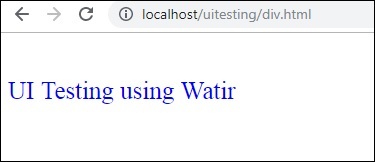
此处显示用于测试 div 的 Watir 代码 −
require 'watir'
b = Watir::Browser.new
b.goto('http://localhost/uitesting/div.html')
l = b.div class: 'divtag'
l.exists?
l.text
b.screenshot.save 'divtag.png'
输出