
如何使用 Android 地图 API 创建自定义形状的位图标记?
简介
如今,许多 Android 应用都内置了 Google 地图来向用户显示地图。例如,我们经常使用外卖应用,可以在 Google 地图上查看订单状态以及送货员的位置。根据不同的应用场景,我们可以看到不同类型的标记。本文将介绍如何使用 Android 地图 API 创建自定义形状的位图标记?
实现
我们将创建一个简单的应用,在其中显示一个简单的 Google 地图,并在地图上为德里位置添加一个自定义形状的标记。我们将按照分步指南来构建此应用。现在,让我们转到 Android Studio 创建一个新项目。
步骤 1:在 Android Studio 中创建新项目
如下图所示,导航到 Android Studio。在下方屏幕中,点击"新建项目"以创建一个新的 Android Studio 项目。
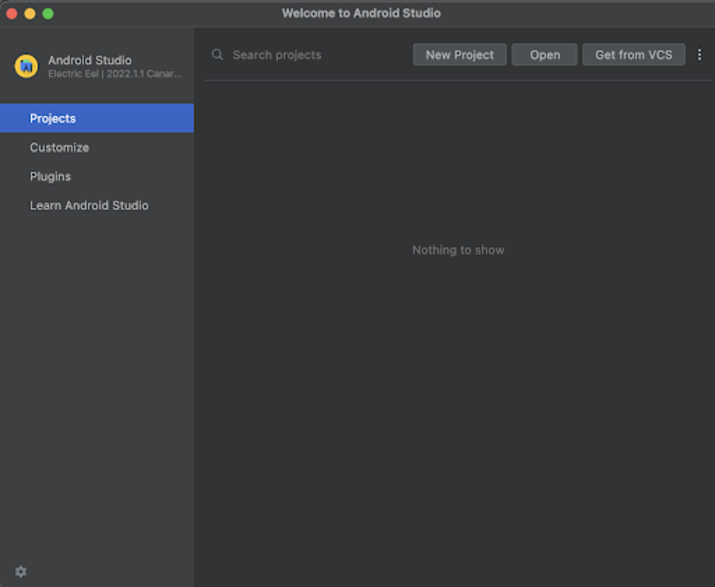
点击"新建项目"后,您将看到以下屏幕。
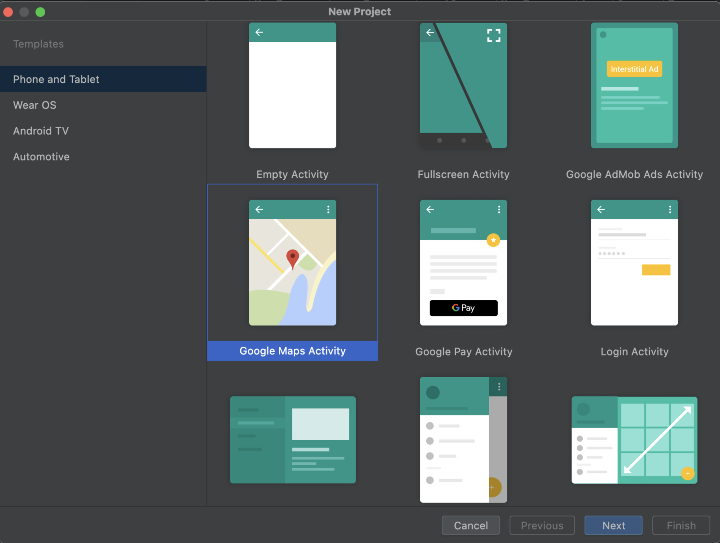
在此屏幕中,我们只需选择"Google 地图活动",然后点击"下一步"。点击"下一步"后,您将看到以下屏幕。
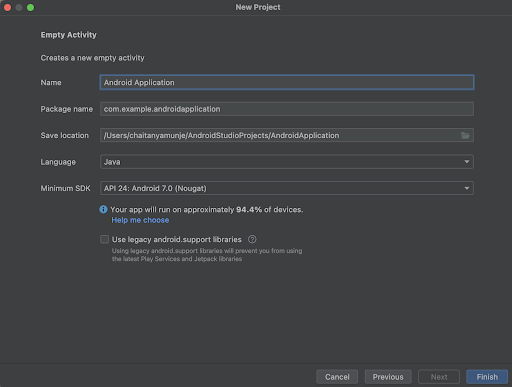
在此屏幕中,我们只需指定项目名称。然后会自动生成软件包名称。
注意:请确保选择 Java 作为语言。
指定所有详细信息后,点击"完成"以创建一个新的 Android Studio 项目。
项目创建完成后,我们将看到两个打开的文件,即 activity_maps.xml 和 MapsActivity.java 文件。
步骤 2:创建 API 密钥以显示 Google 地图
访问以下网址,您将找到有关如何创建 Google 地图 API 密钥的详细文档,我们必须将其添加到我们的应用程序中才能显示 Google 地图。
步骤 3:使用 AndroidManifest.xml 文件
现在,由于我们已经生成了 Google 地图 API 密钥,因此我们必须在项目的 AndroidManifest.xml 文件中使用此密钥。导航至 app>AndroidManifest.xml 文件,并向其中添加以下代码。代码中添加了注释,以便详细了解。
 <?xml version="1.0" encoding="utf-8"?>
<manifest xmlns:android="http://schemas.android.com/apk/res/android"
   xmlns:tools="http://schemas.android.com/tools">
   <application
       android:allowBackup="true"
       android:dataExtractionRules="@xml/data_extraction_rules"
       android:fullBackupContent="@xml/backup_rules"
       android:icon="@mipmap/ic_launcher"
       android:label="@string/app_name"
       android:roundIcon="@mipmap/ic_launcher_round"
       android:supportsRtl="true"
       android:theme="@style/Theme.GoogleMapsProject"
       tools:targetApi="31">
       <!--
            TODO: Before you run your application, you need a Google Maps API key.
            To get one, follow the directions here:
               https://developers.google.com/maps/documentation/android-sdk/get-api-key
            Once you have your API key (it starts with "AIza"), define a new property in your
            project's local.properties file (e.g. MAPS_API_KEY=Aiza...), and replace the
            "YOUR_API_KEY" string in this file with "${MAPS_API_KEY}".
       -->
       <meta-data
           android:name="com.google.android.geo.API_KEY"
           android:value="Enter your API key here" />
       <activity
           android:name=".MapsActivity"
           android:exported="true"
           android:label="@string/title_activity_maps">
           <intent-filter>
               <action android:name="android.intent.action.MAIN" />
               <category android:name="android.intent.category.LAUNCHER" />
           </intent-filter>
       </activity>
   </application>
</manifest>
注意 - 请务必添加您生成的 API 密钥,而不是输入 API 密钥标签。
步骤 4:使用 activity_main.xml
导航到 activity_maps.xml。如果此文件不可见,请打开此文件。在左侧窗格中,导航至 app>res>layout>activity_maps.xml 以打开此文件。打开此文件后,将以下代码添加到其中。代码中添加了注释,以便您详细了解。
<?xml version="1.0" encoding="utf-8"?>
<!-- on below line creating a fragment for displaying maps-->
<fragment xmlns:android="http://schemas.android.com/apk/res/android"
   xmlns:map="http://schemas.android.com/apk/res-auto"
   xmlns:tools="http://schemas.android.com/tools"
   android:id="@+id/map"
   android:name="com.google.android.gms.maps.SupportMapFragment"
   android:layout_width="match_parent"
   android:layout_height="match_parent"
   tools:context=".MapsActivity" />
说明 - 在上述代码中,我们创建了一个 Fragment,用于在应用程序中显示 Google 地图。我们将此 Fragment 的名称指定为"支持地图 Fragment"。
步骤 4:使用 MapsActivity.java 文件
导航到 MainActivity.java。如果此文件不可见,请打开此文件。在左侧窗格中,导航至 app>res>layout>MainActivity.java 以打开此文件。打开此文件后,将以下代码添加到其中。代码中添加了注释,以便您详细了解。
package com.example.googlemapsproject;

import androidx.core.content.ContextCompat;
import androidx.fragment.app.FragmentActivity;
import android.content.Context;
import android.graphics.Bitmap;
import android.graphics.Canvas;
import android.graphics.drawable.Drawable;
import android.os.Bundle;
import com.google.android.gms.maps.CameraUpdateFactory;
import com.google.android.gms.maps.GoogleMap;
import com.google.android.gms.maps.OnMapReadyCallback;
import com.google.android.gms.maps.SupportMapFragment;
import com.google.android.gms.maps.model.BitmapDescriptor;
import com.google.android.gms.maps.model.BitmapDescriptorFactory;
import com.google.android.gms.maps.model.LatLng;
import com.google.android.gms.maps.model.MarkerOptions;
import com.example.googlemapsproject.databinding.ActivityMapsBinding;
public class MapsActivity extends FragmentActivity implements OnMapReadyCallback {
   // 在下面一行中为谷歌地图创建一个变量并进行绑定。
   private GoogleMap mMap;
   private ActivityMapsBinding binding;
   @Override
   protected void onCreate(Bundle savedInstanceState) {
       super.onCreate(savedInstanceState);
       binding = ActivityMapsBinding.inflate(getLayoutInflater());
       setContentView(binding.getRoot());
       // 获取 SupportMapFragment 并在地图可供使用时收到通知。
       SupportMapFragment mapFragment = (SupportMapFragment) getSupportFragmentManager()
               .findFragmentById(R.id.map);
       mapFragment.getMapAsync(this);
   }
   /**
    * Manipulates the map once available.
    * This callback is triggered when the map is ready to be used.
    * This is where we can add markers or lines, add listeners or move the camera. In this case,
    * we just add a marker near Sydney, Australia.
    * If Google Play services is not installed on the device, the user will be prompted to install
    * it inside the SupportMapFragment. This method will only be triggered once the user has
    * installed Google Play services and returned to the app.
    */
   @Override
   public void onMapReady(GoogleMap googleMap) {
        mMap = googleMap;
        // 在下方创建德里位置的经纬度坐标
        LatLng delhi = new LatLng(28.7041, 77.1025);
        // 在下方添加标记。
        mMap.addMarker(new MarkerOptions()
        // 在下方指定添加标记的位置。
        .position(delhi)
        // 在下方指定标记的标题。
        .title("德里的标记")
        // 在下方指定标记的图标。
        .icon(BitmapFromDrawable(this, R.drawable.ic_plane)));
        // 在下方将相机移动到经纬度坐标。
        mMap.moveCamera(CameraUpdateFactory.newLatLng(delhi));
   }
   private BitmapDescriptor BitmapFromDrawable(Context context, int imageID) {
        // 下面我们根据它的 id 创建一个 drawable。
        Drawable imageDrawable = ContextCompat.getDrawable(context, imageID);
        // 下面一行用于设置矢量可绘制对象的边界。
        imageDrawable.setBounds(0, 0, imageDrawable.getIntrinsicWidth(), imageDrawable.getIntrinsicHeight());
        // 下面一行用于为我们添加的可绘制对象创建位图。
        Bitmap bitmap = Bitmap.createBitmap(imageDrawable.getIntrinsicWidth(), imageDrawable.getIntrinsicHeight(), Bitmap.Config.ARGB_8888);
        // 下面一行用于在画布中添加位图。
        Canvas canvas = new Canvas(bitmap);
        // 下面一行用于在画布上绘制我们的
        // 矢量可绘制对象。
        imageDrawable.draw(canvas);
        // 生成位图后,我们将返回该位图。
        返回 BitmapDescriptorFactory.fromBitmap(bitmap);
   }
}
说明:在上面的代码中,我们首先为 Google 地图和活动绑定创建变量。现在我们将看到 onCreate 方法。这是每个 Android 应用程序的默认方法。创建应用程序视图时将调用此方法。在此方法中,我们设置内容视图,即名为 activity_maps.xml 的布局文件,以从该文件设置 UI。在 onCreate 方法中,我们初始化绑定变量。然后,我们为支持片段创建一个变量,并使用我们在 activity_maps.xml 文件中提供的片段 ID 初始化该变量。然后调用获取地图同步来同步我们的地图。之后,我们覆盖 onMapReady 方法。在此方法中,我们为将在德里位置显示的标记创建经纬度。然后,我们在地图上添加自定义形状的标记。我们正在创建一个名为 Bitmap From drawable 的新方法,它将从我们指定的可绘制文件中为图标提供位图。然后,我们将使用此位图描述符在 Google 地图上进行设置。最后,将相机移动到显示标记的位置。
添加上述代码后,只需点击顶部栏中的绿色图标即可在移动设备上运行我们的应用程序。
注意:请确保您已连接到真实设备或模拟器。
输出
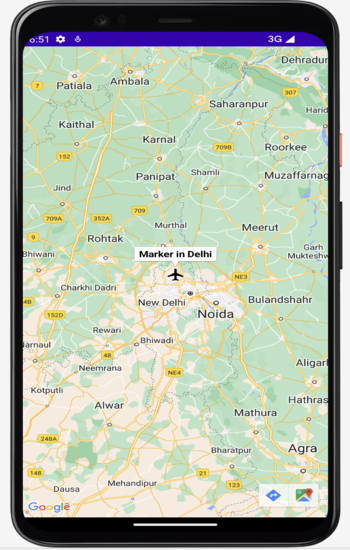
结论
在上文中,我们介绍了如何使用 Android 地图 API 创建自定义形状的位图标记。

