
如何在 Android 中使用 XML 文件定义 GUI 布局?
简介
任何 Android 应用程序的 GUI(图形用户界面)都允许用户与其各种功能进行交互。GUI 是应用程序的主要部分,对用户可见。任何 Android 应用程序的 GUI 都可以通过多种不同的方式设计,例如使用 XML、Dart、Kotlin 等等。在本文中,我们将介绍如何使用 XML 文件定义 Android 应用程序的 GUI 布局。
实现
我们将创建一个简单的应用程序,其中我们将创建一个文本视图来显示应用程序的标题。然后,我们将创建一个图像视图和另一个文本视图来显示应用程序的 UI。现在,让我们转到 Android Studio 创建一个新项目。
步骤 1:在 Android Studio 中创建新项目
如下图所示,导航到 Android Studio。在下方屏幕中,点击"新建项目"以创建一个新的 Android Studio 项目。
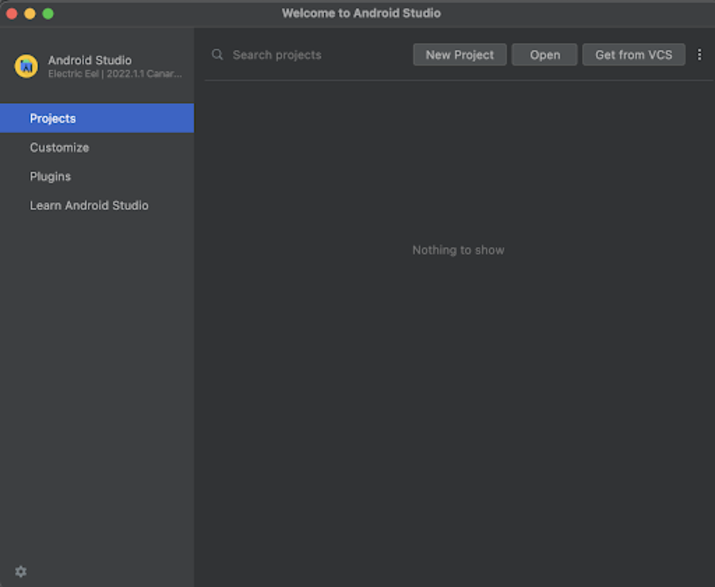
点击"新建项目"后,您将看到以下屏幕。
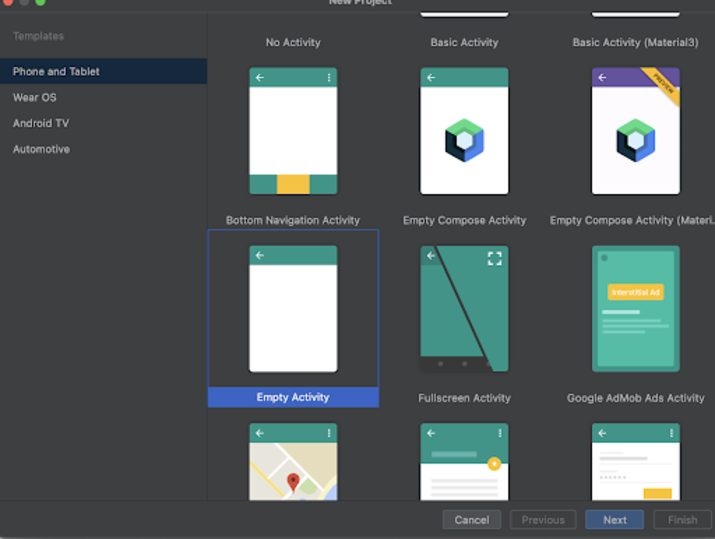
在此屏幕中,我们只需选择"空活动",然后点击"下一步"。点击"下一步"后,您将看到以下屏幕。
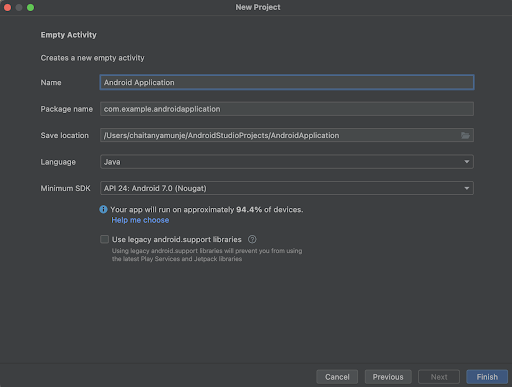
在此屏幕中,我们只需指定项目名称。然后包名称将自动生成。
注意− 确保选择 Java 作为语言。
指定所有详细信息后,点击"完成"以创建一个新的 Android Studio 项目。
项目创建完成后,我们将看到两个打开的文件,即 activity_main.xml 和 MainActivity.java 文件。
步骤 2:使用 activity_main.xml
导航到 activity_main.xml。如果此文件不可见,请打开此文件。在左侧窗格中,导航至 app>res>layout>activity_main.xml 并打开此文件。打开此文件后,添加以下代码。代码中添加了注释,以便您详细了解。
<?xml version="1.0" encoding="utf-8"?>
<RelativeLayout xmlns:android="http://schemas.android.com/apk/res/android"
   xmlns:app="http://schemas.android.com/apk/res-auto"
   xmlns:tools="http://schemas.android.com/tools"
   android:layout_width="match_parent"
   android:layout_height="match_parent">

   <!-- on below line creating a text view for displaying heading of the application -->
   <TextView
       android:id="@+id/idTVHeading"
       android:layout_width="match_parent"
       android:layout_height="wrap_content"
       android:layout_above="@id/idIVImage"
       android:layout_margin="20dp"
       android:padding="4dp"
       android:text="GUI Layout using XML in Android"
       android:textAlignment="center"
       android:textColor="@color/black"
       android:textSize="20sp"
       android:textStyle="bold" />

   <!-- on below line creating an image view for defining the GUI of the application -->
   <ImageView
       android:id="@+id/idIVImage"
       android:layout_width="200dp"
       android:layout_height="200dp"
       android:layout_centerInParent="true"
       android:layout_margin="20dp"
       android:src="@drawable/ic_android" />

   <!-- on below line creating a tet view for defining the GUI of the application -->
   <TextView
       android:id="@+id/idTVMessage"
       android:layout_width="match_parent"
       android:layout_height="wrap_content"
       android:layout_below="@id/idIVImage"
       android:layout_margin="20dp"
       android:gravity="center"
       android:text="Good Morning."
       android:textAlignment="center"
       android:textAllCaps="false"
       android:textColor="@color/black"
       android:textDirection="ltr"
       android:textSize="20sp"
       android:textStyle="normal" />
</RelativeLayout>
说明− 在上面的代码中,我们创建了一个相对布局作为根布局。在这个布局中,我们创建了一个文本视图,用于显示应用程序的标题。之后,我们创建了一个图像视图,用于显示 Android 的图片。最后,我们再创建一个文本视图,用于显示文本视图。最后,我们为相对布局添加一个结束标签。
添加上述代码后,只需点击顶部栏中的绿色图标即可在移动设备上运行我们的应用程序。
注意− 确保您已连接到真实设备或模拟器。
输出
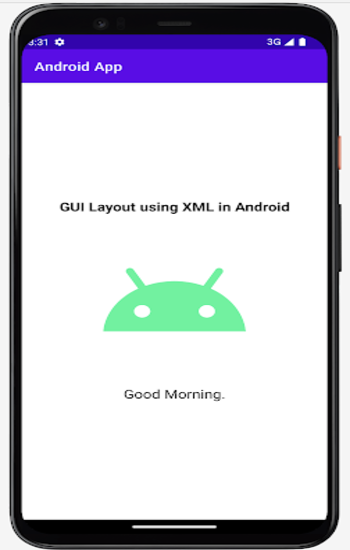
结论
在上文中,我们介绍了如何在 Android 中使用 XML 文件定义 Android 应用程序的 GUI 布局。

