GraphQL - Apollo 客户端
我们已经使用 Apollo 服务器在服务器端构建 graphql 规范。构建可用于生产的 GraphQL 服务器既快速又简单。现在让我们了解客户端。
Apollo 客户端是使用 GraphQL 构建客户端应用程序的最佳方式。该客户端旨在帮助开发人员快速构建使用 GraphQL 获取数据的 UI,并可与任何 JavaScript 前端一起使用。
Apollo 客户端支持以下平台 −
| Sr.No. | 平台 &框架 |
|---|---|
| 1 | Javascript React、Angular、Vue、Meteor、Ember |
| 2 | WebComponents Polymer,lit-apollo |
| 3 | 原生移动 使用 Java 的原生 Android,使用 Swift 的原生 iOS |
缓存是 Apollo Client 的主要功能之一。 apollo-boost 是一个便利包,它带来了一堆其他依赖项。
插图
让我们看看如何使用 Apollo Client 按照以下步骤构建客户端应用程序 −
设置服务器
我们必须按照以下步骤设置服务器 −
步骤 1 − 下载并安装项目所需的依赖项
创建文件夹 apollo-server-app。从终端将目录更改为 apollo-server-app。然后,按照环境设置章节中说明的步骤 3 到 5 进行操作。
步骤 2 − 创建架构
在项目文件夹 apollo-server-app 中添加 schema.graphql 文件并添加以下代码 −
type Query
{
   students:[Student]
}

type Student {
   id:ID!
   firstName:String
   lastName:String
   college:College
}

type College {
   id:ID!
   name:String
   location:String
   rating:Float
}
步骤 3 − 添加解析器
在项目文件夹中创建文件 resolvers.js 并添加以下代码 −
const db = require('./db')

const Query = {
   //students 解析函数返回列表
   students:() => db.students.list(),
}

const Student = {
   college:(root) => {
      return db.colleges.get(root.collegeId);
   }
}
module.exports = {Query,Student}
第 4 步 − 运行应用程序
创建一个 server.js 文件。请参阅环境设置章节中的第 8 步。在终端中执行命令 npm start。服务器将在 9000 端口上启动并运行。在这里,我们将使用 GraphiQL 作为客户端来测试应用程序。
打开浏览器并输入 URL http://localhost:9000/graphiql。在编辑器中输入以下查询。
{
   students{
      id
      firstName
      college{
         name
      }
   }
}
查询的响应如下所示 −
{
   "data": {
      "students": [
         {
            "id": "S1001",
            "firstName": "Mohtashim",
            "college": {
               "name": "CUSAT"
            }
         },

         {
            "id": "S1002",
            "firstName": "Kannan",
            "college": {
               "name": "AMU"
            }
         },

         {
            "id": "S1003",
            "firstName": "Kiran",
            "college": {
               "name": "AMU"
            }
         }
      ]
   }
}
设置客户端
为客户端打开一个新终端。在执行客户端应用程序之前,应保持服务器终端运行。React 应用程序将在端口号 3000 上运行,服务器应用程序将在端口号 9000 上运行。
步骤 1 − 创建 React 应用程序
在客户端终端中,输入以下命令 −
npx create-react-app hello-world-client
这将安装典型 React 应用程序所需的一切。npx 实用程序和 create-react-app 工具创建一个名为 hello-world-client 的项目。安装完成后,在 VSCode 中打开该项目。
步骤 2 − 启动 hello-world-client
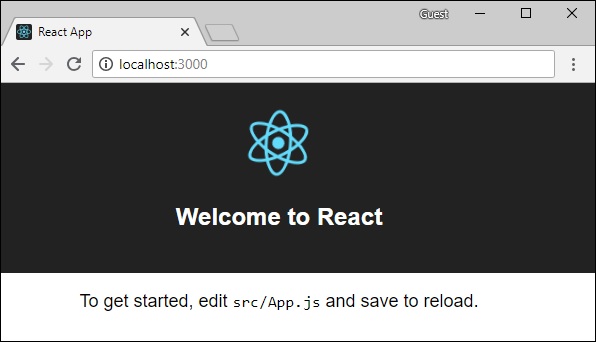
将终端中的当前文件夹路径更改为 hello-world-client。输入 npm start 启动项目。这将在端口 3000 上运行开发服务器,并自动打开浏览器并加载索引页。
如下面的屏幕截图所示 −
步骤 3 − 安装 Apollo 客户端库
要安装 Apollo 客户端,请打开一个新终端并进入当前项目文件夹路径。输入以下命令 −
npm install apollo-boost graphql
这将下载客户端的 graphql 库以及 Apollo Boost 包。我们可以通过在 apollo-boost 依赖项中输入 npm view 来交叉检查。这将有许多依赖项,如下所示 −
{
   'apollo-cache': '^1.1.15',
   'apollo-cache-inmemory': '^1.2.8',
   'apollo-client': '^2.4.0',
   'apollo-link': '^1.0.6',
   'apollo-link-error': '^1.0.3',
   'apollo-link-http': '^1.3.1',
   'apollo-link-state': '^0.4.0',
   'graphql-tag': '^2.4.2'
}
我们可以清楚地看到 Apollo-Client 库已安装。
第 4 步 − 修改 index.js 文件中的应用组件
使用 Apollo Client,我们可以直接调用服务器,而无需使用 fetch API。此外,查询和变异不应嵌入用反勾符号表示的字符串中。这是因为,gql 函数直接解析查询。这意味着,程序员可以在 GraphiQL 工具中编写查询时以相同的方式直接编写查询。gql 是一个标记函数,它将把用反勾符号编写的模板字符串解析为 graphql 查询对象。 Apollo Client 查询方法返回一个承诺。
以下代码片段显示如何导入 Apollo Client −
import {ApolloClient, HttpLink, InMemoryCache} from 'apollo-boost'

const endPointUrl = 'http://localhost:9000/graphql'
const client = new ApolloClient({
    link: new HttpLink({uri:endPointUrl}),
    cache:new InMemoryCache()
});
在上一章中,我们讨论了如何使用 fetch API 进行 HTTP 请求。以下代码显示如何使用 gql 函数。loadStudentsAsync 函数使用 graphql 客户端查询服务器。
async function loadStudentsAsync() {
   const query = gql`
   {
      students{
         id
         firstName
         lastName
         college{
            name
         }
      }
   }`
   const {data} = await client.query({query}) ;
   return data.students;
}
您只需将 index.js 保留在 src 文件夹中,将 index.html 保留在 public 文件夹中;所有其他自动生成的文件都可以删除。
目录结构如下。 −
hello-world-client /
   -->node_modules
   -->public
         index.html
   -->src
         index.js
   -->package.json
以下是 React 应用程序中的 index.js −
import React, {Component} from 'react';
import ReactDOM from 'react-dom';

// apollo client

import {ApolloClient, HttpLink, InMemoryCache} from 'apollo-boost'
import gql from 'graphql-tag'

const endPointUrl = 'http://localhost:9000/graphql'
const client = new ApolloClient({
   link: new HttpLink({uri:endPointUrl}),
   cache:new InMemoryCache()
});

async function loadStudentsAsync() {
   const query = gql`
   {
      students{
         id
         firstName
         lastName
         college{
            name
         }
      }
   }
   `
   const {data} = await client.query({query}) ;
   return data.students;
}
class  App  extends Component {
   constructor(props) {
      super(props);
      this.state = {
         students:[]
      }
      this.studentTemplate =  [];
   }
   async loadStudents() {
      const studentData =  await loadStudentsAsync();
      this.setState({
         students: studentData
      })
      console.log("loadStudents")
   }
   render() {
      return(
         <div>
            <input type = "button"  value = "loadStudents" onClick = {this.loadStudents.bind(this)}/>
            <div>
               <br/>
               <hr/>
               <table border = "3">
                  <thead>
                     <tr>
                        <td>First Name</td>
                        <td>Last Name</td>
                        <td>college Name</td>
                     </tr>
                  </thead>

                  <tbody>
                     {
                        this.state.students.map(s => {
                           return (
                              <tr key = {s.id}>
                                 <td>
                                    {s.firstName}
                                 </td>
                                 <td>
                                    {s.lastName}
                                 </td>
                                 <td>
                                    {s.college.name}
                                 </td>
                              </tr>
                           )
                        })
                     }
                  </tbody>
               </table>
            </div>
         </div>
      )
   }
}
ReactDOM.render(<App/>, document.getElementById('root'));
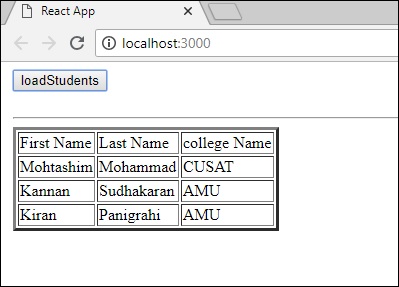
一旦我们点击 loadStudents 按钮,React 应用程序将从 GraphQL 服务器加载 students,如下所示 −