Pygame - 移动矩形对象
Pygame.Rect 类具有存储和操作矩形区域的功能。 一个 Rect 对象可以从 left、top、width 和 height 值构造。 Rect 类中的函数支持复制、移动和调整 Rect 对象的大小。
一个 Rect 对象有以下虚拟属性 −
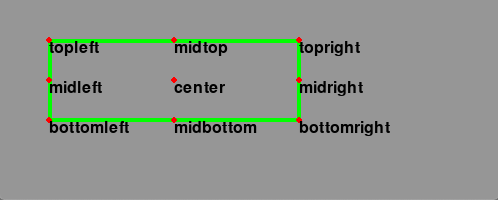
除了移动之外,Rect 类还有测试矩形之间碰撞的方法。
| copy() | 返回一个与原始矩形具有相同位置和大小的新矩形。 |
| move() | 返回一个按给定偏移量移动的新矩形。 x 和 y 参数可以是任何整数值,正数或负数。 |
| move_ip() | 与 Rect.move() 方法相同,但就地操作。 |
| inflate(x,y) | 返回一个新的矩形,其大小由给定的偏移量改变。 负值将缩小矩形。 |
| inflate_ip(x, y) | 与 Rect.inflate() 方法相同,但操作就位。 |
| clamp(Rect) | 返回一个新的矩形,该矩形已移动到完全位于参数 Rect 内。 |
| clip(Rect) | 返回一个裁剪后完全位于参数 Rect 内的新矩形。 |
| union(Rect) | 返回一个完全覆盖所提供的两个矩形区域的新矩形。 |
| union_ip(Rect) | 与 Rect.union() 方法相同,但操作就位。 |
| contains(Rect) | 当参数完全在 Rect 内时返回 true。 |
| collidepoint((x,y)) | 如果给定点在矩形内,则返回 true。 |
| colliderect(Rect) | 如果任一矩形的任何部分重叠则返回 true |
示例
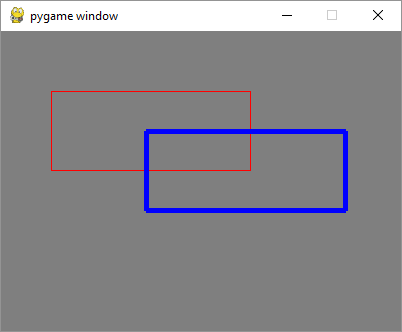
在下面的程序中,用红色轮廓绘制了一个 Rect 对象。 使用 copy() 方法,创建其克隆以供移动。 移动受 move_ip() 方法影响。 箭头键通过将 x/y 坐标递增/递减 + 或 -5 像素来移动复制矩形的位置。
import pygame
from pygame.locals import *
from sys import exit
pygame.init()
screen = pygame.display.set_mode((400,300))
rect1 = Rect(50, 60, 200, 80)
rect2=rect1.copy()
running = True
x=0
y=0
while running:
   for event in pygame.event.get():
      if event.type == QUIT:
         running = False
      if event.type == KEYDOWN:
         if event.key==K_LEFT:
            x= -5
            y=0
         if event.key == K_RIGHT:
            x=5
            y=0
         if event.key == K_UP:
            x = 0
            y = -5
         if event.key == K_DOWN:
            x = 0
            y = 5
   rect2.move_ip(x,y)
   screen.fill((127,127,127))
   pygame.draw.rect(screen, (255,0,0), rect1, 1)
   pygame.draw.rect(screen, (0,0,255), rect2, 5)
   pygame.display.update()
   pygame.quit()
输出
以下输出显示带有红色轮廓的矩形是原始矩形。 它的副本不断移动以响应箭头键并具有蓝色轮廓
示例
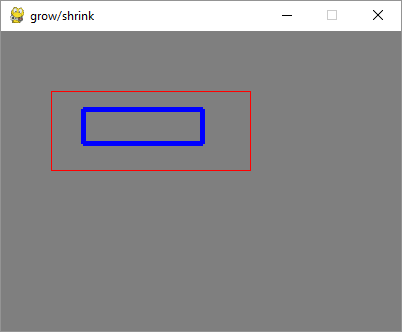
将 move_ip() 方法更改为 inflate_ip() 方法以根据按下的箭头扩大/缩小矩形。
while running:
   for event in pygame.event.get():
      if event.type == QUIT:
         running = False
      if event.type == KEYDOWN:
         if event.key==K_LEFT:
            x= -5
            y=0
         if event.key == K_RIGHT:
            x=5
            y=0
         if event.key == K_UP:
            x = 0
            y = -5
         if event.key == K_DOWN:
            x = 0
            y = 5
      rect2.inflate_ip(x,y)
   screen.fill((127,127,127))
   pygame.draw.rect(screen, (255,0,0), rect1, 1)
   pygame.draw.rect(screen, (0,0,255), rect2, 5)
   pygame.display.update()
输出
以下是箭头按键活动的截图 −
示例
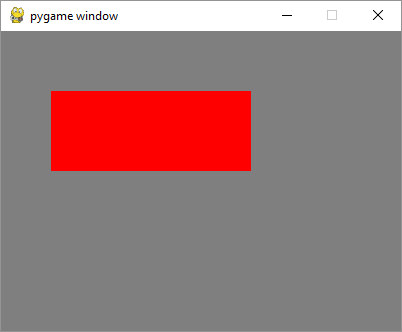
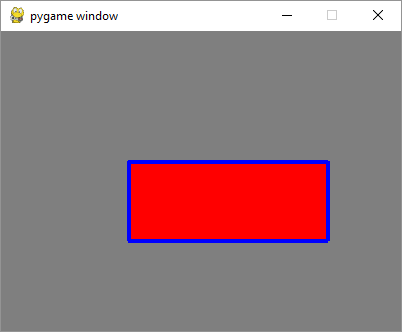
要通过检测MOUSEMOTION事件使矩形移动,我们需要先在原来的矩形内按下鼠标。 为了验证鼠标位置是否在矩形内部,我们使用 Rect 对象的 collidepoint() 方法。 当鼠标在移动时,矩形对象通过 move_ip() 方法移动到位。 松开鼠标时,移动应停止。
import pygame
from pygame.locals import *
from sys import exit
pygame.init()
screen = pygame.display.set_mode((400,300))
rect = Rect(50, 60, 200, 80)
moving = False
running = True
while running:
   for event in pygame.event.get():
      if event.type == QUIT:
         running = False
      elif event.type == MOUSEBUTTONDOWN:
         if rect.collidepoint(event.pos):
            moving = True
      elif event.type == MOUSEBUTTONUP:
         moving = False
      elif event.type == MOUSEMOTION and moving:
         rect.move_ip(event.rel)
   screen.fill((127,127,127))
   pygame.draw.rect(screen, (255,0,0), rect)
   if moving:
      pygame.draw.rect(screen, (0,0,255), rect, 4)
   pygame.display.flip()
pygame.quit()
输出
示例
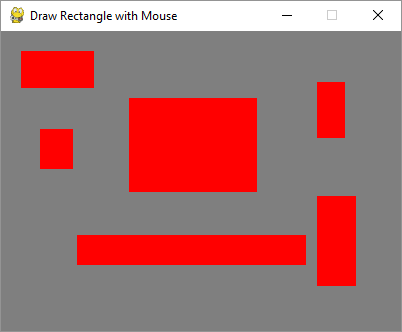
鼠标绘制矩形,在MOUSEBUTTONDOWN和MOUSEBUTTONUP事件中捕获鼠标指针坐标,计算左上角坐标、宽高,调用rect()函数。
import pygame
from pygame.locals import *
from sys import exit
pygame.init()
screen = pygame.display.set_mode((400,300))
pygame.display.set_caption("Draw Rectangle with Mouse")
screen.fill((127,127,127))
x=0
y=0
w=0
h=0
drawmode=True
running = True
while running:
   for event in pygame.event.get():
      if event.type == QUIT:
         running = False
      if event.type == MOUSEBUTTONDOWN:
         x,y = pygame.mouse.get_pos()
         drawmode = True
      if event.type == MOUSEBUTTONUP:
         x1,y1 = pygame.mouse.get_pos()
         w=x1-x
         h=y1-y
         drawmode= False

   rect = pygame.Rect(x,y,w,h)
   if drawmode == False:
      pygame.draw.rect(screen, (255,0,0), rect)
   pygame.display.flip()
pygame.quit()
输出