
Angular 8 - 表单
表单用于处理用户输入数据。 Angular 8 支持两种类型的表单。 它们是模板驱动表单和反应式表单。 本节详细介绍 Angular 8 表单。
模板驱动表单
模板驱动表单是使用模板中的指令创建的。 它主要用于创建简单的表单应用程序。 让我们简要了解如何创建模板驱动的表单。
配置表单
在了解表单之前,让我们先学习如何在应用程序中配置表单。 要启用模板驱动表单,首先我们需要在 app.module.ts 中导入 FormsModule。如下所示 −
import { BrowserModule } from '@angular/platform-browser';
import { NgModule } from '@angular/core';
import { AppRoutingModule } from './app-routing.module';
import { AppComponent } from './app.component';

//import FormsModule here
import { FormsModule } from '@angular/forms';

imports: [
   BrowserModule,
   AppRoutingModule,
   FormsModule   //Assign FormsModule
],
一旦导入FormsModule,应用程序就可以进行表单编程了。
创建简单表单
让我们在 Angular 8 中创建一个示例应用程序(template-form-app)来学习模板驱动的表单。
打开命令提示符并使用以下命令创建新的 Angular 应用程序 −
cd /go/to/workspace
ng new template-form-app
cd template-form-app
在AppComponent中配置FormsModule,如下所示 −
...

import { FormsModule } from '@angular/forms';

@NgModule({
   declarations: [
      AppComponent,
      TestComponent
   ],
   imports: [
      BrowserModule,
      FormsModule
   ],
   providers: [],
   bootstrap: [AppComponent]
})
export class AppModule { }
使用 Angular CLI 创建测试组件,如下所述 −
ng generate component test
上面创建了一个新组件,输出如下 −
CREATE src/app/test/test.component.scss (0 bytes)
CREATE src/app/test/test.component.html (19 bytes)
CREATE src/app/test/test.component.spec.ts (614 bytes)
CREATE src/app/test/test.component.ts (262 bytes)
UPDATE src/app/app.module.ts (545 bytes)
让我们创建一个简单的表单来显示用户输入的文本。
Add the below code in test.component.html file as follows −
<form #userName="ngForm" (ngSubmit)="onClickSubmit(userName.value)">
   <input type="text" name="username" placeholder="username" ngModel>
   <br/>
   <br/>
   <input type="submit" value="submit">
</form>
在这里,我们在 input 文本字段中使用了 ngModel 属性。
在test.component.ts文件中创建onClickSubmit()方法,如下所示
import { Component, OnInit } from '@angular/core';

@Component({
   selector: 'app-test',
   templateUrl: './test.component.html',
   styleUrls: ['./test.component.scss']
})

export class TestComponent implements OnInit {

   ngOnInit() {
   }
   onClickSubmit(result) {
      console.log("You have entered : " + result.username);
   }
}
打开app.component.html并更改如下指定的内容 −
<app-test></app-test>
最后,使用以下命令启动您的应用程序(如果尚未完成)−
ng serve
现在,运行您的应用程序,您可以看到以下响应 −
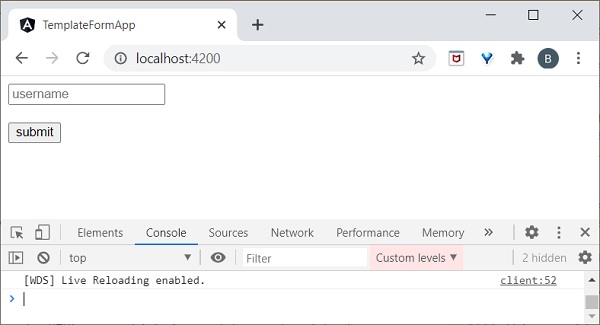
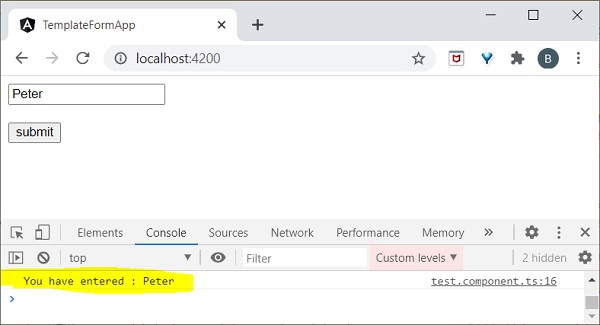
在输入文本字段中输入Peter,然后输入"提交"。 onClickSubmit 函数将被调用,用户输入的文本 Peter 将作为参数发送。 onClickSubmit会在控制台打印用户名,输出如下 −
响应式表单
反应式表单是在组件类内部创建的,因此它也称为模型驱动表单。 每个表单控件在组件中都会有一个对象,这为表单编程提供了更好的控制和灵活性。 Reactive Form基于结构化数据模型。 让我们了解如何在 Angular 中使用响应式表单。
配置响应式表单
要启用反应式表单,首先我们需要在 app.module.ts 中导入 ReactiveFormsModule。 它的定义如下
import { BrowserModule } from '@angular/platform-browser';
import { NgModule } from '@angular/core';

import { AppRoutingModule } from './app-routing.module';
import { AppComponent } from './app.component';
import { TestComponent } from './test/test.component';
import { FormsModule } from '@angular/forms';

//import ReactiveFormsModule here
import { ReactiveFormsModule } from '@angular/forms';

  imports: [
    BrowserModule,
    AppRoutingModule,
    FormsModule,
    ReactiveFormsModule   //Assign here
  ]
创建响应式表单
在创建响应式表单之前,我们需要了解以下概念,
FormControl − 定义单个表单控件的基本功能
FormGroup − 用于聚合集合表单控件的值
FormArray − 用于将表单控件的值聚合到一个数组中
ControlValueAccessor − 充当 Forms API 与 HTML DOM 元素之间的接口。
让我们在 Angular 8 中创建一个示例应用程序(reactive-form-app)来学习模板驱动的表单。
打开命令提示符并使用以下命令创建新的 Angular 应用程序 −
cd /go/to/workspace
ng new reactive-form-app
cd reactive-form-app
在AppComponent中配置ReactiveFormsModule,如下所示 −
...
import { ReactiveFormsModule } from '@angular/forms';

@NgModule({
   declarations: [
      AppComponent,
      TestComponent
   ],
   imports: [
      BrowserModule,
      ReactiveFormsModule
   ],
   providers: [],
   bootstrap: [AppComponent]
})
export class AppModule { }
使用 Angular CLI 创建一个 test 组件,如下所述 −
ng generate component test
上面创建了一个新组件,输出如下 −
CREATE src/app/test/test.component.scss (0 bytes)
CREATE src/app/test/test.component.html (19 bytes)
CREATE src/app/test/test.component.spec.ts (614 bytes)
CREATE src/app/test/test.component.ts (262 bytes)
UPDATE src/app/app.module.ts (545 bytes)
让我们创建一个简单的表单来显示用户输入的文本。
我们需要在TestComponent中导入FormGroup、FormControl类。
import { FormGroup, FormControl } from '@angular/forms';
在test.component.ts文件中创建onClickSubmit()方法,如下所示 −
import { Component, OnInit } from '@angular/core';
import { FormGroup, FormControl } from '@angular/forms';

@Component({
   selector: 'app-test',
   templateUrl: './test.component.html',
   styleUrls: ['./test.component.css']
})
export class TestComponent implements OnInit {
   userName;
   formdata;
   ngOnInit() {
      this.formdata = new FormGroup({
         userName: new FormControl("Tutorialspoint")
      });
   }
   onClickSubmit(data) {this.userName = data.userName;}
}
这里,
创建了 formGroup 的实例并将其设置为局部变量 formdata。
创建 FormControl 的实例并将其设置为 formdata 中的条目之一。
创建了一个 onClickSubmit() 方法,该方法设置局部变量 userName 及其参数。
在test.component.html文件中添加以下代码。
<div>
   <form [formGroup]="formdata" (ngSubmit)="onClickSubmit(formdata.value)" >
      <input type= text"  name="userName" placeholder="userName"
         formControlName = "userName">
      <br/>
      <br/>
      <input type="submit"  value="Click here">
   </form>
</div>
<p> Textbox result is: {{userName}} </p>
这里,
创建新表单并将其 formGroup 属性设置为 formdata。
已创建新的输入文本字段,并将 formControlName 设置为用户名。
ngSubmit 事件属性在表单中使用,并将 onClickSubmit() 方法设置为其值。
onClickSubmit() 方法获取 formdata 值作为其参数。
打开app.component.html并更改以下指定的内容 −
<app-test></app-test>
最后,使用以下命令启动您的应用程序(如果尚未完成) −
ng serve
现在,运行您的应用程序,您可以看到以下响应 −
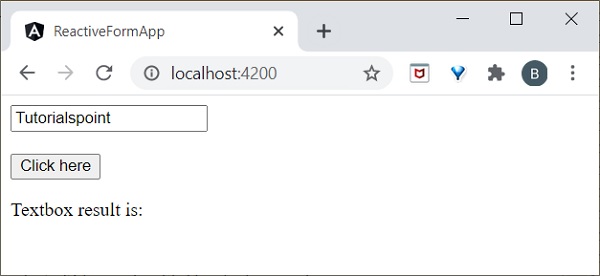
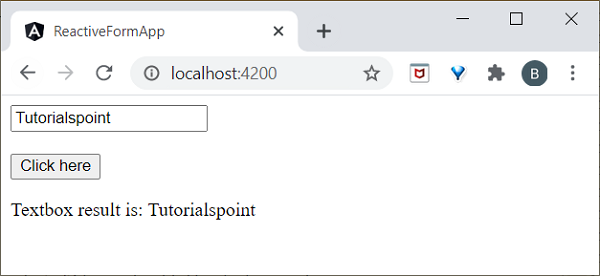
在输入文本字段中输入Tutorialspoint,然后输入提交。 onClickSubmit 函数将被调用,用户输入的文本 Peter 将作为参数发送。
我们将在下一章中执行表单验证。

