
如何在 Ubuntu 16.04 上配置和安装 ownCloud
在本文中,我们将学习如何在 Ubuntu 16.04 上配置和安装 ownCloud。 ownCloud 是一个文件共享服务器,允许用户将个人内容存储在一个集中式存储或位置,就像 Google Drive、Dropbox 等一样。主要区别在于,ownCloud 是一个免费开源应用程序,可以在我们自己的环境中进行配置,我们可以控制数据并通过有限的访问权限来保护它们。
先决条件
- 我们需要以下环境来设置和配置 ownCloud。
- Ubuntu 16.04 已安装,初始设置已完成,并且用户拥有 sudo 权限
- 需要安装 LAMP(Linux、Apache、MySQL 和 PHP)。
- SSL 证书用于保护 ownCloud 网站。
在 Ubuntu 上安装 ownCloud
默认情况下,ownCloud 软件包包含在 Ubuntu 默认存储库中,并且 ownCloud 维护其专用存储库Ubuntu
要将存储库复制到本地计算机,我们需要运行以下命令–
$ curl https://download.owncloud.org/download/repositories/stable/Ubuntu_16.04/Release.key | sudo apt-key add –
% Total % Received % Xferd Average Speed Time Time Time Current
Dload Upload Total Spent Left Speed
0 0 0 0 0 0 0 0 --:--:-- --:--:-- --:--:-- 0
100 1358 100 1358 0 0 896 0 0:00:01 0:00:01 --:--:-- 895
OK
我们将在源目录中为 apt 创建一个仓库地址
$ echo 'deb http://download.owncloud.org/download/repositories/stable/Ubuntu_16.04/ /' | sudo tee /etc/apt/sources.list.d/owncloud.list
$ deb http://download.owncloud.org/download/repositories/stable/Ubuntu_16.04/ /
添加新源后,我们将更新 apt-get 仓库并安装 ownCloud 软件包。
$ sudo apt-get update
Hit:1 http://in.archive.ubuntu.com/ubuntu xenial InRelease
Hit:2 http://security.ubuntu.com/ubuntu xenial-security InRelease
Hit:3 http://in.archive.ubuntu.com/ubuntu xenial-updates InRelease
Ign:4 http://download.owncloud.org/download/repositories/stable/Ubuntu_16.04 In Release
Hit:5 http://in.archive.ubuntu.com/ubuntu xenial-backports InRelease
Get:6 http://download.owncloud.org/download/repositories/stable/Ubuntu_16.04 Re lease [984 B]
Get:7 http://download.owncloud.org/download/repositories/stable/Ubuntu_16.04 Re lease.gpg [481 B]
Get:8 http://download.owncloud.org/download/repositories/stable/Ubuntu_16.04 Pa ckages [1,611 B]
Fetched 3,076 B in 1s (1,982 B/s)
Reading package lists... Done
$ sudo apt-get install owncloud
安装软件包后,我们需要重启 Apache 服务器,以使更改在安装时生效。
$ sudo systemctl restart apache2
为 ownCloud 配置 MySQL 数据库
我们需要为 ownCloud 创建单独的数据库,并为 owncloud 用户提供访问权限
$ mysql -u root -p
Enter password:
Welcome to the MySQL monitor. Commands end with ; or \g.
Your MySQL connection id is 4
Server version: 5.7.13-0ubuntu0.16.04.2 (Ubuntu)
Copyright (c) 2000, 2016, Oracle and/or its affiliates. All rights reserved.
Oracle is a registered trademark of Oracle Corporation and/or its
affiliates. Other names may be trademarks of their respective
owners.
Type 'help;' or '\h' for help. Type '\c' to clear the current input statement.
mysql> CREATE DATABASE owncloud;
Query OK, 1 row affected (0.00 sec)
mysql> GRANT ALL ON owncloud.* to 'owncloud'@'localhost' IDENTIFIED BY 'password';
Query OK, 0 rows affected, 1 warning (0.00 sec)
Mysql> flush privileges;
Mysql> \q
为 ownCloud 创建自己的 SSL 证书
我们将使用 openssl 生成 SSL 证书,并将 SSL 证书保存在 /etc/ssl 目录中。以下是为 ownCloud 生成 openssl 证书的命令 –
$ sudo openssl req -x509 -nodes -days 365 -newkey rsa:2048 -keyout /etc/ssl/private/apache-selfsigned.key -out /etc/ssl/certs/apache-selfsigned.crt
Generating a 2048 bit RSA private key
.............................................................................................+++
..............................................................+++
Writing new private key to '/etc/ssl/private/apache-selfsigned.key'
-----
You are about to be asked to enter information that will be incorporated into your certificate request.
What you are about to enter is what is called a Distinguished Name or a DN.

There are quite a few fields but you can leave some blank
For some fields there will be a default value,
If you enter '.', the field will be left blank.
-----
Country Name (2 letter code) [AU]:IN
State or Province Name (full name) [Some-State]:Telengana
Locality Name (eg, city) []:Hyderabad
Organization Name (eg, company) [Internet Widgits Pty Ltd]:xxxx
Organizational Unit Name (eg, section) []:owncloud
Common Name (e.g. server FQDN or YOUR name) []:owncloud
Email Address []:admin@owncloud.com
为 Owncloud 配置 Apache SSL 虚拟主机文件
我们将备份 /etc/apache2/sites-available 目录中的 default-ssl.conf 文件
$ sudo cp /etc/apache2/sites-available/default-ssl.conf /etc/apache2/sites-available/default-ssl.conf.bak
$ sudo vi /etc/apache2/sites-available/default-ssl.conf
<IfModule mod_ssl.c>
<VirtualHost _default_:443>
ServerAdmin owncloud.com
ServerName 192.168.1.117
DocumentRoot /var/www/owncloud
ErrorLog ${APACHE_LOG_DIR}/error.log
CustomLog ${APACHE_LOG_DIR}/access.log combined
SSLEngine on
SSLCertificateFile /etc/ssl/certs/apache-selfsigned.crt
SSLCertificateKeyFile /etc/ssl/private/apache-selfsigned.key
<FilesMatch "\.(cgi|shtml|phtml|php)$">
SSLOptions +StdEnvVars
</FilesMatch>
<Directory /usr/lib/cgi-bin>
SSLOptions +StdEnvVars
</Directory>
BrowserMatch "MSIE [2-6]" \
nokeepalive ssl-unclean-shutdown \
downgrade-1.0 force-response-1.0
</VirtualHost>
</IfModule>
SSL 配置完成后,我们需要重启 Apache 以使更改在机器上生效。
$ sudo systemctl restart apache2.service
配置 ownCloud
要配置 ownCloud,我们需要访问网站 URL,打开任意浏览器并输入 https://your-IP-Address/owncloud。
这里我使用的是 https://192.168.1.117/owncloud
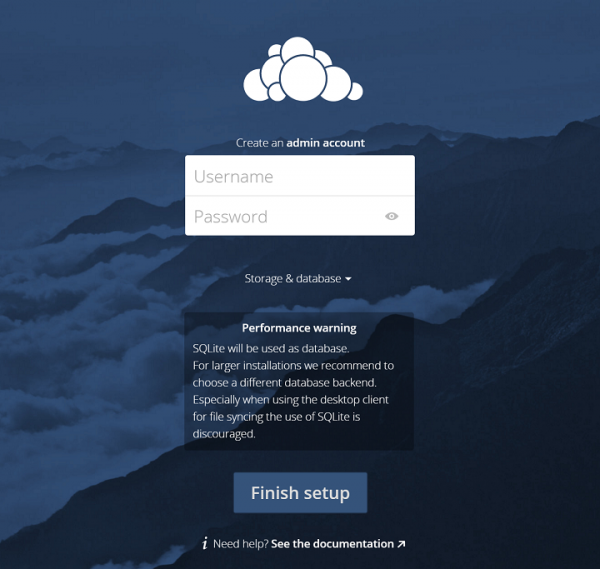
首先,我们需要为 ownCloud 创建一个管理员帐户。
输入输入管理员帐户的用户名和密码后,点击"存储和数据库",如下所示——
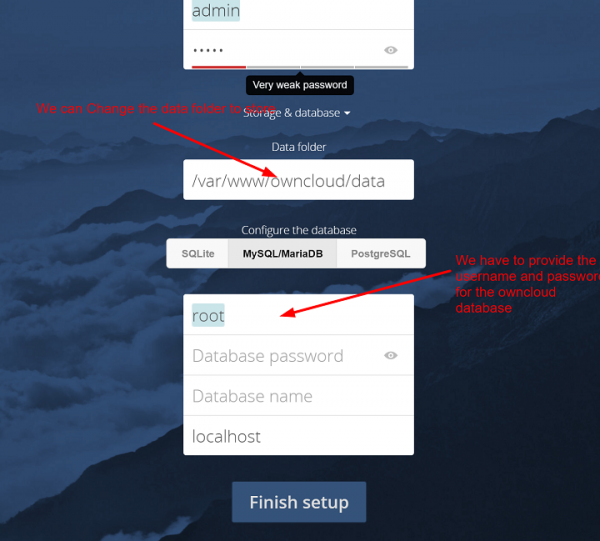
如果要更改客户端或用户上传数据的文件夹,可以在此处更改数据库名称,同时还需要提供访问 MySQL 数据库的用户名和密码,以及我们在前面步骤中创建的数据库名称。
进入配置后,点击"完成设置"屏幕底部的按钮。
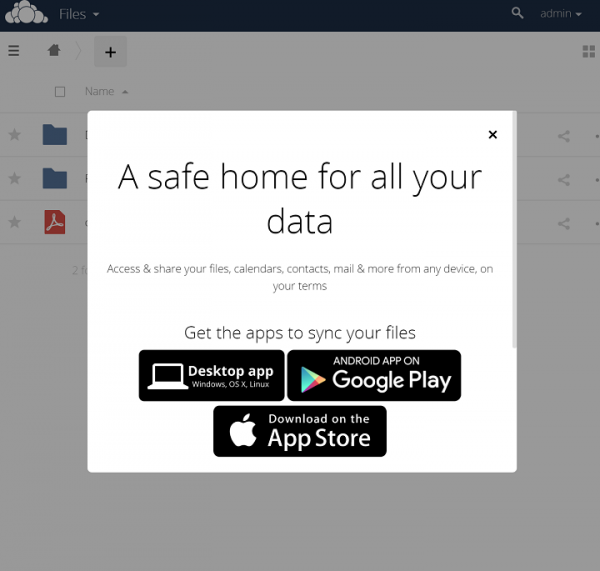
配置完成后,我们可以看到一个欢迎启动画面。
点击启动画面上角的 X,我们进入主界面。
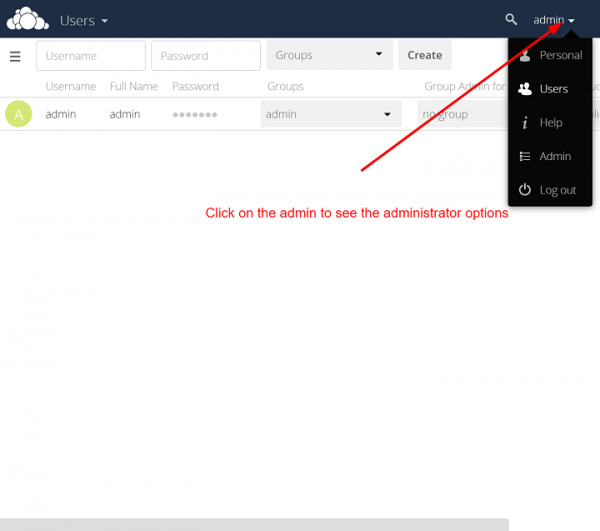
点击右上角的"管理员"设置管理员选项
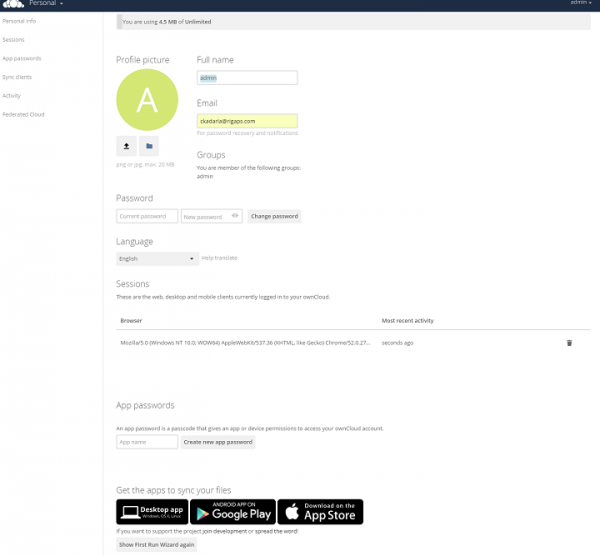
点击"个人信息"设置管理员的全名和应用密码。当用户通过设备使用应用程序访问 ownCloud 时使用,此密码将授予访问 ownCloud 帐户的权限。
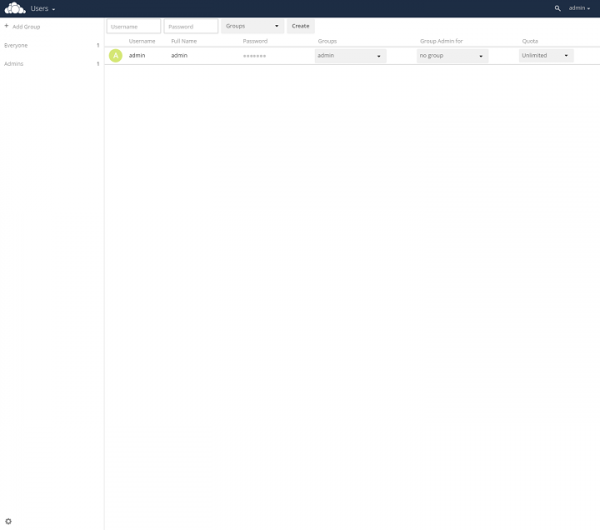
为 OwnCloud 创建用户
点击屏幕右上角的"管理员"选项,然后点击"用户"
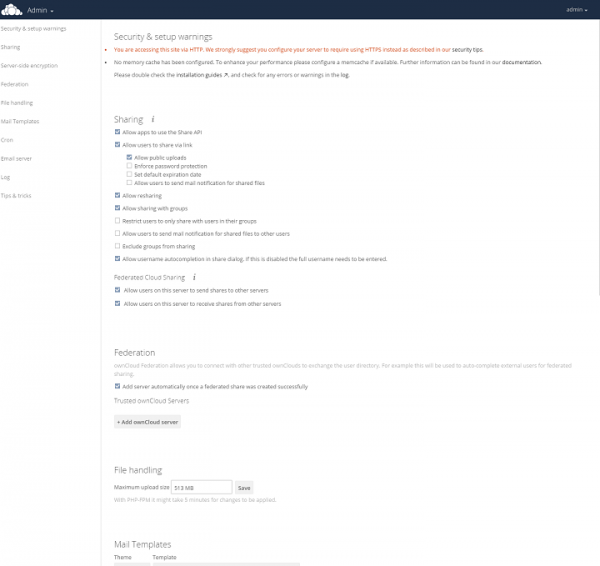
如需更多管理选项,您可以点击右上角的"管理员",然后点击"管理员",您将看到更多设置和保护您的ownCloud。
完成这些设置和配置后,我们现在可以在 Ubuntu 16.04 上配置我们自己的云。ownCloud 的主要优势在于,我们可以保护存储在我们自己环境中的信息和数据。我们还可以通过公共 URL 在用户之间共享内容。

