Angular7 - Materials 组件库
Materials 为您的项目提供了许多内置模块。 自动完成、日期选择器、滑块、菜单、网格和工具栏等功能可与 Angular 7 中的materials一起使用。
要使用materials,我们需要导入包。 Angular 2 也具有上述所有功能,但它们作为 @angular/core 模块 的一部分提供。 从 Angular 4 开始,materials模块已通过单独的模块@angular/materials 提供。 这有助于用户仅导入项目中所需的materials。
要开始使用materials,您需要安装两个软件包:materials 和 cdk。 materials组件依赖于动画模块来实现高级功能。 因此,您需要相同的动画包@angular/animations。 该软件包已在上一章中更新。 我们已经在前面的章节中为虚拟和拖放模块安装了 @angular/cdk 包。
以下是将materials添加到您的项目的命令 −
npm install --save @angular/material
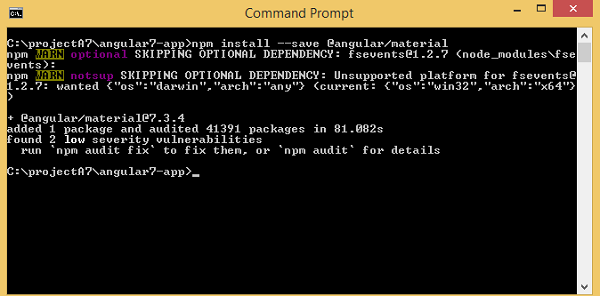
现在让我们看看 package.json。 @Angular/Material 和 @Angular/cdk 已安装。
{
   "name": "angular7-app",
   "version": "0.0.0",
   "scripts": {
      "ng": "ng",
      "start": "ng serve",
      "build": "ng build",
      "test": "ng test",
      "lint": "ng lint",
      "e2e": "ng e2e"
   },
   "private": true,
   "dependencies": {
      "@angular/animations": "~7.2.0",
      "@angular/cdk": "^7.3.4",
      "@angular/common": "~7.2.0",
      "@angular/compiler": "~7.2.0",
      "@angular/core": "~7.2.0",
      "@angular/forms": "~7.2.0",
      "@angular/material": "^7.3.4",
      "@angular/platform-browser": "~7.2.0",
      "@angular/platform-browser-dynamic": "~7.2.0",
      "@angular/router": "~7.2.0",
      "core-js": "^2.5.4",
      "rxjs": "~6.3.3",
      "tslib": "^1.9.0",
      "zone.js": "~0.8.26"
   },
   "devDependencies": {
      "@angular-devkit/build-angular": "~0.13.0",
      "@angular/cli": "~7.3.2",
      "@angular/compiler-cli": "~7.2.0",
      "@angular/language-service": "~7.2.0",
      "@types/node": "~8.9.4",
      "@types/jasmine": "~2.8.8",
      "@types/jasminewd2": "~2.0.3",
      "codelyzer": "~4.5.0",
      "jasmine-core": "~2.99.1",
      "jasmine-spec-reporter": "~4.2.1",
      "karma": "~3.1.1",
      "karma-chrome-launcher": "~2.2.0",
      "karma-coverage-istanbul-reporter": "~2.0.1",
      "karma-jasmine": "~1.1.2",
      "karma-jasmine-html-reporter": "^0.2.2",
      "protractor": "~5.4.0",
      "ts-node": "~7.0.0",
      "tslint": "~5.11.0",
      "typescript": "~3.2.2"
   }
}
我们突出显示了为处理materials而安装的软件包。
我们现在将导入父模块中的模块 - app.module.ts 如下所示。
import { BrowserModule } from '@angular/platform-browser';
import { NgModule } from '@angular/core';
import { AppRoutingModule , RoutingComponent} from './app-routing.module';
import { AppComponent } from './app.component';
import { NewCmpComponent } from './new-cmp/new-cmp.component';
import { ChangeTextDirective } from './change-text.directive';
import { SqrtPipe } from './app.sqrt';
import { MyserviceService } from './myservice.service';
import { HttpClientModule } from '@angular/common/http';
import { ScrollDispatchModule } from '@angular/cdk/scrolling';
import { DragDropModule } from '@angular/cdk/drag-drop';
import { ReactiveFormsModule } from '@angular/forms';
import { BrowserAnimationsModule } from '@angular/platform-browser/animations';
import { MatButtonModule, MatMenuModule, MatSidenavModule } from '@angular/material';

@NgModule({
   declarations: [
      SqrtPipe,
      AppComponent,
      NewCmpComponent,
      ChangeTextDirective,
      RoutingComponent
   ],
   imports: [
      BrowserModule,
      AppRoutingModule,
      HttpClientModule,
      ScrollDispatchModule,
      DragDropModule,
      ReactiveFormsModule,
      BrowserAnimationsModule,
      MatButtonModule,
      MatMenuModule,
      MatSidenavModule
   ],
   providers: [MyserviceService],
   bootstrap: [AppComponent]
})
export class AppModule { }
在上面的文件中,我们从@angular/materials导入了以下模块。
import { MatButtonModule, MatMenuModule, MatSidenavModule } from '@angular/material';
导入数组中也使用了相同的内容,如下所示 −
imports: [
   BrowserModule,
   AppRoutingModule,
   HttpClientModule,
   ScrollDispatchModule,
   DragDropModule,
   ReactiveFormsModule,
   BrowserAnimationsModule,
   MatButtonModule,
   MatMenuModule,
   MatSidenavModule
],
app.component.ts如下所示 −
import { Component } from '@angular/core';
@Component({
   selector: 'app-root',
   templateUrl: './app.component.html',
   styleUrls: ['./app.component.css']
})
export class AppComponent {
   constructor() {}
}
现在让我们在styles.css中添加material-css支持。
@import "~@angular/material/prebuilt-themes/indigo-pink.css";
现在让我们在 app.component.html 中添加materials
菜单
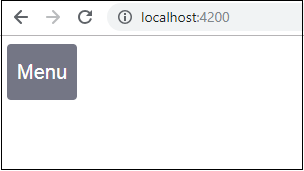
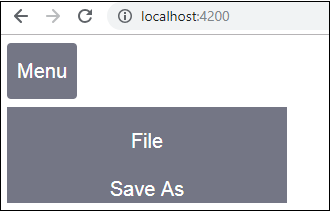
要添加菜单,请使用 <mat-menu></mat-menu>。 文件和另存为项目将添加到mat-menu下的按钮中。添加了一个主按钮菜单。通过使用 [matMenuTriggerFor]="menu" 并使用 # in<mat-menu> 的菜单来给出 <mat-menu> 的引用。
app.component.html
<button mat-button [matMenuTriggerFor] = "menu">Menu</button>
<mat-menu #menu = "matMenu">
   <button mat-menu-item> File </button>
   <button mat-menu-item> Save As </button>
</mat-menu>
下图显示在浏览器中 −
点击菜单将显示其中的项目 −
sidenav 侧边导航
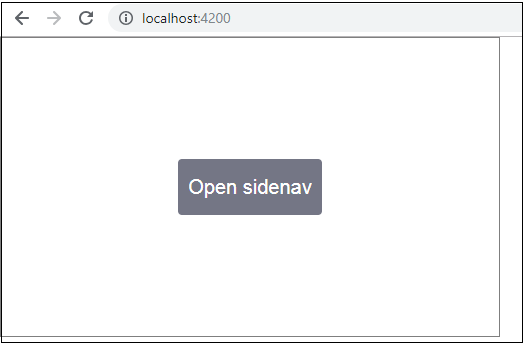
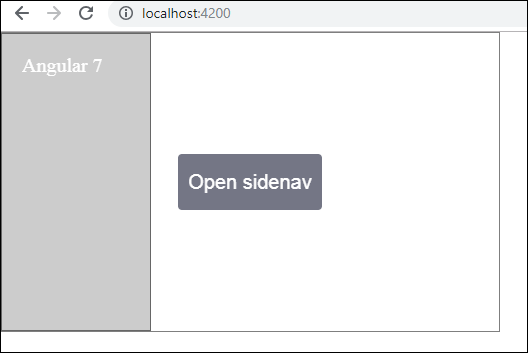
要添加 sidenav 侧边导航,我们需要 <mat-sidenav-container></mat-sidenav-container>。 <mat-sidenav></mat-sidenav> 作为子项添加到容器中。 添加了另一个 div,它通过使用 (click)="sidenav.open()" 触发 sidenav。
app.component.html
<mat-sidenav-container class="example-container" fullscreen>
   <mat-sidenav #sidenav class = "example-sidenav">
      Angular 7
   </mat-sidenav>
   <div class = "example-sidenav-content">
      <button type = "button" mat-button (click) = "sidenav.open()">
         Open sidenav
      </button>
   </div>
</mat-sidenav-container>
app.component.css
.example-container {
   width: 500px;
   height: 300px;
   border: 1px solid rgba(0, 0, 0, 0.5);
}
.example-sidenav {
   padding: 20px;
   width: 150px;
   font-size: 20px;
   border: 1px solid rgba(0, 0, 0, 0.5);
   background-color: #ccc;
   color:white;
}
以下是浏览器中菜单和侧导航的显示 −
如果我们单击"Open Sidenav",则会在左侧打开以下面板 −
日期选择器
现在让我们使用materials添加一个日期选择器。 要添加日期选择器,我们需要导入显示日期选择器所需的模块。
在app.module.ts中,我们为日期选择器导入了以下模块,如下所示 −
import { BrowserModule } from '@angular/platform-browser';
import { NgModule } from '@angular/core';
import { AppRoutingModule , RoutingComponent} from './app-routing.module';
import { AppComponent } from './app.component';
import { NewCmpComponent } from './new-cmp/new-cmp.component';
import { ChangeTextDirective } from './change-text.directive';
import { SqrtPipe } from './app.sqrt';
import { MyserviceService } from './myservice.service';
import { HttpClientModule } from '@angular/common/http';
import { ScrollDispatchModule } from '@angular/cdk/scrolling';
import { DragDropModule } from '@angular/cdk/drag-drop';
import { ReactiveFormsModule } from '@angular/forms';
import { BrowserAnimationsModule } from '@angular/platform-browser/animations';
import { MatDatepickerModule, MatInputModule, MatNativeDateModule } from '@angular/material';

@NgModule({
   declarations: [
      SqrtPipe,
      AppComponent,
      NewCmpComponent,
      ChangeTextDirective,
      RoutingComponent
   ],
   imports: [
      BrowserModule,
      AppRoutingModule,
      HttpClientModule,
      ScrollDispatchModule,
      DragDropModule,
      ReactiveFormsModule,
      BrowserAnimationsModule,
      MatDatepickerModule,
      MatInputModule,
      MatNativeDateModule
   ],
   providers: [MyserviceService],
   bootstrap: [AppComponent]
})
export class AppModule { }
在这里,我们导入了 MatDatepickerModule、MatInputModule 和 MatNativeDateModule 等模块。
现在,app.component.ts如下所示 −
import { Component } from '@angular/core';
@Component({
   selector: 'app-root',
   templateUrl: './app.component.html', s
   tyleUrls: ['./app.component.css']
})
export class AppComponent {
   constructor() {}
}
app.component.html如下所示 −
<mat-form-field>
   <input matInput [matDatepicker] = "picker" placeholder = "Choose a date">
   <mat-datepicker-toggle matSuffix [for] = "picker"></mat-datepicker-toggle>
   <mat-datepicker #picker></mat-datepicker>
</mat-form-field>
在 style.css 中添加全局 css −
/* 您可以将全局样式添加到该文件,也可以导入其他样式文件 */
@import '~@angular/material/prebuilt-themes/deeppurple-amber.css';
body {
   font-family: Roboto, Arial, sans-serif;
   margin: 10;
}
.basic-container {
   padding: 30px;
}
.version-info {
   font-size: 8pt;
   float: right;
}
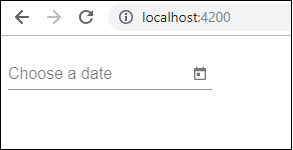
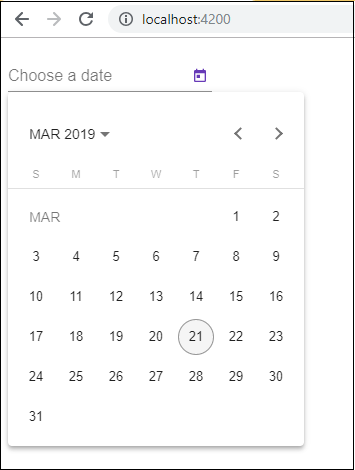
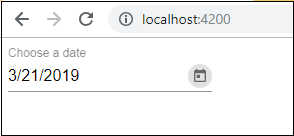
日期选择器在浏览器中显示如下所示 −