Angular7 - 测试和构建 Angular7 项目
本章将讨论以下主题 −
- 测试 Angular 7 项目
- 构建 Angular 7 项目
测试 Angular 7 项目
在项目设置过程中,测试所需的软件包已安装。 为每个新组件、服务、指令等创建一个 .spec.ts 文件。我们将使用 jasmine 来编写测试用例。
对于添加到组件、服务、指令或创建的任何其他文件的任何更改,您可以将测试用例包含在相应的 .spec.ts 文件中。 因此,大部分单元测试可以从一开始就涵盖在内。
运行测试用例,使用的命令如下 −
ng test
下面是 app.component.ts 的 app.component.spec.ts 文件−
import { TestBed, async } from '@angular/core/testing';
import { RouterTestingModule } from '@angular/router/testing';
import { AppComponent } from './app.component';

describe('AppComponent', () => {
   beforeEach(async(() => {
      TestBed.configureTestingModule({
         imports: [
            RouterTestingModule
         ],
         declarations: [
            AppComponent
         ],
      }).compileComponents();
   }));
   it('should create the app', () => {
      const fixture = TestBed.createComponent(AppComponent);
      const app = fixture.debugElement.componentInstance;
      expect(app).toBeTruthy();
   });
   it(`should have as title 'angular7-app'`, () => {
      const fixture = TestBed.createComponent(AppComponent);
      const app = fixture.debugElement.componentInstance;
      expect(app.title).toEqual('angular7-app');
   });
   it('should render title in a h1 tag', () => {
      const fixture = TestBed.createComponent(AppComponent);
      fixture.detectChanges();
      const compiled = fixture.debugElement.nativeElement;
      expect(compiled.querySelector('h1').textContent).toContain(
         'Welcome to angular7-app!');
   })
});
app.component.ts
import { Component } from '@angular/core';
@Component({
   selector: 'app-root',
   templateUrl: './app.component.html',
   styleUrls: ['./app.component.css']
})
export class AppComponent {
   title = 'angular7-app';
}
现在让我们运行命令来查看测试用例的运行情况。
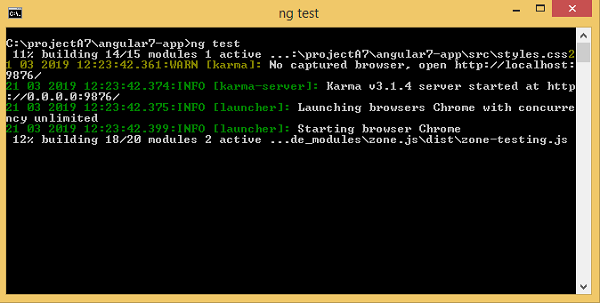
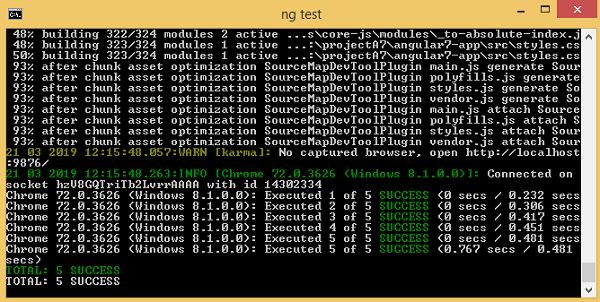
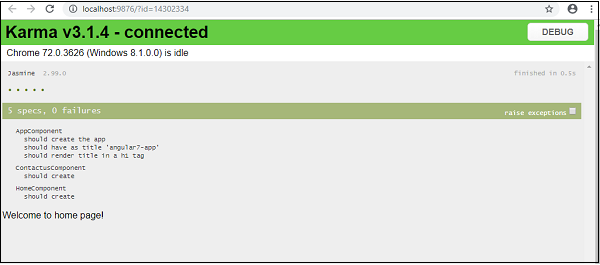
测试用例状态显示在命令行中,如上所示,并且还将在浏览器中打开,如下所示 −
如果出现任何失败,将会显示如下详细信息 −
为此,让我们按如下方式更改 app.component.spec.ts −
import { TestBed, async } from '@angular/core/testing';
import { RouterTestingModule } from '@angular/router/testing';
import { AppComponent } from './app.component';

describe('AppComponent', () => {
   beforeEach(async(() => {
      TestBed.configureTestingModule({
         imports: [
            RouterTestingModule
         ],
         declarations: [
            AppComponent
         ],
      }).compileComponents();
   }));
   it('should create the app', () => {
      const fixture = TestBed.createComponent(AppComponent);
      const app = fixture.debugElement.componentInstance;
      expect(app).toBeTruthy();
   });
   it(`should have as title 'angular7-app'`, () => {
      const fixture = TestBed.createComponent(AppComponent);
      const app = fixture.debugElement.componentInstance;
      expect(app.title).toEqual('Angular 7'); // change the
      title from angular7-app to Angular 7
   });
   it('should render title in a h1 tag', () => {
      const fixture = TestBed.createComponent(AppComponent);
      fixture.detectChanges();
      const compiled = fixture.debugElement.nativeElement;
      expect(compiled.querySelector('h1').textContent).toContain(
         'Welcome to angular7-app!');
   });
});
在上面的文件中,测试用例检查标题 Angular 7。 但在 app.component.ts 中,我们有标题 angular7-app ,如下所示 −
import { Component } from '@angular/core';
@Component({
   selector: 'app-root',
   templateUrl: './app.component.html',
   styleUrls: ['./app.component.css']
})
export class AppComponent {
   title = 'angular7-app';
}
此处测试用例将失败,下面是命令行和浏览器中显示的详细信息。
在命令行中
命令行中显示以下屏幕 −
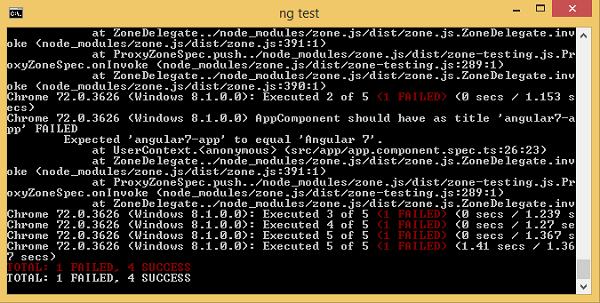
在浏览器中
浏览器中显示以下屏幕 −
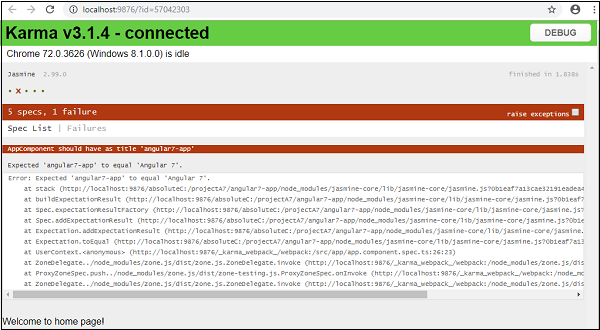
项目的所有失败的测试用例都将在命令行和浏览器中显示,如上所示。
同样,您可以为您的服务、指令和将添加到项目中的新组件编写测试用例。
构建 Angular 7 项目
完成 Angular 中的项目后,我们需要构建它,以便它可以在生产或陈述中使用。
需要在 src/environments 中定义构建配置,即生产、登台、开发、测试。
目前,我们在 src/environment 中定义了以下环境 −
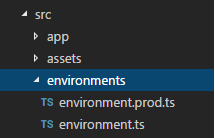
您可以根据您的构建将文件添加到 src/environment,即environment.staging.ts、environment.testing.ts 等。
目前我们会尝试搭建生产环境。 文件 environment.ts 包含默认环境设置和文件详细信息,如下所示 −
export const environment = {
   production: false
};
要构建用于生产的文件,我们需要在environment.ts中设置 Production: true,如下所示 −
export const environment = {
   production: true
};
必须将默认环境文件导入到组件内部,如下所示 −
app.component.ts
import { Component } from '@angular/core';
import { environment } from './../environments/environment';

@Component({
   selector: 'app-root',
   templateUrl: './app.component.html',
   styleUrls: ['./app.component.css']
})
export class AppComponent {
   title = 'angular7-app';
}
我们尝试执行的从默认到生产的环境替换在 angular.json fileReplacements 部分中定义,如下所示 −
"production": {
   "fileReplacements": [
      {
         "replace": "src/environments/environment.ts",
         "with": "src/environments/environment.prod.ts"
      }
   ],
}
当构建命令运行时,该文件将替换为src/environments/environment.prod.ts。 可以在此处添加额外的配置(例如暂存或测试),如下例所示 −
"configurations": {
   "production": { ... },
   "staging": {
      "fileReplacements": [
         {
            "replace": "src/environments/environment.ts",
            "with": "src/environments/environment.staging.ts"
         }
      ]
   }
}
因此运行构建的命令如下 −
ng build --configuration = production // for production environmnet
ng build --configuration = staging // for stating enviroment
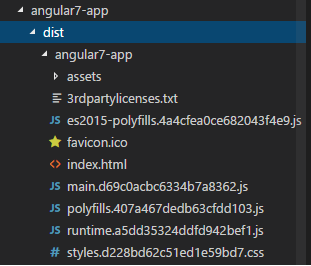
现在让我们运行用于生产的构建命令,该命令将在我们的项目中创建一个 dist 文件夹,其中将包含构建后的最终文件。
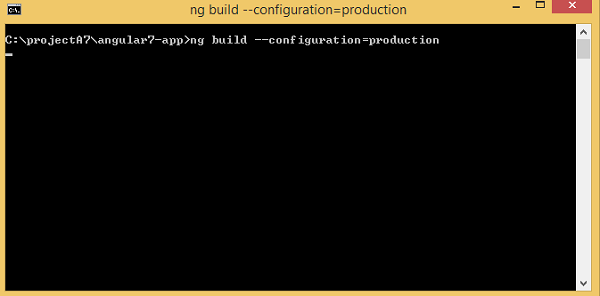
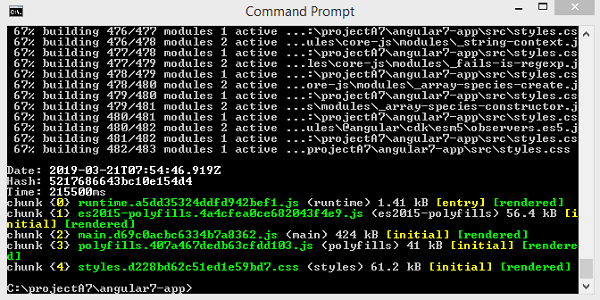
最终文件构建在 dist/ 文件夹内,该文件夹可以托管在您的生产服务器上。