
BabylonJS - 网格固体粒子
固体粒子系统在网格上更新。我们在网格上看到的所有属性都可以在固体粒子上使用。
在下面给出的演示中,我们创建了标准材质并将其分配给盒子和球体。
要创建固体粒子系统,请执行以下命令 −
var SPS = new BABYLON.SolidParticleSystem('SPS', scene);
SPS.addShape(sphere, 500);
SPS.addShape(box, 500);
var mesh = SPS.buildMesh();
要将粒子添加到系统,请使用 addShape 方法。它需要形状等参数,即要添加的网格及其数量。
在演示链接中,我们将添加球体和盒子。数量为 500,这意味着有 500 个球体和盒子。
sphere.dispose(); // 释放内存
box.dispose();
dispose () 方法有助于释放内存,具体操作如上所示。
粒子属性
现在让我们看看粒子属性的工作原理 −
var speed = 1.5;
var grave = -0.01;
我们在演示中对粒子系统使用以下方法 −
initParticles −此方法有助于初始化粒子。SPS.nbParticles 提供所有可用的粒子。
recycleParticle − 您可以使用此方法回收粒子。它包含单个粒子的详细信息。
updateParticle − 允许更新粒子属性。
试用提供的演示,您可以更改属性并查看输出。
演示
<!doctype html>
<html>
   <head>
      <meta charset = "utf-8">
      <title>BabylonJs - Basic Element-Creating Scene</title>
      <script src = "babylon.js"></script>
      <style>
         canvas {width: 100%; height: 100%;}
      </style>
   </head>

   <body>
      <canvas id = "renderCanvas"></canvas>
      <script type = "text/javascript">
         var canvas = document.getElementById("renderCanvas");
         var engine = new BABYLON.Engine(canvas, true);

         var createScene  = function() {
            var scene = new BABYLON.Scene(engine);
            scene.clearColor = new BABYLON.Color3( .1, .2, .4);

            var camera = new BABYLON.ArcRotateCamera("camera1",  0, 0, 0, new BABYLON.Vector3(0, 0, -0), scene);
            camera.setPosition(new BABYLON.Vector3(0, 50, -300));
            camera.attachControl(canvas, true);

            var light = new BABYLON.HemisphericLight("light1", new BABYLON.Vector3(1, 1, 0), scene);
            light.intensity = 0.9;

            var pl = new BABYLON.PointLight("pl", new BABYLON.Vector3(0, 0, 0), scene);
            pl.diffuse = new BABYLON.Color3(1, 1, 1);
            pl.specular = new BABYLON.Color3(0.2, 0.2, 0.8);
            pl.intensity = 0.75;

            // 纹理和材质
            var url = "images/gem1.jpg";
            var mat = new BABYLON.StandardMaterial("mat1", scene);
            var texture = new BABYLON.Texture(url, scene);
            mat.diffuseTexture = texture;

            // SPS creation
            var sphere = BABYLON.Mesh.CreateSphere("sphere", 32, 2, scene);
            var box = BABYLON.MeshBuilder.CreateBox("box", { size: 2 }, scene);
            var SPS = new BABYLON.SolidParticleSystem('SPS', scene);
            SPS.addShape(sphere, 500);
            SPS.addShape(box, 500);
            var mesh = SPS.buildMesh();
            mesh.material = mat;
            mesh.position.y = -50;
            sphere.dispose();  // free memory
            box.dispose();

            // SPS behavior definition
            var speed = 1.5;
            var gravity = -0.01;

            // init
            SPS.initParticles = function() {
               // just recycle everything
               for (var p = 0; p < this.nbParticles; p++) {
                  this.recycleParticle(this.particles[p]);
               }
            };

            // recycle
            SPS.recycleParticle = function(particle) {
               particle.position.x = 0;
               particle.position.y = 0;
               particle.position.z = 0;
               particle.velocity.x = (Math.random() - 0.5) * speed;
               particle.velocity.y = Math.random() * speed;
               particle.velocity.z = (Math.random() - 0.5) * speed;

               var scale = Math.random() +0.5;
               particle.scale.x = scale;
               particle.scale.y = scale;
               particle.scale.z = scale;
               particle.rotation.x = Math.random() * 3.5;
               particle.rotation.y = Math.random() * 3.5;
               particle.rotation.z = Math.random() * 3.5;

               particle.color.r = Math.random() * 0.6 + 0.5;
               particle.color.g = Math.random() * 0.6 + 0.5;
               particle.color.b = Math.random() * 0.6 + 0.5;
               particle.color.a = Math.random() * 0.6 + 0.5;
            };

            // update : will be called by setParticles()
            SPS.updateParticle = function(particle) {
               // some physics here
               if (particle.position.y < 0) {
                  this.recycleParticle(particle);
               }
               particle.velocity.y += gravity; // apply gravity to y
               (particle.position).addInPlace(particle.velocity);  // update particle new position
               particle.position.y += speed / 2;

               var sign = (particle.idx % 2 == 0) ? 1 : -1;  // rotation sign and new value
               particle.rotation.z += 0.1 * sign;
               particle.rotation.x += 0.05 * sign;
               particle.rotation.y += 0.008 * sign;
            };

            // init all particle values and set them once to apply textures, colors, etc
            SPS.initParticles();
            SPS.setParticles();

            // Tuning :
            SPS.computeParticleColor = false;
            SPS.computeParticleTexture = false;

            //scene.debugLayer.show();
            // animation
            scene.registerBeforeRender(function() {
               SPS.setParticles();
               pl.position = camera.position;
               SPS.mesh.rotation.y += 0.01;
            });
            return scene;
         };
         var scene = createScene();
         engine.runRenderLoop(function() {
            scene.render();
         });
      </script>
   </body>
</html>
输出
上述代码行生成以下输出 −
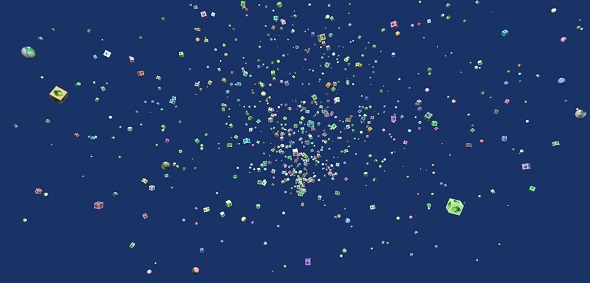
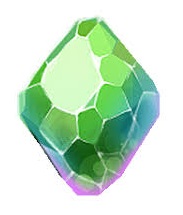
在此演示中,我们使用了图像 gem1.jpg。图像存储在本地的 images/ 文件夹中,也粘贴在下面以供参考。您可以下载您选择的任何图像并在演示链接中使用。
images/gem1.jpg
 babylonjs_mesh.html
