Meteor - 表单
在本章中,我们将学习如何使用 Meteor 表单。
文本输入
首先,我们将创建一个带有文本输入字段和提交按钮的 form 元素。
meteorApp.html
<head>
   <title>meteorApp</title>
</head>

<body>
   <div>
      {{> myTemplate}}
   </div>
</body>

<template name = "myTemplate">
   <form>
      <input type = "text" name = "myForm">
      <input type = "submit" value = "SUBMIT">
   </form>
</template>
在 JavaScript 文件中,我们将创建 submit 事件。我们需要阻止默认事件行为以阻止浏览器刷新。接下来,我们将获取输入字段的内容并将其分配给 textValue 变量。
在下面的示例中,我们只会将该内容记录到开发人员控制台。我们最后要做的是清除输入字段。
meteorApp.js
if (Meteor.isClient) {

   Template.myTemplate.events({

      'submit form': function(event) {
         event.preventDefault();
         var textValue = event.target.myForm.value;
         console.log(textValue);
         event.target.myForm.value = "";
      }
   });
}
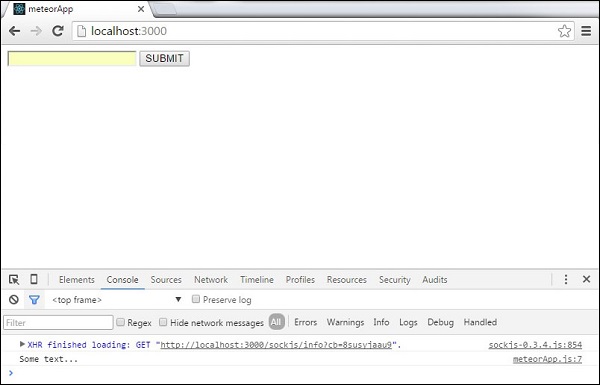
当我们在输入字段中输入"Some text..."并提交时,控制台将记录我们输入的文本。
单选按钮
单选按钮可以使用类似的概念。
meteorApp.html
<head>
   <title>meteorApp</title>
</head>

<body>
   <div>
      {{> myTemplate}}
   </div>
</body>

<template name = "myTemplate">
   <form>
      <input type = "radio" name = "myForm" value = "form-1">FORM 1
      <input type = "radio" name = "myForm" value = "form-2">FORM 2
      <input type = "submit" value = "SUBMIT">
   </form>
</template>
meteorApp.js
if (Meteor.isClient) {

   Template.myTemplate.events({

      'submit form': function(event) {
         event.preventDefault();
         var radioValue = event.target.myForm.value;
         console.log(radioValue);
      }
   });
}
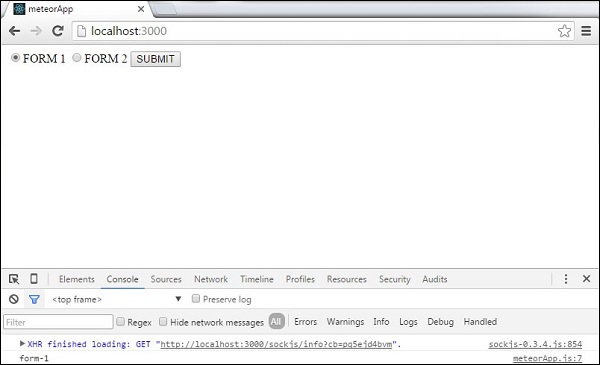
当我们提交第一个按钮时,控制台将显示以下输出。
复选框
以下示例展示了如何使用复选框。您可以看到我们只是在重复相同的过程。
meteorApp.html
<head>
   <title>meteorApp</title>
</head>

<body>
   <div>
      {{> myTemplate}}
   </div>
</body>

<template name = "myTemplate">
   <form>
      <input type = "checkbox" name = "myForm" value = "form-1">FORM 1
      <input type = "checkbox" name = "myForm" value = "form-2">FORM 2
      <input type = "submit" value = "SUBMIT">
   </form>
</template>
meteorApp.js
if (Meteor.isClient) {

   Template.myTemplate.events({

      'submit form': function(event) {
         event.preventDefault();
         var checkboxValue1 = event.target.myForm[0].checked;
         var checkboxValue2 = event.target.myForm[1].checked;
         console.log(checkboxValue1);
         console.log(checkboxValue2);
      }
   });
}
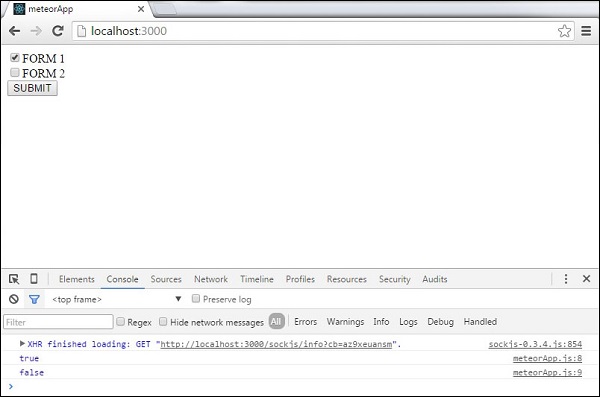
提交表单后,选中的输入将被记录为 true,而未选中的输入将被记录为 false。
选择下拉列表
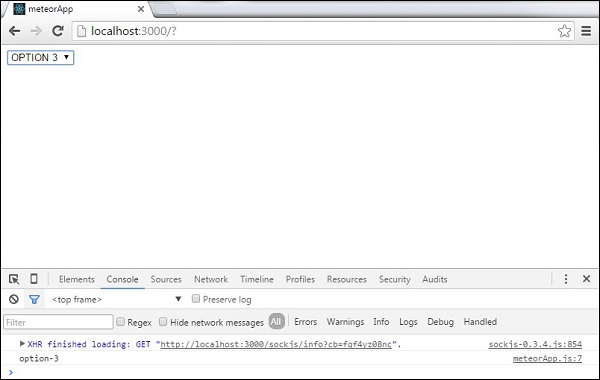
在下面的示例中,我们将学习如何使用 select 元素。我们将使用 change 事件在每次选项更改时更新数据。
meteorApp.html
<head>
   <title>meteorApp</title>
</head>

<body>
   <div>
      {{> myTemplate}}
   </div>
</body>

<template name = "myTemplate">
   <select>
      <option name = "myOption" value = "option-1">OPTION 1</option>
      <option name = "myOption" value = "option-2">OPTION 2</option>
      <option name = "myOption" value = "option-3">OPTION 3</option>
      <option name = "myOption" value = "option-4">OPTION 4</option>
   </select>
</template>
meteorApp.js
if (Meteor.isClient) {

   Template.myTemplate.events({

      'change select': function(event) {
         event.preventDefault();
         var selectValue = event.target.value;
         console.log(selectValue);
      }
   });
}
如果我们选择第三个选项,控制台将记录选项值。