
如何在 Excel 中将多个 XLS 文件转换为 XLSX 文件?
ms excelmicrosoft technologiescomputers更新于 2025/2/24 14:36:17
Excel 97 到 Excel 2003 之间的 Excel 文件默认格式为 XLS,而以上版本的默认格式为 XLSX。两者都是 Excel 文件扩展名。如果我们的系统中有一些旧文件,并且需要使用新功能,那么将它们转换为新扩展名就非常有必要。如果只有一个文件,我们可以使用"另存为"功能来完成任务,但如果是多个文件,则可能会很耗时。我们可以使用 VBA 应用程序以更快的方式完成任务。阅读本教程,了解如何在 Excel 中将多个 XLS 文件转换为 XLSX 文件。
在 Excel 中将多个 XLS 文件转换为 XLSX 文件
在这里,我们将首先创建一个模块,然后运行它来转换文件。让我们看一下使用 VBA 应用程序在 Excel 中将多个 Xls 文件转换为 Xlsx 文件的简单过程。
步骤 1
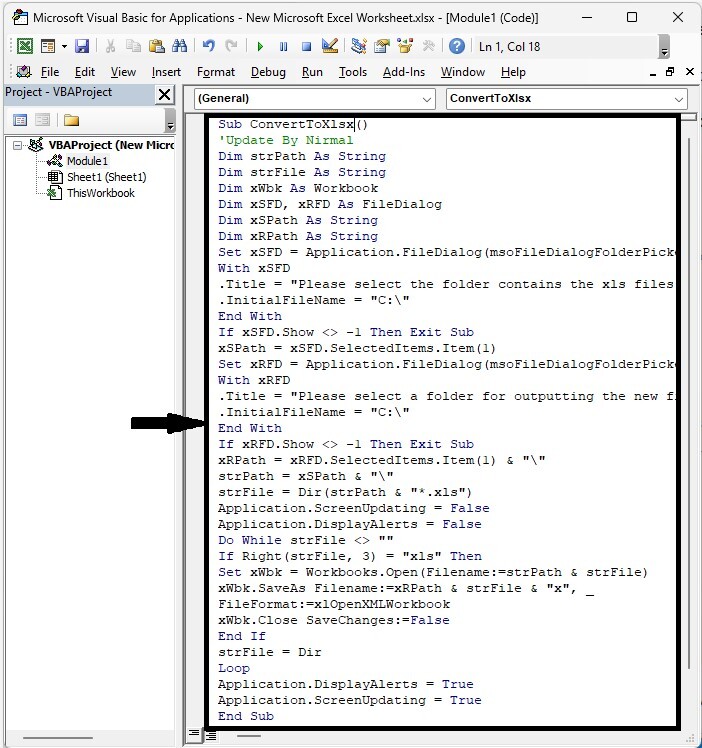
假设新建一个 Excel 工作表,右键单击工作表名称并选择"查看代码"以打开 VBA 应用程序,然后点击"插入",选择"模块",并在文本框中输入以下程序,如下图所示。
右键单击 >"查看代码">"插入">"模块">"程序"
程序
Sub ConvertToXlsx()
'Update By Nirmal
Dim strPath As String
Dim strFile As String
Dim xWbk As Workbook
Dim xSFD, xRFD As FileDialog
Dim xSPath As String
Dim xRPath As String
Set xSFD = Application.FileDialog(msoFileDialogFolderPicker)
With xSFD
.Title = "Please select the folder contains the xls files:"
.InitialFileName = "C:"
End With
If xSFD.Show <> -1 Then Exit Sub
xSPath = xSFD.SelectedItems.Item(1)
Set xRFD = Application.FileDialog(msoFileDialogFolderPicker)
With xRFD
.Title = "Please select a folder for outputting the new files:"
.InitialFileName = "C:"
End With
If xRFD.Show <> -1 Then Exit Sub
xRPath = xRFD.SelectedItems.Item(1) & ""
strPath = xSPath & ""
strFile = Dir(strPath & "*.xls")
Application.ScreenUpdating = False
Application.DisplayAlerts = False
Do While strFile <> ""
If Right(strFile, 3) = "xls" Then
Set xWbk = Workbooks.Open(Filename:=strPath & strFile)
xWbk.SaveAs Filename:=xRPath & strFile & "x", _
FileFormat:=xlOpenXMLWorkbook
xWbk.Close SaveChanges:=False
End If
strFile = Dir
Loop
Application.DisplayAlerts = True
Application.ScreenUpdating = True
End Sub
步骤 2
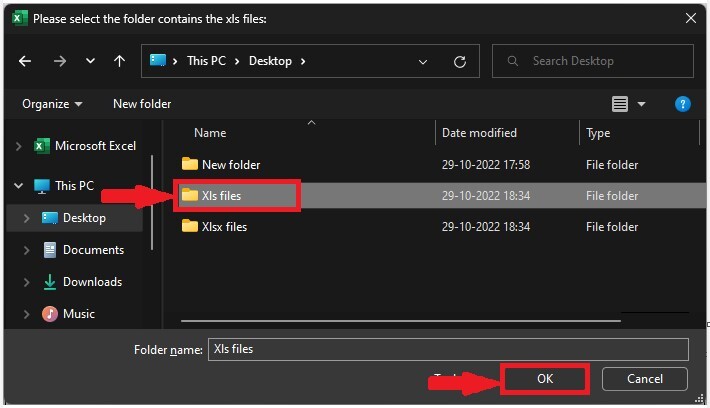
然后将工作表保存为启用宏的工作簿,点击 F5 运行代码,选择 XLS 文件所在的文件夹,然后点击"确定"。
保存 > F5 > 文件夹 >确定
步骤 3
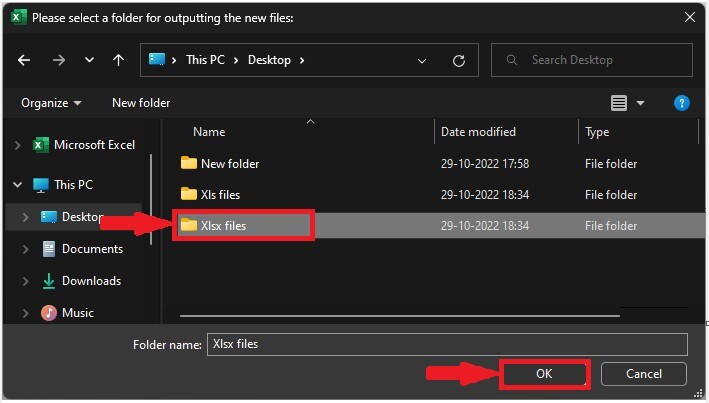
现在选择要存储新文件的文件夹,然后点击"确定"。
总结
在本教程中,我们使用了一个简单的示例来演示如何将多个 XLS 文件转换为 XLSX 文件。
相关文章
有用资源
excel 参考教程 - 该教程包含有关 excel 的更多信息:https://www.cainiaomax.com/excel/

