
如何在 Excel 中创建月历或年历
ms excelmicrosoft technologiescomputers更新于 2024/8/20 22:04:17
Excel 是一款高效的程序,用途广泛,包括创建日历。Excel 提供了一个灵活且可调整的平台,可根据您的独特需求构建日历,无论您是想管理个人日程、追踪重要事件还是安排商务活动。本文将逐步指导您使用 Excel 创建月历和年历。我们将介绍创建实用且美观的日历所需的核心方法和组件。无需任何 Excel 经验,我们将用浅显易懂的语言引导您完成每个步骤。
完成本教程后,您将能够创建自己的自定义日历,包括日期、工作日和节假日等必要细节。此外,您还将学习如何格式化和个性化日历的外观,使其更具特色并提升其美感。那么,让我们开始探索 Excel 构建动态、交互式且实用的日历的功能,让您全年都能井井有条地了解重要活动。
在 Excel 中创建月历/年历
在这里,我们将首先创建一个 VBA 模块,然后运行它并指定完成任务的月份和年份。让我们通过一个简单的流程来学习如何在 Excel 中创建月历或年历。
步骤 1
考虑任何 Excel 工作表。
首先,右键单击工作表名称,然后选择"查看代码"以打开 VBA 应用程序。
步骤 2
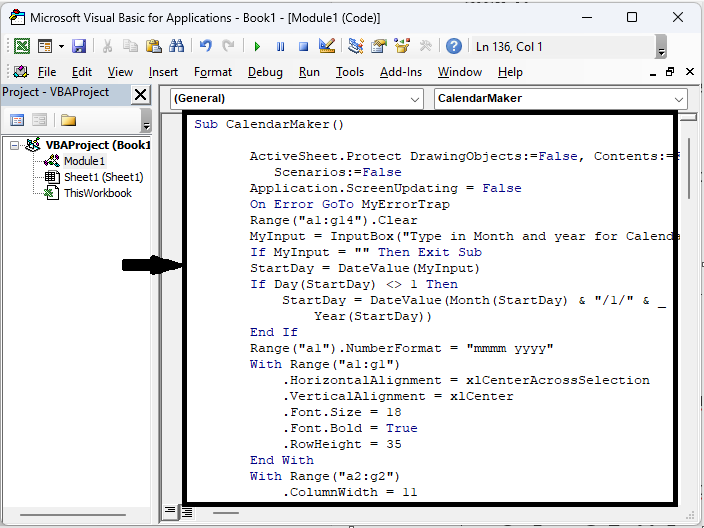
然后点击"插入",选择"模块",然后将以下代码复制到文本框中。
插入 > 模块 > 复制。
示例
Sub CalendarMaker()

   ActiveSheet.Protect DrawingObjects:=False, Contents:=False, _
   Scenarios:=False
   Application.ScreenUpdating = False
   On Error GoTo MyErrorTrap
   Range("a1:g14").Clear
   MyInput = InputBox("Type in Month and year for Calendar ")
   If MyInput = "" Then Exit Sub
   StartDay = DateValue(MyInput)
   If Day(StartDay) <> 1 Then
      StartDay = DateValue(Month(StartDay) & "/1/" & _
         Year(StartDay))
      End If
      Range("a1").NumberFormat = "mmmm yyyy"
      With Range("a1:g1")
         .HorizontalAlignment = xlCenterAcrossSelection
         .VerticalAlignment = xlCenter
         .Font.Size = 18
         .Font.Bold = True
         .RowHeight = 35
      End With
      With Range("a2:g2")
         .ColumnWidth = 11
         .VerticalAlignment = xlCenter
         .HorizontalAlignment = xlCenter
         .VerticalAlignment = xlCenter
         .Orientation = xlHorizontal
         .Font.Size = 12
         .Font.Bold = True
         .RowHeight = 20
      End With
      Range("a2") = "Sunday"
      Range("b2") = "Monday"
      Range("c2") = "Tuesday"
      Range("d2") = "Wednesday"
      Range("e2") = "Thursday"
      Range("f2") = "Friday"
      Range("g2") = "Saturday"
      With Range("a3:g8")
         .HorizontalAlignment = xlRight
         .VerticalAlignment = xlTop
         .Font.Size = 18
         .Font.Bold = True
         .RowHeight = 21
      End With
      Range("a1").Value = Application.Text(MyInput, "mmmm yyyy")
      DayofWeek = WeekDay(StartDay)
      CurYear = Year(StartDay)
      CurMonth = Month(StartDay)
      FinalDay = DateSerial(CurYear, CurMonth + 1, 1)
      Select Case DayofWeek
         Case 1
            Range("a3").Value = 1
         Case 2
            Range("b3").Value = 1
         Case 3
            Range("c3").Value = 1
         Case 4
            Range("d3").Value = 1
         Case 5
            Range("e3").Value = 1
         Case 6
            Range("f3").Value = 1
         Case 7
            Range("g3").Value = 1
      End Select
      For Each cell In Range("a3:g8")
         RowCell = cell.Row
         ColCell = cell.Column
         If cell.Column = 1 And cell.Row = 3 Then
         ElseIf cell.Column <> 1 Then
            If cell.Offset(0, -1).Value >= 1 Then
               cell.Value = cell.Offset(0, -1).Value + 1
               If cell.Value > (FinalDay - StartDay) Then
                  cell.Value = ""
                  Exit For
                  End If
               End If
         ElseIf cell.Row > 3 And cell.Column = 1 Then
            cell.Value = cell.Offset(-1, 6).Value + 1
            ' Stop when the last day of the month has been entered.
            If cell.Value > (FinalDay - StartDay) Then
               cell.Value = ""
               Exit For
               End If
         End If
      Next

      For x = 0 To 5
         Range("A4").Offset(x * 2, 0).EntireRow.Insert
         With Range("A4:G4").Offset(x * 2, 0)
            .RowHeight = 65
            .HorizontalAlignment = xlCenter
            .VerticalAlignment = xlTop
            .WrapText = True
            .Font.Size = 10
            .Font.Bold = False
            .Locked = False
         End With
         ' Put border around the block of dates.
         With Range("A3").Offset(x * 2, 0).Resize(2, _
         7).Borders(xlLeft)
            .Weight = xlThick
            .ColorIndex = xlAutomatic
         End With

         With Range("A3").Offset(x * 2, 0).Resize(2, _
         7).Borders(xlRight)
            .Weight = xlThick
            .ColorIndex = xlAutomatic
         End With
         Range("A3").Offset(x * 2, 0).Resize(2, 7).BorderAround _
            Weight:=xlThick, ColorIndex:=xlAutomatic
      Next
      If Range("A13").Value = "" Then Range("A13").Offset(0, 0) _
         .Resize(2, 8).EntireRow.Delete
      ActiveWindow.DisplayGridlines = False
      ActiveSheet.Protect DrawingObjects:=True, Contents:=True, _
          Scenarios:=True

      ActiveWindow.WindowState = xlMaximized
      ActiveWindow.ScrollRow = 1
      Application.ScreenUpdating = True
      Exit Sub
   MyErrorTrap:
      MsgBox "You may not have entered your Month and Year correctly." _
      & Chr(13) & "Spell the Month correctly" _
      & " (or use 3 letter abbreviation)" _
      & Chr(13) & "and 4 digits for the Year"
      MyInput = InputBox("Type in Month and year for Calendar")
      If MyInput = "" Then Exit Sub
      Resume
   End Sub
步骤 3
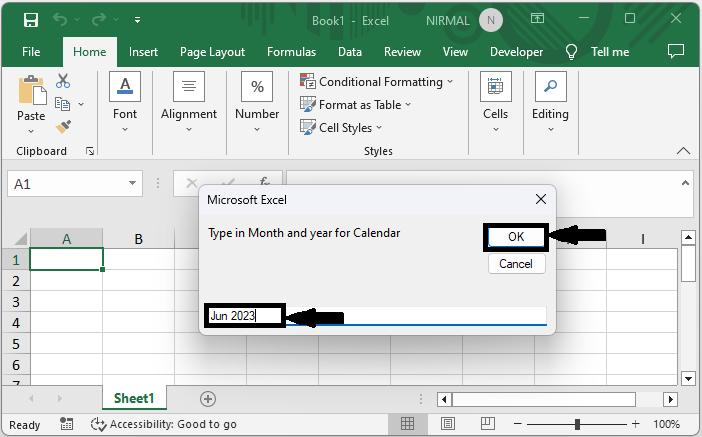
然后点击 F5 运行模块,指定月份和年份,然后点击"确定"完成任务。
F5 > 月份和年份 > 确定。
总结
在本教程中,我们使用了一个简单的示例来演示如何在 Excel 中创建月历或年历,以突出显示特定的一组数据。
相关文章
有用资源
excel 参考教程 - 该教程包含有关 excel 的更多信息:https://www.cainiaomax.com/excel/

