
使用 RESTful Web 服务
本章将详细讨论使用 jQuery AJAX 使用 RESTful Web 服务。
创建一个简单的 Spring Boot Web 应用程序并编写一个控制器类文件,用于重定向到 HTML 文件以使用 RESTful Web 服务。
我们需要在构建配置文件中添加 Spring Boot 启动器 Thymeleaf 和 Web 依赖。
对于 Maven 用户,在您的 pom.xml 文件中添加以下依赖项。
<dependency>
   <groupId>org.springframework.boot</groupId>
   <artifactId>spring-boot-starter-thymeleaf</artifactId>
</dependency>

<dependency>
   <groupId>org.springframework.boot</groupId>
   <artifactId>spring-boot-starter-web</artifactId>
</dependency>
对于 Gradle 用户,将以下依赖项添加到您的 build.gradle 文件中 −
compile group: ‘org.springframework.boot’, name: ‘spring-boot-starter-thymeleaf’
compile(‘org.springframework.boot:spring-boot-starter-web’)
@Controller 类文件的代码如下 −
@Controller
public class ViewController {
}
您可以定义请求 URI 方法以重定向到 HTML 文件,如下所示 −
@RequestMapping(“/view-products”)
public String viewProducts() {
   return “view-products”;
}
@RequestMapping(“/add-products”)
public String addProducts() {
   return “add-products”;
}
此 API http://localhost:9090/products 应返回以下 JSON 作为响应,如下所示 −
[
   {
      "id": "1",
      "name": "Honey"
   },
   {
      "id": "2",
      "name": "Almond"
   }
]
现在,在类路径的模板目录下创建一个 view-products.html 文件。
在 HTML 文件中,我们添加了 jQuery 库并编写了代码以在页面加载时使用 RESTful Web 服务。
<script src = "https://ajax.googleapis.com/ajax/libs/jquery/3.2.1/jquery.min.js"></script>

<script>
$(document).ready(function(){
   $.getJSON("http://localhost:9090/products", function(result){
      $.each(result, function(key,value) {
         $("#productsJson").append(value.id+" "+value.name+" ");
      });
   });
});
</script>
POST 方法和此 URL http://localhost:9090/products 应包含以下请求正文和响应正文。
请求正文的代码如下 −
{
   "id":"3",
   "name":"Ginger"
}
响应正文的代码如下 −
Product is created successfully
现在,在类路径的模板目录下创建 add-products.html 文件。
在 HTML 文件中,我们添加了 jQuery 库并编写了在单击按钮时将表单提交到 RESTful Web 服务的代码。
<script src = "https://ajax.googleapis.com/ajax/libs/jquery/3.2.1/jquery.min.js"></script>
<script>
   $(document).ready(function() {
      $("button").click(function() {
         var productmodel = {
            id : "3",
            name : "Ginger"
         };
         var requestJSON = JSON.stringify(productmodel);
         $.ajax({
            type : "POST",
            url : "http://localhost:9090/products",
            headers : {
               "Content-Type" : "application/json"
            },
            data : requestJSON,
            success : function(data) {
               alert(data);
            },
            error : function(data) {
            }
         });
      });
   });
</script>
完整的代码如下。
Maven – pom.xml file
<?xml version = "1.0" encoding = "UTF-8"?>
<project xmlns = "http://maven.apache.org/POM/4.0.0"
   xmlns:xsi = "http://www.w3.org/2001/XMLSchema-instance"
   xsi:schemaLocation = "http://maven.apache.org/POM/4.0.0
   http://maven.apache.org/xsd/maven-4.0.0.xsd">

   <modelVersion>4.0.0</modelVersion>
   <groupId>com.tutorialspoint</groupId>
   <artifactId>demo</artifactId>
   <version>0.0.1-SNAPSHOT</version>
   <packaging>jar</packaging>
   <name>demo</name>
   <description>Demo project for Spring Boot</description>

   <parent>
      <groupId>org.springframework.boot</groupId>
      <artifactId>spring-boot-starter-parent</artifactId>
      <version>1.5.8.RELEASE</version>
      <relativePath />
   </parent>

   <properties>
      <project.build.sourceEncoding>UTF-8</project.build.sourceEncoding>
      <project.reporting.outputEncoding>UTF-8</project.reporting.outputEncoding>
      <java.version>1.8</java.version>
   </properties>

   <dependencies>
      <dependency>
         <groupId>org.springframework.boot</groupId>
         <artifactId>spring-boot-starter-web</artifactId>
      </dependency>

      <dependency>
         <groupId>org.springframework.boot</groupId>
         <artifactId>spring-boot-starter-test</artifactId>
         <scope>test</scope>
      </dependency>

      <dependency>
         <groupId>org.springframework.boot</groupId>
         <artifactId>spring-boot-starter-thymeleaf</artifactId>
      </dependency>
   </dependencies>

   <build>
      <plugins>
         <plugin>
            <groupId>org.springframework.boot</groupId>
            <artifactId>spring-boot-maven-plugin</artifactId>
         </plugin>
      </plugins>
   </build>

</project>
Gradle 的代码 - build.gradle 如下所示 −
buildscript {
   ext {
      springBootVersion = ‘1.5.8.RELEASE’
   }
   repositories {
      mavenCentral()
   }
   dependencies {
      classpath("org.springframework.boot:spring-boot-gradle-plugin:${springBootVersion}")
   }
}

apply plugin: ‘java’
apply plugin: ‘eclipse’
apply plugin: ‘org.springframework.boot’

group = ‘com.tutorialspoint’
version = ‘0.0.1-SNAPSHOT’
sourceCompatibility = 1.8

repositories {
   mavenCentral()
}

dependencies {
   compile(‘org.springframework.boot:spring-boot-starter-web’)
   compile group: ‘org.springframework.boot’, name: ‘spring-boot-starter-thymeleaf’
   testCompile(‘org.springframework.boot:spring-boot-starter-test’)
}
下面给出的控制器类文件——ViewController.java 如下所示 −
package com.tutorialspoint.demo.controller;

import org.springframework.stereotype.Controller;
import org.springframework.web.bind.annotation.RequestMapping;

@Controller
public class ViewController {
   @RequestMapping(“/view-products”)
   public String viewProducts() {
      return “view-products”;
   }
   @RequestMapping(“/add-products”)
   public String addProducts() {
      return “add-products”;
   }
}
view-products.html 文件如下所示 −
<!DOCTYPE html>
<html>
   <head>
      <meta charset = "ISO-8859-1"/>
      <title>View Products</title>
      <script src = "https://ajax.googleapis.com/ajax/libs/jquery/3.2.1/jquery.min.js"></script>

      <script>
         $(document).ready(function(){
            $.getJSON("http://localhost:9090/products", function(result){
               $.each(result, function(key,value) {
                  $("#productsJson").append(value.id+" "+value.name+" ");
               });
            });
         });
      </script>
   </head>

   <body>
      <div id = "productsJson"> </div>
   </body>
</html>
add-products.html 文件如下所示 −
<!DOCTYPE html>
<html>
   <head>
      <meta charset = "ISO-8859-1" />
      <title>Add Products</title>
      <script src = "https://ajax.googleapis.com/ajax/libs/jquery/3.2.1/jquery.min.js"></script>

      <script>
         $(document).ready(function() {
            $("button").click(function() {
               var productmodel = {
                  id : "3",
                  name : "Ginger"
               };
               var requestJSON = JSON.stringify(productmodel);
               $.ajax({
                  type : "POST",
                  url : "http://localhost:9090/products",
                  headers : {
                     "Content-Type" : "application/json"
                  },
                  data : requestJSON,
                  success : function(data) {
                     alert(data);
                  },
                  error : function(data) {
                  }
               });
            });
         });
      </script>
   </head>

   <body>
      <button>Click here to submit the form</button>
   </body>
</html>
主要的 Spring Boot 应用程序类文件如下所示 −
package com.tutorialspoint.demo;

import org.springframework.boot.SpringApplication;
import org.springframework.boot.autoconfigure.SpringBootApplication;

@SpringBootApplication
public class DemoApplication {
   public static void main(String[] args) {
      SpringApplication.run(DemoApplication.class, args);
   }
}
现在,您可以创建一个可执行的 JAR 文件,并使用以下 Maven 或 Gradle 命令运行 Spring Boot 应用程序。
对于 Maven,使用下面给出的命令 −
mvn clean install
在"BUILD SUCCESS"之后,您可以在目标目录下找到 JAR 文件。
对于 Gradle,使用下面给出的命令 −
gradle clean build
在"BUILD SUCCESSFUL"之后,您可以在 build/libs 目录下找到 JAR 文件。
使用以下命令运行 JAR 文件 −
java –jar <JARFILE>
现在,应用程序已在 Tomcat 端口 8080 上启动。

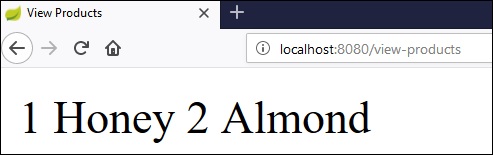
现在在您的网络浏览器中点击 URL,您可以看到如图所示的输出 −
http://localhost:8080/view-products
http://localhost:8080/add-products
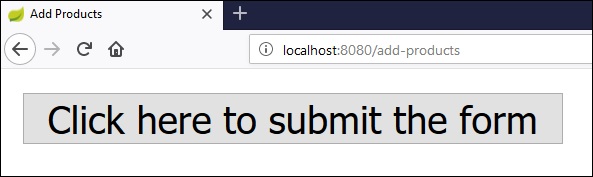
现在,单击按钮Click here to submit the form,您可以看到如图所示的结果 −
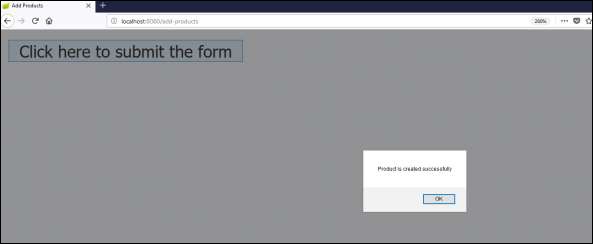
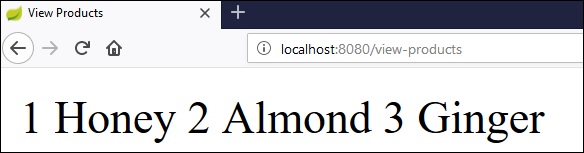
现在,点击查看产品 URL 并查看创建的产品。
http://localhost:8080/view-products
Angular JS
要使用 Angular JS 使用 API,您可以使用下面给出的示例 −
使用以下代码创建 Angular JS 控制器以使用 GET API - http://localhost:9090/products −
angular.module('demo', [])
.controller('Hello', function($scope, $http) {
   $http.get('http://localhost:9090/products').
   then(function(response) {
      $scope.products = response.data;
   });
});
使用以下代码创建 Angular JS 控制器以使用 POST API - http://localhost:9090/products −
angular.module('demo', [])
.controller('Hello', function($scope, $http) {
   $http.post('http://localhost:9090/products',data).
   then(function(response) {
      console.log("Product created successfully");
   });
});
注意 − Post 方法数据以 JSON 格式表示用于创建产品的请求正文。

