
Spring Boot - Tomcat 部署
通过使用 Spring Boot 应用程序,我们可以创建一个 war 文件以部署到 Web 服务器中。 在本章中,您将学习如何创建 WAR 文件并在 Tomcat Web 服务器中部署 Spring Boot 应用程序。
Spring Boot Servlet Initializer
传统的部署方式是让 Spring Boot Application @SpringBootApplication 类扩展 SpringBootServletInitializer 类。 Spring Boot Servlet Initializer 类文件允许您在使用 Servlet Container 启动应用程序时对其进行配置。
下面给出了用于 JAR 文件部署的 Spring Boot Application 类文件的代码 −
package com.tutorialspoint.demo;

import org.springframework.boot.SpringApplication;
import org.springframework.boot.autoconfigure.SpringBootApplication;

@SpringBootApplication
public class DemoApplication {
   public static void main(String[] args) {
      SpringApplication.run(DemoApplication.class, args);
   }
}
我们需要扩展类SpringBootServletInitializer来支持WAR文件部署。 Spring Boot Application类文件的代码如下 −
package com.tutorialspoint.demo;

import org.springframework.boot.SpringApplication;
import org.springframework.boot.autoconfigure.SpringBootApplication;
import org.springframework.boot.builder.SpringApplicationBuilder;
import org.springframework.boot.web.servlet.support.SpringBootServletInitializer;

@SpringBootApplication
public class DemoApplication  extends SpringBootServletInitializer {
   @Override
   protected SpringApplicationBuilder configure(SpringApplicationBuilder application) {
      return application.sources(DemoApplication.class);
   }
   public static void main(String[] args) {
      SpringApplication.run(DemoApplication.class, args);
   }
}
设置主类
在 Spring Boot 中,我们需要提到应该在构建文件中启动的主类。 为此,您可以使用以下代码 −
对于 Maven,在 pom.xml 属性中添加启动类,如下所示 −
<start-class>com.tutorialspoint.demo.DemoApplication</start-class>
对于 Gradle,在 build.gradle 中添加主类名,如下所示 −
mainClassName="com.tutorialspoint.demo.DemoApplication"
更新打包 JAR 到 WAR
我们必须使用以下代码将打包 JAR 更新为 WAR −
对于 Maven,在 pom.xml 中添加包装为 WAR,如下所示 −
<packaging>war</packaging>
对于 Gradle,在 build.gradle 中添加应用插件和 war 插件,如下所示 −
apply plugin: ‘war’
apply plugin: ‘application’
现在,让我们编写一个简单的 Rest Endpoint 来返回字符串"Hello World from Tomcat"。 要编写一个 Rest Endpoint,我们需要将 Spring Boot web starter 依赖项添加到我们的构建文件中。
对于 Maven,使用如下所示的代码在 pom.xml 中添加 Spring Boot starter 依赖项 −
<dependency>
   <groupId>org.springframework.boot</groupId>
   <artifactId>spring-boot-starter-web</artifactId>
</dependency>
对于 Gradle,使用如下所示的代码在 build.gradle 中添加 Spring Boot 启动器依赖项 −
dependencies {
   compile('org.springframework.boot:spring-boot-starter-web')
}
现在,使用如下代码在 Spring Boot Application 类文件中编写一个简单的 Rest Endpoint −
package com.tutorialspoint.demo;

import org.springframework.boot.SpringApplication;
import org.springframework.boot.autoconfigure.SpringBootApplication;
import org.springframework.boot.builder.SpringApplicationBuilder;
import org.springframework.boot.web.servlet.support.SpringBootServletInitializer;
import org.springframework.web.bind.annotation.RequestMapping;
import org.springframework.web.bind.annotation.RestController;

@SpringBootApplication
@RestController
public class DemoApplication  extends SpringBootServletInitializer {
   @Override
   protected SpringApplicationBuilder configure(SpringApplicationBuilder application) {
      return application.sources(DemoApplication.class);
   }
   public static void main(String[] args) {
      SpringApplication.run(DemoApplication.class, args);
   }

   @RequestMapping(value = "/")
   public String hello() {
      return "Hello World from Tomcat";
   }
}
打包您的应用程序
现在,使用 Maven 和 Gradle 命令创建一个 WAR 文件以部署到 Tomcat 服务器中,以打包您的应用程序,如下所示 −
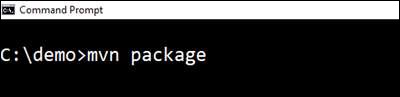
对于 Maven,使用命令 mvn package 来打包您的应用程序。 然后,将创建 WAR 文件,您可以在目标目录中找到它,如下面的屏幕截图所示 −
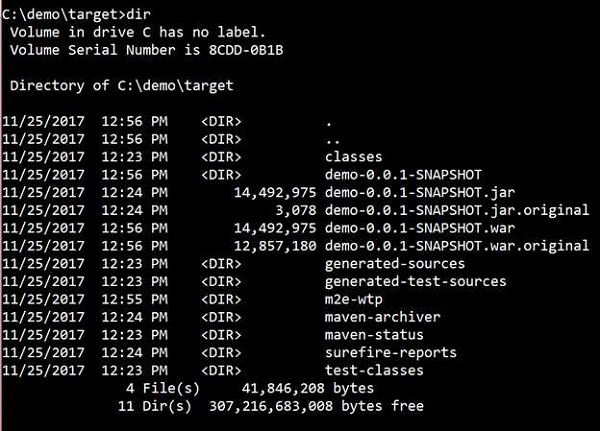
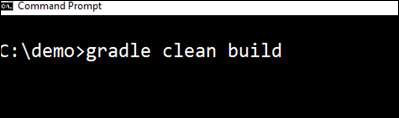
对于 Gradle,使用命令 gradle clean build 来打包您的应用程序。 然后,您的 WAR 文件将被创建,您可以在 build/libs 目录下找到它。 观察此处给出的屏幕截图以便更好地理解 −
部署到 Tomcat
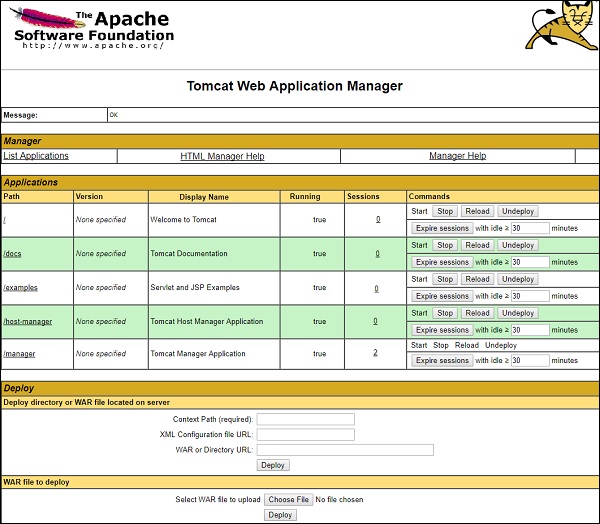
现在,运行 Tomcat 服务器,并在 webapps 目录下部署 WAR 文件。 观察此处显示的屏幕截图以便更好地理解 −

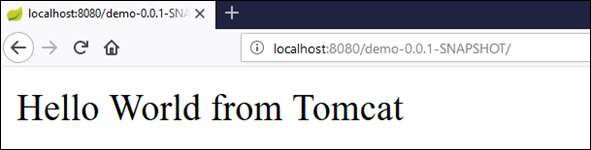
成功部署后,在您的网络浏览器中点击 URL http://localhost:8080/demo-0.0.1-SNAPSHOT/ 并观察输出将如下面的屏幕截图所示 −
下面给出了用于此目的的完整代码。
pom.xml
<?xml version = "1.0" encoding = "UTF-8"?>
<project xmlns = "http://maven.apache.org/POM/4.0.0"
   xmlns:xsi = "http://www.w3.org/2001/XMLSchema-instance"

xsi:schemaLocation = "http://maven.apache.org/POM/4.0.0 http://maven.apache.org/xsd/maven-4.0.0.xsd">
<modelVersion>4.0.0</modelVersion>

   <groupId>com.tutorialspoint</groupId>
   <artifactId>demo</artifactId>
   <version>0.0.1-SNAPSHOT</version>
   <packaging>war</packaging>
   <name>demo</name>
   <description>Demo project for Spring Boot</description>

   <parent>
      <groupId>org.springframework.boot</groupId>
      <artifactId>spring-boot-starter-parent</artifactId>
      <version>1.5.8.RELEASE</version>
      <relativePath/> <!-- lookup parent from repository -->
   </parent>

   <properties>
      <project.build.sourceEncoding>UTF-8</project.build.sourceEncoding>
      <project.reporting.outputEncoding>UTF-8</project.reporting.outputEncoding>
      <java.version>1.8</java.version>
      <start-class>com.tutorialspoint.demo.DemoApplication</start-class>
   </properties>

   <dependencies>
      <dependency>
         <groupId>org.springframework.boot</groupId>
         <artifactId>spring-boot-starter-web</artifactId>
      </dependency>
      <dependency>
         <groupId>org.springframework.boot</groupId>
         <artifactId>spring-boot-starter-test</artifactId>
         <scope>test</scope>
      </dependency>
   </dependencies>

   <build>
      <plugins>
         <plugin>
            <groupId>org.springframework.boot</groupId>
            <artifactId>spring-boot-maven-plugin</artifactId>
         </plugin>
      </plugins>
   </build>

</project>
build.gradle
buildscript {
   ext {
      springBootVersion = '1.5.8.RELEASE'
   }
   repositories {
      mavenCentral()
   }
dependencies {
      classpath("org.springframework.boot:spring-boot-gradle-plugin:${springBootVersion}")
   }
}

apply plugin: 'java'
apply plugin: 'eclipse'
apply plugin: 'org.springframework.boot'
apply plugin: 'war'
apply plugin: 'application'

group = 'com.tutorialspoint'
version = '0.0.1-SNAPSHOT'
sourceCompatibility = 1.8
mainClassName = "com.tutorialspoint.demo.DemoApplication"

repositories {
   mavenCentral()
}
dependencies {
   compile('org.springframework.boot:spring-boot-starter-web')
   testCompile('org.springframework.boot:spring-boot-starter-test')
}
主 Spring Boot 应用程序类文件的代码如下所示−
package com.tutorialspoint.demo;

import org.springframework.boot.SpringApplication;
import org.springframework.boot.autoconfigure.SpringBootApplication;
import org.springframework.boot.builder.SpringApplicationBuilder;
import org.springframework.boot.web.servlet.support.SpringBootServletInitializer;
import org.springframework.web.bind.annotation.RequestMapping;
import org.springframework.web.bind.annotation.RestController;

@SpringBootApplication
@RestController
public class DemoApplication  extends SpringBootServletInitializer {
   @Override
   protected SpringApplicationBuilder configure(SpringApplicationBuilder application) {
      return application.sources(DemoApplication.class);
   }
   public static void main(String[] args) {
      SpringApplication.run(DemoApplication.class, args);
   }

   @RequestMapping(value = "/")
   public String hello() {
      return "Hello World from Tomcat";
   }
}

