OpenCV - 彩色图像转为灰度图像
在前面的章节中,我们讨论了如何将输入图像读取为不同类型(二进制、灰度、BGR 等)。在本章中,我们将学习如何将一种类型的图像转换为另一种类型的图像。
包 org.opencv.imgproc 中名为 Imgproc 的类提供了将图像从一种颜色转换为另一种颜色的方法。
将彩色图像转为灰度图像
名为 cvtColor() 的方法用于将彩色图像转换为灰度图像。以下是该方法的语法。
cvtColor(Mat src, Mat dst, int code)
该方法接受以下参数 −
src − 表示源的矩阵。
dst − 表示目标的矩阵。
code −表示转换类型的整数代码,例如,RGB 到灰度。
您可以通过将代码 Imgproc.COLOR_RGB2GRAY 以及源矩阵和目标矩阵作为参数传递给 cvtColor() 方法,将彩色图像转换为灰度。
示例
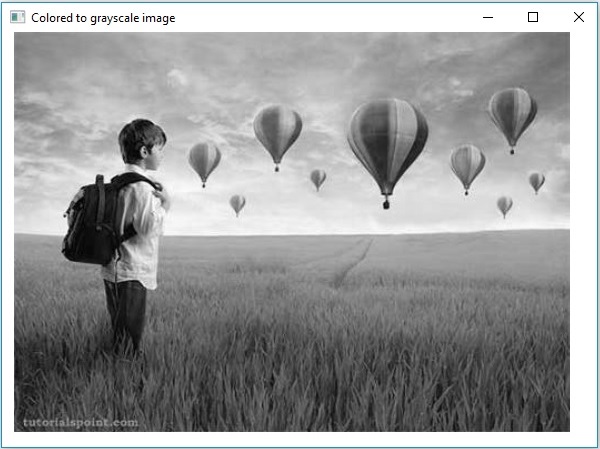
以下程序演示了如何将彩色图像读取为灰度图像并使用 JavaFX 窗口显示它。
import java.awt.image.BufferedImage;

import org.opencv.core.Core;
import org.opencv.core.Mat;
import org.opencv.imgcodecs.Imgcodecs;
import org.opencv.imgproc.Imgproc;

import javafx.application.Application;
import javafx.embed.swing.SwingFXUtils;
import javafx.scene.Group;
import javafx.scene.Scene;
import javafx.scene.image.ImageView;
import javafx.scene.image.WritableImage;

import javafx.stage.Stage;

public class ColorToGrayscale extends Application {
   @Override
   public void start(Stage stage) throws Exception {
      WritableImage writableImage = loadAndConvert();

        // 设置图像视图
        ImageView imageView = new ImageView(writableImage);

        // 设置图像的位置
        imageView.setX(10);
        imageView.setY(10);

        // 设置图像视图的适合高度和宽度
        imageView.setFitHeight(400);
        imageView.setFitWidth(600);

        // 设置图像视图的保留比例
        imageView.setPreserveRatio(true);

        // 创建 Group 对象
        Group root = new Group(imageView);

        // 创建场景对象
        Scene scene = new Scene(root, 600, 400);

        // 设置舞台标题
        stage.setTitle("彩色转灰度图像");

        // 将场景添加到舞台
        stage.setScene(scene);

        // 显示舞台内容
        stage.show();
   }
   public WritableImage loadAndConvert() throws Exception {
        //加载 OpenCV 核心库
        System.loadLibrary( Core.NATIVE_LIBRARY_NAME );

        String input = "C:/EXAMPLES/OpenCV/sample.jpg";

        //读取图像
        Mat src = Imgcodecs.imread(input);

        //创建空目标矩阵
        Mat dst = new Mat();

        //将图像转换为灰度图像并保存在 dst 矩阵中
        Imgproc.cvtColor(src, dst, Imgproc.COLOR_RGB2GRAY);

        //从转换后的图像 (dst) 中提取数据
        byte[] data1 = new byte[dst.rows() * dst.cols() * (int)(dst.elemSize())];
        dst.get(0, 0, data1);

        //使用数据创建缓冲图像
        BufferedImage bufImage = new BufferedImage(dst.cols(),dst.rows(),
        BufferedImage.TYPE_BYTE_GRAY);

        //将数据元素设置为图像
        bufImage.getRaster().setDataElements(0, 0, dst.cols(), dst.rows(), data1);

        //创建可写图像
        WritableImage writableImage = SwingFXUtils.toFXImage(bufImage, null);
        System.out.println("转换为灰度");
        return writableImage;
   }
   public static void main(String args[]) throws Exception {
      launch(args);
   }
}
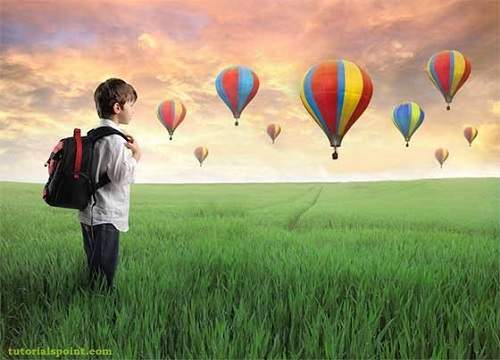
输入图像
假设以下是上述程序中指定的输入图像 sample.jpg。
输出图像
执行程序后,您将获得以下输出。