
ReactJS - cloneElement() 函数
React 是一个用于创建用户界面的著名 JavaScript 库。它包含许多功能,可帮助我们创建灵活且可维护的代码。CloneElement 就是其中一种工具,它允许我们基于前一个 React 元素创建新的 React 元素,同时修改其属性和子元素。那么让我们看看 cloneElement 是什么以及如何使用它。
什么是 cloneElement?
术语 cloneElement 是一种 React 方法,它允许我们使用现有元素创建新的 React 元素。当我们想要更新元素的属性或向其添加子元素而不更改原始元素时,这很有用。
语法
const clonedElement = cloneElement(elem, props, ...children)
参数
elem − 这是一个有效的 React 元素,如 JSX 节点或另一个 cloneElement 调用的结果。
props − 它是一个对象或 null,允许我们覆盖元素的属性。如果我们传递 null,则克隆的元素将保留所有原始 props。
...children − 有零个或多个子节点。它们可以是任何 React 节点,例如元素、字符串或数字。如果我们不传递任何子元素,则将使用原始子元素。
返回值
函数 cloneElement 返回具有以下属性的 React 元素对象 −
type − 与 element.type 相同。
props − element.props 和覆盖 props 的组合。
ref − 原始 ref,除非被 props.ref 覆盖。
key − 原始 key,除非被 props.key 覆盖。
cloneElement 最常见的用途是覆盖元素的属性。如果我们有一个现有元素并想更新特定功能,我们只需使用 cloneElement 即可。
示例
示例 − 添加新的 Prop 和 Button
在此应用中,我们将首先从"react"库导入必要的模块。导入 cloneElement 是为了对基本 React 元素进行修改。现在我们将使用 JSX 创建一个基本 React 元素。此元素是一个带有文本内容的简单 <div>。定义 App 功能组件。在此组件内,我们将使用 cloneElement 创建 basicElement 的修改版本。修改涉及添加一个名为 newProp 的新 prop,其值为"添加的 prop 值"。
import React, { cloneElement } from 'react';

const basicElement = <div>This is a basic React element.</div>;
const App = () => {
   const modifiedElement = cloneElement(basicElement, { newProp: 'Added prop value' });
   return (
   <div>
   {modifiedElement}
   <button onClick={() => alert('Button clicked!')}>Click me</button>
   </div>
   );
};

export default App;
输出
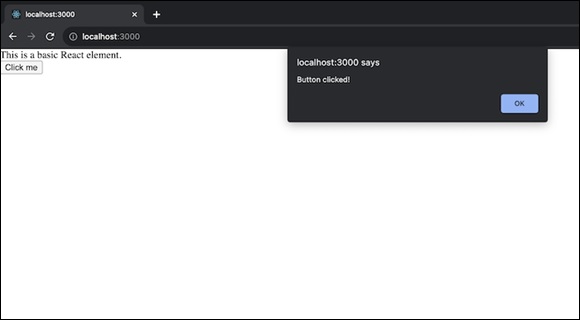
当我们在 React 应用程序中使用此组件时,它将渲染修改后的元素以及一个按钮。单击按钮将显示一条警告,提示"按钮已单击!"。
示例 − 添加项目列表
在此示例中,我们将首先从"react"库导入必要的模块。同时导入 cloneElement 以对基本 React 元素进行修改。现在我们将使用 JSX 获得一个基本 React 元素。此元素是一个简单的 <div>,文本内容为"这是一个基本 React 元素"。然后定义 App 功能组件。在这个组件内,我们将定义一个项目数组。我们将使用 cloneElement 创建 basicElement 的修改版本。修改包括添加一个段落(<p>)和一个无序列表(<ul>),其中包含通过 items 数组映射生成的列表项。
import React, { cloneElement } from 'react';

const basicElement = <div>This is a basic React element.</div>;
const App = () => {
   const items = ['Item 1', 'Item 2', 'Item 3'];
   const modifiedElement = cloneElement(basicElement, null,
   <>
      <p>List of Items:</p>
      <ul>
         {items.map((item, index) => (
            <li key={index}>{item}</li>
         ))}
      </ul>
   </>
   );
   return <div>{modifiedElement}</div>;
};

export default App;
输出
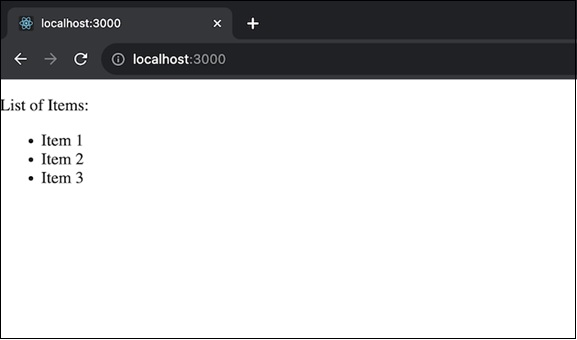
当我们在 React 应用程序中使用此组件时,它将呈现修改后的元素,显示一个段落和一个无序列表的项目。
示例 − 让我们使用 cloneElement 创建一个应用程序
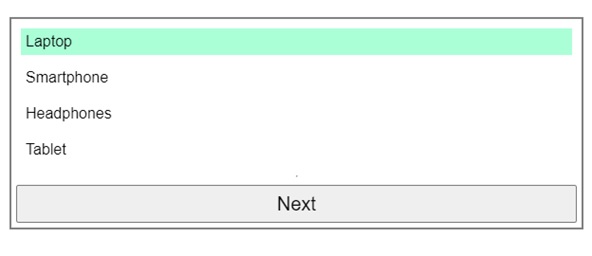
在此应用程序中,我们将创建一个简单的 React 应用程序,该应用程序使用 cloneElement 突出显示项目列表中的特定项目。该应用程序由两个组件组成:一个 List 组件和一个 Row 组件,以及一个显示产品列表的父 App 组件。
List 组件 − 它接收子组件列表。维护 selectedIndex 状态以跟踪当前突出显示的项目。使用 Children.map 迭代子项,并使用 cloneElement 根据 selectedIndex 修改 isHighlighted 属性。
Row 组件 − 它将产品标题呈现为一行。如果 isHighlighted 属性为真,则应用 CSS 类进行突出显示。
data.js 模块 − 它定义产品对象数组。
App.js − 在此文件中,我们将导入 List 和 Row 组件以及产品数据。并使用 List 组件呈现产品列表。
List.js
import { Children, cloneElement, useState } from 'react';

export default function List({ children }) {
   const [selectedIndex, setSelectedIndex] = useState(0);

   return (
   <div className="List">
      {Children.map(children, (child, index) =>
         cloneElement(child, {
            isHighlighted: index === selectedIndex,
         })
      )}
      <hr />
      <button
         onClick={() => {
            setSelectedIndex((i) => (i + 1) % Children.count(children));
         }}
      >
         Next
      </button>
   </div>
   );
}
Row.js
export default function Row({ title, isHighlighted }) {
   return (
      <div className={['Row', isHighlighted ? 'RowHighlighted' : ''].join(' ')}>
         {title}
      </div>
   );
}
Data.js
export const products = [
   { title: 'Laptop', id: 1 },
   { title: 'Smartphone', id: 2 },
   { title: 'Headphones', id: 3 },
   { title: 'Tablet', id: 4 },
];
App.js
import List from "./List.js";
import Row from "./Row.js";
import { products } from "./data.js";

export default function App() {
   return (
      <List>
         {products.map((product) => (
            <Row key={product.id} title={product.title} />
         ))}
      </List>
   );
}
输出
总结
因此 cloneElement 是 React 中的一个有用函数,它通常被使用,并且可能会给我们的程序增加复杂性和问题。了解何时在 React 应用程序中使用 cloneElement 以及何时使用其他技术可以帮助我们编写更干净、更高效的代码。
 reactjs_reference_api.html
