
ReactJS - TestRenderer.act() 方法
React 测试对于确保我们的组件按预期运行非常重要。因此,我们将研究 TestRenderer.act() 函数,这是一个使测试更容易的有用工具。
TestRenderer.act() 是"react-test-renderer"库中可用的函数。此方法允许我们为断言准备 React 组件。它类似于"react-dom/test-utils"中的 act() 助手,并且可以轻松测试 TestRenderer 组件。
语法
TestRenderer.act(callback);
首先,我们必须导入必要的函数 −
import { create, act } from 'react-test-renderer';
让我们考虑一个例子,其中我们有一个名为 App 的组件,它获得一个名为 value 的 prop −
import App from './app.js';

// 渲染组件
let root;
act(() => {
   root = create(<App value={1} />);
});

// 对 root 进行断言
expect(root.toJSON()).toMatchSnapshot();
在此代码中,我们创建 App 组件的实例,其 prop 的值等于 1。act() 方法包装此创建过程,以确保组件已准备好进行测试。
现在,我们将使用不同的 props − 更新组件
// 使用一些不同的 props 进行更新
act(() => {
    root.update(<App value={2} />);
});
// 对 root 进行断言
expect(root.toJSON()).toMatchSnapshot();
再次使用 act(),我们安全地用新的 props 更新组件,并对更新后的组件进行断言。
示例
让我们通过使用 TestRenderer.act(callback) 函数创建小型 React 应用来利用这些信息。我们将展示此功能如何在许多测试场景中发挥作用。
示例 − 基本组件
在第一个应用中,我们将检查一个简单的东西 - 我们称之为"BasicComponent"的 React 程序的基本部分。它就像我们项目的一小部分。这部分不需要任何额外的信息。我们想看看它在屏幕上显示时是否看起来正确。我们检查的方法是创建它并确保它看起来就像我们预期的那样。
BasicComponent.js
import React from 'react';

const BasicComponent = () => {
   return (
      <div>
         <h1>Hello, I'm a Basic Component!</h1>
         <p>This is a simple React component for testing.</p>
      </div>
   );
};

export default BasicComponent;
App.js
import { create, act } from 'react-test-renderer';
// 导入组件
import BasicComponent from './BasicComponent.js';

let root;
act(() => {
   root = create(<BasicComponent />);
});

expect(root.toJSON()).toMatchSnapshot();
输出
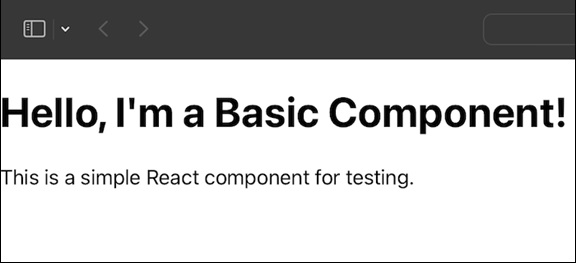
在此示例中,BasicComponent 是一个基本的 React 功能组件,它创建一个带有 h1 标题和 p 段落的 div。此组件用于测试,其输出将与我们测试代码中的快照进行比较。
带有 Props 的示例 − 组件
第二个应用程序用于测试名为 ComponentWithProps 的 React 组件,该组件获取一个名称 prop,值为"John"。此示例展示了如何使用 TestRenderer.act() 创建具有特定功能的组件实例,并确认渲染结果与所需快照匹配。
ComponentWithProps.js
import React from 'react';
const ComponentWithProps = (props) => {
   return (
      <div>
         <h1>Hello, {props.name}!</h1>
         <p>This component receives a prop named "name" and displays a greeting.</p>
      </div>
   );
};

export default ComponentWithProps;
App.js
import { create, act } from 'react-test-renderer';
// 导入组件
import ComponentWithProps from './ComponentWithProps.js';

let root;
act(() => {
   root = create(<ComponentWithProps name="John" />);
});

expect(root.toJSON()).toMatchSnapshot();
输出
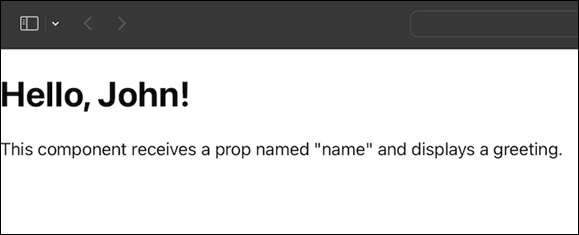
在上面的代码中,ComponentWithProps 是另一个接收名为 name 的 prop 的简单函数组件。此 prop 用于创建显示在 h1 标题中的问候语。该段落还对该组件进行了简要说明。
示例 − 动态组件
在此程序中,我们将展示如何测试名为 DynamicComponent 的动态 React 组件。此组件的生命周期将包括状态更新或 prop 更改等更改。测试使用设置组件并通过更新它来重新创建动态更改。这展示了 TestRenderer.act() 如何处理动态组件行为。
DynamicComponent.js
import React, { useState, useEffect } from 'react';

const DynamicComponent = () => {
   const [count, setCount] = useState(0);

   useEffect(() => {
      // 组件挂载后动态变化
      const interval = setInterval(() => {
         setCount((prevCount) => prevCount + 1);
      }, 1000);

      // 组件卸载时的清理间隔
      return () => clearInterval(interval);
   }, []);

   return (
      <div>
         <h1>Dynamic Component</h1>
         <p>This component changes dynamically. Count: {count}</p>
      </div>
   );
};

export default DynamicComponent;
App.js
import { create, act } from 'react-test-renderer';
// 导入组件
import DynamicComponent from './DynamicComponent.js';

let root;
act(() => {
   root = create(<DynamicComponent />);
});

// 动态变化
act(() => {
   root.update(<DynamicComponent />);
});

expect(root.toJSON()).toMatchSnapshot();
输出
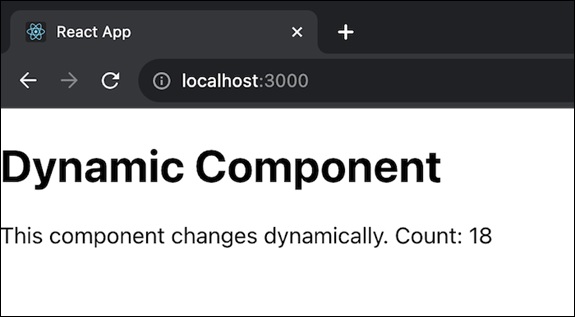
在此示例中,DynamicComponent 是一个使用 useState 和 useEffect Hooks(钩子)的功能组件。它在初始化计数状态后使用 setInterval 启动一个计时器,以每秒增加计数。这表示组件随时间动态变化。
此外,上述示例还展示了如何使用 TestRenderer.act() 来测试各种类型的 React 组件。通过遵循这些模式,我们可以简化测试过程并确保 React 应用程序的可靠性。
注意
在使用 react-test-renderer 时,使用 TestRenderer.act() 非常重要,以确保与 React 的内部行为兼容,并获得正确可靠的测试结果。
摘要
TestRenderer.act() 是 react-test-renderer 库中可用的函数。其主要目的是帮助测试 React 组件。它确保我们的测试以与 React 更新用户界面的方式非常相似的方式执行。所以我们已经了解了它的工作原理以及如何在不同场景中使用此功能。
 reactjs_reference_api.html
