SwiftUI - 绘制饼图
饼图是一种圆形图,用于以圆形形式显示数据。此图分为多个切片,每个切片代表一类数据,大小代表该类别的数量或百分比。饼图通常用于以非常简单的形式显示数据,以便用户可以轻松比较整个图表的不同部分。饼图包含以下组件 −
- 切片:它代表数据的类别。
- 标签:它用百分比值和类别名称标记每个切片。
- 图例:它解释了每个切片代表什么。
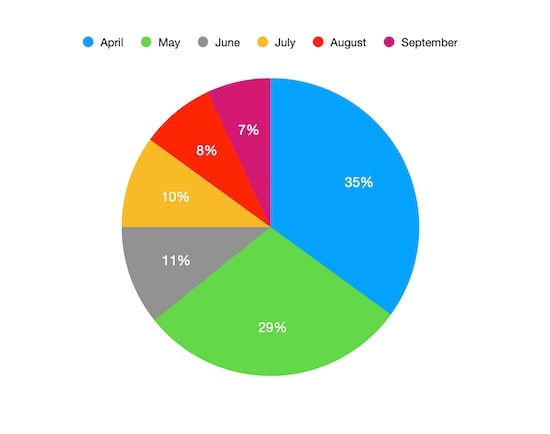
SwiftUI 不提供任何内置方法来直接创建饼图。因此,我们将使用 addArc() 方法和 Zstack 创建饼图。其中Zstack用于创建不同颜色的切片,addArc()方法用于根据指定的半径和角度计算起点和终点,然后在这些点之间创建一条曲线,然后将曲线插入路径中以创建所需的形状。
语法
以下是语法−
func addArc(center: CGPoint, radius: CGFloat, startAngle: Angle, endAngle: Angle, chronological: Bool, transform: CGAffineTransform = .identity)
参数
此函数采用以下参数−
- center:此参数的坐标代表圆弧的中心。
- radius:此参数的坐标表示圆弧的半径。
- startAngle:表示圆弧起点的角度。从 x 轴正方向计算。
- endAngle:表示圆弧终点的角度。从 x 轴正方向计算。
- clock:如果此参数的值设置为 true,则圆弧将顺时针创建。否则,圆弧将逆时针创建。
- transform:用于在添加到路径之前对圆弧应用变换。默认情况下,它设置为身份变换。
绘制饼图
现在我们将开始绘制饼图。因此,我们将使用以下问题陈述。假设 Mohan 在 100 人中开展了一项关于他们最喜欢的蔬菜的调查,结果为 −
- 土豆:40%
- 豌豆:30%
- 西红柿:20%
- 青辣椒:10%
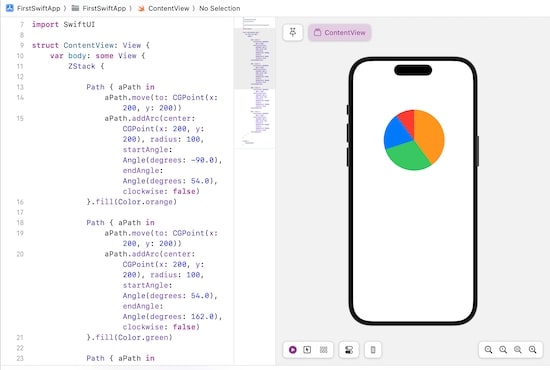
现在我们将创建此调查的饼图。根据数据,饼图将包含四种不同颜色的四个切片,其中每种颜色代表每种蔬菜,例如土豆代表橙色,豌豆代表绿色,西红柿代表红色,青辣椒代表蓝色。因此,以下 SwiftUI 程序将使用 addArch() 方法和 Zstack 创建饼图。
import SwiftUI

struct ContentView: View {
   var body: some View {
      ZStack {
         Path {
		    aPath in
               aPath.move(to: CGPoint(x: 200, y: 200))
               aPath.addArc(center: CGPoint(x: 200, y: 200), radius: 100, startAngle: Angle(degrees: -90.0), endAngle: Angle(degrees: 54.0), clockwise: false)
         }.fill(Color.orange)

         Path {
            aPath in
               aPath.move(to: CGPoint(x: 200, y: 200))
               aPath.addArc(center: CGPoint(x: 200, y: 200), radius: 100, startAngle: Angle(degrees: 54.0), endAngle: Angle(degrees: 162.0), clockwise: false)
         }.fill(Color.green)
         Path {
		    aPath in
               aPath.move(to: CGPoint(x: 200, y: 200))
               aPath.addArc(center: CGPoint(x: 200, y: 200), radius: 100, startAngle: Angle(degrees: 162.0), endAngle: Angle(degrees: 234.0), clockwise: false)
         }.fill(Color.blue)

         Path {
		    aPath in
               aPath.move(to: CGPoint(x: 200, y: 200))
               aPath.addArc(center: CGPoint(x: 200, y: 200), radius: 100, startAngle: Angle(degrees: 234.0), endAngle: Angle(degrees: 270.0), clockwise: false)
         }.fill(Color.red)
      }
   }
}

#Preview {
   ContentView()
}
输出
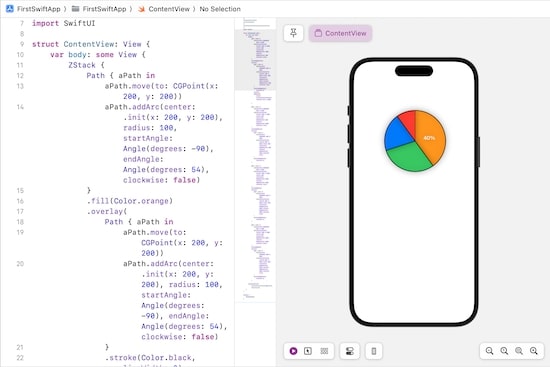
我们可以自定义饼图,使其更具吸引力。因此,我们在每个切片上添加边框和阴影。此外,在切片中添加标签。
import SwiftUI

struct ContentView: View {
   var body: some View {
      ZStack {
         Path {
		    aPath in
               aPath.move(to: CGPoint(x: 200, y: 200))
               aPath.addArc(center: .init(x: 200, y: 200), radius: 100, startAngle: Angle(degrees: -90), endAngle: Angle(degrees: 54), clockwise: false)
         }.fill(Color.orange).overlay(
            Path {
               aPath in
                  aPath.move(to: CGPoint(x: 200, y: 200))
                  aPath.addArc(center: .init(x: 200, y: 200), radius: 100, startAngle: Angle(degrees: -90), endAngle: Angle(degrees: 54), clockwise: false)
            }.stroke(Color.black, lineWidth: 2).overlay(Text("40%")
               .bold().foregroundColor(.white).offset(x: 50, y: -190)))

            Path {
			   aPath in
                  aPath.move(to: CGPoint(x: 200, y: 200))
                  aPath.addArc(center: .init(x: 200, y: 200), radius: 100, startAngle: Angle(degrees: 54), endAngle: Angle(degrees: 162), clockwise: false)
            }.fill(Color.green).overlay(
               Path {
			      aPath in
                     aPath.move(to: CGPoint(x: 200, y: 200))
                     aPath.addArc(center: .init(x: 200, y: 200), radius: 100, startAngle: Angle(degrees: 54), endAngle: Angle(degrees: 162), clockwise: false)
               }.stroke(Color.black, lineWidth: 2)
            )

            Path { aPath in
                aPath.move(to: CGPoint(x: 200, y: 200))
                aPath.addArc(center: .init(x: 200, y: 200), radius: 100, startAngle: Angle(degrees: 162), endAngle: Angle(degrees: 234), clockwise: false)
            }
            .fill(Color.blue)
            .overlay(
                Path { aPath in
                    aPath.move(to: CGPoint(x: 200, y: 200))
                    aPath.addArc(center: .init(x: 200, y: 200), radius: 100, startAngle: Angle(degrees: 162), endAngle: Angle(degrees: 234), clockwise: false)
                }.stroke(Color.black, lineWidth: 2))
                Path {
				   aPath in
                      aPath.move(to: CGPoint(x: 200, y: 200))
                      aPath.addArc(center: .init(x: 200, y: 200), radius: 100, startAngle: Angle(degrees: 234), endAngle: Angle(degrees: 270), clockwise: false)
                }.fill(Color.red).overlay(
                Path {
                   aPath in
                      aPath.move(to: CGPoint(x: 200, y: 200))
                      aPath.addArc(center: .init(x: 200, y: 200), radius: 100, startAngle: Angle(degrees: 234), endAngle: Angle(degrees: 270), clockwise: false)
                }.stroke(Color.black, lineWidth: 2))

      }.shadow(radius: 10)
   }
}

#Preview {
   ContentView()
}
输出