
Yii - 片段缓存
片段缓存提供网页片段的缓存。
步骤 1 − 向 SiteController 添加一个名为 actionFragmentCaching() 的新函数。
public function actionFragmentCaching() {
   $user = new MyUser();
   $user->name = "cached user name";
   $user->email = "cacheduseremail@gmail.com";
   $user->save();
   $models = MyUser::find()->all();
   return $this->render('cachedview', ['models' => $models]);
}
在上面的代码中,我们创建了一个新用户并显示了一个 cachedview 视图文件。
步骤 2 − 现在,在 views/site 文件夹中创建一个名为 cachedview.php 的新文件。
<?php if ($this->beginCache('cachedview')) { ?>
   <?php foreach ($models as $model): ?>
      <?= $model->id; ?>
      <?= $model->name; ?>
      <?= $model->email; ?>
      <br/>
   <?php endforeach; ?>
<?php $this->endCache(); } ?>
<?php echo "Count:", \app\models\MyUser::find()->count(); ?>
我们在 beginCache() 和 endCache() 方法中封装了内容生成逻辑。如果在缓存中找到内容,beginCache() 方法将呈现它。
步骤 3 − 转到 URL http://localhost:8080/index.php?r=site/fragment-caching 并重新加载页面。以下是输出。
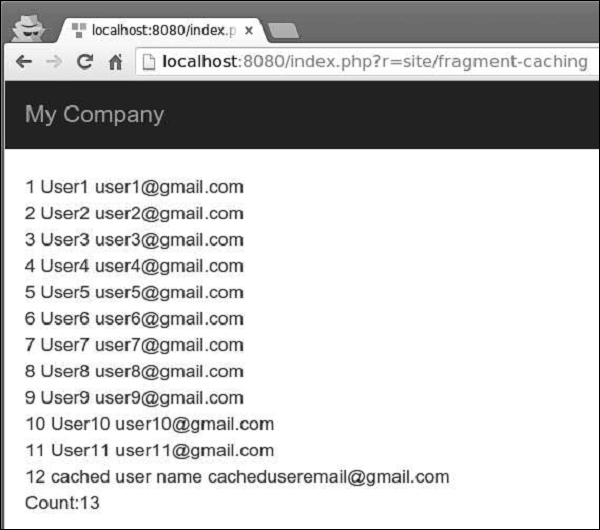
请注意,beginCache() 和 endCache() 方法之间的内容已被缓存。在数据库中,我们有 13 个用户,但只显示了 12 个。
页面缓存
页面缓存提供对整个网页内容的缓存。 yii\filter\PageCache 支持页面缓存。
步骤 1 − 修改 SiteController 的 behaviors() 函数。
public function behaviors() {
   return [
      'access' => [
         'class' => AccessControl::className(),
         'only' => ['logout'],
         'rules' => [
            [
               'actions' => ['logout'],
               'allow' => true,
               'roles' => ['@'],
            ],
         ],
      ],
      'verbs' => [
         'class' => VerbFilter::className(),
         'actions' => [
            'logout' => ['post'],
         ],
      ],
      [
         'class' => 'yii\filters\PageCache',
         'only' => ['index'],
         'duration' => 60
      ],
   ];
}
上述代码将索引页缓存 60 秒。
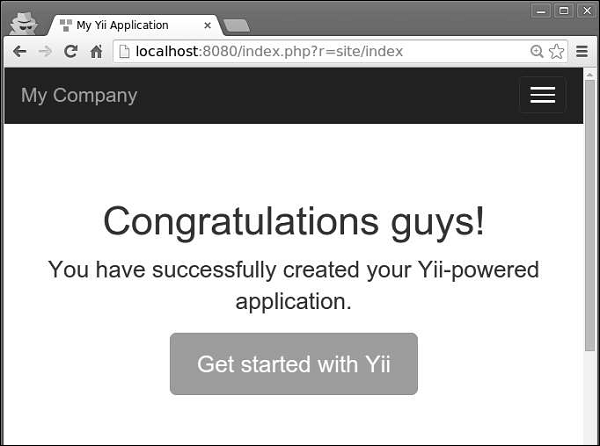
步骤 2 − 转到 URL http://localhost:8080/index.php?r=site/index。然后,修改索引视图文件的祝贺消息。如果重新加载页面,您将不会注意到任何变化,因为页面已被缓存。等一分钟,然后再次重新加载页面。
HTTP 缓存
Web 应用程序也可以使用客户端缓存。要使用它,您可以为控制器操作配置 yii\filter\HttpCache 过滤器。
Last-Modified 标头使用时间戳来指示页面是否已被修改。
步骤 1 −要启用发送 Last-Modified 标头,请配置 yii\filter\HttpCache::$lastModified 属性。
public function behaviors() {
   return [
      [
         'class' => 'yii\filters\HttpCache',
         'only' => ['index'],
         'lastModified' => function ($action, $params) {
            $q = new \yii\db\Query();
            return $q->from('news')->max('created_at');
         },
      ],
   ];
}
在上面的代码中,我们只为索引页启用了 HTTP 缓存。当浏览器第一次打开索引页时,页面在服务器端生成并发送到浏览器。第二次,如果没有创建新闻,服务器将不会重新生成页面。
Etag 标头提供了一个表示页面内容的哈希值。如果页面发生变化,哈希值也会改变。
步骤 2 − 要启用发送 Etag 标头,请配置 yii\filters\HttpCache::$etagSeed 属性。
public function behaviors() {
   return [
      [
         'class' => 'yii\filters\HttpCache',
         'only' => ['index'],
         'etagSeed' => function ($action, $params) {
            $user = $this->findModel(\Yii::$app->request->get('id'));
            return serialize([$user->name, $user->email]);
         },
      ],
   ];
}
在上面的代码中,我们仅为 index 操作启用了 HTTP 缓存。它应根据用户的姓名和电子邮件生成 Etag HTTP 标头。当浏览器第一次打开索引页时,该页面在服务器端生成并发送到浏览器。第二次,如果姓名或电子邮件没有更改,服务器将不会重新生成该页面。

