Yii - 本地化
I18N(国际化)是设计可适应各种语言的应用程序的过程。Yii 提供全方位的 I18N 功能。
区域设置是一组指定用户语言和国家/地区的参数。例如,en-US 代表英语区域设置和美国。Yii 提供两种类型的语言:源语言和目标语言。源语言是应用程序中所有文本消息的编写语言。目标语言是应该用来向最终用户显示内容的语言。
消息翻译组件将文本消息从源语言翻译成目标语言。要翻译消息,消息翻译服务必须在消息源中查找它。
要使用消息翻译服务,您应该 −
- 在 Yii::t() 方法中包装要翻译的文本消息。
- 配置消息源。
- 将消息存储在消息源中。
步骤 1 − Yii::t() 方法可以这样使用。
echo \Yii::t('app', 'This is a message to translate!');
在上面的代码片段中,"app"代表消息类别。
步骤 2 −现在,修改 config/web.php 文件。
<?php
   $params = require(__DIR__ . '/params.php');
   $config = [
      'id' => 'basic',
      'basePath' => dirname(__DIR__),
      'bootstrap' => ['log'],
      'components' => [
         'request' => [
            // !!! insert a secret key in the following (if it is empty) - this
               //is required by cookie validation
            'cookieValidationKey' => 'ymoaYrebZHa8gURuolioHGlK8fLXCKjO',
         ],
         'cache' => [
            'class' => 'yii\caching\FileCache',
         ],
         'i18n' => [
            'translations' => [
               'app*' => [
                  'class' => 'yii\i18n\PhpMessageSource',
                  'fileMap' => [
                     'app' => 'app.php'
                  ],
               ],
            ],
         ],
         'user' => [
            'identityClass' => 'app\models\User',
            'enableAutoLogin' => true,
         ],
         'errorHandler' => [
            'errorAction' => 'site/error',
         ],
         'mailer' => [
            'class' => 'yii\swiftmailer\Mailer',
            // 默认将所有邮件发送到一个文件。您必须设置
            // 'useFileTransport' 为 false 并配置传输
            // 以便邮件程序发送真实的电子邮件。
            'useFileTransport' => true,
         ],
         'log' => [
            'flushInterval' => 1,
            'traceLevel' => YII_DEBUG ? 3 : 0,
            'targets' => [
               [
                  'class' => 'yii\log\FileTarget',
                  'exportInterval' => 1,
                  'logVars' => [],
               ],
            ],
         ],
         'db' => require(__DIR__ . '/db.php'),
      ],
      // set target language to be Russian
      'language' => 'ru-RU',
      // set source language to be English
      'sourceLanguage' => 'en-US',
      'modules' => [
         'hello' => [
            'class' => 'app\modules\hello\Hello',
         ],
      ],
      'params' => $params,
   ];
   if (YII_ENV_DEV) {
      // 针对"dev"环境的配置调整
      $config['bootstrap'][] = 'debug';
      $config['modules']['debug'] = [
         'class' => 'yii\debug\Module',
      ];
      $config['bootstrap'][] = 'gii';
      $config['modules']['gii'] = [
         'class' => 'yii\gii\Module',
      ];
   }
   return $config;
?>
在上面的代码中,我们定义了源语言和目标语言。我们还指定了 yii\i18n\PhpMessageSource 支持的消息源。app* 模式表示所有以 app 开头的消息类别都必须使用此特定消息源进行翻译。在上述配置中,所有俄语翻译都将位于 messages/ru-RU/app.php 文件中。
步骤 3 − 现在,创建 messages/ru-RU 目录结构。在 ru-RU 文件夹中创建一个名为 app.php 的文件。这将存储所有 EN → RU 翻译。
<?php
   return [
      'This is a string to translate!' => 'Эта строка для перевода!'
   ];
?>
步骤 4 − 在 SiteController 中创建一个名为 actionTranslation() 的函数。
public function actionTranslation() {
    echo \Yii::t('app', 'This is a string to Translation!');
}
步骤 5 − 在 Web 浏览器中输入 URL http://localhost:8080/index.php?r=site/translation,您将看到以下内容。
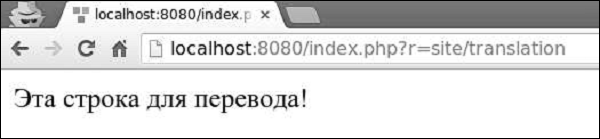
由于我们将目标语言设置为 ru-RU,因此该消息被翻译成俄语。我们可以动态更改应用程序的语言。
步骤 6 − 修改 actionTranslation() 方法。
public function actionTranslation() {
   \Yii::$app->language = 'en-US';
   echo \Yii::t('app', 'This is a string to translate!');
}
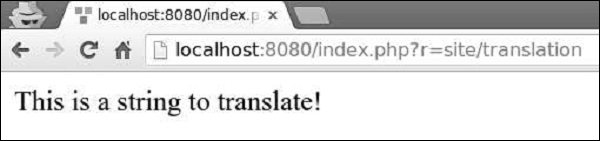
现在,消息以英文显示 −
步骤 7 − 在翻译的消息中,您可以插入一个或多个参数。
public function actionTranslation() {
   $username = 'Vladimir';
   // 显示用户名为"Vladimir"的翻译消息
   echo \Yii::t('app', 'Hello, {username}!', [
      'username' => $username,
   ]), "<br>";
   $username = 'John';
   // 显示用户名为"John"的翻译消息
   echo \Yii::t('app', 'Hello, {username}!', [
      'username' => $username,
   ]), "<br>";
   $price = 150;
   $count = 3;
   $subtotal = 450;
   echo \Yii::t('app', 'Price: {0}, Count: {1}, Subtotal: {2}', [$price, $count, $subtotal]);
}
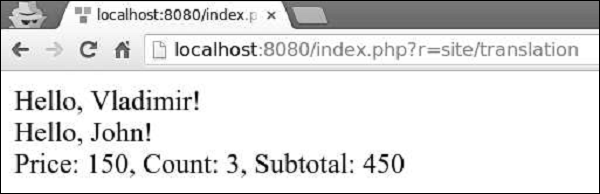
以下是输出。
您可以翻译整个视图脚本,而不是翻译单个文本消息。例如,如果目标语言是 ru-RU,并且您想要翻译 views/site/index.php 视图文件,则应翻译该视图并将其保存在 views/site/ru-RU 目录下。
步骤 8 − 创建 views/site/ru-RU 目录结构。然后,在 ru-RU 文件夹中使用以下代码创建一个名为 index.php 的文件。
<?php
   /* @var $this yii\web\View */
   $this->title = 'My Yii Application';
?>

<div class = "site-index">
   <div class = "jumbotron">
      <h1>Добро пожаловать!</h1>
   </div>
</div>
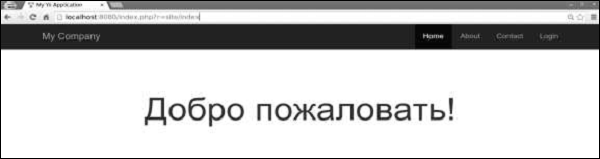
步骤 9 − 目标语言是 ru-RU,因此如果您输入 URL http://localhost:8080/index.php?r=site/index,您将看到包含俄语翻译的页面。