
Yii - 布局
布局代表多个视图的公共部分,例如页眉和页脚。默认情况下,布局应存储在 views/layouts 文件夹中。
让我们看一下基本应用程序模板的主要布局 −
<?php
   /* @var $this \yii\web\View */
   /* @var $content string */
   use yii\helpers\Html;
   use yii\bootstrap\Nav;
   use yii\bootstrap\NavBar;
   use yii\widgets\Breadcrumbs;
   use app\assets\AppAsset;
   AppAsset::register($this);
?>

<?php $this->beginPage() ?>
<!DOCTYPE html>
<html lang = "<?= Yii::$app->language ?>">
   <head>
      <meta charset = "<?= Yii::$app->charset ?>">
      <meta name = "viewport" content = "width = device-width, initial-scale = 1">
      <?= Html::csrfMetaTags() ?>
      <title><?= Html::encode($this->title) ?></title>
      <?php $this->head() ?>
   </head>

   <body>
      <?php $this->beginBody() ?>
         <div class = "wrap">
            <?php
               NavBar::begin([
                  'brandLabel' => 'My Company',
                  'brandUrl' => Yii::$app->homeUrl,
                  'options' => [
                     'class' => 'navbar-inverse navbar-fixed-top',
                  ],
               ]);

               echo Nav::widget([
                  'options' => ['class' => 'navbar-nav navbar-right'],
                  'items' => [
                     ['label' => 'Home', 'url' => ['/site/index']],
                     ['label' => 'About', 'url' => ['/site/about']],
                     ['label' => 'Contact', 'url' => ['/site/contact']],
                     Yii::$app->user->isGuest ?
                        ['label' => 'Login', 'url' => ['/site/login']] :
                        [
                           'label' => 'Logout (' . Yii::$app->user->identity->username.')',
                           'url' => ['/site/logout'],
                           'linkOptions' => ['data-method' => 'post']
                        ],
                  ],
               ]);

               NavBar::end();
            ?>
            <div class = "container">
               <?= Breadcrumbs::widget([
                  'links' => isset($this->params['breadcrumbs']) ? $this>params
                     ['breadcrumbs'] : [],
               ]) ?>
               <?= $content ?>
            </div>

         </div>

         <footer class = "footer">
            <div class = "container">
               <p class = "pull-left">© My Company <?= date('Y') ?></p>
               <p class = "pull-right"><?= Yii::powered() ?></p>
            </div>
         </footer>

      <?php $this->endBody() ?>
   </body>
</html>
<?php $this->endPage() ?>
此布局生成所有页面通用的 HTML 页面。$content 变量是内容视图的渲染结果。以下方法触发有关渲染过程的事件,以便可以正确注入在其他地方注册的脚本和标签 −
head() − 应在 head 部分内调用。生成一个占位符,它将被替换为针对 head 位置的已注册 HTML。
beginBody() − 应在 body 部分的开头调用。触发 EVENT_BEGIN_BODY 事件。生成一个占位符,它将被替换为针对 body 开始位置的已注册 HTML。
endBody() −应在 body 部分末尾调用。触发 EVENT_END_BODY 事件。生成占位符,该占位符将被替换为针对正文末尾位置的已注册 HTML。
beginPage() − 应在布局开始时调用。触发 EVENT_BEGIN_PAGE 事件。
endPage() − 应在布局末尾调用。触发 EVENT_END_PAGE 事件。
创建布局
步骤 1 − 在 views/layouts 目录中,使用以下代码创建一个名为 newlayout.php 的文件。
<?php
   /* @var $this \yii\web\View */
   /* @var $content string */
   use yii\helpers\Html;
   use yii\bootstrap\Nav;
   use yii\bootstrap\NavBar;
   use yii\widgets\Breadcrumbs;
   use app\assets\AppAsset;
   AppAsset::register($this);
?>
<?php $this->beginPage() ?>
<!DOCTYPE html>
<html lang = "<?= Yii::$app->language ?>">
   <head>
      <meta charset = "<?= Yii::$app->charset ?>">
      <meta name = "viewport" content = "width = device-width, initial-scale = 1">
      <? = Html::csrfMetaTags() ?>
      <title><? = Html::encode($this->title) ?></title>
      <?php $this->head() ?>
   </head>

   <body>
      <?php $this->beginBody() ?>
         <div class = "wrap">
            <div class = "container">
               <? = $content ?>
            </div>
         </div>

         <footer class = "footer">
            <div class = "container">
               <p class = "pull-left">© My Company <?= date('Y') ?></p>
               <p class = "pull-right"><? = Yii::powered() ?></p>
            </div>
         </footer>
      <?php $this->endBody() ?>
   </body>

</html>
<?php $this->endPage() ?>
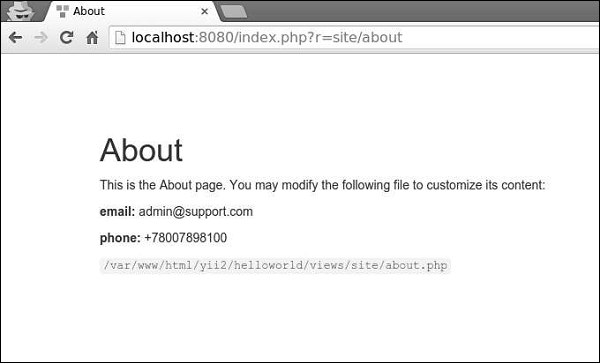
我们已删除顶部菜单栏。
步骤 2 − 要将此布局应用于 SiteController,请将 $layout 属性添加到 SiteController 类。
<?php
   namespace app\controllers;
   use Yii;
   use yii\filters\AccessControl;
   use yii\web\Controller;
   use yii\filters\VerbFilter;
   use app\models\LoginForm;
   use app\models\ContactForm;
   class SiteController extends Controller {
      public $layout = "newlayout";
      /* other methods */
   }
?>
步骤 3 − 现在,如果您在 SiteController 的任何视图中转到 Web 浏览器,您将看到布局已更改。
步骤 4 − 要注册各种元标记,您可以在内容视图中调用 yii\web\View::registerMetaTag()。
步骤 5 − 修改 SiteController 的 '关于' 视图。
<?php
   /* @var $this yii\web\View */
   use yii\helpers\Html;
   $this->title = 'About';
   $this->params['breadcrumbs'][] = $this->title;
   $this->registerMetaTag(['name' => 'keywords', 'content' => 'yii, developing, views,
      meta, tags']);
   $this->registerMetaTag(['name' => 'description', 'content' => 'This is the description
      of this page!'], 'description');
?>
<div class="site-about">
   <h1><?= Html::encode($this->title) ?></h1>
   <p>
      This is the About page. You may modify the following file to customize its content:
   </p>
   <code><?= __FILE__ ?></code>
</div>
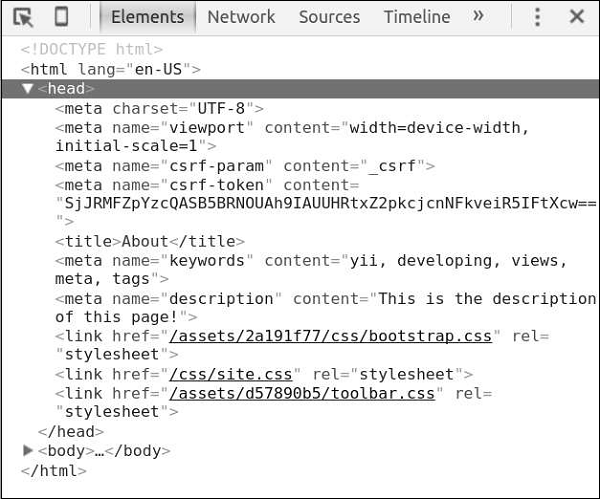
我们刚刚注册了两个元标记 − 关键词和描述。
步骤 6 − 现在转到 http://localhost:8080/index.php?r=site/about,您将在页面的头部找到元标记,如以下屏幕截图所示。
视图触发多个事件 −
EVENT_BEGIN_BODY − 通过调用 yii\web\View::beginBody() 在布局中触发。
EVENT_END_BODY −通过调用 yii\web\View::endBody() 在布局中触发。
EVENT_BEGIN_PAGE − 通过调用 yii\web\View::beginPage() 在布局中触发。
EVENT_END_PAGE − 通过调用 yii\web\View::endPage() 在布局中触发。
EVENT_BEFORE_RENDER − 在开始渲染文件时在控制器中触发。
EVENT_AFTER_RENDER −在渲染文件后触发。
您可以响应这些事件以将内容注入视图。
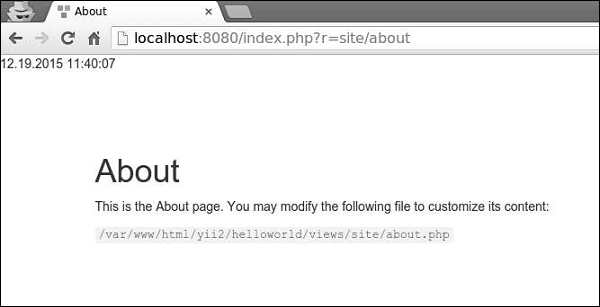
步骤 7 − 要在 SiteController 的 actionAbout 中显示当前日期和时间,请按如下方式修改它。
public function actionAbout() {
   \Yii::$app->view->on(View::EVENT_BEGIN_BODY, function () {
      echo date('m.d.Y H:i:s');
   });
   return $this->render('about');
}
步骤 8 −在 Web 浏览器的地址栏中输入 http://localhost:8080/index.php?r=site/about,您将看到以下内容。
要点
为了使视图更易于管理,您应该 −
- 将复杂的视图分成几个较小的视图。
- 对常见的 HTML 部分(页眉、页脚、菜单等)使用布局。
- 使用小部件。
视图应该 −
- 包含 HTML 和简单的 PHP 代码来格式化和呈现数据。
- 不处理请求。
- 不修改模型属性。
- 不执行数据库查询。

