Yii - URL 路由
要更改应用程序的默认路由,您应该配置 defaultRoute 属性。
步骤 1 − 按照以下方式修改 config/web.php 文件。
<?php
   $params = require(__DIR__ . '/params.php');
   $config = [
      'id' => 'basic',
      'basePath' => dirname(__DIR__),
      'bootstrap' => ['log'],
      'defaultRoute' => 'site/contact',
      'components' => [
         //other code
?>
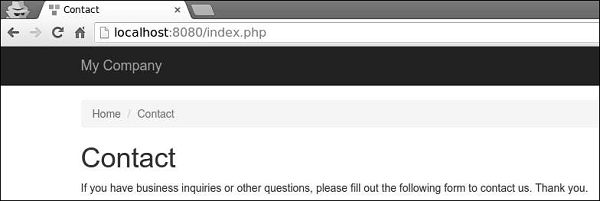
步骤 2 − 转到 http://localhost:8080/index.php。您将看到默认的 contact 页面。
要暂时将应用程序置于维护模式,您应该配置 yii\web\Application::$catchAll 属性。
步骤 3 − 将以下函数添加到 SiteController。
public function actionMaintenance() {
    echo "<h1>Maintenance</h1>";
}
步骤 4 −然后,按照下列方式修改 config/web.php 文件。
<?php
   $params = require(__DIR__ . '/params.php');
   $config = [
      'id' => 'basic',
      'basePath' => dirname(__DIR__),
      'bootstrap' => ['log'],
      'catchAll' => ['site/maintenance'],
      'components' => [
         //OTHER CODE
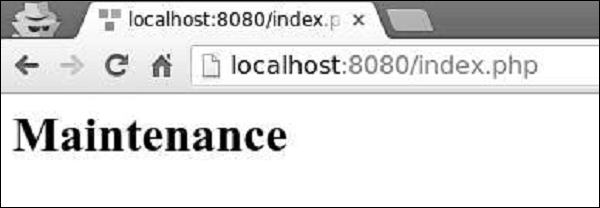
步骤 5 − 现在输入应用程序的任意 URL,您将看到以下内容。
创建 URL
要创建各种类型的 URL,您可以使用 yii\helpers\Url::to() 辅助方法。以下示例假定使用默认 URL 格式。
步骤 1 − 向 SiteController 添加 actionRoutes() 方法。
public function actionRoutes() {
    return $this->render('routes');
}
此方法仅呈现 routes 视图。
步骤 2 − 在 views/site 目录中,使用以下代码创建一个名为 routes.php 的文件。
<?php
   use yii\helpers\Url;
?>

<h4>
   <b>Url::to(['post/index']):</b>
   <?php
      // 创建到路由的 URL:/index.php?r = post/index
      echo Url::to(['post/index']);
   ?>
</h4>

<h4>
   <b>Url::to(['post/view', 'id' => 100]):</b>
   <?php
      // 创建一个带有参数的路由 URL:/index.php?r = post/view&id=100
      echo Url::to(['post/view', 'id' => 100]);
   ?>
</h4>

<h4>
   <b>Url::to(['post/view', 'id' => 100, '#' => 'content']):</b>
   <?php
      // 创建一个锚定 URL:/index.php?r = post/view&id=100#content
      echo Url::to(['post/view', 'id' => 100, '#' => 'content']);
   ?>
</h4>

<h4>
   <b>Url::to(['post/index'], true):</b>
   <?php
      // 创建一个绝对 URL:http://www.example.com/index.php?r=post/index
      echo Url::to(['post/index'], true);
   ?>
</h4>

<h4>
   <b>Url::to(['post/index'], 'https'):</b>
   <?php
      // 使用 https 方案创建绝对 URL:https://www.example.com/index.php?r=post/index
      echo Url::to(['post/index'], 'https');
   ?>
</h4>
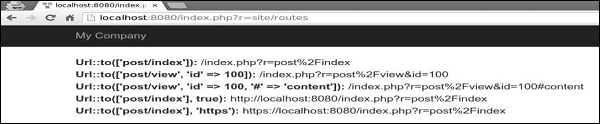
步骤 3 −输入 http://localhost:8080/index.php?r=site/routes,你会看到 to() 函数的一些用法。
传递给 yii\helpers\Url::to() 方法的路由可以是相对的,也可以是绝对的,具体规则如下 −
如果路由为空,则使用当前请求的路由。
如果路由没有前导斜杠,则认为是相对于当前模块的路由。
如果路由不包含斜杠,则认为是当前控制器的操作 ID。
yii\helpers\Url 辅助类还提供了几个有用的方法。
步骤 4 − 修改 routes 视图,如以下代码所示。
<?php
   use yii\helpers\Url;
?>

<h4>
   <b>Url::home():</b>
   <?php
      // 主页网址:/index.php?r=site/index
      echo Url::home();
   ?>
</h4>

<h4>
   <b>Url::base():</b>
   <?php
      // 基本 URL,如果应用程序部署在 Web 根目录的子文件夹中则很有用
      echo Url::base();
   ?>
</h4>

<h4>
   <b>Url::canonical():</b>
   <?php
        // 当前请求的 URL 的规范 URL
        // 请参阅 https://en.wikipedia.org/wiki/Canonical_link_element
      	echo Url::canonical();
   ?>
</h4>

<h4>
   <b>Url::previous():</b>
   <?php
      // 记住当前请求的 URL 并在以后的请求中检索它
      Url::remember();
      echo Url::previous();
   ?>
</h4>
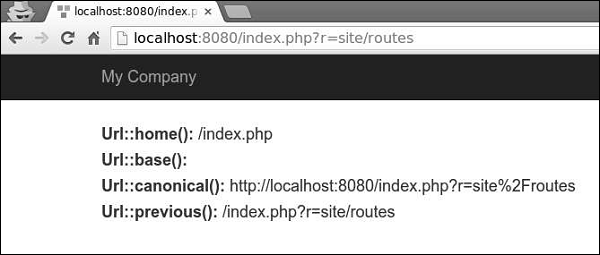
步骤 5 − 如果您在 Web 浏览器中输入地址 http://localhost:8080/index.php?r=site/routes,您将看到以下内容。