
Windows 10 开发 - 快速指南
Windows 10 开发 - 简介
本教程专为想要学习如何开发 Windows 10 应用程序的人士而设计。在本教程中,我们将学习 −
- Windows 10 应用程序开发
- 微软发布的新操作系统更新
- 更新中为开发者提供的新功能
许多有趣的应用场景现在都成为可能,而这些场景在第一个版本中是无法实现的。微软不仅添加了新的 API,还扩展了现有的 API。
通用 Windows 应用
通用 Windows 应用最初在 Windows 8 中以 Windows 运行时的形式引入,它基于通用应用程序平台构建。
现在,在 Windows 10 中,通用应用程序平台的名称已更改为通用 Windows 平台 (UWP)。您可以通过面向 Windows 应用商店的 Windows 10 设备(例如 PC、平板电脑、手机等)构建现代化且完全沉浸式的应用。
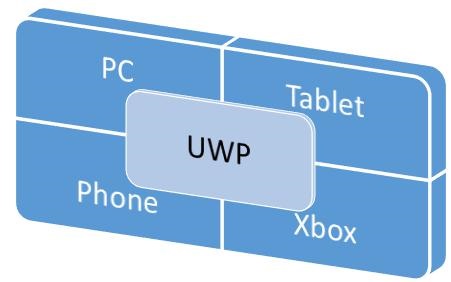
在 Windows 10 中,您只需 − 即可轻松开发适用于 Windows 10 支持的所有设备的应用。
- 一套 API
- 一个应用包
- 一个应用商店
通用 Windows 平台还支持不同的屏幕尺寸和不同的交互模型,例如触摸板、鼠标等。键盘、游戏控制器或触控笔。
UWP 应用的特点
以下是通用 Windows 应用的一些特点,这些特点使其优于 Windows 10。
您可以定位设备系列,而不是像 Windows 8.1 这样的操作系统。
应用使用 .AppX 打包格式进行打包和分发,这确保您的应用可以无缝部署和更新。
您可以将应用提交到 Windows 应用商店,它会在所有设备系列上或仅在您选择的设备上提供。您可以轻松地在一个地方管理所有适用于 Windows 设备的应用。
您可以将应用的可用性限制在特定设备系列上。
通用 Windows 平台 (UWP) 的核心 API 在所有 Windows 设备系列中都是相同的。因此,如果您的应用仅使用核心 API,则可以在所有 Windows 10 设备上运行。
借助扩展 SDK,您可以针对特定设备优化您的应用。
开发选择
通用 Windows 应用可以使用以下任何一种语言创建 −
- C# 或 Visual Basic 结合 XAML
- JavaScript 结合 HTML
- C++ 结合 DirectX 和/或 XAML
您还可以使用一种语言编写组件,并在使用另一种语言开发的应用程序中使用它们。
Windows 10 开发 - UWP
Windows 运行时 (WinRT) 是一种平台同构的应用程序架构,支持使用 C++/CX、C#、VB.NET 和 JavaScript 进行开发。WinRT 应用程序原生支持 x86 和 ARM 架构。以下是一些重要功能。
它于 2012 年 9 月在 Windows Server 2012 中首次推出。
WinRT API 允许使用 JavaScript、C#、Visual Basic 和 C++ 访问所有核心平台功能。
WinRT 组件支持多种语言和 API,例如本机语言、托管语言和脚本语言。
通用 Windows 平台 (UWP)
通用 Windows 应用基于通用 Windows 平台 (UWP) 构建,该平台最初在 Windows 8 中作为 Windows 运行时引入。 Windows 10 引入了通用 Windows 平台 (UWP),进一步推进了 Windows 运行时 (WinRT) 模型。
在 Windows 8.1 中,借助通用 Windows 8 应用,WinRT 首次在 Windows Phone 8.1 应用和 Windows 8.1 应用之间实现统一,从而使用共享代码库同时支持 Windows Phone 和 Windows 应用。
Windows 10 统一核心(现称为 Windows 核心)已发展到 UWP 为所有运行 Windows 10 的设备提供一个通用的应用平台的阶段。
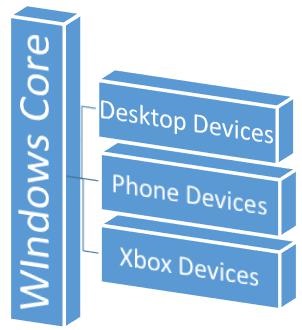
UWP 不仅可以调用所有设备通用的 WinRT API,还可以调用 API(包括Win32 和 .NET API)特定于应用所运行的设备系列。
Windows 10 支持的设备
Windows 8.1 和 Windows Phone 8.1 应用面向特定操作系统;Windows 或 Windows Phone。Windows 10 应用不面向特定操作系统,但面向一个或多个设备系列。
设备系列也有自己的 API,这些 API 为特定设备系列添加了功能。您可以轻松确定设备系列中所有可以从 Windows 应用商店安装和运行您的应用的设备。以下是设备系列的层次结构表示。

UWP 的优势
通用 Windows 平台 (UWP) 为开发者提供了许多功能。它们是 −
- 适用于所有设备的统一操作系统和统一核心。
- 一个应用平台,用于跨所有家庭运行应用程序。
- 一个开发者中心,用于提交应用程序和控制面板。
- 一个商店,适用于所有设备。
UWP 开发设置
请按照以下步骤开始为 Windows 10 创建您自己的通用 Windows 平台 (UWP) 应用。
Windows 10 操作系统 − UWP 应用需要最新版本的 Windows 才能开发。您也可以在 Windows 8.1 上开发 UWP 应用,但不支持 UI 设计器窗口。
Windows 10 开发者工具 − 在 Visual Studio 2015 中,您可以设计、编写、测试和调试 UWP 应用。您可以从 https://dev.windows.com/en-us/downloads
下载并安装免费的 Microsoft Visual Studio Community 2015。
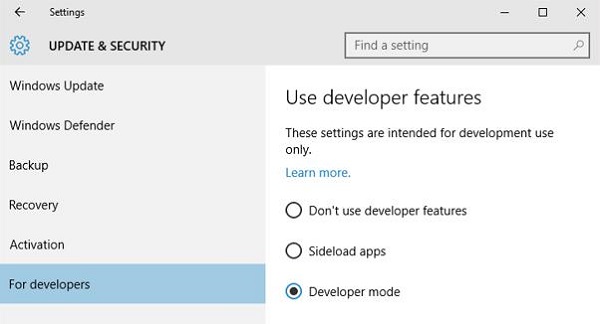
启用 Windows 10 的开发模式 −
前往开始 > 设置。
选择更新和安全。
然后选择面向开发者。
点击开发者模式
对于 UWP 应用,在设备上测试您的应用非常重要。
注册为应用开发者 − 您可以开始开发应用,但要将您的应用提交到商店,您需要一个开发者账户。您可以在此处创建您的开发者帐户:https://msdn.microsoft.com/enus/library/windows/apps/bg124287.aspx
完成上述步骤后,您现在就可以开始开发通用 Windows 平台 (UWP) 应用程序了。
Windows 10 开发 - 第一个应用
在本章中,我们将在 Windows 10 上的通用 Windows 平台 (UWP) 上使用 XAML 和 C# 创建我们的第一个简单应用 "Hello world"。我们将演示如何在任何 Windows 10 设备上运行和执行在 Visual Studio 中创建的单个 UWP 应用。
让我们按照以下步骤开始创建应用。
启动 Visual Studio 2015。
点击文件菜单,然后选择新建 > 项目。
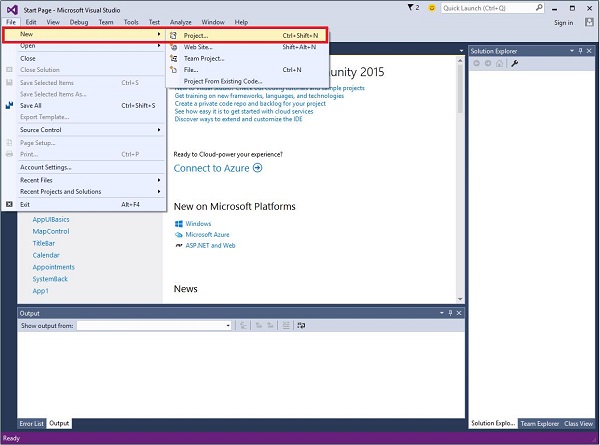
将显示以下新建项目对话框。您可以在对话框的左侧窗格中看到不同类型的模板。
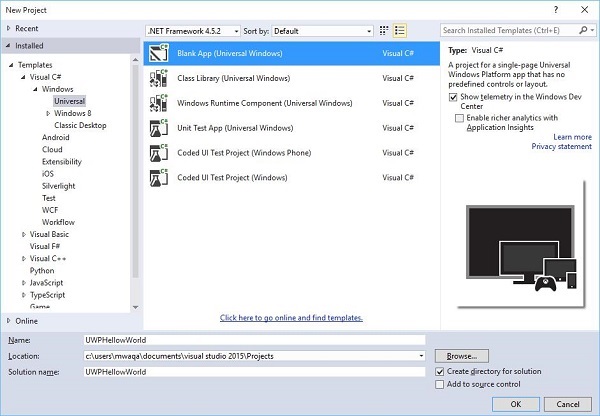
在左侧窗格中,您可以看到树状视图。从模板 > Visual C# > 中选择通用模板。 Windows。
在中心窗格中,选择空白应用(通用 Windows)模板
在名称字段中写入UWPHelloWorld,为项目命名。
点击确定即可创建一个新的 UWP 项目。
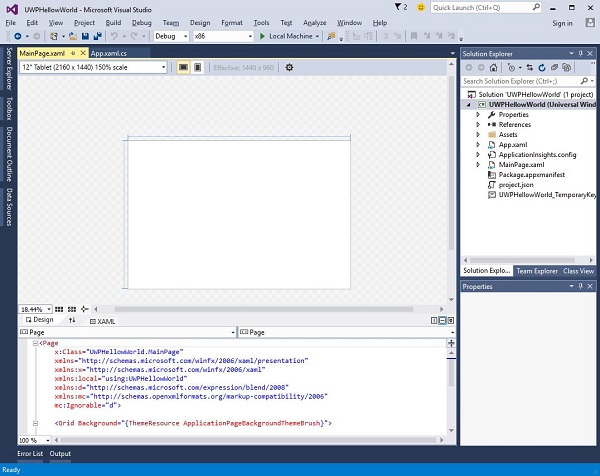
您可以在解决方案资源管理器中看到新创建的项目。
这是一个空白应用,但包含许多文件,这是任何 UWP 应用程序的最低要求。
MainPage.xaml 和MainPage.xaml.cs 在您执行应用程序时运行。
默认情况下,MainPage.xaml 文件包含以下信息。
<Page
   x:Class = "UWPHellowWorld.MainPage"
   xmlns = "http://schemas.microsoft.com/winfx/2006/xaml/presentation"
   xmlns:x = "http://schemas.microsoft.com/winfx/2006/xaml"
   xmlns:local = "using:UWPHellowWorld"
   xmlns:d = "http://schemas.microsoft.com/expression/blend/2008"
   xmlns:mc = "http://schemas.openxmlformats.org/markup-compatibility/2006"
   mc:Ignorable = "d">

   <Grid Background = "{ThemeResource ApplicationPageBackgroundThemeBrush}">
   </Grid>

</Page>
下面给出的是 MainPage.xaml.cs 中可用的默认信息。
using System;
using System.Collections.Generic;
using System.IO;
using System.Linq;
using System.Runtime.InteropServices.WindowsRuntime;

using Windows.Foundation;
using Windows.Foundation.Collections;

using Windows.UI.Xaml;
using Windows.UI.Xaml.Controls;
using Windows.UI.Xaml.Controls.Primitives;
using Windows.UI.Xaml.Data;
using Windows.UI.Xaml.Input;
using Windows.UI.Xaml.Media;
using Windows.UI.Xaml.Navigation;

// The Blank Page item template is documented at
   http://go.microsoft.com/fwlink/?LinkId=402352&clcid=0x409

namespace UWPHellowWorld {

   /// <summary>
      /// An empty page that can be used on its own or navigated to within a Frame.
   /// </summary>

   public sealed partial class MainPage : Page {
      public MainPage(){
         this.InitializeComponent();
      }
   }

}
让我们添加一些文本块、一个文本框和一个按钮,如下面的 XAML 代码所示。
<Page
   x:Class = "UWPHellowWorld.MainPage"
   xmlns = "http://schemas.microsoft.com/winfx/2006/xaml/presentation"
   xmlns:x = "http://schemas.microsoft.com/winfx/2006/xaml"
   xmlns:local = "using:UWPHellowWorld"
   xmlns:d = "http://schemas.microsoft.com/expression/blend/2008"
   xmlns:mc = "http://schemas.openxmlformats.org/markup-compatibility/2006"
   mc:Ignorable = "d">

   <Grid Background = "{ThemeResource ApplicationPageBackgroundThemeBrush}">

      <StackPanel HorizontalAlignment = "Center">
         <TextBlock Text = "Hello, world!"  Margin = "20"  Width = "200"
            HorizontalAlignment = "Left"/>

         <TextBlock Text = "Write your name." Margin = "20" Width = "200"
            HorizontalAlignment = "Left"/>

         <TextBox x:Name = "txtbox"  Width = "280" Margin = "20"
            HorizontalAlignment = "Left"/>

         <Button x:Name = "button" Content = "Click Me" Margin = "20"
            Click = "button_Click"/>

         <TextBlock x:Name = "txtblock" HorizontalAlignment = "Left"
            Margin = "20"/>
      </StackPanel>

   </Grid>

</Page>
- 下面给出的是 C# 中的点击事件按钮。
using System;
using System.Collections.Generic;
using System.IO;
using System.Linq;

using System.Runtime.InteropServices.WindowsRuntime;
using Windows.Foundation;
using Windows.Foundation.Collections;

using Windows.UI.Xaml;
using Windows.UI.Xaml.Controls;
using Windows.UI.Xaml.Controls.Primitives;
using Windows.UI.Xaml.Data;
using Windows.UI.Xaml.Input;
using Windows.UI.Xaml.Media;
using Windows.UI.Xaml.Navigation;

// The Blank Page item template is documented at
   http://go.microsoft.com/fwlink/?LinkId=402352&clcid=0x409

namespace UWPHellowWorld {

   /// <summary>
      /// An empty page that can be used on its own or navigated to within a Frame.
   /// </summary>

   public sealed partial class MainPage : Page {
      public MainPage() {
         this.InitializeComponent();
      }

      private void button_Click(object sender, RoutedEventArgs e) {
         if (txtbox.Text != "")
            txtblock.Text = "Hello: " + txtbox.Text;
         else
            txtblock.Text = "You have not write your name";
      }

   }

}
在 UWP 项目中,设计窗口上提供了设备预览选项,您可以借助该选项轻松更改布局,使其适应应用程序所针对的设备系列中所有设备的屏幕尺寸。
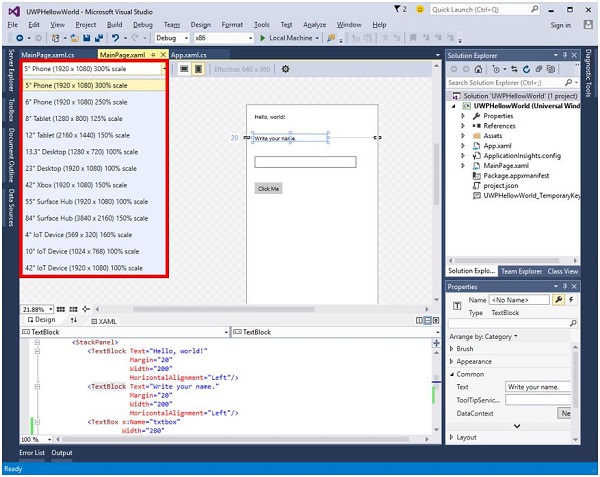
您可以在本地计算机、模拟器、仿真器或远程设备上运行和测试您的应用。您可以从如下所示的菜单中选择目标设备 −
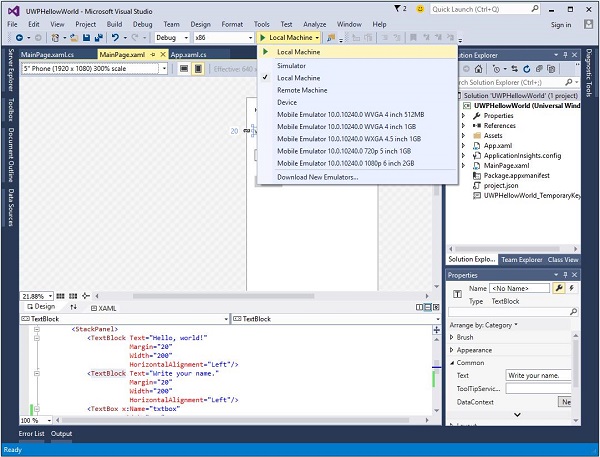
让我们在本地机器上运行上述代码,您将看到以下窗口。现在,在文本框中输入任意名称,然后点击按钮 Click Me。
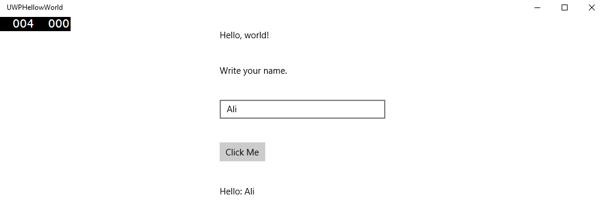
现在,如果您想在模拟器上测试您的应用,您可以从菜单中选择一个特定的模拟器并执行您的应用。您将看到以下模拟器 −
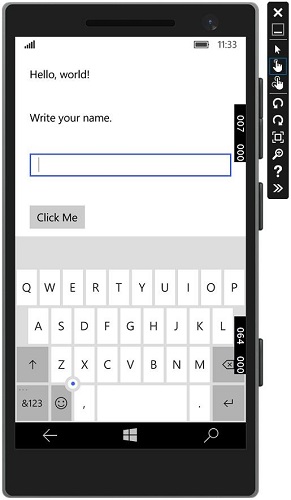
我们建议您使用不同的设备执行上述应用程序。
Windows 10 开发 - 应用商店
Windows 应用商店为开发者带来的优势在于,您可以销售自己的应用程序。您可以为每种设备系列提交单个应用程序。
Windows 10 应用商店是提交应用程序的地方,以便用户找到您的应用程序。
在 Windows 8 中,应用商店仅限于应用程序,而微软提供了许多应用商店,例如 Xbox 音乐商店、Xbox 游戏商店等。
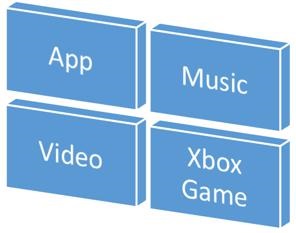
在 Windows 8 中,这些都是不同的应用商店,但在 Windows 10 中,它们被称为 Windows 应用商店。它的设计理念是让用户可以在一个地方为所有 Windows 10 设备找到全面的应用、游戏、歌曲、电影、软件和服务。
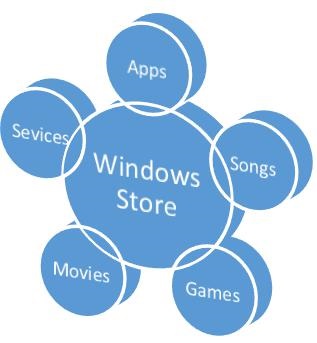
货币化
货币化意味着在桌面、移动设备、平板电脑和其他设备上销售您的应用。您可以通过多种方式在 Windows 应用商店中销售您的应用程序和服务来赚取收入。
您可以选择以下任意一种方法 −
最简单的方法是将您的应用提交到商店,并提供付费下载选项。
试用选项,用户可以在购买功能有限的应用之前试用它。
使用 Microsoft Advertising 为您的应用添加广告。
Microsoft Advertising
当您将广告添加到您的应用时,如果用户点击了该广告,广告商就会向您支付费用。 Microsoft Advertising 允许开发者接收来自 Microsoft 广告网络的广告。
适用于通用 Windows 应用的 Microsoft Advertising SDK 包含在 Visual Studio 2015 安装的库中。
您也可以从 visualstudiogallery
安装它。
现在,您可以轻松地将视频和横幅广告集成到您的应用中。
让我们看一个使用 XAML 编写的简单示例,使用 AdControl 在您的应用中添加横幅广告。
创建一个新的通用 Windows 空白应用项目,其中包含命名为 UWPBannerAd。
在解决方案资源管理器中,右键单击引用。
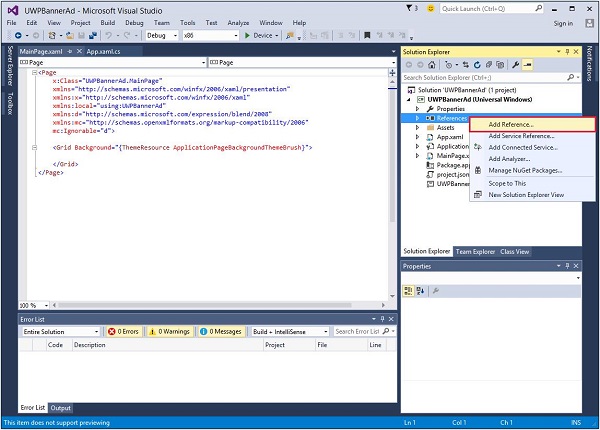
选择添加引用,这将打开引用管理器对话框。
在左侧窗格中,选择"通用 Windows"选项下的扩展,然后选中Microsoft Advertising SDK for XAML。
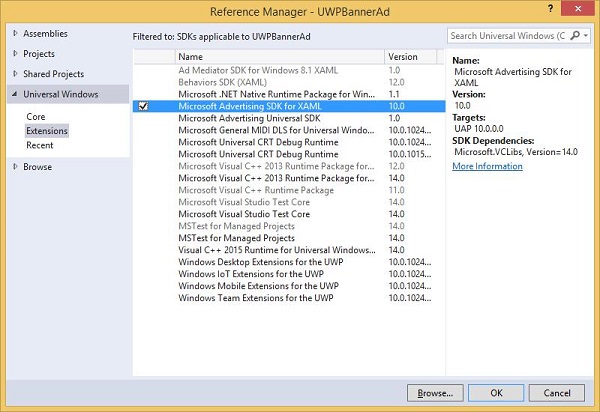
点击确定继续。
下面是 XAML 代码,其中添加了 AdControl 及其一些属性。
<Page
   x:Class = "UWPBannerAd.MainPage"
   xmlns = "http://schemas.microsoft.com/winfx/2006/xaml/presentation"
   xmlns:x = "http://schemas.microsoft.com/winfx/2006/xaml"
   xmlns:local = "using:UWPBannerAd"
   xmlns:d = "http://schemas.microsoft.com/expression/blend/2008"
   xmlns:mc = "http://schemas.openxmlformats.org/markup-compatibility/2006"
   xmlns:UI = "using:Microsoft.Advertising.WinRT.UI"
   mc:Ignorable = "d">

   <Grid Background = "{ThemeResource ApplicationPageBackgroundThemeBrush}">
      <StackPanel HorizontalAlignment = "Center">
         <UI:AdControl ApplicationId = "d25517cb-12d4-4699-8bdc-52040c712cab"
            AdUnitId = "10043121" HorizontalAlignment = "Left" Height = "580"
            VerticalAlignment = "Top" Width = "800"/>
      </StackPanel>
   </Grid>

</Page>
当上述代码在本地计算机上编译并执行后,您将看到以下带有 MSN 横幅的窗口。点击此横幅即可打开 MSN 网站。
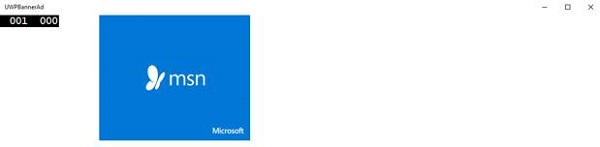
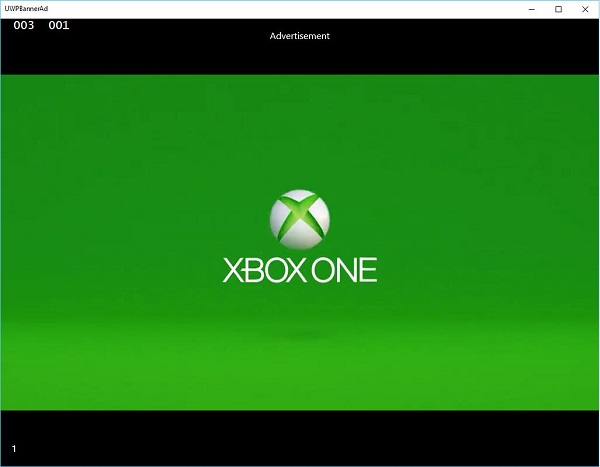
您还可以在应用程序中添加视频横幅。让我们再举一个例子,点击显示广告按钮后,将播放 Xbox One 的视频广告。
以下 XAML 代码演示了如何添加按钮及其属性和事件。
<Page
   x:Class = "UWPBannerAd.MainPage"
   xmlns = "http://schemas.microsoft.com/winfx/2006/xaml/presentation"
   xmlns:x = "http://schemas.microsoft.com/winfx/2006/xaml"
   xmlns:local = "using:UWPBannerAd"
   xmlns:d = "http://schemas.microsoft.com/expression/blend/2008"
   xmlns:mc = "http://schemas.openxmlformats.org/markup-compatibility/2006"
   xmlns:UI = "using:Microsoft.Advertising.WinRT.UI"
   mc:Ignorable = "d">

   <Grid Background = "{ThemeResource ApplicationPageBackgroundThemeBrush}">
      <StackPanel HorizontalAlignment = "Center">
         <Button x:Name = "showAd" Content = "Show Ad" HorizontalAlignment = "Left"
            Margin = "138,296,0,0" VerticalAlignment = "Top" FontSize = "48"
            Click = "showAd_Click"/>
      </StackPanel>
   </Grid>

</Page>
以下是 C# 中点击事件的实现。
using Microsoft.Advertising.WinRT.UI;
using Windows.UI.Xaml;
using Windows.UI.Xaml.Controls;

// 空白页项目模板的文档位于
   http://go.microsoft.com/fwlink/?LinkId=402352&clcid=0x409

namespace UWPBannerAd {

   /// <summary>
      /// An empty page that can be used on its own or navigated to within a Frame.
   /// </summary>

   public sealed partial class MainPage : Page {
      InterstitialAd videoAd = new InterstitialAd();

      public MainPage() {
         this.InitializeComponent();
      }

      private void showAd_Click(object sender, RoutedEventArgs e) {
         var MyAppId = "d25517cb-12d4-4699-8bdc-52040c712cab";
         var MyAdUnitId = "11388823";
         videoAd.AdReady += videoAd_AdReady;
         videoAd.RequestAd(AdType.Video, MyAppId, MyAdUnitId);
      }

      void videoAd_AdReady(object sender, object e){
         if ((InterstitialAdState.Ready) == (videoAd.State)) {
            videoAd.Show();
         }
      }

   }

}
当上述代码在本地计算机上编译并执行后,您将看到以下窗口,其中包含一个显示广告按钮。
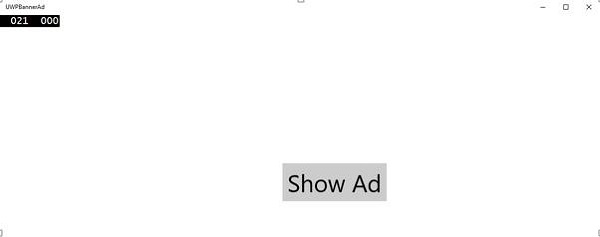
现在,当您点击显示广告按钮时,它将在您的应用上播放视频。
Windows 10 开发 - XAML 控件
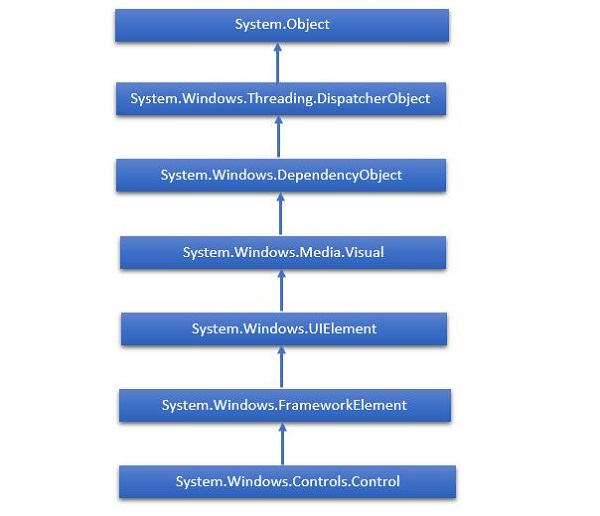
XAML 代表可扩展应用程序标记语言 (Extensible Application Markup Language)。它是一个用户界面框架,提供了一个丰富的控件库,支持 Windows 的 UI 开发。其中一些控件具有可视化表示,例如按钮、文本框和文本块等;而其他控件则用作其他控件或内容的容器,例如图像等。所有 XAML 控件均继承自 "System.Windows.Controls.Control"。
XAML 的新兴故事
XAML 应用于许多重要的 Microsoft 平台,例如 Windows Presentation Foundation (WPF)、Silverlight 以及现在的 Windows 应用。现在,Microsoft Office 2016 也属于 UWP 应用家族。 XAML 是一个功能丰富的平台,它提供了非常酷炫的功能和控件,可用于 UWP 应用程序。
控件的完整继承层次结构如下所示。
控件布局
控件布局对于应用程序的可用性至关重要。它用于在应用程序中排列一组 GUI 元素。选择布局面板时需要考虑一些重要事项 −
- 子元素的位置。
- 子元素的大小。
- 重叠子元素的层叠方式。
下面列出了布局控件 −
| 序列号 | 控件 &说明 |
|---|---|
| 1 | StackPanel StackPanel 是一个简单实用的 XAML 布局面板。在 Stack 面板中,子元素可以根据 Orientation 属性水平或垂直排列在一行中。 |
| 2 | WrapPanel 在 WrapPanel 中,子元素根据 Orientation 属性按从左到右或从上到下的顺序排列。 StackPanel 和 WrapPanel 之间的唯一区别在于,StackPanel 不会将所有子元素堆叠到一行,而是如果剩余空间不足,会将剩余元素换行到另一行。 |
| 3 | DockPanel DockPanel 定义了一个区域,用于水平或垂直排列子元素。使用 DockPanel,您可以使用 Dock 属性轻松地将子元素停靠到顶部、底部、右侧、左侧和中间。 使用 LastChildFill 属性,最后一个子元素将填充剩余空间,无论该元素设置了其他停靠值。 |
| 4 | Canvas Canvas 是一种基本的布局面板,子元素可以在其中使用相对于任意边(例如左、右、上、下)的坐标进行显式定位。通常,Canvas 用于 2D 图形元素(例如椭圆、矩形等),但不用于 UI 元素,因为在 XAML 应用程序中,指定绝对坐标会在调整大小、本地化或缩放时带来麻烦。 |
| 5 | Grid Grid 提供了一个灵活的区域,由行和列组成。在 Grid 中,子元素可以以表格形式排列。可以使用 Grid.Row 和 Grid.Column 属性将元素添加到任何特定的行和列。 |
| 6 | SplitView SplitView 表示一个包含两个视图的容器;一个视图用于显示主内容,另一个视图通常用于显示导航命令。 |
| 7 | RelativePanel RelativePanel 定义一个区域,您可以在其中定位和对齐子对象,这些子对象彼此之间或与父面板之间相对。 |
| 8 | ViewBox ViewBox 定义一个内容装饰器,可以拉伸和缩放单个子对象以填充可用空间。 |
| 9 | FlipView FlipView 表示一个项目的控件,它一次显示一个项目,并启用"翻转"行为以进行遍历其项目集合。 |
| 10 | GridView GridView 是一个控件,它以行和列的形式呈现项目集合,并且可以水平滚动。 |
UI 控件
以下是最终用户可见的 UI 控件列表。
| S.No. | UI 控件及说明 |
|---|---|
| 1 | Button 响应用户输入的控件 |
| 2 | Calendar 表示允许用户通过可视化日历显示选择日期的控件。 |
| 3 | CheckBox 用户可以选择或清除的控件。 |
| 4 | ComboBox 用户可以选择的下拉列表项来自。 |
| 5 | ContextMenu 获取或设置上下文菜单元素,每当通过用户界面 (UI) 在此元素内请求上下文菜单时,该元素应显示该菜单。 |
| 6 | DataGrid 表示在可自定义网格中显示数据的控件。 |
| 7 | DatePicker 允许用户选择日期的控件。 |
| 8 | Dialogs 应用程序还可以显示其他窗口,以便用户收集或显示重要信息。 |
| 9 | Flyout 表示显示轻量级 UI 的控件,该 UI 要么是信息,要么需要用户交互。与对话框不同,弹出窗口可以通过点击或轻触其外部、按设备的返回按钮或按"Esc"键来轻量级关闭。 |
| 10 | Image 显示图片的控件。 |
| 11 | ListBox 显示用户可以选择的内联项目列表的控件。 |
| 12 | Menus 表示 Windows 菜单控件,可让您按层次结构组织与命令和事件处理程序相关的元素。 |
| 13 | MenuFlyout 表示显示命令菜单的弹出窗口。 |
| 14 | PasswordBox 用于输入密码的控件。 |
| 15 | Popup 在应用程序边界内,在现有内容之上显示内容窗口。 |
| 16 | ProgressBar 通过显示条形图指示进度的控件。 |
| 17 | ProgressRing 通过显示圆环指示不确定进度的控件。 |
| 18 | RadioButton 允许用户从一组选项中选择单个选项的控件。 |
| 19 | RichEditBox 允许用户编辑包含以下内容的富文本文档的控件格式化的文本、超链接和图像。 |
| 20 | ScrollViewer 一个容器控件,允许用户平移和缩放其内容。 |
| 21 | SearchBox 一个控件,允许用户输入搜索查询。 |
| 22 | Slider 一个控件,允许用户通过沿轨道移动 Thumb 控件来从一系列值中进行选择。 |
| 23 | TextBlock 一个控件,显示文本。 |
| 24 | TimePicker 允许用户设置时间值的控件。 |
| 25 | ToggleButton 一个可以在两种状态之间切换的按钮。 |
| 26 | ToolTip 一个显示元素信息的弹出窗口。 |
| 27 | Window 提供最小化/最大化选项、标题栏、边框和关闭按钮的根窗口。 |
以下示例在 SplitView 中包含不同类型的控件。在 XAML 文件中,使用一些属性和事件创建不同的控件。
<Page
x:Class = "UWPControlsDemo.MainPage"
xmlns = "http://schemas.microsoft.com/winfx/2006/xaml/presentation"
xmlns:x = "http://schemas.microsoft.com/winfx/2006/xaml"
xmlns:local = "using:UWPControlsDemo"
xmlns:d = "http://schemas.microsoft.com/expression/blend/2008"
xmlns:mc = "http://schemas.openxmlformats.org/markup-compatibility/2006"
mc:Ignorable = "d">
<Grid Background = "{ThemeResource ApplicationPageBackgroundThemeBrush}">
<StackPanel Margin = "20">
<StackPanel Orientation = "Horizontal">
<ToggleButton x:Name = "HamburgerButton" FontFamily = "Segoe MDL2 Assets"
Content = "" Checked = "HandleCheck" Unchecked = "HandleUnchecked"
HorizontalAlignment = "Center"/>
<AppBarButton Icon = "Like" />
<AppBarButton Icon = "Dislike" />
<AppBarSeparator/>
<AppBarButton Icon = "Accept" />
<AppBarButton Icon = "Add" />
</StackPanel>
<SplitView x:Name = "splitView" DisplayMode = "Inline"
OpenPaneLength = "296">
<SplitView.Pane>
<StackPanel>
<TextBlock Text = "SplitView Pane" FontSize = "36"
VerticalAlignment = "Center" HorizontalAlignment = "Center"
Margin = "10"/>
<Button Content = "Options" Margin = "10">
<Button.Flyout>
<MenuFlyout>
<MenuFlyoutItem Text = "Reset"/>
<MenuFlyoutSeparator/>
<MenuFlyoutItem Text = "Repeat"/>
<MenuFlyoutItem Text = "Shuffle"/>
</MenuFlyout>
</Button.Flyout>
</Button>
</StackPanel>
</SplitView.Pane>
<StackPanel>
<TextBlock Text = "SplitView Content" FontSize = "36"
VerticalAlignment = "Center" HorizontalAlignment = "Center"
Margin = "10"/>
<Border BorderThickness = "3" BorderBrush = "Red" Margin = "5">
<StackPanel Orientation = "Horizontal">
<TextBlock Text = "Hyperlink example" Margin = "5"/>
<HyperlinkButton Content = "www.microsoft.com"
NavigateUri = "http://www.microsoft.com"/>
</StackPanel>
</Border>
<RelativePanel BorderBrush = "Red" BorderThickness = "2"
CornerRadius = "10" Padding = "12" Margin = "5">
<TextBlock x:Name = "txt" Text = "Relative Panel example"
RelativePanel.AlignLeftWithPanel = "True"
Margin = "5,0,0,0"/>
<TextBox x:Name = "textBox1" RelativePanel.RightOf = "btn"
Margin = "5,0,0,0"/>
<Button x:Name = "btn" Content = "Name"
RelativePanel.RightOf = "txt" Margin = "5,0,0,0"/>
</RelativePanel>
<FlipView Height = "400" Margin = "10" Width = "400">
<Image Source = "Images/DSC_0104.JPG"/>
<Image Source = "Images/DSC_0080.JPG"/>
<Image Source = "Images/DSC_0076.JPG"/>
<Image Source = "Images/thGTF7BWGW.jpg"/>
</FlipView>
</StackPanel>
</SplitView>
</StackPanel>
</Grid>
</Page>
以下是 Events 的 C# 实现。
using Windows.UI.Xaml;
using Windows.UI.Xaml.Controls;
using Windows.UI.Xaml.Media;

// 空白页项目模板的文档位于
   http://go.microsoft.com/fwlink/?LinkId=402352&clcid=0x409

namespace UWPControlsDemo {

   /// <summary>
      /// An empty page that can be used on its own or navigated to within a Frame.
   /// </summary>

   public sealed partial class MainPage : Page {

      public MainPage() {
         this.InitializeComponent();
      }

      private void HandleCheck(object sender, RoutedEventArgs e) {
         splitView.IsPaneOpen = true;
      }

      private void HandleUnchecked(object sender, RoutedEventArgs e) {
         splitView.IsPaneOpen = false;
      }

   }

}
编译并执行上述代码后,您将看到以下窗口 −
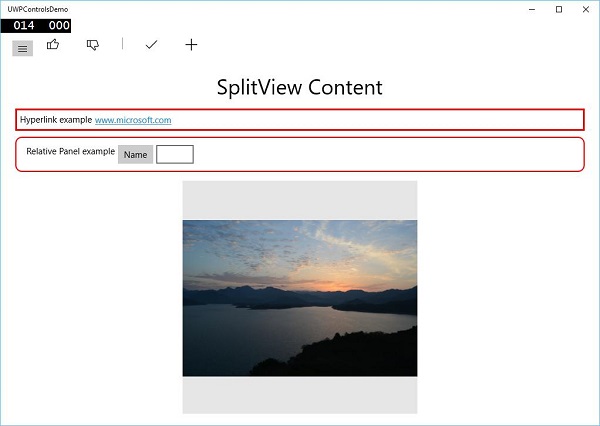
点击左上角的汉堡按钮,可以打开/关闭 SplitView 窗格。
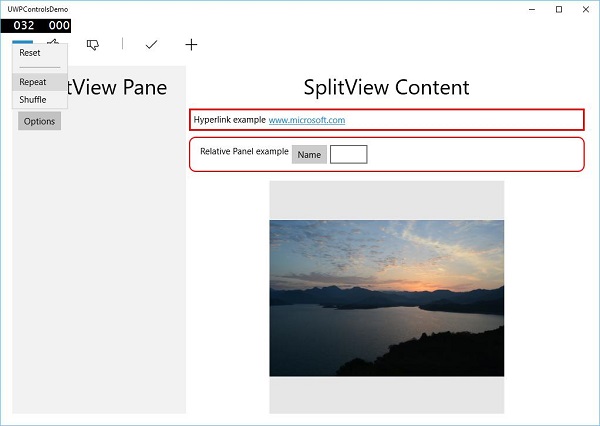
在 SplitView 窗格中,您可以看到 Flyout、MenuFlyout 和 FlipView 控件。
在 SplitView 内容中,您可以看到超链接、相关面板、ViewBox 以及其他按钮和文本框控件。
Windows 10 开发 - 数据绑定
数据绑定是 XAML 应用程序中的一种机制,它为使用部分类的 Windows 运行时应用提供了一种简单易行的方式来显示和交互数据。在此机制中,数据的管理与数据的显示方式完全分离。
数据绑定允许数据在 UI 元素和用户界面上的数据对象之间流动。当绑定建立后,如果数据或业务模型发生变化,它会自动将更新反映到 UI 元素上,反之亦然。它也可以绑定到页面上的其他元素,而不是标准数据源。数据绑定可以是 −
- 单向数据绑定
- 双向数据绑定
- 元素绑定
单向数据绑定
在单向绑定中,数据从其源(保存数据的对象)绑定到其目标(显示数据的对象)。
让我们看一个单向数据绑定的简单示例。下面给出的 XAML 代码创建了四个带有一些属性的文本块。
<Page
   x:Class = "OneWayDataBinding.MainPage"
   xmlns = "http://schemas.microsoft.com/winfx/2006/xaml/presentation"
   xmlns:x = "http://schemas.microsoft.com/winfx/2006/xaml"
   xmlns:local = "using:OneWayDataBinding"
   xmlns:d = "http://schemas.microsoft.com/expression/blend/2008"
   xmlns:mc = "http://schemas.openxmlformats.org/markup-compatibility/2006"
   mc:Ignorable = "d">

   <Grid Background = "{ThemeResource ApplicationPageBackgroundThemeBrush}">
      <StackPanel Name = "Display">
         <StackPanel Orientation = "Horizontal" Margin = "50, 50, 0, 0">
            <TextBlock Text = "Name: " Margin = "10" Width = "100"/>
            <TextBlock Margin = "10" Width = "100" Text = "{Binding Name}"/>
         </StackPanel>

         <StackPanel Orientation = "Horizontal" Margin = "50,0,50,0">
            <TextBlock Text = "Title: " Margin = "10" Width = "100"/>
            <TextBlock Margin = "10" Width = "200" Text = "{Binding Title}" />
         </StackPanel>

      </StackPanel>
   </Grid>

</Page>
两个文本块的 Text 属性静态设置为 "Name" 和 "Title",而文本块的另外两个 Text 属性绑定到"Name"和"Title",它们是 Employee 类的类变量,如下所示。
using Windows.UI.Xaml.Controls;

// 空白页项目模板的文档位于
   http://go.microsoft.com/fwlink/?LinkId=402352&clcid=0x409

namespace OneWayDataBinding {

   /// <summary>
      /// An empty page that can be used on its own or navigated to within a Frame.
   /// </summary>

   public sealed partial class MainPage : Page {
      public MainPage(){
         this.InitializeComponent();
         DataContext = Employee.GetEmployee();
      }
   }

   public class Employee {
      public string Name { get; set; }
      public string Title { get; set; }

      public static Employee GetEmployee() {
         var emp = new Employee() {
            Name = "Waqar Ahmed",
            Title = "Development Manager"
         };

         return emp;
      }

   }
}
在 Employee 类 中,我们有变量 Name 和 Title,以及一个静态方法,该方法初始化 employee 对象 并返回该员工对象。因此,我们绑定了 Name 和 Title 属性,但尚未选择该属性所属的对象。简单的方法是将一个对象赋值给 DataContext,我们将在 MainPage 构造函数中绑定其属性。
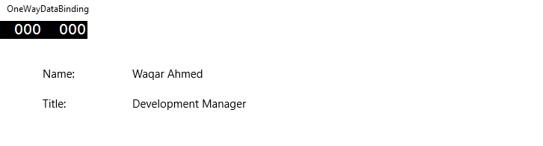
运行此应用程序时,您可以立即在 MainWindow 中看到已成功绑定到该 Employee 对象的 Name 和 Title。
双向数据绑定
在双向绑定中,用户可以通过用户界面修改数据,并在源中更新该数据。例如,如果在用户查看视图时源发生变化,您希望视图也随之更新。
我们来看下面的示例,其中创建了两个标签、两个文本框和一个按钮,并设置了一些属性和事件。
<Page
   x:Class = "TwoWayDataBinding.MainPage"
   xmlns = "http://schemas.microsoft.com/winfx/2006/xaml/presentation"
   xmlns:x = "http://schemas.microsoft.com/winfx/2006/xaml"
   xmlns:local = "using:TwoWayDataBinding"
   xmlns:d = "http://schemas.microsoft.com/expression/blend/2008"
   xmlns:mc = "http://schemas.openxmlformats.org/markup-compatibility/2006"
   mc:Ignorable = "d">

   <Grid Background = "{ThemeResource ApplicationPageBackgroundThemeBrush}">

      <Grid.RowDefinitions>
         <RowDefinition Height = "Auto" />
         <RowDefinition Height = "Auto" />
         <RowDefinition Height = "*" />
      </Grid.RowDefinitions>

      <Grid.ColumnDefinitions>
         <ColumnDefinition Width = "Auto" />
         <ColumnDefinition Width = "200" />
      </Grid.ColumnDefinitions>

      <TextBlock Name = "nameLabel" Margin = "200,20,0,0">Name:</TextBlock>

      <TextBox Name = "nameText" Grid.Column = "1" Margin = "10,20,0,0"
         Text = "{Binding Name, Mode = TwoWay}"/>

      <TextBlock Name = "ageLabel" Margin = "200,20,0,0"
         Grid.Row = "1">Age:</TextBlock>

      <TextBox Name = "ageText" Grid.Column = "1" Grid.Row = "1" Margin = "10,20,0,0"
         Text = "{Binding Age, Mode = TwoWay}"/>

      <StackPanel Grid.Row = "2" Grid.ColumnSpan = "2">
         <Button Content = "Display" Click = "Button_Click"
            Margin = "200,20,0,0"/>
         <TextBlock x:Name = "txtblock" Margin = "200,20,0,0"/>
      </StackPanel>

   </Grid>

</Page>
我们可以观察到以下 −
两个文本框的 Text 属性都绑定到 "Name" 和 "Age",它们是 Person 类 的类变量,如下所示。
在 Person 类 中,我们只有两个变量 − Name 和 Age,其对象在 MainWindow 类中初始化。
在 XAML 代码中,我们绑定到属性 − Name 和 Age,但我们尚未选择属性所属的对象。
更简单的方法是将一个对象分配给 DataContext,我们将在 C# 代码中绑定其属性,如下例中的 MainWindowconstructor 所示。
using Windows.UI.Xaml;
using Windows.UI.Xaml.Controls;

// 空白页项目模板的文档位于
   http://go.microsoft.com/fwlink/?LinkId=402352&clcid=0x409

namespace TwoWayDataBinding {

   /// <summary>
      /// An empty page that can be used on its own or navigated to within a Frame.
   /// </summary>

   public sealed partial class MainPage : Page {
      Person person = new Person { Name = "Salman", Age = 26 };

      public MainPage() {
         this.InitializeComponent();
         this.DataContext = person;
      }

      private void Button_Click(object sender, RoutedEventArgs e) {
         string message = person.Name + " is " + person.Age + " years old";
         txtblock.Text = message;
      }

   }

   public class Person {
      private string nameValue;

      public string Name {
         get { return nameValue; }
         set { nameValue = value; }
      }

      private double ageValue;

      public double Age {
         get { return ageValue; }

         set {
            if (value != ageValue) {
               ageValue = value;
            }
         }
      }

   }

}
当上述代码编译并执行后,您将看到以下窗口。点击显示按钮。
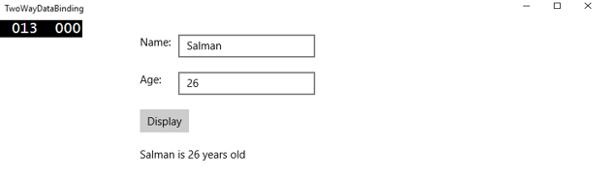
我们修改一下姓名和年龄,然后再次点击显示按钮。
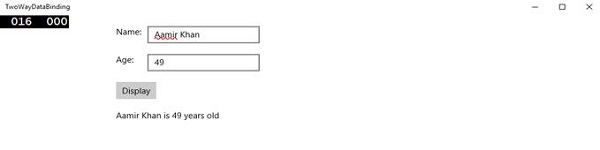
您可以看到,点击"显示"按钮时,文本框的文本不会用于在TextBlock上显示数据,而是使用了类变量。
为了更好地理解,建议您分别执行上述代码。
元素绑定
也可以绑定到其他数据源,而不是标准数据源。页面上的元素。让我们创建一个名为 ElementBinding 的应用程序,在其中创建一个滑块 (Slider) 和一个矩形 (Rectangle),并使用滑块绑定矩形的宽度和高度。以下是 XAML 代码。
<Page
   x:Class = "ElementBinding.MainPage"
   xmlns = "http://schemas.microsoft.com/winfx/2006/xaml/presentation"
   xmlns:x = "http://schemas.microsoft.com/winfx/2006/xaml"
   xmlns:local = "using:ElementBinding"
   xmlns:d = "http://schemas.microsoft.com/expression/blend/2008"
   xmlns:mc = "http://schemas.openxmlformats.org/markup-compatibility/2006"
   mc:Ignorable = "d">

   <Grid Background = "{ThemeResource ApplicationPageBackgroundThemeBrush}">
      <StackPanel VerticalAlignment = "Center" HorizontalAlignment = "Center">

         <Rectangle Height = "100" Width = "100" Fill = "SteelBlue"
            RenderTransformOrigin = "0.5,0.5" Margin = "50">

            <Rectangle.RenderTransform>
               <CompositeTransform ScaleX = "{Binding Value, ElementName = MySlider}"
                  ScaleY = "{Binding Value, ElementName = MySlider}"/>
            </Rectangle.RenderTransform>

         </Rectangle>

         <Slider Minimum = ".5" Maximum = "2.0" StepFrequency = ".1"
            x:Name = "MySlider" />

      </StackPanel>
   </Grid>

</Page>
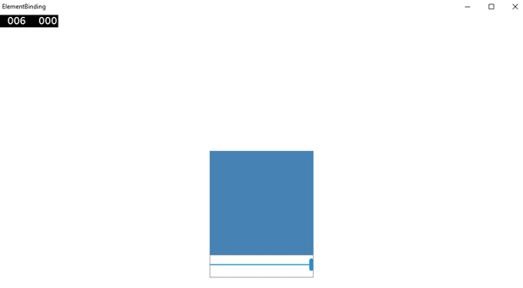
编译并执行上述代码后,您将看到以下窗口。
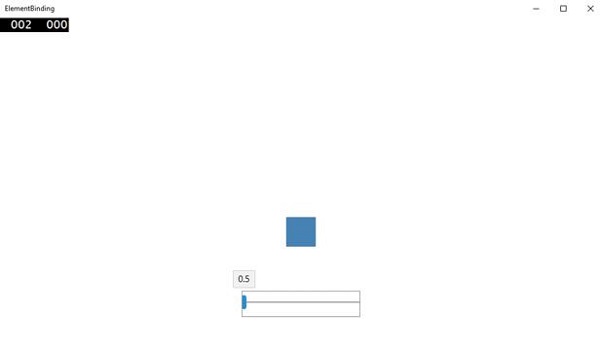
您可以使用滑块更改矩形的大小,如下所示。
Windows 10 开发 - XAML 性能
应用程序的性能非常重要,例如应用程序在启动时显示的速度、导航到显示下一个内容的速度等等。
应用程序的性能受多种因素影响,包括 XAML 渲染引擎解析应用程序中所有 XAML 代码的能力。XAML 是一个非常强大的 UI 创建工具,但使用 Windows 10 应用程序中现在提供的新技术可以使其更加健壮。
例如,在您的应用程序中,有些内容您希望在页面加载时显示,但之后不再需要。启动时,您也可能不需要加载所有 UI 元素。
Windows 10 应用在 XAML 中添加了一些新功能,从而提升了 XAML 的性能。
任何通用 Windows 应用的性能都可以通过以下技术来提升;
- 渐进式渲染
- 延迟加载
渐进式渲染
Windows 10 在 XAML 中引入了两个非常酷炫的新功能。它们是 −
x:Bind
这是 XAML 中引入的一种用于绑定的新语法,其工作方式与 Binding 语法几乎相同。x:Bind 有两个主要区别;它提供编译时语法验证和更佳性能。
X:Phase
它能够优先处理数据模板中 XAML 控件的渲染。每个 UI 元素只能指定一个阶段。如果指定,则该阶段将应用于元素上的所有绑定。如果未指定阶段,则假定为阶段 0。
在通用 Windows 平台 (UWP) 应用程序中,这两个新功能可提升性能。它也可以用于迁移到 Windows 10 的现有 Windows 8.x 应用程序。
以下示例使用 x:Bind 关键字将员工对象与 GridView 绑定。
<Page
   x:Class = "XAMLPhase.MainPage"
   xmlns = "http://schemas.microsoft.com/winfx/2006/xaml/presentation"
   xmlns:x = "http://schemas.microsoft.com/winfx/2006/xaml"
   xmlns:local = "using:XAMLPhase"
   xmlns:d = "http://schemas.microsoft.com/expression/blend/2008"
   xmlns:mc = "http://schemas.openxmlformats.org/markup-compatibility/2006"
   mc:Ignorable = "d">

   <Grid Background = "{ThemeResource ApplicationPageBackgroundThemeBrush}">
      <GridView Name = "Presidents" ItemsSource = "{Binding}" Height = "300"
         Width = "400" Margin = "50">

         <GridView.ItemTemplate>
            <DataTemplate x:DataType = "local:Employee">

               <StackPanel Orientation = "Horizontal" Margin = "2">
                  <TextBlock Text = "{x:Bind Name}" Width = "95" Margin = "2" />
                  <TextBlock Text = "{x:Bind Title}" Width = "95" Margin = "2"
                     x:Phase = "1"/>
               </StackPanel>

            </DataTemplate>
         </GridView.ItemTemplate>

      </GridView>

   </Grid>

</Page>
在上述 XAML 代码中,x:Phase = "1" 定义了 Title。因此,在第一个阶段,将渲染 Name,然后渲染 Title。
以下是 Employee 类 的 C# 实现。
using System.Collections.ObjectModel;
using System.ComponentModel;
using System.Runtime.CompilerServices;
using Windows.UI.Xaml.Controls;

// 空白页项目模板的文档位于
   http://go.microsoft.com/fwlink/?LinkId=402352&clcid=0x409

namespace XAMLPhase {

   /// <summary>
      /// An empty page that can be used on its own or navigated to within a Frame.
   /// </summary>

   public sealed partial class MainPage : Page {
      public MainPage() {
         this.InitializeComponent();
         DataContext = Employee.GetEmployees();
      }
   }

   public class Employee : INotifyPropertyChanged {
      private string name;

      public string Name {
         get { return name; }

         set {
            name = value;
            RaiseProperChanged();
         }
      }

      private string title;

      public string Title {
         get { return title; }

         set {
            title = value;
            RaiseProperChanged();
         }
      }

      public static Employee GetEmployee() {

         var emp = new Employee() {
            Name = "Waqas",
            Title = "Software Engineer"
         };

         return emp;
      }

      public event PropertyChangedEventHandler PropertyChanged;

      private void RaiseProperChanged(
         [CallerMemberName] string caller = "") {

         if (PropertyChanged != null) {
            PropertyChanged(this, new PropertyChangedEventArgs(caller));
         }

      }

      public static ObservableCollection<Employee> GetEmployees() {
         var employees = new ObservableCollection<Employee>();

         employees.Add(new Employee() { Name = "Ali", Title = "Developer" });
         employees.Add(new Employee() { Name = "Ahmed", Title = "Programmer" });
         employees.Add(new Employee() { Name = "Amjad", Title = "Desiner" });
         employees.Add(new Employee() { Name = "Waqas", Title = "Programmer" });
         employees.Add(new Employee() { Name = "Bilal", Title = "Engineer" });
         employees.Add(new Employee() { Name = "Waqar", Title = "Manager" });

         return employees;
      }

   }

}
执行上述代码后,您将看到以下窗口。
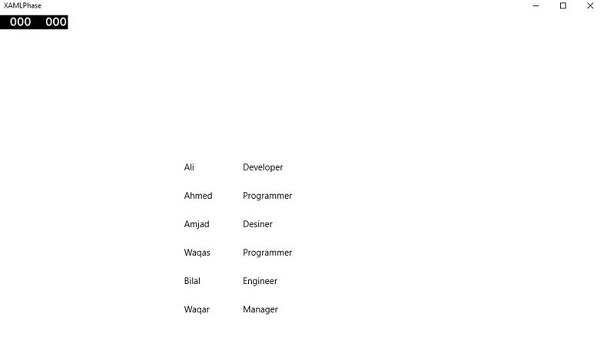
结合使用 X:Phase 和 x:Bind 来增量渲染 ListView 和 GridView 项目,并提升平移体验。
延迟加载
延迟加载是一种技术,可通过减少应用程序启动时 XAML UI 元素的数量来最大限度地缩短启动加载时间。如果您的应用程序包含 30 个 UI 元素,并且用户在启动时不需要所有这些元素,那么所有不需要的元素都可以通过延迟加载来节省一些加载时间。
x:DeferLoadStrategy = "Lazy" 会延迟元素及其子元素的创建,这会缩短启动时间,但会略微增加内存使用量。
可以通过使用元素上定义的名称调用 FindName 来实现/创建延迟元素。
创建延迟元素后,将发生几件事 −
将引发元素上的 Loaded 事件。
将评估元素上的任何绑定。
如果应用程序已注册接收包含延迟元素的属性的属性更改通知,则通知将已提升。
以下示例使用 x:DeferLoadStrategy = "Lazy" 来表示包含四个文本块的网格,该网格在应用程序启动时不会加载,直到您加载它为止。
<Page
   x:Class = "UWPDeferredLoading.MainPage"
   xmlns = "http://schemas.microsoft.com/winfx/2006/xaml/presentation"
   xmlns:x = "http://schemas.microsoft.com/winfx/2006/xaml"
   xmlns:local = "using:UWPDeferredLoading"
   xmlns:d = "http://schemas.microsoft.com/expression/blend/2008"
   xmlns:mc = "http://schemas.openxmlformats.org/markup-compatibility/2006"
   mc:Ignorable = "d">

   <Grid Background = "{ThemeResource ApplicationPageBackgroundThemeBrush}">
      <Grid x:Name = "DeferredGrid" x:DeferLoadStrategy = "Lazy" Margin = "50">
         <Grid.RowDefinitions>
            <RowDefinition Height = "Auto" />
            <RowDefinition Height = "Auto" />
         </Grid.RowDefinitions>

         <Grid.ColumnDefinitions>
            <ColumnDefinition Width = "Auto" />
            <ColumnDefinition Width = "Auto" />
         </Grid.ColumnDefinitions>

         <TextBlock Height = "100" Width = "100" Text = "TextBlock 1" Margin = "0,0,4,4" />

         <TextBlock Height = "100" Width = "100" Text = "TextBlock 2"
            Grid.Column = "1" Margin = "4,0,0,4" />

         <TextBlock Height = "100" Width = "100" Text = "TextBlock 3"
            Grid.Row = "1" Margin = "0,4,4,0" />

         <TextBlock Height = "100" Width = "100" Text = "TextBlock 4"
            Grid.Row = "1" Grid.Column = "1" Margin = "4,4,0,0" />
      </Grid>

      <Button x:Name = "RealizeElements" Content = "Show Elements"
         Click = "RealizeElements_Click" Margin = "50"/>

   </Grid>

</Page>
以下程序是点击事件的实现,其中网格在应用程序主页面上加载。
using Windows.UI.Xaml;
using Windows.UI.Xaml.Controls;

// 空白页项目模板的文档位于
   http://go.microsoft.com/fwlink/?LinkId=402352&clcid=0x409

namespace UWPDeferredLoading {

   /// <summary>
      /// An empty page that can be used on its own or navigated to within a Frame.
   /// </summary>

   public sealed partial class MainPage : Page {
      public MainPage() {
         this.InitializeComponent();
      }

      private void RealizeElements_Click(object sender, RoutedEventArgs e) {
         this.FindName("DeferredGrid"); // This will realize the deferred grid
      }

   }

}
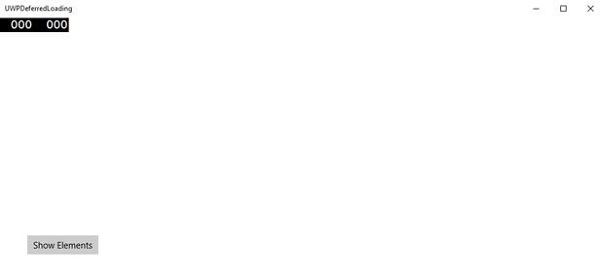
当上述代码编译并执行后,您将只看到一个按钮。文本块在启动时不会加载。
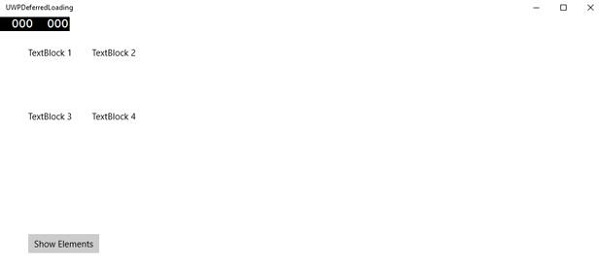
现在,当您点击显示元素按钮时,它将加载文本块,这将提高应用程序的启动性能。
Windows 10 开发 - 自适应设计
在 Windows 10 中,通用 Windows 平台 (UWP) 应用程序现在可以在多个设备系列上运行,例如 −
桌面设备系列 − 平板电脑、笔记本电脑、PC
移动设备系列 − Windows Phone、平板手机
物联网设备系列 − 紧凑型设备,例如可穿戴设备或家用电器
团队设备系列 − Surface Hub
每个设备系列都有自己的屏幕和窗口大小。那么,如何设计一款能够在屏幕尺寸和输入方式差异巨大的多种设备上提供出色用户体验的应用呢?
为多种设备系列设计应用需要一些额外的考量、规划和设计。Windows 10 UWP 提供了一系列内置功能和通用构建块,让您能够更轻松地为多种设备进行设计,并能够在平台控件支持的不同屏幕和窗口尺寸之间自动缩放。
新的内置功能
以下是开发者在创建 UWP 应用时可以使用的新功能。这些功能是自动且免费的。
有效像素和平台缩放
当您的 UWP 应用在任何 Windows 10 支持的设备上运行,则 −
系统使用一种算法来规范化控件、字体和其他 UI 元素在当前运行设备的屏幕上的显示方式。
缩放算法控制观看距离和屏幕密度(每英寸像素数),以优化预期尺寸(而非实际尺寸)。
缩放算法确保 10 英尺外 Surface Hub 上的 36 像素字体与几英寸外 5 英寸手机上的 36 像素字体对用户的可读性相同。
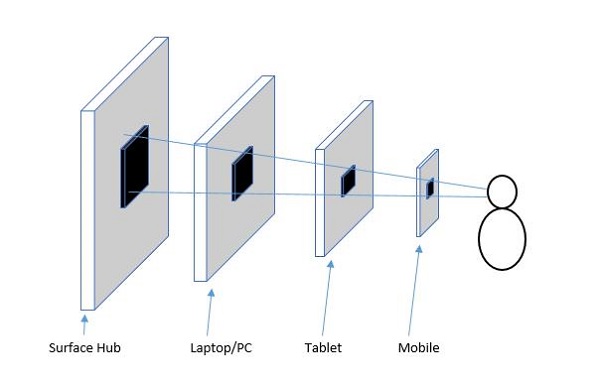
通用输入和智能交互
通用 Windows 平台内置智能交互输入系统,可理解所有设备的输入。例如,当您在应用程序中设计点击交互时,您无需知道该点击是来自鼠标实际点击还是手指轻触。系统会自动为您完成。
通用构建块
通用 Windows 平台 (UWP) 中有一些实用的构建块,让您可以更轻松地为多种设备系列设计应用程序。
通用控件
UWP 提供了一组通用控件,保证可在所有 Windows 10 设备上正常运行。
此"通用控件"列表包含常用控件,例如单选按钮、组合框和文本框等。
它还包含一些复杂的控件,例如网格视图和列表视图,它们可以从数据流和模板生成项目列表。
通用样式
UWP 应用会自动获取一组默认样式,为您提供这些功能 −
一组样式,可自动为您的应用提供亮色或暗色主题。
用于交互的默认动画。
自动支持高对比度模式。
自动支持其他语言。我们的默认样式会自动为 Windows 支持的每种语言选择正确的字体。您甚至可以在同一个应用中使用多种语言,它们都会正确显示。
Windows 10 开发 - 自适应 UI
通用 Windows 平台 (UWP) 应用程序可以在许多不同的设备上运行,每种设备都有其独特的输入方式、屏幕分辨率、DPI 密度和其他独特特性。
在 Windows 10 中,借助新的通用控件、布局面板和工具,您可以轻松地使 UI 适应应用程序可能运行的设备。例如,当您的 UWP 应用在台式机、移动设备或平板电脑上运行时,您可以定制 UI,以充分利用不同的屏幕分辨率、屏幕尺寸和 DPI 密度。
在 Windows 10 中,您可以使用以下功能轻松地将您的 UI 适配到多种设备 −
您可以使用通用控件和布局面板增强 UI,使其适应不同的屏幕分辨率和屏幕尺寸。
通用输入处理允许您通过触摸板、触控笔、鼠标、键盘或控制器(例如 Microsoft Xbox 控制器)接收输入。
借助工具,您可以设计能够适应不同屏幕分辨率的应用 UI。
自适应缩放功能可根据不同设备的分辨率和 DPI 差异进行调整。
在 Windows 10 中,您可以以任何方式轻松地排列、调整大小和定位应用程序您想要的。它还为用户提供了一定程度的灵活性,让他们能够按照自己想要的方式使用您的应用程序。在 Windows 10 中,您可以通过多种方式在 UWP 应用程序中实现响应式技术,因此无论屏幕或窗口大小如何,应用程序都能呈现出绝佳的外观。
VisualStateManager
在 Windows 10 中,VisualStateManager 类新增了两种机制,借助它们,您可以在 UWP 应用程序中实现响应式设计。新的 VisualState.StateTriggers 允许开发者检查某些条件,例如窗口高度或窗口宽度,然后 VisualState.Setters API 会根据这些特定条件定义视觉状态。
我们来看下面的示例,其中在堆栈面板中添加了一些控件。
<Page
   x:Class = "UWPAdaptiveUI.MainPage"
   xmlns = "http://schemas.microsoft.com/winfx/2006/xaml/presentation"
   xmlns:x = "http://schemas.microsoft.com/winfx/2006/xaml"
   xmlns:local = "using:UWPAdaptiveUI"
   xmlns:d = "http://schemas.microsoft.com/expression/blend/2008"
   xmlns:mc = "http://schemas.openxmlformats.org/markup-compatibility/2006"
   mc:Ignorable = "d">

   <Grid Background = "{ThemeResource ApplicationPageBackgroundThemeBrush}">
      <VisualStateManager.VisualStateGroups>

         <VisualStateGroup>

            <VisualState>

               <VisualState.StateTriggers>
                  <!-- VisualState to be triggered when window
                     width is >=720 effective pixels. -->
                  <AdaptiveTrigger MinWindowWidth = "720" />
               </VisualState.StateTriggers>

               <VisualState.Setters>
                  <Setter Target = "myPanel.Orientation" Value = "Horizontal" />
               </VisualState.Setters>

            </VisualState>

         </VisualStateGroup>

      </VisualStateManager.VisualStateGroups>

      <StackPanel x:Name = "myPanel" Orientation = "Vertical">

         <TextBlock Text = "Windows 10 Tutorials: Text block 1. "
            Style = "{ThemeResource BodyTextBlockStyle}"/>

         <TextBlock Text = "Windows 10 Tutorials: Text block 2. "
            Style = "{ThemeResource BodyTextBlockStyle}"/>

         <TextBlock Text = "Windows 10 Tutorials: Text block 3. "
            Style = "{ThemeResource BodyTextBlockStyle}"/>

      </StackPanel>

   </Grid>

</Page>
现在,VisualStateManager 将根据窗口的宽度调整堆栈面板的方向。如果宽度 >= 720,则方向将变为水平,否则将保持垂直。编译并执行上述代码后,您将看到以下窗口,其中包含三个垂直排列的文本块。
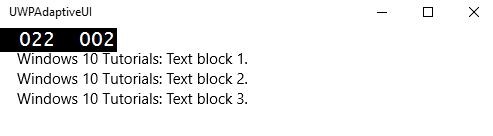
调整上述窗口的宽度,您将看到以下窗口 −

现在您可以看到文本块按水平顺序排列。
RelativePanel
RelativePanel 可用于通过表达元素之间的空间关系来布局 UI 元素。我们举个例子,在相对面板中创建一些矩形。
<Page
   x:Class = "UWPAdaptiveUI.MainPage"
   xmlns = "http://schemas.microsoft.com/winfx/2006/xaml/presentation"
   xmlns:x = "http://schemas.microsoft.com/winfx/2006/xaml"
   xmlns:local = "using:UWPAdaptiveUI"
   xmlns:d = "http://schemas.microsoft.com/expression/blend/2008"
   xmlns:mc = "http://schemas.openxmlformats.org/markup-compatibility/2006"
   mc:Ignorable = "d">

   <Grid Background = "{ThemeResource ApplicationPageBackgroundThemeBrush}">

      <VisualStateManager.VisualStateGroups>

         <VisualStateGroup>

            <VisualState>

               <VisualState.StateTriggers>
                  <AdaptiveTrigger MinWindowWidth = "720" />
               </VisualState.StateTriggers>

               <VisualState.Setters>
                  <Setter Target = "GreenRect.(RelativePanel.RightOf)"
                     Value = "BlueRect" />
                  <Setter Target = "GreenRect.(RelativePanel.AlignRightWithPanel)"
                     Value = "True" />
               </VisualState.Setters>

            </VisualState>

         </VisualStateGroup>

      </VisualStateManager.VisualStateGroups>

      <RelativePanel BorderBrush = "Gray" BorderThickness = "10">
         <Rectangle x:Name = "RedRect" Fill = "Red" MinHeight = "100"
            MinWidth = "100"/>

         <Rectangle x:Name = "BlueRect" Fill = "Blue" MinHeight = "100"
            MinWidth = "100" RelativePanel.RightOf = "RedRect" />

         <!-- Width is not set on the green and yellow rectangles.
            It's determined by the RelativePanel properties. -->

         <Rectangle x:Name = "GreenRect" Fill = "Green" MinHeight = "100"
            RelativePanel.Below = "BlueRect" RelativePanel.AlignLeftWith = "RedRect"
            RelativePanel.AlignRightWith = "BlueRect"/>

         <Rectangle Fill = "Yellow" MinHeight = "100" RelativePanel.Below = "GreenRect"
            RelativePanel.AlignLeftWith = "BlueRect"
            RelativePanel.AlignRightWithPanel = "True"/>

      </RelativePanel>

   </Grid>

</Page>
编译并执行上述代码后,您将看到以下窗口。
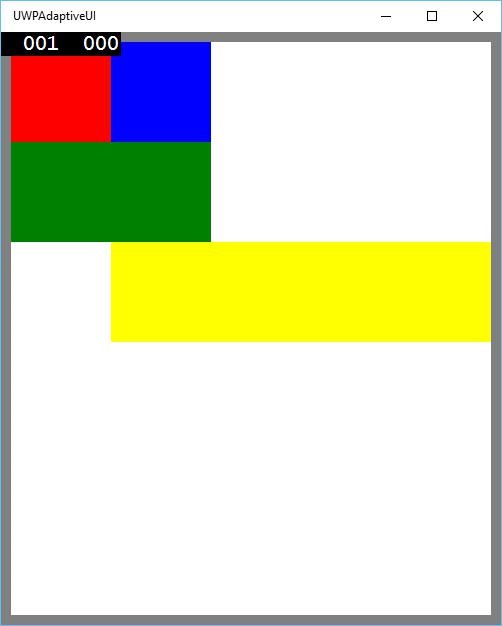
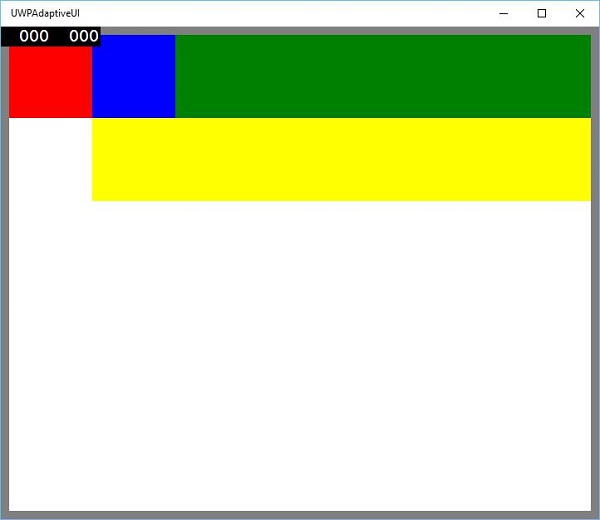
调整上述窗口的大小后,您将看到绿色矩形现在已调整到蓝色矩形左侧的顶行,如下所示。
Windows 10 开发 - 自适应代码
在本章中,我们将演示如何将您的应用程序适配到 Windows 10 支持的不同设备上。我们已经学习了如何适配您的 UI 以及 UWP 应用程序中使用的所有技巧、技术和控件。
现在,我们将学习如何适配您的代码,因为
应用程序代码在所有设备上并不相同。
所使用的 API(尤其是 Xbox 的 API)将不适用于移动设备。 HoloLens 等设备也是如此。
自适应代码可以有条件地点亮您的应用程序,并且仅在特定设备系列和/或特定版本的平台/扩展 API 上运行时才执行代码。
编写代码
在 Windows 10 中,您可以使用 C++、C#、Visual Basic 或 JavaScript 在 Visual Studio 中实现 UWP 应用程序。
使用 C# 和 Visual Basic,您可以使用 XAML 进行 UI 设计。
使用 C++,您可以使用 DirectX 而不是 XAML。
对于 JavaScript,您可以使用 HTML 作为表示层,它是一个跨平台的 Web标准。
Windows 核心 API 在所有设备上以相同的方式运行,其中包含代码和 UI 所需的大部分功能。但是,对于针对特定设备系列定制的代码和 UI,您需要使用自适应代码和自适应 UI。
调用目标设备系列未实现的 API −
UI 可以轻松适应不同的屏幕,但不同的设备系列不仅具有不同的屏幕尺寸,还具有更多其他功能。
例如,手机有一些硬件按钮,例如"返回"和"相机",而这些按钮在其他设备(例如 PC)上可能不可用。
默认情况下,核心 API 包含适用于所有设备的大部分功能,但特定于设备的功能可以通过在 UWP 应用程序中引用扩展 SDK 来使用,就像外部程序集一样。
要添加应用程序所需的任何特定扩展 SDK,请按照以下步骤 −
右键单击引用。
选择"添加引用...."。将打开以下对话框。
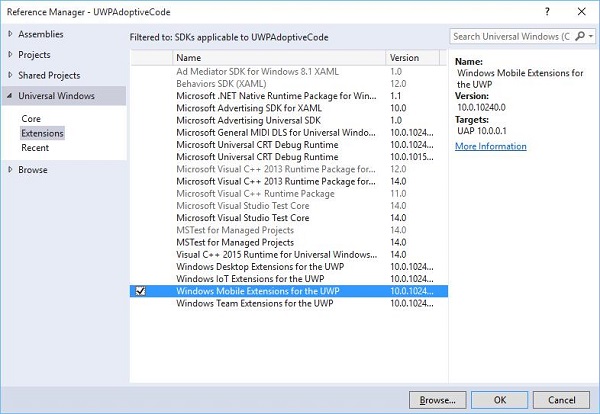
添加扩展就像添加项目引用一样简单。
现在您可以从列表中添加任何扩展 SDK,其中包含桌面扩展、物联网扩展和移动扩展等。
桌面和移动扩展是两种最常见的平台扩展 SDK。例如,移动扩展启用了使用硬件相机按钮所需的 API。
您可以使用 Windows.Foundation.Metadata.ApiInformation 类方法检查设备功能,如果当前设备支持该类型,该方法将返回布尔值输出。例如,您可以使用如下代码启用 Windows 应用使用相机按钮 −
bool isHardwareButtonsAPIPresent =
   Windows.Foundation.Metadata.ApiInformation.
   IsTypePresent("Windows.Phone.UI.Inpu t.HardwareButtons");

if (isHardwareButtonsAPIPresent) {
   Windows.Phone.UI.Input.HardwareButtons.CameraPressed += HardwareButtons_CameraPressed;
}
仅当设备上启用了移动扩展 SDK 时,手机相机按钮代码才会执行。同样,您也可以使用 IsEventPresent、IsMethodPresent 和 IsPropertyPresent 来检查当前 API 版本中是否存在任何特定事件、方法或属性,而不是 IsTypePresent,如下所示。
bool isHardwareButtons_CameraPressedAPIPresent =
    Windows.Foundation.Metadata.ApiInformation.IsEventPresent
    ("Windows.Phone.UI.Input.HardwareButtons", "CameraPressed");
UWP 中的 Win32 API
使用 C++/CX 编写的通用 Windows 平台 (UWP) 应用程序或 Windows 运行时组件可以访问 Win32 API,这些 API 现在也已成为 UWP 的一部分。所有 Windows 10 设备系列都可以通过将应用程序与 Windowsapp.lib 链接来实现 Win32 API。
Windowsapp.lib 是一个"伞状"库,它提供 UWP API 的导出功能。链接到 Windowsapp.lib 将为您的应用添加对所有 Windows 10 设备系列中存在的 dll 的依赖关系。
让我们看一个简单的示例,其中应用程序同时面向桌面和手机。因此,当应用程序在桌面上运行时,它不会显示状态栏,但当同一应用程序在手机上运行时,它会显示状态栏。
下面是添加了不同控件的 XAML 代码。
<Page
   x:Class = "UWPAdoptiveCode.MainPage"
   xmlns = "http://schemas.microsoft.com/winfx/2006/xaml/presentation"
   xmlns:x = "http://schemas.microsoft.com/winfx/2006/xaml"
   xmlns:local = "using:UWPAdoptiveCode"
   xmlns:d = "http://schemas.microsoft.com/expression/blend/2008"
   xmlns:mc = "http://schemas.openxmlformats.org/markup-compatibility/2006"
   mc:Ignorable = "d">

   <Page.Background>
      <SolidColorBrush Color = "Green"/>
   </Page.Background>

   <Page.BottomAppBar>
      <CommandBar x:Name = "commandBar" >
         <AppBarButton Icon = "Accept" Label = "appbarbutton"/>
         <AppBarButton Icon = "Cancel" Label = "appbarbutton"/>
      </CommandBar>
   </Page.BottomAppBar>

   <Grid Background = "AliceBlue">

      <VisualStateManager.VisualStateGroups>

         <VisualStateGroup>

            <VisualState>
               <VisualState.StateTriggers>
                  <local:DeviceFamilyTrigger DeviceFamily = "Desktop" />
               </VisualState.StateTriggers>


               <VisualState.Setters>
                  <Setter Target = "StatusBarControls.Visibility"
                     Value = "Collapsed"/>
               </VisualState.Setters>

            </VisualState>

         </VisualStateGroup>

      </VisualStateManager.VisualStateGroups>

      <StackPanel HorizontalAlignment = "Left" Margin = "75,164,0,0"
         VerticalAlignment = "Top" >

         <RadioButton x:Name = "ShowAppBarRadioButton" Content = "Show AppBar"
            HorizontalAlignment = "Stretch" VerticalAlignment = "Stretch"
            IsChecked = "True" Checked = "RadioButton_Checked"/>

         <RadioButton x:Name = "ShowOpaqueAppBarRadioButton"
            Content = "Show Transparent AppBar" HorizontalAlignment = "Stretch"
            VerticalAlignment = "Stretch" Checked = "RadioButton_Checked"/>

         <RadioButton x:Name = "HideAppBarRadioButton" Content = "Hide AppBar"
            HorizontalAlignment = "Stretch" VerticalAlignment = "Stretch"
            Checked = "RadioButton_Checked"/>

      </StackPanel>

      <StackPanel x:Name = "StatusBarControls" Orientation = "Vertical"
         Margin = "75,350,0,0" Visibility = "Visible">

         <CheckBox x:Name = "StatusBarBackgroundCheckBox"
            Content = "Set StatusBar Background"
            Checked = "StatusBarBackgroundCheckBox_Checked"
            Unchecked = "StatusBarBackgroundCheckBox_Unchecked"/>

         <CheckBox x:Name = "StatusBarHiddenCheckBox"
            Content = "Set StatusBar Hidden" Checked = "StatusBarHiddenCheckBox_Checked"
            Unchecked = "StatusBarHiddenCheckBox_Unchecked"/>

      </StackPanel>

   </Grid>

</Page>
以下是不同事件的 C# 实现。
using Windows.UI;
using Windows.UI.Xaml;
using Windows.UI.Xaml.Controls;

// 空白页项目模板的文档位于
   http://go.microsoft.com/fwlink/?LinkId=402352&clcid=0x409

namespace UWPAdoptiveCode {
   /// <summary>
      /// An empty page that can be used on its own or navigated to within a Frame.
   /// </summary>

   public sealed partial class MainPage : Page {

      private Color? DefaultTitleBarButtonsBGColor;
      private Color? DefaultTitleBarBGColor;

      public MainPage() {
         this.InitializeComponent();

         //Windows.UI.ViewManagement.ApplicationView.GetForCurrentView().
            VisibleBoundsCh anged += MainPage_VisibleBoundsChanged;

         var viewTitleBar = Windows.UI.ViewManagement.ApplicationView.
            GetForCurrentView().TitleBar;

         DefaultTitleBarBGColor = viewTitleBar.BackgroundColor;
         DefaultTitleBarButtonsBGColor = viewTitleBar.ButtonBackgroundColor;
      }

      private void RadioButton_Checked(object sender, RoutedEventArgs e) {

         // Bottom AppBar shows on Desktop and Mobile
         if (ShowAppBarRadioButton != null) {

            if (ShowAppBarRadioButton.IsChecked.HasValue &&
               (ShowAppBarRadioButton.IsChecked.Value == true)) {
                 commandBar.Visibility = Windows.UI.Xaml.Visibility.Visible;
                 commandBar.Opacity = 1;
            } else {
               commandBar.Visibility = Windows.UI.Xaml.Visibility.Collapsed;
            }
         }

         if (ShowOpaqueAppBarRadioButton != null) {

            if (ShowOpaqueAppBarRadioButton.IsChecked.HasValue &&
               (ShowOpaqueAppBarRadioButton.IsChecked.Value == true)){
                  commandBar.Visibility = Windows.UI.Xaml.Visibility.Visible;
                  commandBar.Background.Opacity = 0;
            } else{
               commandBar.Background.Opacity = 1;
            }
         }

      }

      private void StatusBarHiddenCheckBox_Checked(object sender, RoutedEventArgs e){

         // StatusBar is Mobile only
         if (Windows.Foundation.Metadata.ApiInformation.
            IsTypePresent("Windows.UI.ViewManag ement.StatusBar")){
               var ignore = Windows.UI.ViewManagement.StatusBar.GetForCurrentView().HideAsync();
         }
      }

      private void StatusBarHiddenCheckBox_Unchecked(object sender, RoutedEventArgs e){

         // StatusBar is Mobile only
         if (Windows.Foundation.Metadata.ApiInformation.
            IsTypePresent("Windows.UI.ViewManag ement.StatusBar")){
               var ignore = Windows.UI.ViewManagement.StatusBar.GetForCurrentView().ShowAsync();
         }
      }

      private void StatusBarBackgroundCheckBox_Checked(object sender, RoutedEventArgs e){

         // StatusBar is Mobile only
         if (Windows.Foundation.Metadata.ApiInformation.
            IsTypePresent("Windows.UI.ViewManag ement.StatusBar")){

               Windows.UI.ViewManagement.StatusBar.GetForCurrentView().
                  BackgroundColor = Windows.UI.Colors.Blue;

               Windows.UI.ViewManagement.StatusBar.GetForCurrentView().
                   BackgroundOpacity = 1;
         }
      }

      private void StatusBarBackgroundCheckBox_Unchecked(object sender, RoutedEventArgs e){

         // StatusBar is Mobile only
         if (Windows.Foundation.Metadata.ApiInformation.
            IsTypePresent("Windows.UI.ViewManag ement.StatusBar")){
               Windows.UI.ViewManagement.StatusBar.GetForCurrentView().
                  BackgroundOpacity = 0;
         }
      }

   }

   public class DeviceFamilyTrigger : StateTriggerBase{

      //private variables
      private string _deviceFamily;

      //Public property
      public string DeviceFamily {

         get {
            return _deviceFamily;
         }
         set{
            _deviceFamily = value;
            var qualifiers = Windows.ApplicationModel.Resources.Core.ResourceContext.
               GetForCurrentView().Qua lifierValues;

            if (qualifiers.ContainsKey("DeviceFamily"))
               SetActive(qualifiers["DeviceFamily"] == _deviceFamily);
            else
               SetActive(false);
         }
      }
   }
}
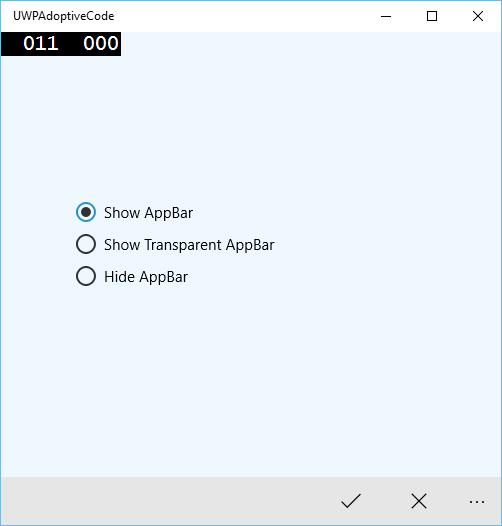
当上述代码在移动设备上编译并执行时,您将看到以下窗口。
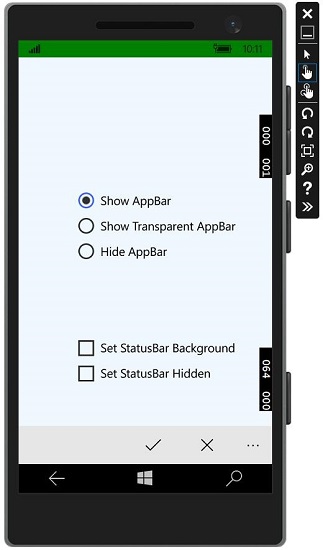
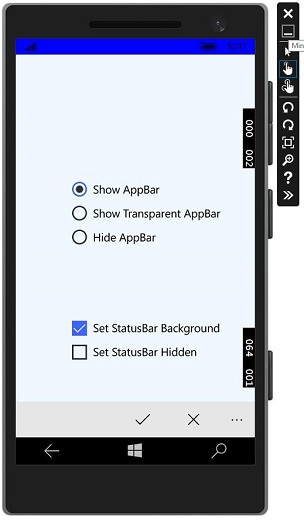
您可以使用图中所示的复选框更改状态栏的背景颜色。
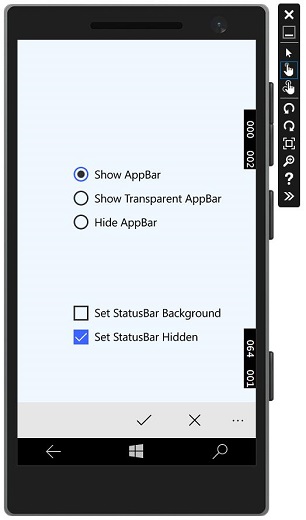
您还可以隐藏状态栏。
现在,当您在桌面设备上运行相同的应用程序时,您将看到以下窗口,其中状态栏和状态栏上的复选框不可见。
Windows10 开发 - 文件管理
在任何应用程序中,最重要的部分之一就是数据。如果您是 .NET 开发人员,您可能了解独立存储,并且通用 Windows 平台 (UWP) 应用程序也遵循相同的概念。
文件位置
这些是您的应用程序可以访问数据的区域。应用程序包含一些区域,这些区域是该应用程序私有的,其他应用程序无法访问,但还有许多其他区域,您可以在其中存储和保存文件中的数据。
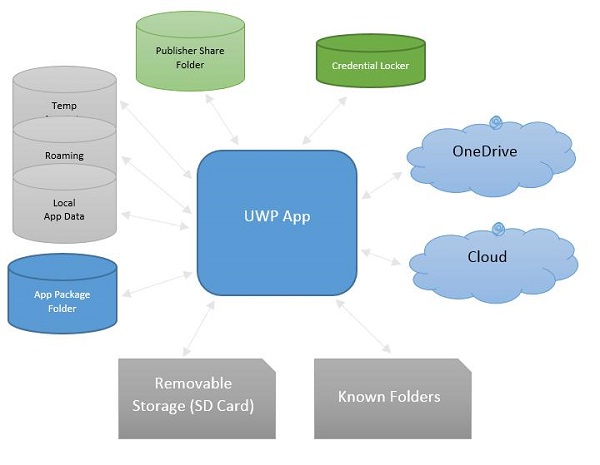
以下是每个文件夹的简要说明。
| 序列号 | 文件夹 &说明 |
|---|---|
| 1 | App package folder 包管理器会将应用的所有相关文件安装到应用包文件夹中,应用只能从此文件夹读取数据。 |
| 2 | Local folder 应用将本地数据存储到本地文件夹中。本地文件夹的存储容量不超过存储设备的上限。 |
| 3 | Roaming folder 与应用相关的设置和属性存储在漫游文件夹中。其他设备也可以从此文件夹访问数据。每个应用程序的大小限制为 100KB。 |
| 4 | Temp Folder 使用临时存储空间,并且无法保证应用程序再次运行时该存储空间仍然可用。 |
| 5 | Publisher Share 同一发布商的所有应用程序共享存储空间。它在应用清单中声明。 |
| 6 | Credential Locker 用于安全存储密码凭据对象。 |
| 7 | OneDrive OneDrive 是 Microsoft 帐户附带的免费在线存储空间。 |
| 8 | Cloud 将数据存储在云端。 |
| 9 | Known folders 这些文件夹是已知的文件夹,例如"我的图片"、"视频"和"音乐"。 |
| 10 | Removable storage USB 存储设备或外部硬盘等 |
文件处理 API
Windows 8 引入了新的文件处理 API。这些 API 位于 Windows.Storage 和 Windows.Storage.Streams 命名空间中。您可以使用这些 API 替代 System.IO.IsolatedStorage 命名空间。使用这些 API,您可以更轻松地将 Windows Phone 应用移植到 Windows 应用商店,并且可以轻松地将应用升级到 Windows 的未来版本。
要访问本地、漫游或临时文件夹,您需要调用这些 API −
StorageFolder localFolder = ApplicationData.Current.LocalFolder;
StorageFolder roamingFolder = ApplicationData.Current.RoamingFolder;
StorageFolder tempFolder = ApplicationData.Current.TemporaryFolder;
要在本地文件夹中创建新文件,请使用以下代码 −
StorageFolder localFolder = ApplicationData.Current.LocalFolder;
StorageFile textFile = await localFolder.CreateFileAsync(filename,
CreationCollisionOption.ReplaceExisting);
以下代码用于打开新创建的文件并在其中写入一些内容。
using (IRandomAccessStream textStream = await textFile.OpenAsync(FileAccessMode.ReadWrite)) {

   using (DataWriter textWriter = new DataWriter(textStream)){
      textWriter.WriteString(contents);
      await textWriter.StoreAsync();
   }

}
您可以从本地文件夹再次打开同一个文件,如下面的代码所示。
using (IRandomAccessStream textStream = await textFile.OpenReadAsync()) {

   using (DataReader textReader = new DataReader(textStream)){
      uint textLength = (uint)textStream.Size;
      await textReader.LoadAsync(textLength);
      contents = textReader.ReadString(textLength);
   }

}
为了理解数据的读写工作原理,我们来看一个简单的示例。下面是添加了不同控件的 XAML 代码。
<Page
   x:Class = "UWPFileHandling.MainPage"
   xmlns = "http://schemas.microsoft.com/winfx/2006/xaml/presentation"
   xmlns:x = "http://schemas.microsoft.com/winfx/2006/xaml"
   xmlns:local = "using:UWPFileHandling"
   xmlns:d = "http://schemas.microsoft.com/expression/blend/2008"
   xmlns:mc = "http://schemas.openxmlformats.org/markup-compatibility/2006"
   mc:Ignorable = "d">

   <Grid Background = "{ThemeResource ApplicationPageBackgroundThemeBrush}">

      <Button x:Name = "readFile" Content = "Read Data From File"
         HorizontalAlignment = "Left" Margin = "62,518,0,0"
         VerticalAlignment = "Top" Height = "37" Width = "174"
         Click = "readFile_Click"/>

      <TextBox x:FieldModifier = "public" x:Name = "textBox"
         HorizontalAlignment = "Left" Margin = "58,145,0,0" TextWrapping = "Wrap"
         VerticalAlignment = "Top" Height = "276" Width = "245"/>.

      <Button x:Name = "writeFile" Content = "Write Data to File"
         HorizontalAlignment = "Left" Margin = "64,459,0,0"
         VerticalAlignment = "Top" Click = "writeFile_Click"/>

      <TextBlock x:Name = "textBlock" HorizontalAlignment = "Left"
         Margin = "386,149,0,0" TextWrapping = "Wrap"
         VerticalAlignment = "Top" Height = "266" Width = "250"
         Foreground = "#FF6231CD"/>

   </Grid>

</Page>
下面给出了不同事件的 C# 实现,以及用于读取和写入文本文件数据的 FileHelper 类的实现。
using System;
using System.IO;
using System.Threading.Tasks;

using Windows.Storage;
using Windows.Storage.Streams;
using Windows.UI.Xaml;
using Windows.UI.Xaml.Controls;

// 空白页项目模板记录在
   http://go.microsoft.com/fwlink/?LinkId=402352&clcid=0x409

namespace UWPFileHandling {

   /// <summary>
      /// An empty page that can be used on its own or navigated to within a Frame.
   /// </summary>

   public partial class MainPage : Page {
      const string TEXT_FILE_NAME = "SampleTextFile.txt";

      public MainPage(){
         this.InitializeComponent();
      }

      private async void readFile_Click(object sender, RoutedEventArgs e) {
         string str = await FileHelper.ReadTextFile(TEXT_FILE_NAME);
         textBlock.Text = str;
      }

      private async void writeFile_Click(object sender, RoutedEventArgs e) {
         string textFilePath = await FileHelper.WriteTextFile(TEXT_FILE_NAME, textBox.Text);
      }

   }

   public static class FileHelper {

      // Write a text file to the app's local folder.

      public static async Task<string>
         WriteTextFile(string filename, string contents) {

         StorageFolder localFolder = ApplicationData.Current.LocalFolder;
         StorageFile textFile = await localFolder.CreateFileAsync(filename,
            CreationCollisionOption.ReplaceExisting);

         using (IRandomAccessStream textStream = await
            textFile.OpenAsync(FileAccessMode.ReadWrite)){

               using (DataWriter textWriter = new DataWriter(textStream)){
                  textWriter.WriteString(contents);
                  await textWriter.StoreAsync();
               }
         }

         return textFile.Path;
      }

      // Read the contents of a text file from the app's local folder.

      public static async Task<string> ReadTextFile(string filename) {
         string contents;
         StorageFolder localFolder = ApplicationData.Current.LocalFolder;
         StorageFile textFile = await localFolder.GetFileAsync(filename);

         using (IRandomAccessStream textStream = await textFile.OpenReadAsync()){

            using (DataReader textReader = new DataReader(textStream)){
               uint textLength = (uint)textStream.Size;
               await textReader.LoadAsync(textLength);
               contents = textReader.ReadString(textLength);
            }

         }

         return contents;
      }
   }
}
编译并执行上述代码后,您将看到以下窗口。
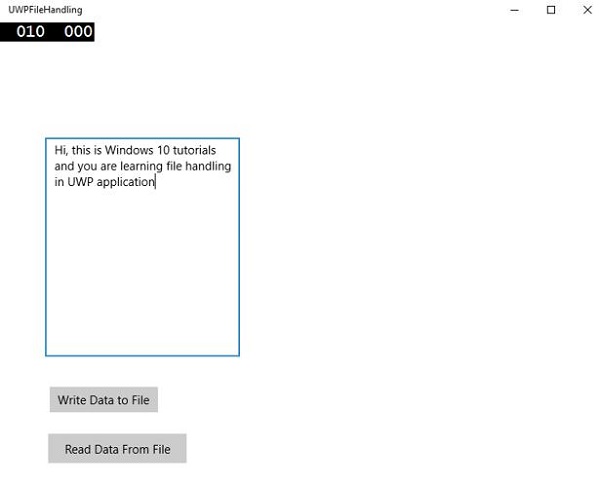
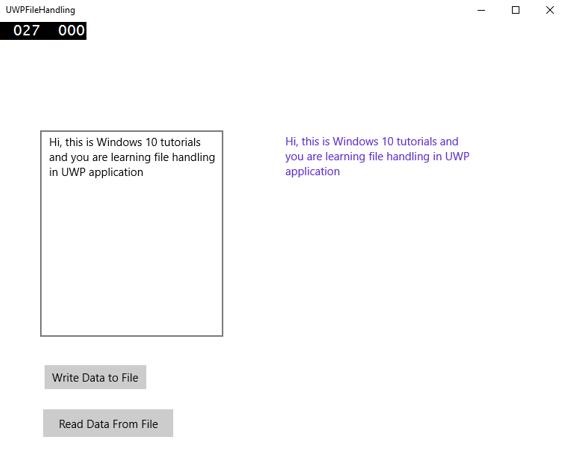
现在,您在文本框中输入一些内容,然后点击"将数据写入文件"按钮。程序会将数据写入本地文件夹中的文本文件。如果您点击"从文件读取数据"按钮,程序将从位于本地文件夹中的同一文本文件中读取数据,并将其显示在文本块中。
Windows 10 开发 - SQLite 数据库
在许多应用程序中,某些类型的数据彼此之间存在某种关系。这些难以存储在文件中的数据可以存储在数据库中。
如果您熟悉各种数据库类型,例如任何应用程序中的 SQL Server 或 Oracle 数据库,那么理解 SQLite 数据库 就非常容易了。
什么是 SQLite?
SQLite 是一个软件库,它实现了一个自包含、无服务器、零配置、事务型 SQL 数据库引擎。
重要特性有 −
SQLite 是世界上部署最广泛的数据库引擎。
SQLite 的源代码是开源的。
由于其可移植性和占用空间小,它对游戏和移动应用程序开发产生了巨大的影响。
SQLite 的优势
SQLite 的优势 − 如下
- 它是一个非常轻量级的数据库。
- 它与平台无关,可在所有平台上运行。
- 它占用内存很少。
- 它非常可靠。
- 无需任何设置和安装。
- 它没有任何依赖项。
要在通用 Windows 平台 (UWP) 应用程序中使用 SQLite,您需要按照以下步骤操作。
创建一个名为 UWPSQLiteDemo 的新通用 Windows 空白应用。
转到 工具 菜单,然后选择"扩展和更新"。将打开以下对话框。
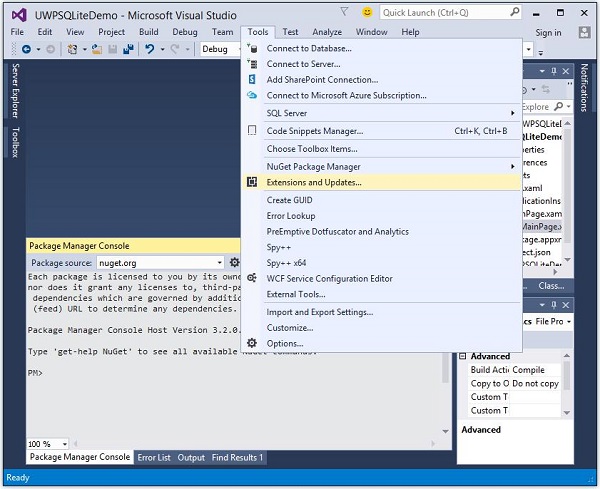
- 选择"扩展和更新"后,将打开以下窗口。
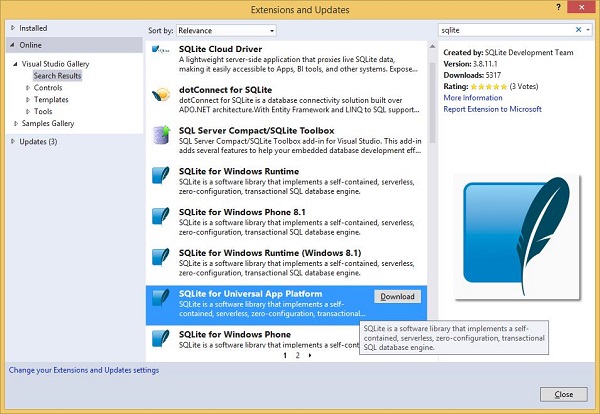
现在,选择在线选项,并从左侧窗格中搜索 SQLite。
下载并安装适用于通用应用平台的 SQLite。
现在,再次转到"工具"菜单,然后选择NuGet 包管理器 >程序包管理器控制台菜单选项,如下所示。
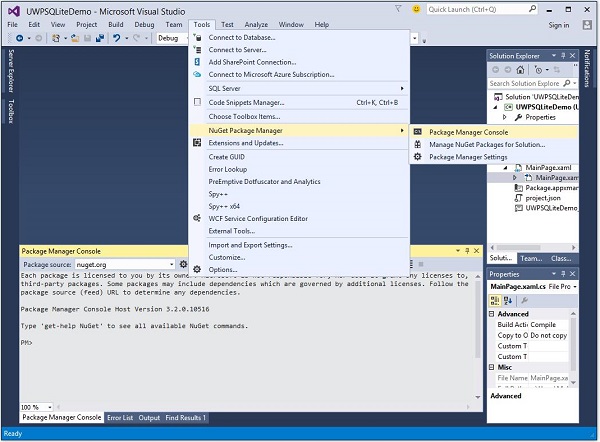
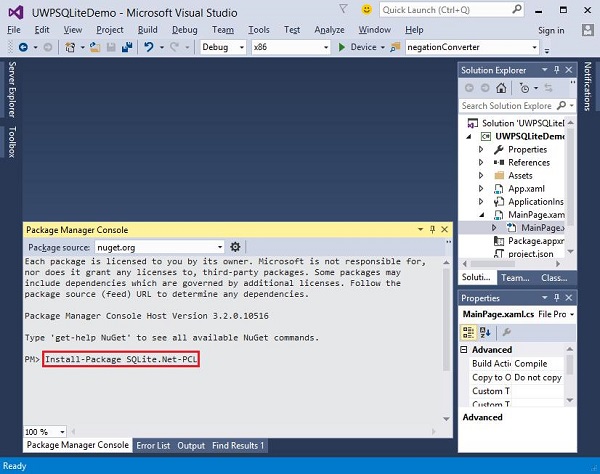
在程序包管理器控制台中输入以下命令,然后按 Enter 键执行此命令 −
Install-Package SQLite.Net-PCL
现在,在解决方案资源管理器中右键单击引用,然后选择添加引用。
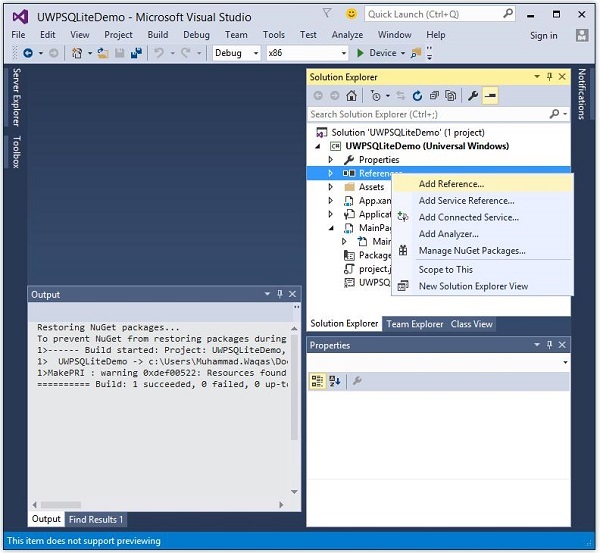
- 将打开以下对话框。
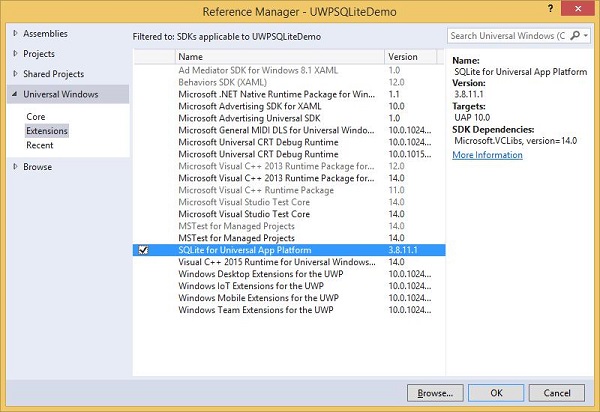
在左侧窗格中的通用 Windows下选择扩展,在中间窗格中勾选"通用应用平台"中的 SQLite,然后点击"确定"。
现在,您已准备好在 UWP 应用程序中使用 SQLite。
您可以使用以下代码创建数据库。
string path = Path.Combine(Windows.Storage.ApplicationData.
   Current.LocalFolder.Path, "db.sqlite");

SQLite.Net.SQLiteConnection conn = new SQLite.Net.SQLiteConnection(new
   SQLite.Net.Platform.WinRT.SQLitePlatformWinRT(), path);
要创建表,您需要调用 CreateTable 方法,并传入表名对象。
conn.CreateTable<Customer>();
您可以使用以下代码将数据插入表中。
conn.Insert(new Customer(){
   Name = textBox.Text,
   Age = textBox1.Text
});
下面给出了从表中检索数据的代码。
var query = conn.Table<Customer>();
string id = "";
string name = "";
string age = "";

foreach (var message in query) {
   id = id + " " + message.Id;
   name = name + " " + message.Name;
   age = age + " " + message.Age;
}
让我们通过一个简单的示例来了解如何创建数据库、表以及如何在数据库中插入和检索数据。我们将添加姓名和年龄,然后从表中检索相同的数据。下面给出了添加了不同控件的 XAML 代码。
<Page
   x:Class = "UWPSQLiteDemo.MainPage"
   xmlns = "http://schemas.microsoft.com/winfx/2006/xaml/presentation"
   xmlns:x = "http://schemas.microsoft.com/winfx/2006/xaml"
   xmlns:local = "using:UWPSQLiteDemo"
   xmlns:d = "http://schemas.microsoft.com/expression/blend/2008"
   xmlns:mc = "http://schemas.openxmlformats.org/markup-compatibility/2006"
   mc:Ignorable = "d">

   <Grid Background = "{ThemeResource ApplicationPageBackgroundThemeBrush}" >
      <Button x:Name = "Retrieve" Content = "Retrieve" HorizontalAlignment = "Left"
         VerticalAlignment = "Top" Margin = "384,406,0,0"
         Click = "Retrieve_Click"/>

      <Button x:Name = "Add" Content = "Add" HorizontalAlignment = "Left"
         VerticalAlignment = "Top" Margin = "291,406,0,0" Click = "Add_Click"/>

      <TextBlock x:Name = "textBlock" HorizontalAlignment = "Left"
         TextWrapping = "Wrap" Text = "Name" VerticalAlignment = "Top"
         Margin = "233,280,0,0" Width = "52"/>

      <TextBox x:Name = "textBox" HorizontalAlignment = "Left" TextWrapping = "Wrap"
         VerticalAlignment = "Top" Margin = "289,274,0,0" Width = "370"/>

      <TextBlock x:Name = "textBlock1" HorizontalAlignment = "Left"
         TextWrapping = "Wrap" Text = "Age" VerticalAlignment = "Top"
         Margin = "233,342,0,0" Width = "52"/>

      <TextBox x:Name = "textBox1" HorizontalAlignment = "Left" TextWrapping = "Wrap"
         VerticalAlignment = "Top" Margin = "289,336,0,0" Width = "191"/>

      <TextBlock x:Name = "textBlock2" HorizontalAlignment = "Left"
         Margin = "290,468,0,0" TextWrapping = "Wrap"
         VerticalAlignment = "Top" Width = "324" Height = "131"/>

   </Grid>

</Page>
下面给出了事件和 SQLite 数据库 的 C# 实现。
using SQLite.Net.Attributes;

using System;
using System.Collections.Generic;
using System.IO;
using System.Linq;
using System.Runtime.InteropServices.WindowsRuntime;

using Windows.Foundation;
using Windows.Foundation.Collections;

using Windows.UI.Xaml;
using Windows.UI.Xaml.Controls;
using Windows.UI.Xaml.Controls.Primitives;
using Windows.UI.Xaml.Data;
using Windows.UI.Xaml.Input;
using Windows.UI.Xaml.Media;
using Windows.UI.Xaml.Navigation;

// The Blank Page item template is documented at
   http://go.microsoft.com/fwlink/?LinkId=402352&clcid=0x409

namespace UWPSQLiteDemo {

   /// <summary>
      /// An empty page that can be used on its own or navigated to within a Frame.
   /// </summary>

   public sealed partial class MainPage : Page {
      string path;
      SQLite.Net.SQLiteConnection conn;

      public MainPage(){
         this.InitializeComponent();
         path = Path.Combine(Windows.Storage.ApplicationData.Current.LocalFolder.Path,
            "db.sqlite");
         conn = new SQLite.Net.SQLiteConnection(new
            SQLite.Net.Platform.WinRT.SQLitePlatformWinRT(), path);
         conn.CreateTable<Customer>();
      }

      private void Retrieve_Click(object sender, RoutedEventArgs e) {
         var query = conn.Table<Customer>();
         string id = "";
         string name = "";
         string age = "";

         foreach (var message in query) {
            id = id + " " + message.Id;
            name = name + " " + message.Name;
            age = age + " " + message.Age;
         }

         textBlock2.Text = "ID: " + id + "
Name: " + name + "
Age: " + age;
      }

      private void Add_Click(object sender, RoutedEventArgs e){

         var s = conn.Insert(new Customer(){
            Name = textBox.Text,
            Age = textBox1.Text
         });

      }
   }

   public class Customer {
      [PrimaryKey, AutoIncrement]
      public int Id { get; set; }
      public string Name { get; set; }
      public string Age { get; set; }
   }

}
编译并执行上述代码后,您将看到以下窗口。
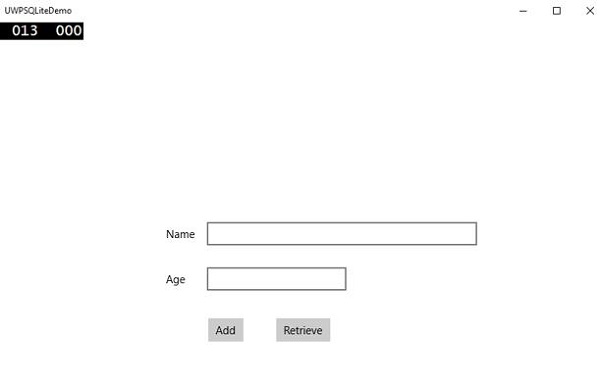
输入名称和年龄,然后点击添加按钮。
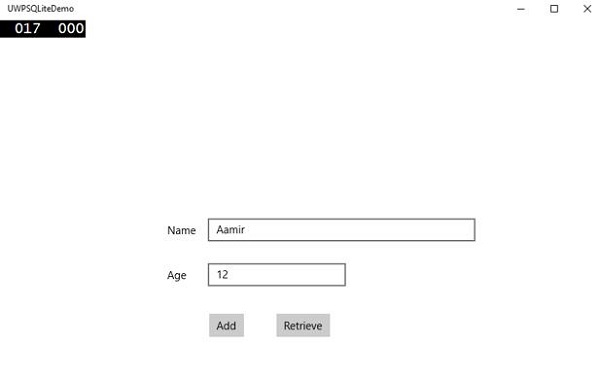
现在点击检索按钮。您将在文本块中看到以下数据。
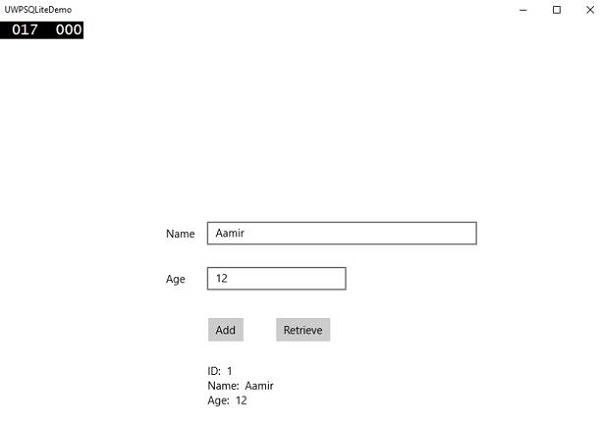
ID 字段是主键和自动递增字段,在 Customer 类中指定。
[PrimaryKey, AutoIncrement]
public int Id { get; set; }
Windows10 开发 - 应用通信
应用间通信是指您的应用可以与安装在同一设备上的其他应用进行通信。这并非通用 Windows 平台 (UWP) 的新功能,Windows 8.1 中也曾提供此功能。
Windows 10 引入了一些全新改进的方法,以便在同一设备上的应用之间轻松通信。两个应用之间的通信可以通过以下方式实现:−
- 一个应用启动另一个应用并传输一些数据。
- 应用之间只是交换数据,无需启动任何应用。
应用间通信的主要优势在于,您可以将应用拆分成更小的块,以便于维护、更新和使用。
准备您的应用
如果您按照以下步骤操作,其他应用就可以启动您的应用。
在应用程序包清单中添加协议声明。
双击 Package.appxmanifest 文件,该文件在解决方案资源管理器中可用,如下所示。
转到 Declaration 选项卡,并输入协议名称,如下所示。
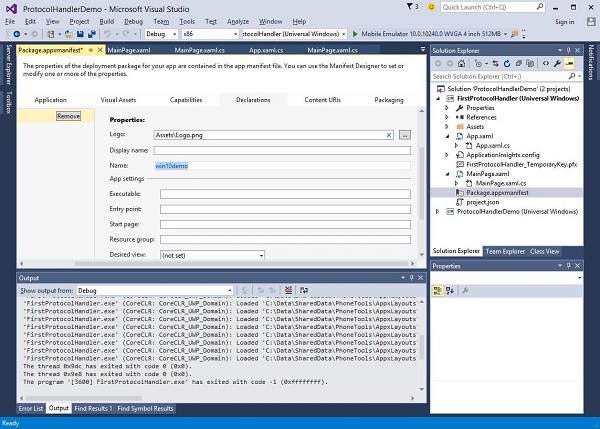
下一步是添加 activation 代码,以便应用在由其他应用程序启动时能够做出适当的响应。
为了响应协议激活,我们需要重写激活类的 OnActivated 方法。因此,在 App.xaml.cs 文件中添加以下代码。
protected override void OnActivated(IActivatedEventArgs args) {

   ProtocolActivatedEventArgs protocolArgs = args as ProtocolActivatedEventArgs;

   if (args != null){

      Frame rootFrame = Window.Current.Content as Frame;

      // Do not repeat app initialization when the Window already has content,
      // just ensure that the window is active

      if (rootFrame == null){

         // Create a Frame to act as the navigation context and navigate to the first page
         rootFrame = new Frame();

         // Set the default language
         rootFrame.Language = Windows.Globalization.ApplicationLanguages.Languages[0];
         rootFrame.NavigationFailed += OnNavigationFailed;

         // Place the frame in the current Window
         Window.Current.Content = rootFrame;
      }

      if (rootFrame.Content == null){

         // When the navigation stack isn't restored, navigate to the
         // first page, configuring the new page by passing required
         // information as a navigation parameter

         rootFrame.Navigate(typeof(MainPage), null);
      }

      // Ensure the current window is active
      Window.Current.Activate();

   }
}
要启动应用程序,您只需使用 Launcher.LaunchUriAsync 方法即可,该方法将使用此方法中指定的协议启动应用程序。
await Windows.System.Launcher.LaunchUriAsync(new Uri("win10demo:?SomeData=123"));
让我们通过一个简单的示例来理解这一点,其中我们有两个 UWP 应用程序,分别为 ProtocolHandlerDemo 和 FirstProtocolHandler。
在此示例中,ProtocolHandlerDemo 应用程序包含一个按钮,点击该按钮将打开 FirstProtocolHandler 应用程序。
包含一个按钮的 ProtocolHandlerDemo 应用程序中的 XAML 代码如下所示。
<Page
   x:Class = "ProtocolHandlerDemo.MainPage"
   xmlns = "http://schemas.microsoft.com/winfx/2006/xaml/presentation"
   xmlns:x = "http://schemas.microsoft.com/winfx/2006/xaml"
   xmlns:local = "using:ProtocolHandlerDemo"
   xmlns:d = "http://schemas.microsoft.com/expression/blend/2008"
   xmlns:mc = "http://schemas.openxmlformats.org/markup-compatibility/2006"
   mc:Ignorable = "d">

   <Grid Background = "{ThemeResource ApplicationPageBackgroundThemeBrush}">
      <Button x:Name = "LaunchButton" Content = " Launch First Protocol App"
         FontSize = "24" HorizontalAlignment = "Center"
         Click = "LaunchButton_Click"/>
   </Grid>

</Page>
以下是实现按钮点击事件的 C# 代码。
using System;
using Windows.UI.Xaml;
using Windows.UI.Xaml.Controls;

// 空白页项目模板的文档位于
   http://go.microsoft.com/fwlink/?LinkId=402352&clcid=0x409

namespace ProtocolHandlerDemo {

   /// <summary>
      /// An empty page that can be used on its own or navigated to within a Frame.
   /// </summary>

   public sealed partial class MainPage : Page {

      public MainPage(){
         this.InitializeComponent();
      }

      private async void LaunchButton_Click(object sender, RoutedEventArgs e) {
         await Windows.System.Launcher.LaunchUriAsync(new
            Uri("win10demo:?SomeData=123"));
      }

   }
}
现在让我们看一下 FirstProtocolHandler 应用程序表。下面给出了创建带有一些属性的文本块的 XAML 代码。
<Page
   x:Class = "FirstProtocolHandler.MainPage"
   xmlns = "http://schemas.microsoft.com/winfx/2006/xaml/presentation"
   xmlns:x = "http://schemas.microsoft.com/winfx/2006/xaml"
   xmlns:local = "using:FirstProtocolHandler"
   xmlns:d = "http://schemas.microsoft.com/expression/blend/2008"
   xmlns:mc = "http://schemas.openxmlformats.org/markup-compatibility/2006"
   mc:Ignorable = "d">

   <Grid Background = "{ThemeResource ApplicationPageBackgroundThemeBrush}">
      <TextBlock Text = "You have successfully launch First Protocol Application"
         TextWrapping = "Wrap" Style = "{StaticResource SubtitleTextBlockStyle}"
         Margin = "30,39,0,0" VerticalAlignment = "Top" HorizontalAlignment = "Left"
         Height = "100" Width = "325"/>
   </Grid>

</Page>
App.xaml.cs 文件的 C# 实现,其中覆盖了 OnActicated 函数,如下所示。请在 App.xaml.cs 文件的 App 类中添加以下代码。
protected override void OnActivated(IActivatedEventArgs args) {
   ProtocolActivatedEventArgs protocolArgs = args as ProtocolActivatedEventArgs;

   if (args != null) {
      Frame rootFrame = Window.Current.Content as Frame;

      // Do not repeat app initialization when the Window already has content,
      // just ensure that the window is active

      if (rootFrame == null) {

         // Create a Frame to act as the navigation context and navigate to
            the first page
         rootFrame = new Frame();

         // Set the default language
         rootFrame.Language = Windows.Globalization.ApplicationLanguages.Languages[0];
         rootFrame.NavigationFailed += OnNavigationFailed;

         // Place the frame in the current Window
         Window.Current.Content = rootFrame;
      }

      if (rootFrame.Content == null) {

         // When the navigation stack isn't restored navigate to the
         // first page, configuring the new page by passing required
         // information as a navigation parameter

         rootFrame.Navigate(typeof(MainPage), null);
      }

      // Ensure the current window is active
      Window.Current.Activate();
   }
}
在模拟器上编译并执行 ProtocolHandlerDemo 应用程序时,您将看到以下窗口。
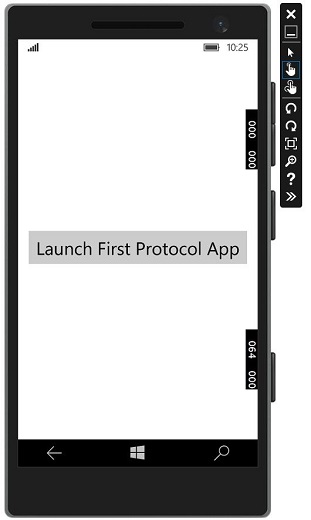
现在,当您点击按钮时,它将打开 FirstProtocolHandler 应用程序,如下所示。
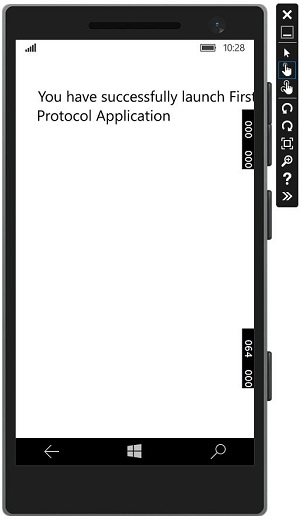
Windows 10 开发 - 本地化
Windows 在全球范围内使用,涵盖各种不同的市场,目标受众的文化、地域或语言也各不相同。本地化是指将应用程序资源翻译成针对其支持的特定文化的本地化版本。
如果仅使用一种语言开发任何应用程序,就意味着您的业务和客户受到了限制。如果您想扩大客户群,从而提升您的业务,那么您的应用程序必须在全球范围内可用且易于访问。对产品进行经济高效的本地化是吸引更多客户的最佳且最经济的方式之一。
在 Windows 10 中,使用 resx 文件可以轻松创建可本地化的应用程序,这是最简单的本地化解决方案。
让我们通过一个简单的示例来理解这一点,并遵循以下所有步骤。
翻译 UI 资源
您可以将 UI 的字符串资源放入资源 (resw) 文件中,而不是将它们直接放在代码或标记中,然后您就可以在代码或标记中引用这些字符串。按照以下步骤将字符串添加到资源文件中。
创建一个新的通用 Windows 平台 (UWP) 应用程序。
在解决方案资源管理器中,右键单击项目,然后选择添加 >新建文件夹。
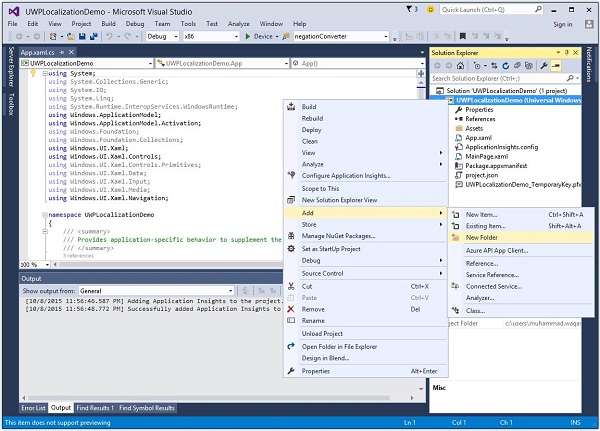
将新文件夹的名称更改为"Strings"。
右键单击Strings文件夹,然后添加一个名为"en-US"的新文件夹。这些是特定于语言和国家/地区名称的命名约定,可以在国家语言支持 (NLS) API 参考 msdn.microsoft.com 页面中找到。
右键单击 en-US 文件夹,然后选择 添加 > 新建项目…。
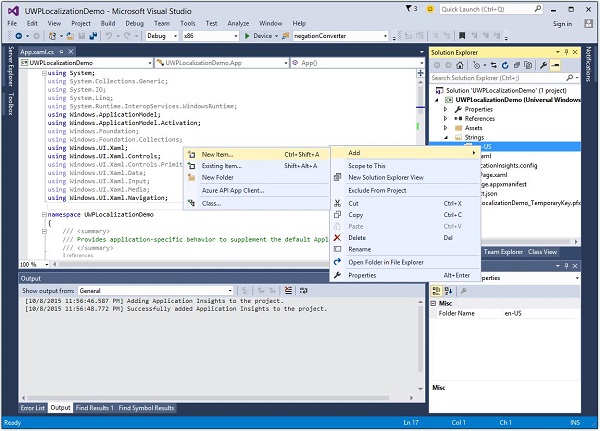
- 将打开以下对话框。
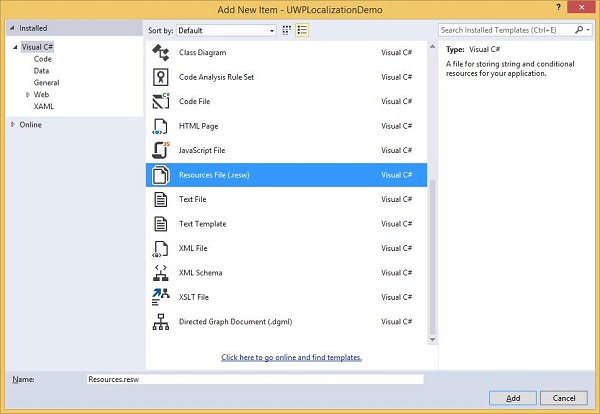
选择"资源文件 (.resw)",然后点击添加按钮。
现在,我们转到 XAML 文件并添加一个 Hub 控件,并设置一些属性,如下所示。
<Page
   x:Class = "UWPLocalizationDemo.MainPage"
   xmlns = "http://schemas.microsoft.com/winfx/2006/xaml/presentation"
   xmlns:x = "http://schemas.microsoft.com/winfx/2006/xaml"
   xmlns:local = "using:UWPLocalizationDemo"
   xmlns:d = "http://schemas.microsoft.com/expression/blend/2008"
   xmlns:mc = "http://schemas.openxmlformats.org/markup-compatibility/2006"
   mc:Ignorable = "d">

   <Grid Background = "{ThemeResource ApplicationPageBackgroundThemeBrush}">
      <Hub x:Name = "textBlock" x:Uid = "HubControl" Background = "Black"
         Foreground = "White" Header = "Localization Demo"/>
   </Grid>

</Page>
x:Uid = "HubControl" 是用于本地化的标识符
现在,编译并执行上述代码后,您将看到以下窗口。
所有与 Hub 相关的信息,例如标题、前景和背景颜色,均在 XAML 中设置。
现在,在 Strings/en-US 文件夹中的 Resource.resw 文件中添加一些信息,如下所示。
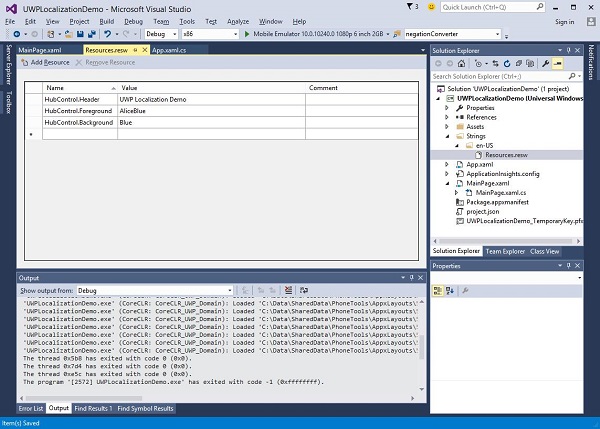
您需要将每个需要本地化文本的控件与 .resw 文件关联。您可以通过在 XAML 元素上使用 x:Uid 属性来实现,例如 −
x:Uid = "HubControl" 在 resw 文件中用于为标题、前景色和背景色分配字符串。
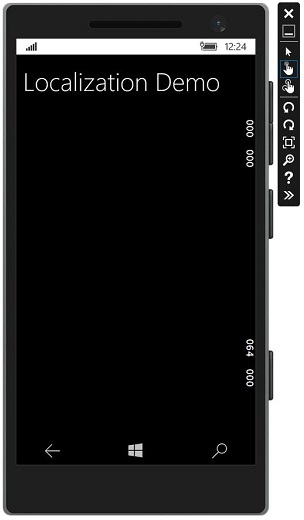
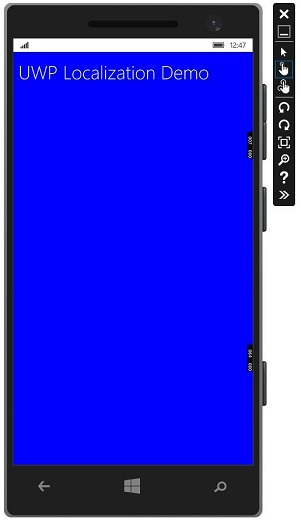
现在,当您在模拟器上编译并执行应用程序时,您将看到以下窗口。您可以看到,标题、前景和背景颜色值均从 Resources.resw 文件中选取。
您可以手动添加其他语言(例如法语、德语和日语等)的 Resource.resw 文件,就像我们为美国英语所做的那样,但 Microsoft 还提供了 多语言应用工具包,借助该工具包,您可以轻松地将 Resource.resw 翻译成其他语言。
前往 工具 >扩展和更新菜单,搜索多语言应用工具包。
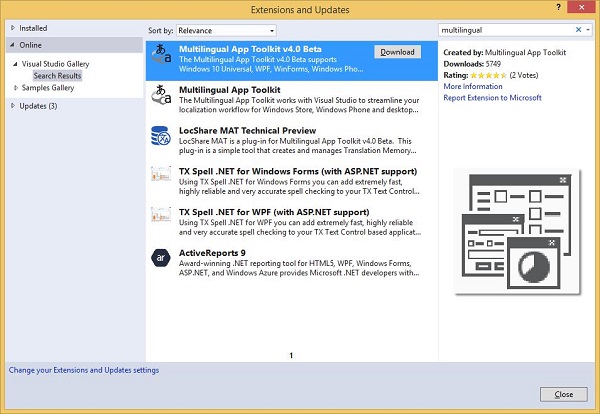
下载并安装此工具包。安装完成后,重新启动 Visual Studio 并打开同一项目。
现在从工具 > 启用此工具包。多语言应用工具包菜单选项。
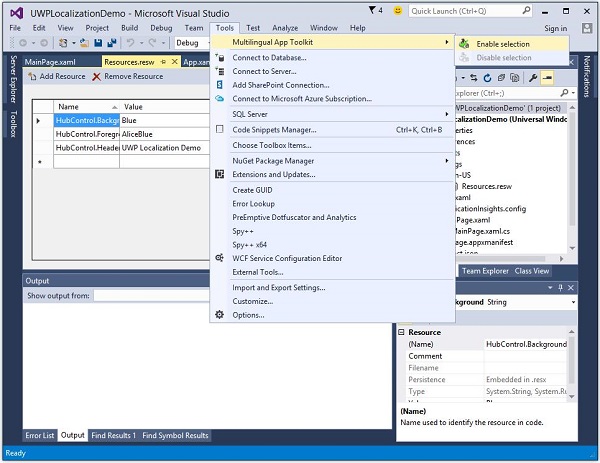
现在您可以添加其他语言的翻译。
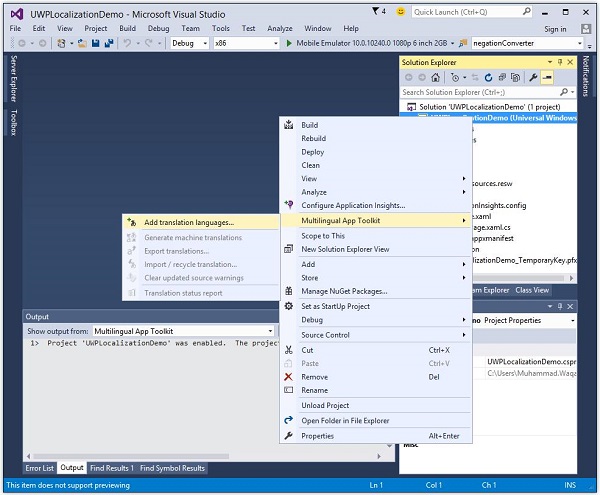
在解决方案资源管理器中右键单击项目,然后从菜单中选择多语言应用工具包 > 添加翻译语言选项。
将打开以下翻译语言对话框。您可以选择任何所需的语言,以便针对这些文化本地化您的应用程序。
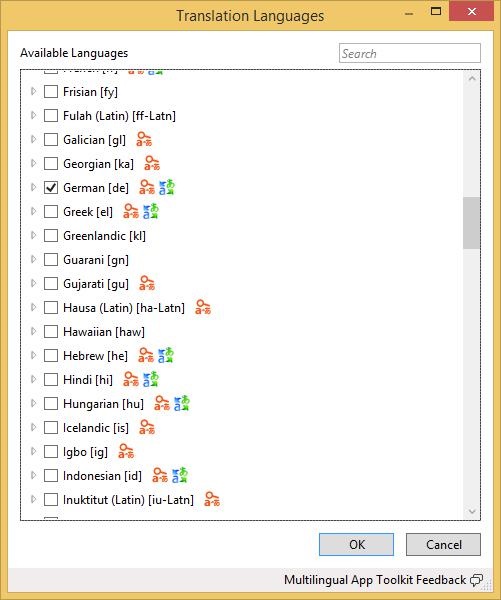
选择德语语言,然后点击确定按钮。
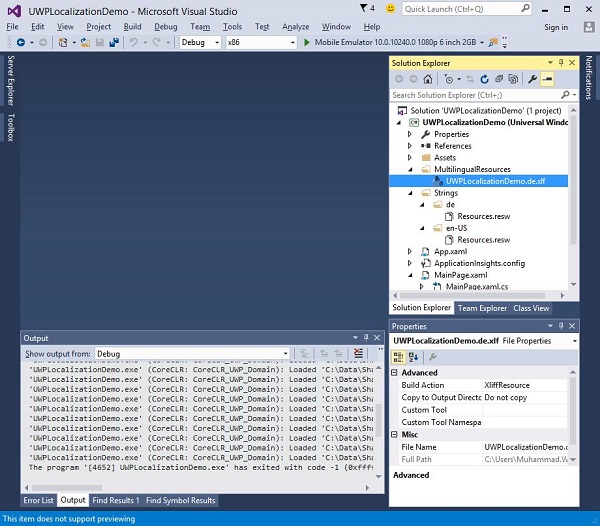
您还可以看到在文件夹 Strings\de 中创建了 Resources.resw 文件。
现在,您将看到另一个 MultiLingualResources 已添加到 *.xlf 文件中。双击此文件,将打开多语言编辑器,检查并验证已翻译的字符串,并根据需要进行一些更改。
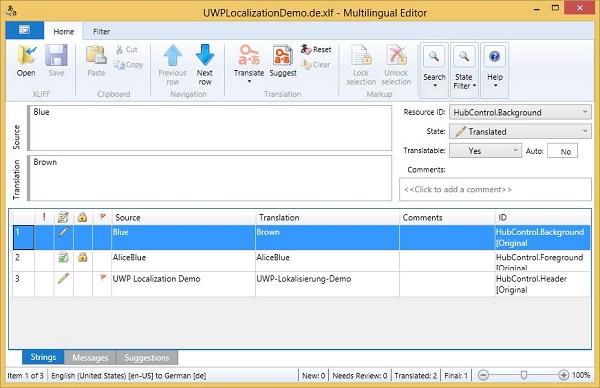
进行更改,并验证背景色是否已更改为棕色,以及标题文本是否已正确翻译为德语。
如上例所示,Hub 的背景色已从蓝色更改为棕色,而前景色保持不变。
现在打开 Strings\de 文件夹中的 Resources.resw。
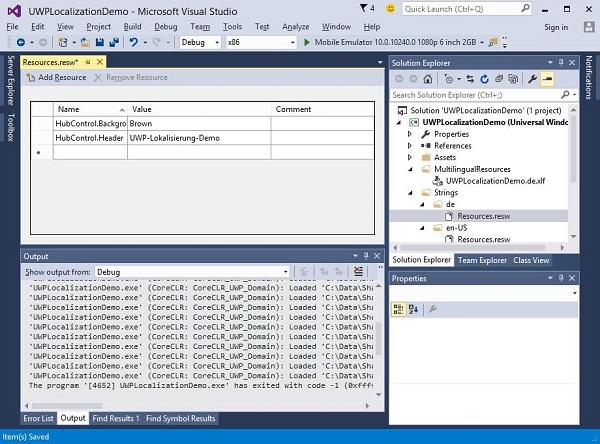
您可以看到这里只提到了两个字符串,因为我们没有更改多语言编辑器的前景色。
要检查应用程序的本地化版本,请更改计算机的文化。要更改计算机的文化,请按照给定的步骤操作。
- 让我们转到 PC 设置并选择"时间和语言"。
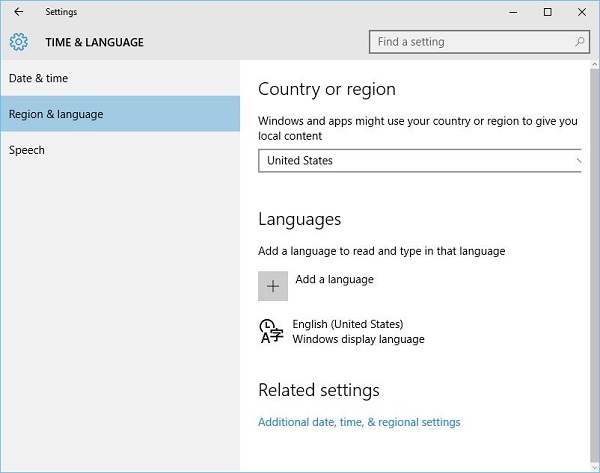
在左侧窗格中,选择区域和语言,然后点击添加语言。
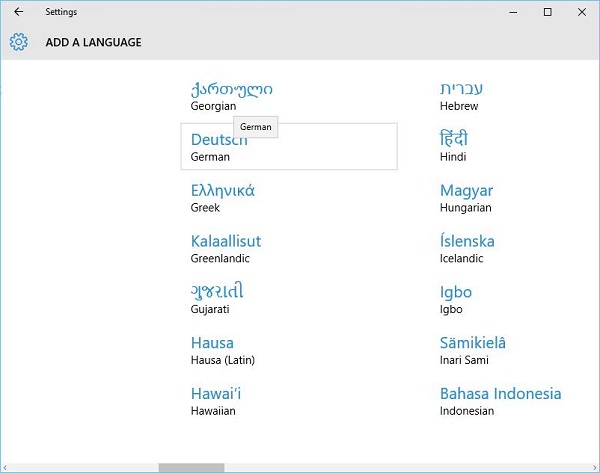
如上所示,选择Deutsch German语言,这将打开另一个对话框。
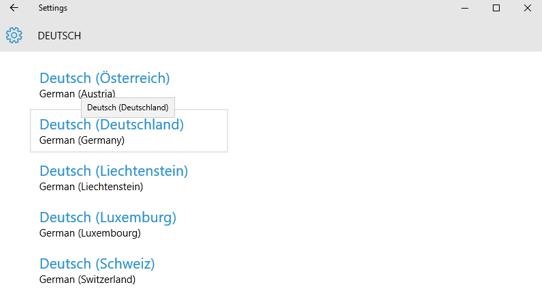
现在选择德语(德国)并关闭此对话框。
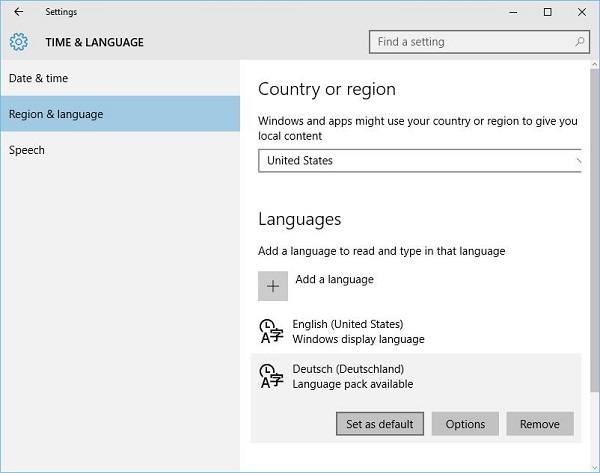
- 将德语设为默认语言。
- 现在执行您的应用程序,它将显示以下窗口。
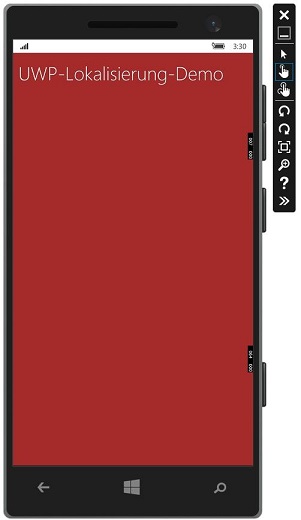
- 现在您可以看到应用程序以德语输出的内容。
Windows 10 开发 - 生命周期
从历史上看,Windows 的环境允许用户同时运行多个应用程序。用户可以轻松地在不同应用程序之间切换。这种模式并不适用于通常以单个应用程序为中心的手机或平板电脑设备。
Windows 8 应用商店应用程序程序员面临的最大挑战之一是管理和理解应用程序的生命周期。如果您一直在构建 Windows Phone 应用程序,那么其中的大部分内容应该很熟悉。
在 Windows 8 中,操作系统会管理应用程序的生命周期。虽然用户可以终止某个应用程序,但通常情况下,用户会在不主动终止正在运行的应用程序的情况下打开新的应用程序。
适用于 Windows 10 的通用 Windows 平台 (UWP) 解决了这些问题,它为桌面用户提供了一些很酷的功能,使多个应用程序可以以多窗口体验运行。
Windows 应用程序在基本级别上可以处于三种状态,如下所示。
正在运行
已暂停
终止
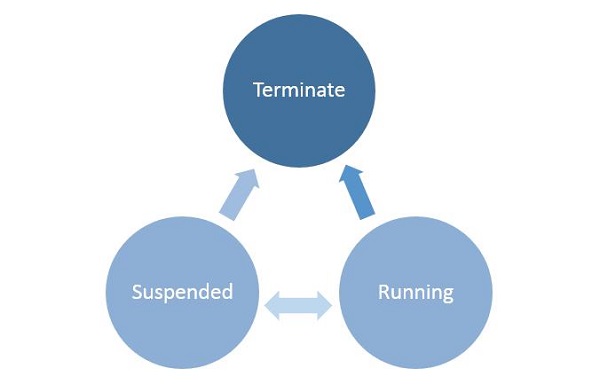
当用户启动/激活任何应用时,该应用都会进入运行状态。
如果用户不使用应用且应用不再处于前台,则应用可以被暂停。
在暂停状态下,应用可以恢复运行,也可以终止操作系统以回收系统资源。
进程状态转换
了解正在运行的应用中的进程状态转换非常重要。用户首次启动应用程序时,会显示启动画面,然后应用程序开始运行。
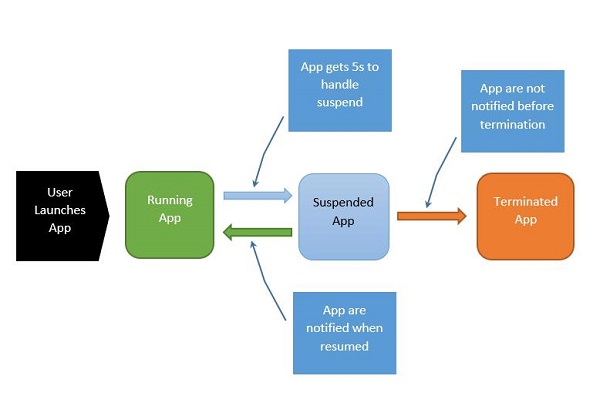
该过程可解释如下 −
当应用程序暂停时,您的应用有五秒钟的时间来处理该暂停事件。
当应用程序暂停时,绝对不会运行任何代码,也不会分配任何资源。
当应用程序恢复时,会通知应用程序已恢复。如果您刚从暂停状态恢复,则无需采取任何操作。
在内存压力下,您的应用可能会被终止。
请记住,此时您不会收到通知,因此任何保存操作都必须在进入暂停状态时进行。
当应用在 Running 和 Suspended 状态之间切换时,分别触发暂停和恢复事件。
有时,您需要保存数据。这时,您必须调用如下所示的异步方法。
Application.Current.Suspending += new SuspendingEventHandler(App_Suspending);

async void App_Suspending(Object sender, Windows.ApplicationModel.SuspendingEventArgs e){
   // Create a simple setting
   localSettings.Values["FirstName"] = fName.Text;
   localSettings.Values["LastName"] = lName.Text;
   localSettings.Values["Email"] = email.Text;
}
Application.Current.Resuming += new EventHandler<Object>(App_Resuming);

private void App_Resuming(Object sender, Object e){
   fName.Text = localSettings.Values["FirstName"];
   lName.Text = localSettings.Values["LastName"];
   email.Text = localSettings.Values["Email"];
}
让我们研究一个添加控件的示例,如以下给出的 XAML 文件所示。
<Page
   x:Class = "UWPLifeCycleDemo.MainPage"
   xmlns = "http://schemas.microsoft.com/winfx/2006/xaml/presentation"
   xmlns:x = "http://schemas.microsoft.com/winfx/2006/xaml"
   xmlns:local = "using:UWPLifeCycleDemo"
   xmlns:d = "http://schemas.microsoft.com/expression/blend/2008"
   xmlns:mc = "http://schemas.openxmlformats.org/markup-compatibility/2006"
   mc:Ignorable = "d">

   <Grid Background = "{ThemeResource ApplicationPageBackgroundThemeBrush}">
      <Hub Header = "Details" />

      <StackPanel VerticalAlignment = "Top" HorizontalAlignment = "Left"
         Margin = "12,64,0,0">

         <TextBox Header = "First Name" Text = "{Binding FirstName,
            Mode = TwoWay, UpdateSourceTrigger = PropertyChanged}"
            Width = "200" />

         <TextBox Header = "Last Name" Text = "{Binding LastName, Mode = TwoWay,
            UpdateSourceTrigger = PropertyChanged}" Width = "200" />

         <TextBox Header = "Email" Text = "{Binding Email, Mode = TwoWay,
            UpdateSourceTrigger = PropertyChanged}" Width = "200" />

         <Button Margin = "0,12">Submit</Button>

      </StackPanel>

   </Grid>

</Page>
以下是实现"暂停"和"恢复"事件的 C# 代码。当前数据将存储在本地设置的 suspend 事件 中,然后从本地设置的 resume 事件 中检索数据,如下所示。
using System;
using System.ComponentModel;
using System.Runtime.CompilerServices;

using Windows.UI.Xaml;
using Windows.UI.Xaml.Controls;

namespace UWPLifeCycleDemo {

   /// <summary>
      /// An empty page that can be used on its own or navigated to within a Frame.
   /// </summary>

   public sealed partial class MainPage : Page{
      var localSettings = Windows.Storage.ApplicationData.Current.LocalSettings;

      public MainPage() {
         this.InitializeComponent();
         Application.Current.Suspending += new SuspendingEventHandler(App_Suspending);
         Application.Current.Resuming += new EventHandler<Object>(App_Resuming);
      }

      async void App_Suspending(Object sender, Windows.ApplicationModel.SuspendingEventArgs e){

         // Create a simple setting
         localSettings.Values["FirstName"] = fName.Text;
         localSettings.Values["LastName"] = lName.Text;
         localSettings.Values["Email"] = email.Text;
      }

      private void App_Resuming(Object sender, Object e){
         fName.Text = localSettings.Values["FirstName"];
         lName.Text = localSettings.Values["LastName"];
         email.Text = localSettings.Values["Email"];
      }

   }

   public abstract class BindableBase : INotifyPropertyChanged {
      private string _FirstName = default(string);

      public string FirstName {
         get { return _FirstName; }
         set { Set(ref _FirstName, value); }
      }

      private string _LastName = default(string);

      public string LastName {
         get { return _LastName; }
         set { Set(ref _LastName, value); }
      }

      private string _Email = default(string);

      public string Email {
         get { return _Email; }
         set { Set(ref _Email, value); }
      }

      public event PropertyChangedEventHandler PropertyChanged;

      public void RaisePropertyChanged([CallerMemberName]string propertyName = null) {
         PropertyChanged?.Invoke(this, new PropertyChangedEventArgs(propertyName));
      }

      public void Set<T>(ref T storage, T value,
         [CallerMemberName()]string propertyName = null){

         if (!object.Equals(storage, value)){
            storage = value;
            RaisePropertyChanged(propertyName);
         }
      }
   }
}
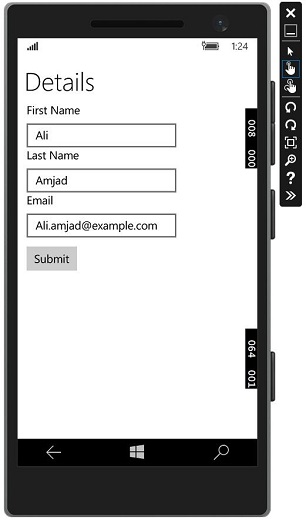
编译并执行上述代码后,您将看到以下窗口。现在输入所需的信息。
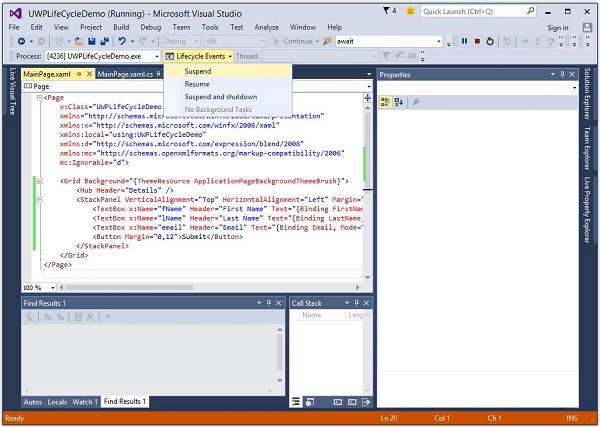
我们转到生命周期事件下拉菜单,然后选择已暂停。现在您的应用将被暂停,所需的信息将存储在本地设置中。请参阅下面的屏幕截图。
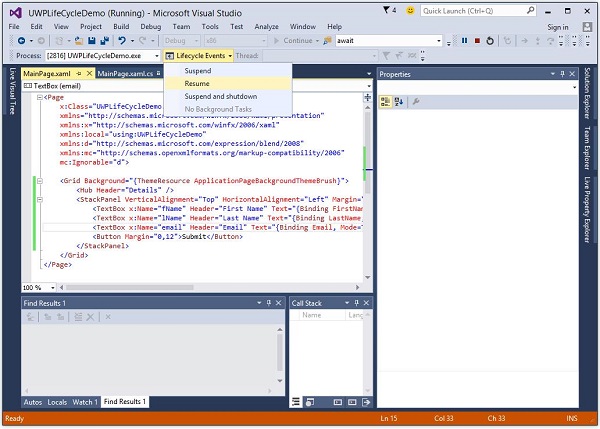
现在,当您想要恢复应用程序时,请从生命周期事件菜单中选择恢复选项。
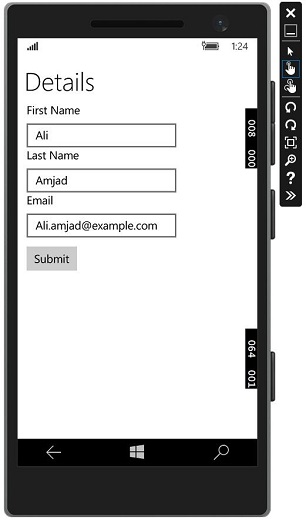
现在,您将看到已存储的信息已从本地设置中检索,并且应用程序已恢复到其暂停时的状态。
Windows10 开发 - 后台执行
通用 Windows 平台 (UWP) 引入了新的机制,允许应用程序在非前台运行时执行某些功能。UWP 还增强了应用程序延长后台任务和触发器后台执行时间的能力。后台执行是应用程序生命周期中真正互补的部分。
后台任务的重要特性包括 −
后台任务由系统或时间事件触发,并可受一个或多个条件约束。
触发后台任务时,其关联的处理程序将运行并执行后台任务的工作。
即使注册后台任务的应用处于暂停状态,后台任务仍可运行。
它们是标准应用程序平台的一部分,本质上为应用程序提供了注册系统事件(触发器)的能力。当该事件发生时,它们会在后台运行预定义的代码块。系统触发器包括网络连接或系统时区变化等事件。
后台执行无法保证,因此不适用于关键功能和特性。
操作系统对同时运行的后台任务数量有限制。因此,即使触发器触发且条件满足,任务仍然无法运行。
创建并注册后台任务
创建一个后台任务类,并将其注册为在应用不在前台时运行。您可以通过编写实现 IBackgroundTask 接口的类来在后台运行代码。以下示例代码展示了后台任务类的一个非常基本的入门步骤。
public sealed class MyBackgroundTask : IBackgroundTask {
   public void Run(IBackgroundTaskInstance taskInstance){
      // write code
   }
}
您可以按如下方式请求后台任务的访问权限。
var access = await BackgroundExecutionManager.RequestAccessAsync();

switch (access) {

   case BackgroundAccessStatus.Unspecified:
      break;
   case BackgroundAccessStatus.AllowedMayUseActiveRealTimeConnectivity:
      break;
   case BackgroundAccessStatus.AllowedWithAlwaysOnRealTimeConnectivity:
      break;
   case BackgroundAccessStatus.Denied:
      break;
   default:
      break;
}
要构建和注册后台任务,请使用以下代码。
var task = new BackgroundTaskBuilder {
   Name = "My Task",
   TaskEntryPoint = typeof(BackgroundStuff.MyBackgroundTask).ToString()
};

var trigger = new ApplicationTrigger();
task.SetTrigger(trigger);
task.Register();

await trigger.RequestAsync();
让我们按照以下给出的所有步骤来理解后台任务的简单示例。
创建一个新的空白 UWP 项目"UWPBackgroundDemo",并在 XAML 文件中添加一个按钮。
<Page
   x:Class = "UWPBackgroundDemo.MainPage"
   xmlns = "http://schemas.microsoft.com/winfx/2006/xaml/presentation"
   xmlns:x = "http://schemas.microsoft.com/winfx/2006/xaml"
   xmlns:local = "using:UWPBackgroundDemo"
   xmlns:d = "http://schemas.microsoft.com/expression/blend/2008"
   xmlns:mc = "http://schemas.openxmlformats.org/markup-compatibility/2006"
   mc:Ignorable = "d">

   <Grid Background = "{ThemeResource ApplicationPageBackgroundThemeBrush}">
      <Button x:Name = "button" Content = "Button"
         HorizontalAlignment = "Left" Margin = "159,288,0,0"
         VerticalAlignment = "Top" Click = "button_Click"/>
   </Grid>

</Page>
下面给出了注册了后台任务的按钮点击事件实现。
using System;

using Windows.ApplicationModel.Background;
using Windows.UI.Xaml;
using Windows.UI.Xaml.Controls;

// 空白页项目模板的文档位于
   http://go.microsoft.com/fwlink/?LinkId=402352&clcid=0x409

namespace UWPBackgroundDemo {

   /// <summary>
      /// An empty page that can be used on its own or navigated to within a Frame.
   /// </summary>

   public sealed partial class MainPage : Page {

      public MainPage() {
         this.InitializeComponent();
      }

      private async void button_Click(object sender, RoutedEventArgs e) {
         var access = await BackgroundExecutionManager.RequestAccessAsync();

         switch (access){
            case BackgroundAccessStatus.Unspecified:
               break;
            case BackgroundAccessStatus.AllowedMayUseActiveRealTimeConnectivity:
               break;
            case BackgroundAccessStatus.AllowedWithAlwaysOnRealTimeConnectivity:
               break;
            case BackgroundAccessStatus.Denied:
               break;
            default:
               break;
         }

         var task = new BackgroundTaskBuilder {
            Name = "My Task",
            TaskEntryPoint = typeof(BackgroundStuff.MyBackgroundTask).ToString()
         };

         var trigger = new ApplicationTrigger();
         task.SetTrigger(trigger);

         var condition = new SystemCondition(SystemConditionType.InternetAvailable);
         task.Register();

         await trigger.RequestAsync();
      }
   }
}
现在创建另一个项目,但这次从菜单中选择"Windows 运行时组件(通用 Windows)",并将该项目命名为 Background stuff。
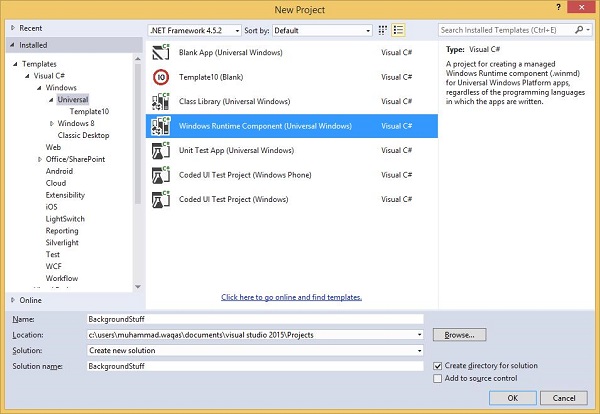
以下是 C# 代码,其中包含 MyBackgroundTask 类的实现,它将运行后台任务。
using Windows.ApplicationModel.Background;
using Windows.UI.Notifications;

namespace BackgroundStuff {
   public sealed class MyBackgroundTask : IBackgroundTask {

      public void Run(IBackgroundTaskInstance taskInstance) {
         SendToast("Hi this is background Task");
      }

      public static void SendToast(string message) {
         var template = ToastTemplateType.ToastText01;
         var xml = ToastNotificationManager.GetTemplateContent(template);
         var elements = xml.GetElementsByTagName("Test");
         var text = xml.CreateTextNode(message);

         elements[0].AppendChild(text);
         var toast = new ToastNotification(xml);
         ToastNotificationManager.CreateToastNotifier().Show(toast);
      }
   }
}
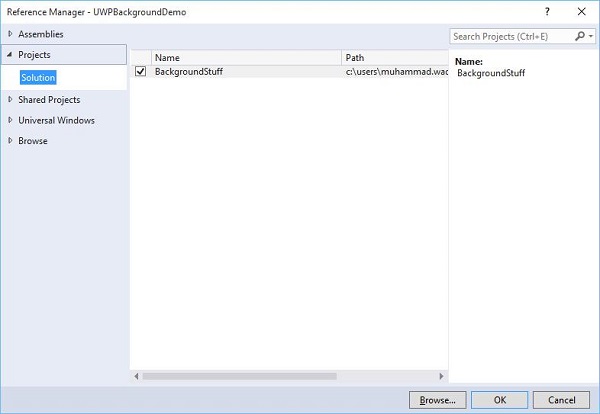
为了使此项目可以在 UWPBackgroundDemo 项目中访问,请右键单击 References >在解决方案资源管理器中添加"引用",并添加 BackgroundStuff 项目。
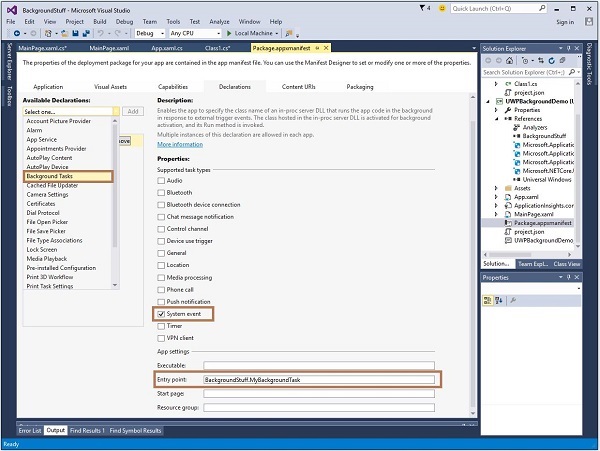
现在,我们转到 UWPBackgroundDemo 项目的 Package.appxmanifest 文件,并在"声明"选项卡中添加以下信息。
首先构建 Background stuff 项目,然后构建并执行 UWPBackgroundDemo 项目。
编译并执行上述代码后,您将看到以下内容窗口。
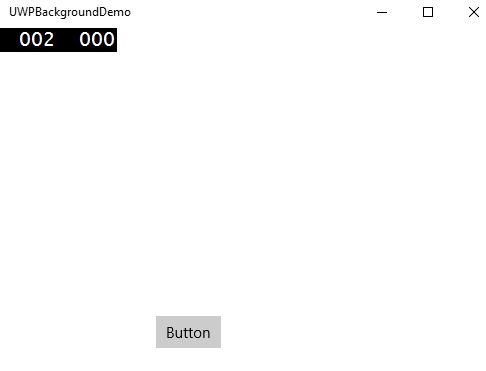
点击按钮,它将运行后台任务,并在窗口右侧显示通知。
Windows 10 开发 - 服务
在本章中,我们将学习 UWP 应用如何帮助或为其他通用 Windows 平台 (UWP) 应用提供服务。实际上,本章是后台执行一章的延伸,是其特例。
在 Windows 10 中,应用服务是应用向其他应用提供服务的一种方式或机制。
应用服务以后台任务的形式工作。
前台应用可以调用其他应用中的应用服务在后台执行任务。
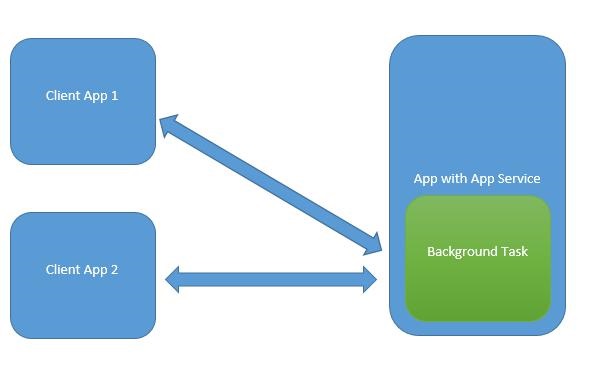
应用服务类似于 Web 服务,但应用服务是在 Windows 10 设备上使用的。
通用 Windows 平台 (UWP) 应用可以通过多种方式与其他 UWP 应用交互 −
- 使用 URI 关联LaunchUriAsync
- 使用 LaunchFileAsync 进行文件关联
- 使用 LaunchUriForResultsAsync 启动并获取结果
- 应用服务
前三种方式适用于两个应用都在前台的情况,但应用服务用于后台任务,在这种情况下,客户端应用必须处于前台并可以使用应用服务。
应用服务在提供非可视化服务的应用中非常有用,例如:条形码扫描器,前台应用会拍摄图像并将这些字节发送到应用服务以识别条形码。
为了理解所有这些概念,让我们在 Microsoft Visual Studio 2015 中创建一个名为 AppServiceProvider 的新 UWP 项目。
现在,在 Package.appmenifest 文件中添加以下信息。
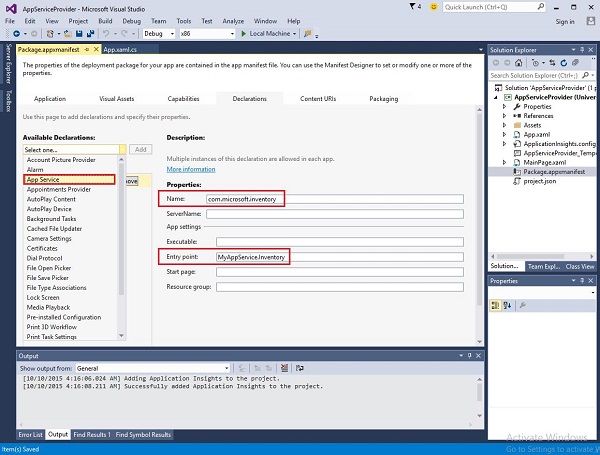
为了创建一个可由前台应用调用的应用服务,让我们在解决方案中添加一个名为 MyAppService 的新 Windows Runtime 组件项目,因为应用服务是作为后台任务实现的。
在 AppServiceProvider 中添加对 MyAppService 项目的引用项目。
现在从 MyAppService 项目中删除 class1.cs 文件,并添加一个名为 inventory 的新类,该类将实现 IBackgrounTask 接口。
IBackgrounTask 接口只有一个方法 "Run",需要为后台任务实现该方法。
public sealed class Inventory : IBackgroundTask {
   public void Run(IBackgroundTaskInstance taskInstance) {

   }
}
创建后台任务时,会调用 Run() 方法,当 Run 方法完成后,后台任务就会终止。为了保持后台任务的执行并处理请求,代码会采用延迟处理。
应用服务代码位于 OnRequestedReceived() 中。在此示例中,库存商品的索引传递给服务,以检索指定库存商品的名称和价格。
private async void OnRequestReceived(AppServiceConnection sender,
AppServiceRequestReceivedEventArgs args) {
    // 由于我们使用下面的可等待 API 来响应消息,因此需要延迟处理
}
以下是 Inventory 类在 C# 中的完整实现。
using System;
using System.Collections.Generic;
using System.Linq;
using System.Text;
using System.Threading.Tasks;

using Windows.ApplicationModel.AppService;
using Windows.ApplicationModel.Background;
using Windows.Foundation.Collections;

namespace MyAppService{
   public sealed class Inventory : IBackgroundTask {

      private BackgroundTaskDeferral backgroundTaskDeferral;
      private AppServiceConnection appServiceconnection;

      private String[] inventoryItems = new string[] { "Robot vacuum", "Chair" };
      private double[] inventoryPrices = new double[] { 129.99, 88.99 };

      public void Run(IBackgroundTaskInstance taskInstance) {
         this.backgroundTaskDeferral = taskInstance.GetDeferral();
         taskInstance.Canceled += OnTaskCanceled;
         var details = taskInstance.TriggerDetails as AppServiceTriggerDetails;

         appServiceconnection = details.AppServiceConnection;
         appServiceconnection.RequestReceived += OnRequestReceived;
      }

      private async void OnRequestReceived(AppServiceConnection sender,
         AppServiceRequestReceivedEventArgs args) {

            var messageDeferral = args.GetDeferral();
            ValueSet message = args.Request.Message;
            ValueSet returnData = new ValueSet();

            string command = message["Command"] as string;
            int? inventoryIndex = message["ID"] as int?;
            if (inventoryIndex.HasValue &&

            inventoryIndex.Value >= 0 &&
            inventoryIndex.Value < inventoryItems.GetLength(0)) {

               switch (command) {

                  case "Price": {
                     returnData.Add("Result", inventoryPrices[inventoryIndex.Value]);
                     returnData.Add("Status", "OK");
                     break;
                  }

                  case "Item": {
                     returnData.Add("Result", inventoryItems[inventoryIndex.Value]);
                     returnData.Add("Status", "OK");
                     break;
                  }

                  default: {
                     returnData.Add("Status", "Fail: unknown command");
                     break;
                  }
               } else {
                  returnData.Add("Status", "Fail: Index out of range");
               }
            }
            await args.Request.SendResponseAsync(returnData);
            messageDeferral.Complete();
      }

      private void OnTaskCanceled(IBackgroundTaskInstance sender,
         BackgroundTaskCancellationReason reason){
            if (this.backgroundTaskDeferral != null) {
               // Complete the service deferral.
               this.backgroundTaskDeferral.Complete();
            }
      }
   }
}
让我们通过添加一个新的空白 UWP 项目 ClientApp 来创建一个客户端应用程序,并在 XAML 文件中添加一个按钮、一个文本框和两个文本块,如下所示。
<Page
   x:Class = "ClientApp.MainPage"
   xmlns = "http://schemas.microsoft.com/winfx/2006/xaml/presentation"
   xmlns:x = "http://schemas.microsoft.com/winfx/2006/xaml"
   xmlns:local = "using:ClientApp"
   xmlns:d = "http://schemas.microsoft.com/expression/blend/2008"
   xmlns:mc = "http://schemas.openxmlformats.org/markup-compatibility/2006"
   mc:Ignorable = "d">

   <Grid Background = "{ThemeResource ApplicationPageBackgroundThemeBrush}">
      <TextBlock HorizontalAlignment = "Left" Text = "Enter Item No."
         Margin = "52,40,0,0" TextWrapping = "Wrap"
         VerticalAlignment = "Top" Height = "32" Width = "268"/>

      <Button x:Name = "button" Content = "Get Info" HorizontalAlignment = "Left"
         Margin = "255,96,0,0" VerticalAlignment = "Top" Click = "button_Click"/>

      <TextBox x:Name = "textBox" HorizontalAlignment = "Left" Margin = "52,96,0,0"
         TextWrapping = "Wrap" VerticalAlignment = "Top" Width = "168"/>

      <TextBlock x:Name = "textBlock" HorizontalAlignment = "Left"
         Margin = "52,190,0,0" TextWrapping = "Wrap"
         VerticalAlignment = "Top" Height = "32" Width = "268"/>
   </Grid>

</Page>
下面给出了请求应用服务的按钮点击事件实现。
using System;

using Windows.ApplicationModel.AppService;
using Windows.Foundation.Collections;

using Windows.UI.Xaml;
using Windows.UI.Xaml.Controls;

// 空白页项目模板记录在
   http://go.microsoft.com/fwlink/?LinkId=402352&clcid=0x409

namespace ClientApp {

   /// <summary>
      /// An empty page that can be used on its own or navigated to within a Frame.
   /// </summary>

   public sealed partial class MainPage : Page {

      private AppServiceConnection inventoryService;

      public MainPage() {
         this.InitializeComponent();
      }

      private async void button_Click(object sender, RoutedEventArgs e){

         // Add the connection.
         if (this.inventoryService == null) {

            this.inventoryService = new AppServiceConnection();
            this.inventoryService.AppServiceName = "com.microsoft.inventory";
            this.inventoryService.PackageFamilyName =
               "bb1a8478-8005-46869923-e525ceaa26fc_4sz2ag3dcq60a";

            var status = await this.inventoryService.OpenAsync();

            if (status != AppServiceConnectionStatus.Success) {
               button.Content = "Failed to connect";
               return;
            }
         }

         // Call the service.
         int idx = int.Parse(textBox.Text);
         var message = new ValueSet();

         message.Add("Command", "Item");
         message.Add("ID", idx);

         AppServiceResponse response = await
            this.inventoryService.SendMessageAsync(message);
         string result = "";

         if (response.Status == AppServiceResponseStatus.Success) {
            // Get the data  that the service sent  to us.
            if (response.Message["Status"] as string == "OK") {
               result = response.Message["Result"] as string;
            }
         }

         message.Clear();
         message.Add("Command", "Price");
         message.Add("ID", idx);

         response = await this.inventoryService.SendMessageAsync(message);

         if (response.Status == AppServiceResponseStatus.Success){
            // Get the data that the service sent to us.
            if (response.Message["Status"] as string == "OK") {
               result += " : Price = " + "$"+ response.Message["Result"] as string;
            }
         }

         textBlock.Text = result;
      }
   }
}
要运行此应用程序,您需要在解决方案资源管理器中将 ClientApp 项目设置为启动项目,然后从"构建 > 部署解决方案"部署此解决方案。
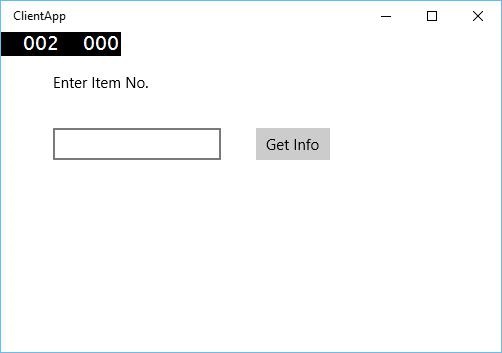
编译并执行上述代码后,您将看到以下窗口。在"应用服务"中,我们刚刚添加了两个项目的信息。因此,您可以输入 0 或 1 来获取这两个项目的信息。
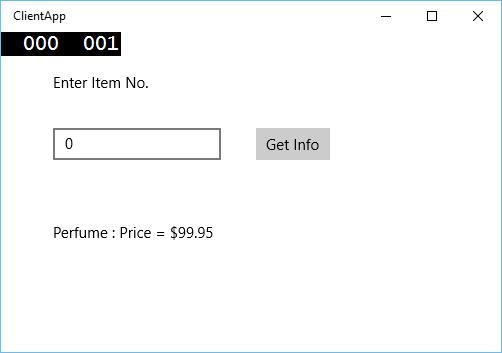
输入 0 并点击按钮后,它将以后台任务的形式运行应用服务,并在文本块上显示项目信息。
Windows 10 开发 - Web 平台
在 Windows 10 中,开发者可以轻松创建通用 Windows 平台 (UWP) 应用,并将其网站托管在该应用上,然后发布到 Windows 应用商店供下载。
优势
借助 Windows 10 中的这一新功能,Web 开发者可以轻松地将其网站组件转换为 Windows 应用。
但是,所有这些组件仍将远程托管在他们自己的 Web 服务器上。
此外,他们还可以访问通用 API,这将允许开发者访问一些很酷的功能,例如通知、相机、日历、Cortana 等。
微软希望此功能和能力能够吸引更多开发者为 Windows 10 平台编写应用,其中包括:
- 台式机
- 智能手机
- Xbox
- 平板电脑
- HoloLens 和其他设备
目前,此功能只有一个问题,那就是安全性。显然,微软需要尽快解决这个问题。
让我们通过一个示例来理解,我们将托管一个网站,并将该网站转换为 Windows 应用。
请按照以下步骤操作。
通过文件 > 新建 > 创建一个新的通用 Windows 项目项目。
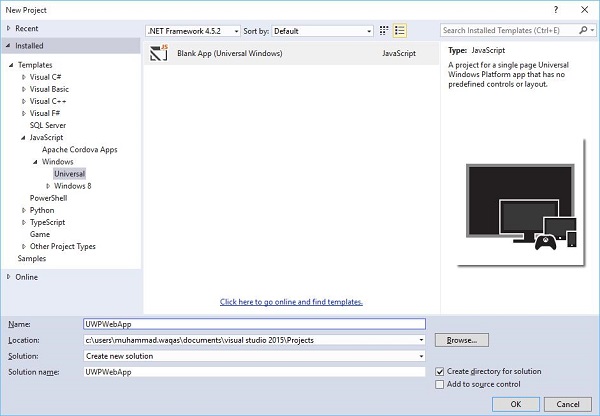
选择 JavaScript > Windows >在"新建项目和"对话框的左侧窗格中选择"通用"选项。
在中间窗格中,选择空白应用(通用 Windows)。
在名称字段中输入UWPWebApp,然后点击确定按钮。
如果您查看解决方案资源管理器窗口,您将看到一些文件和文件夹。
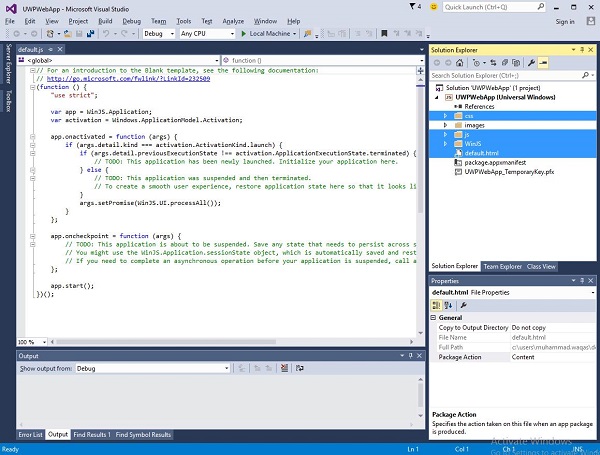
删除 css、js、WinJS 文件夹和 default.html 文件,因为在本例中,我们只是托管一个网站,并且假设所有内容都在远程服务器上。因此,我们不需要大多数本地文件。
删除上述文件和文件夹后,双击 package.appxmanifest 文件,您将看到以下窗口。
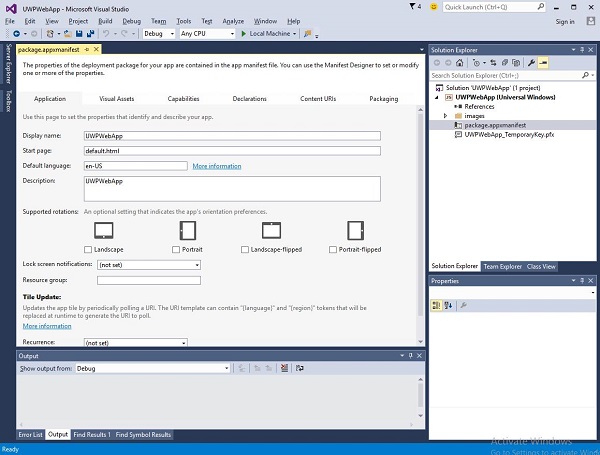
现在,通过将"起始页"字段中的 default.html 替换为 URL 来指定网站 URL。为了演示,我们将使用 URL https://www.google.com.pk/ 网站。
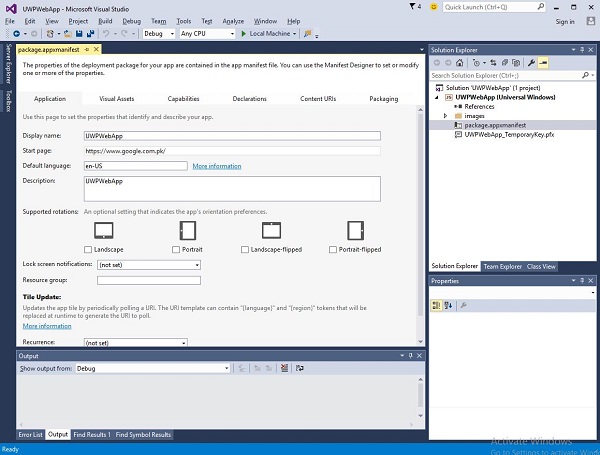
现在转到 Content URIs 选项卡,并为您的 Web 应用定义规则和访问权限。
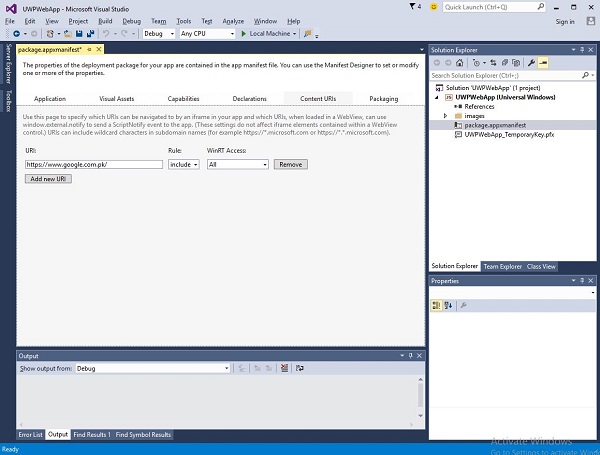
在 URI 字段中,指定您的网站链接,然后从 Rule 下拉菜单 中选择 Include,并从 WinRT 中选择 All访问。
运行此应用程序时,您将在应用中看到 Google 起始页,如下所示。
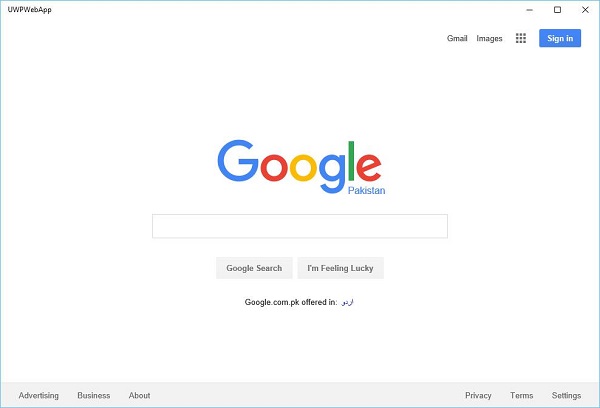
Windows10 开发 - 互联体验
众所周知,在 Windows 10 中,我们可以创建一个可在多台 Windows 10 设备上运行的应用程序。假设我们拥有这些不同的设备,并且我们希望让它感觉像是一个应用程序,即使它运行在不同的设备上。
在通用 Windows 平台 (UWP) 中,您可以在所有 Windows 10 设备上运行单个应用程序,并让用户感觉它是一个应用程序。这被称为互联体验。
互联体验的重要特性 −
Windows 10 迈向更加个性化计算的时代,您的应用、服务和内容可以无缝、轻松地跨设备移动。
借助互联体验,您可以轻松共享与该应用程序相关的数据和个人设置,并且该设置将在所有设备上可用。
在本章中,我们将学习 −
这些共享数据或设置的存储位置,以便您可以在设备上使用该应用程序。
如何识别用户;确保在不同设备上使用同一应用程序的用户是同一个人。
Windows 10 向前迈出了大胆的一步。当您使用 Microsoft 帐户 (MSA) 或企业或(工作)帐户登录 Windows 10 时,系统将假定 −
您可以免费访问 OneDrive for MSA 帐户,并且可以使用企业帐户访问 Active Directory (AD) 和 Azure Active Directory (AAD)(云版本)。
您可以访问不同的应用程序和资源。
设备和应用程序处于漫游状态和设置。
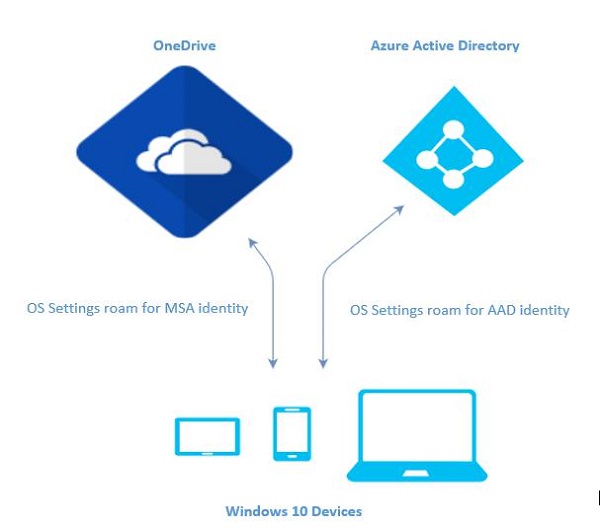
Windows 10 中的漫游
当您登录 PC 时,您可以设置一些首选项,例如锁定屏幕或背景颜色,或个性化您的各种设置。如果您有多台运行 Windows 10 的计算机或设备,当您使用同一帐户登录其他设备时,您在其中一台设备上的首选项和设置将从云端同步。
在 Windows 10 中,当您设置或个性化您的应用程序设置后,这些设置将通过 UWP 中提供的漫游 API 进行漫游。当您在其他设备上再次运行同一应用程序时,它将首先检索设置,并将这些设置应用于该设备上的应用程序。
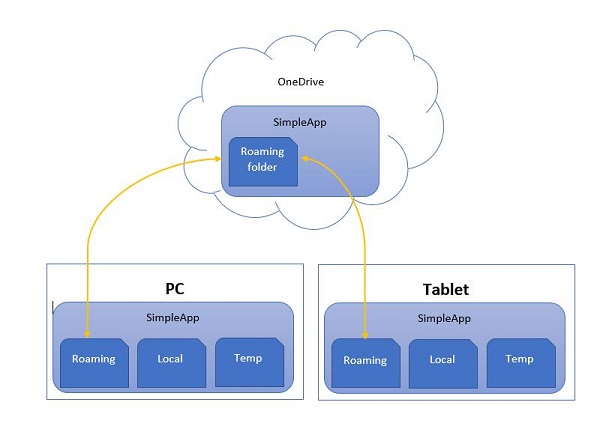
将漫游数据上传到云端的限制为 100KB。如果超过此限制,同步将停止,并且仅像本地文件夹一样运行。
RoamingSettings API 以字典的形式公开,应用程序可以在其中保存数据。
Windows.Storage.ApplicationDataContainer roamingSettings =
Windows.Storage.ApplicationData.Current.RoamingSettings;

// 从 RoamingSettings 中获取值
var colorName = roamingSettings.Values["PreferredBgColor"].ToString();

// 将值设置为 RoamingSettings
roamingSettings.Values["PreferredBgColor"] = "Green";
当 RoamingSettings 中的数据发生变化时,会触发 DataChanged 事件,您可以在此刷新设置。
Windows.Storage.ApplicationData.Current.DataChanged += RoamingDataChanged;

private void RoamingDataChanged(Windows.Storage.ApplicationData sender, object args) {
    // 漫游数据或设置中发生了一些变化
}
让我们看一个示例,我们将设置应用程序的背景颜色,这些设置将通过 UWP 中提供的漫游 API 进行漫游。
Given below is the XAML code in which different controls are added.
<Page
   x:Class = "RoamingSettingsDemo.Views.MainPage"
   xmlns = "http://schemas.microsoft.com/winfx/2006/xaml/presentation"
   xmlns:x = "http://schemas.microsoft.com/winfx/2006/xaml"
   xmlns:local = "using:RoamingSettingsDemo.Views"
   xmlns:d = "http://schemas.microsoft.com/expression/blend/2008"
   xmlns:mc = "http://schemas.openxmlformats.org/markup-compatibility/2006"
   mc:Ignorable = "d">

   <Grid x:Name = "MainGrid" Background = "{ThemeResource ApplicationPageBackgroundThemeBrush}">
      <Grid.RowDefinitions>
         <RowDefinition Height = "80" />
         <RowDefinition />
      </Grid.RowDefinitions>

      <StackPanel Orientation = "Horizontal" VerticalAlignment = "Top" Margin = "12,12,0,0">
         <TextBlock Style = "{StaticResource HeaderTextBlockStyle}"
            FontSize = "24" Text = "Connected Experience Demo" />
      </StackPanel>

      <Grid Grid.Row = "1" Margin = "0,80,0,0">
         <StackPanel Margin = "62,0,0,0">
            <TextBlock x:Name = "textBlock" HorizontalAlignment = "Left"
               TextWrapping = "Wrap" Text = "Choose your background color:"
               VerticalAlignment = "Top"/>

            <RadioButton x:Name = "BrownRadioButton" Content = "Brown"
               Checked = "radioButton_Checked" />

            <RadioButton x:Name = "GrayRadioButton" Content = "Gray"
               Checked = "radioButton_Checked"/>
         </StackPanel>
      </Grid>

   </Grid>

</Page>
下面给出了 RoamingSettings 和不同事件的 C# 实现。
using System;
using System.Collections.Generic;
using System.IO;
using System.Linq;
using System.Runtime.InteropServices.WindowsRuntime;

using Windows.Foundation;
using Windows.Foundation.Collections;

using Windows.UI;
using Windows.UI.Xaml;
using Windows.UI.Xaml.Controls;
using Windows.UI.Xaml.Controls.Primitives;
using Windows.UI.Xaml.Data;
using Windows.UI.Xaml.Input;
using Windows.UI.Xaml.Media;
using Windows.UI.Xaml.Navigation;

// The RoamingSettingsDemo Page item template is documented at
   http://go.microsoft.com/fwlink/?LinkId=234238

namespace RoamingSettingsDemo.Views {

   /// <summary>
      /// An empty page that can be used on its own or navigated to within a Frame.
   /// </summary>

   public sealed partial class MainPage : Page {

      public MainPage() {
         this.InitializeComponent();
      }

      protected override void OnNavigatedTo(NavigationEventArgs e) {
         SetBackgroundFromSettings();
         Windows.Storage.ApplicationData.Current.DataChanged += RoamingDataChanged;
      }

      protected override void OnNavigatedFrom(NavigationEventArgs e) {
         Windows.Storage.ApplicationData.Current.DataChanged -= RoamingDataChanged;
      }

      private void RoamingDataChanged(Windows.Storage.ApplicationData sender, object args) {

         // Something has changed in the roaming data or settings
         var ignore = Dispatcher.RunAsync(Windows.UI.Core.CoreDispatcherPriority.Normal,
            () ⇒ SetBackgroundFromSettings());
      }

      private void SetBackgroundFromSettings() {

         // Get the roaming settings
         Windows.Storage.ApplicationDataContainer roamingSettings =
            Windows.Storage.ApplicationData.Current.RoamingSettings;

         if (roamingSettings.Values.ContainsKey("PreferBrownBgColor")) {
            var colorName = roamingSettings.Values["PreferBrownBgColor"].ToString();

            if (colorName == "Gray") {
               MainGrid.Background = new SolidColorBrush(Colors.Gray);
               GrayRadioButton.IsChecked = true;
            } else if (colorName == "Brown") {
               MainGrid.Background = new SolidColorBrush(Colors.Brown);
               BrownRadioButton.IsChecked = true;
            }
         }

      }

      private void radioButton_Checked(object sender, RoutedEventArgs e){
         if (GrayRadioButton.IsChecked.HasValue &&
            (GrayRadioButton.IsChecked.Value == true)) {
               Windows.Storage.ApplicationData.Current.RoamingSettings.
                  Values["PreferBrownBgCo lor"] = "Gray";
         } else {
            Windows.Storage.ApplicationData.Current.RoamingSettings.
               Values["PreferBrownBgCo lor"] = "Brown";
         }

         SetBackgroundFromSettings();
      }

   }
}
编译并执行上述代码后,您将看到以下窗口。
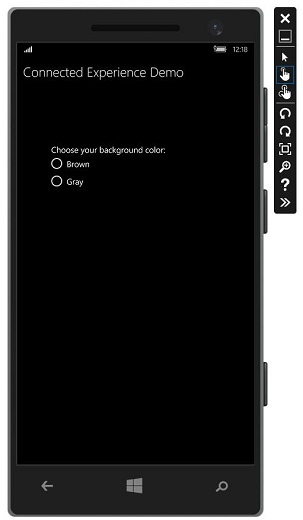
让我们选择灰色作为背景颜色并关闭此应用。
现在,当您在此设备或任何其他设备上运行此应用时,您将看到背景颜色已变为灰色。这表明该应用已成功在RoamingSettings中检索到背景颜色变化的信息。
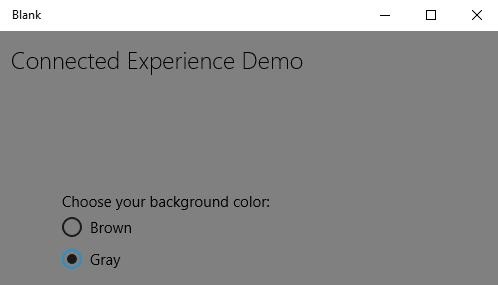
Windows 10 开发 - 导航
在通用 Windows 平台 (UWP) 应用中,导航是一种灵活的导航结构、导航元素和系统级功能模型。它能够在应用、页面和内容之间切换,提供各种直观的用户体验。
在某些情况下,所有内容和功能都可以轻松地整合到一个页面中,开发者无需创建多个页面。然而,大多数应用程序使用多个页面来实现不同内容和功能之间的交互。
当应用程序包含多个页面时,提供正确的导航体验对开发人员来说非常重要。
页面模型
通常,在通用 Windows 平台 (UWP) 应用程序中,使用单页导航模型。
重要特性有 −
单页导航模型将应用程序的所有上下文以及其他内容和数据维护在一个中心框架中。
您可以将应用程序的内容分成多个页面。但是,当从一个页面移动到另一个页面时,您的应用程序会将页面加载到主页面表单中。
应用程序的主页面、代码和数据都不会卸载,这使得状态管理更加容易,并在页面之间提供更流畅的过渡动画。
多页面导航也用于在不同页面或屏幕之间导航,而无需担心应用程序上下文。在多页导航中,每个页面都有各自的功能、用户界面和数据等。
多页导航通常用于网站内的网页。
导航结构
在多页导航中,每个页面都有各自的功能、用户界面和数据等。例如,一个照片应用程序可能有一个用于拍摄照片的页面,当用户想要编辑照片时,它会导航到另一个页面;而当用户想要维护图片库时,它又会导航到另一个页面。
应用程序的导航结构由这些页面的组织方式定义。
以下是在应用程序中构建导航的方式 −
层次结构
在这种导航结构中,
页面被组织成树状结构。
每个子页面只有一个父页面,但父页面可以有一个或多个子页面。
要访问子页面,您必须经过父页面。
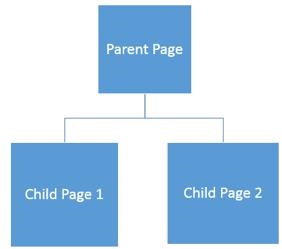
同级
在这种导航类型中 −
- 页面并排存在。
- 您可以按任意顺序从一个页面切换到另一个页面。
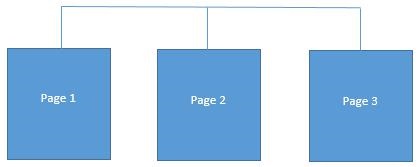
在大多数多页面应用程序中,这两种结构会同时使用。有些页面被组织为对等结构,有些则被组织为层次结构。
让我们以包含三个页面的示例为例。
创建一个名为 UWPNavigation 的空白 UWP 应用程序。
在解决方案资源管理器中右键单击项目并选择添加 >,再添加两个空白页面。从菜单中选择"新建项目"选项,这将打开以下对话框窗口。
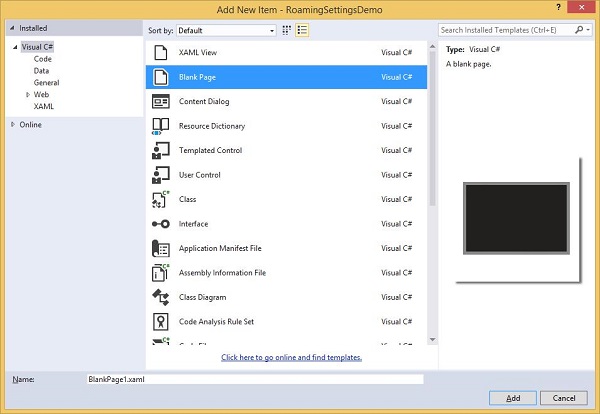
从中间窗格中选择空白页,然后点击添加按钮。
现在按照上述步骤再添加一个页面。
您将在解决方案资源管理器中看到三个页面,其中MainPage、BlankPage1和BlankPage2。
下面是MainPage的 XAML 代码,其中添加了两个按钮。
<Page
   x:Class = "UWPNavigation.MainPage"
   xmlns = "http://schemas.microsoft.com/winfx/2006/xaml/presentation"
   xmlns:x = "http://schemas.microsoft.com/winfx/2006/xaml"
   xmlns:local = "using:UWPNavigation"
   xmlns:d = "http://schemas.microsoft.com/expression/blend/2008"
   xmlns:mc = "http://schemas.openxmlformats.org/markup-compatibility/2006"
   mc:Ignorable = "d">

   <Grid Background = "{ThemeResource ApplicationPageBackgroundThemeBrush}">
      <Hub Header = "Hi, this Main Page"/>
      <Button Content = "Go to Page 1" Margin = "64,131,0,477" Click = "Button_Click"/>
      <Button Content = "Go to Page 2" Margin = "64,210,0,398" Click = "Button_Click_1"/>
   </Grid>

</Page>
下面是 MainPage 上两个按钮的 C# 代码,它们将导航到其他两个页面。
using Windows.UI.Xaml;
using Windows.UI.Xaml.Controls;

// 空白页项目模板的文档位于
   http://go.microsoft.com/fwlink/?LinkId=402352&clcid=0x409

namespace UWPNavigation {

   /// <summary>
      /// An empty page that can be used on its own or navigated to within a Frame.
   /// </summary>

   public sealed partial class MainPage : Page {
      public MainPage() {
         this.InitializeComponent();
      }

      private void Button_Click(object sender, RoutedEventArgs e){
         this.Frame.Navigate(typeof(BlankPage1));
      }

      private void Button_Click_1(object sender, RoutedEventArgs e) {
         this.Frame.Navigate(typeof(BlankPage2));
      }

   }
}
空白页 1 的 XAML 代码如下所示。
<Page
   x:Class = "UWPNavigation.BlankPage1"
   xmlns = "http://schemas.microsoft.com/winfx/2006/xaml/presentation"
   xmlns:x = "http://schemas.microsoft.com/winfx/2006/xaml"
   xmlns:local = "using:UWPNavigation"
   xmlns:d = "http://schemas.microsoft.com/expression/blend/2008"
   xmlns:mc = "http://schemas.openxmlformats.org/markup-compatibility/2006"
   mc:Ignorable = "d">

   <Grid Background = "{ThemeResource ApplicationPageBackgroundThemeBrush}">
      <Hub Header = "Hi, this is page 1"/>
      <Button Content = "Go to Main Page" Margin = "64,94,0,514" Click = "Button_Click"/>
   </Grid>

</Page>
C# 代码用于在空白页 1上执行按钮点击事件,该事件将导航至主页,如下所示。
using System;
using Windows.UI.Xaml;
using Windows.UI.Xaml.Controls;

// 空白页项目模板的文档位于
   http://go.microsoft.com/fwlink/?LinkId=234238

namespace UWPNavigation {

   /// <summary>
      /// An empty page that can be used on its own or navigated to within a Frame.
   /// </summary>

   public sealed partial class BlankPage1 : Page {

      public BlankPage1() {
         this.InitializeComponent();
      }

      private void Button_Click(object sender, RoutedEventArgs e) {
         this.Frame.Navigate(typeof(MainPage));
      }

   }
}
下面是空白页 2的 XAML 代码。
<Page
   x:Class = "UWPNavigation.BlankPage2"
   xmlns = "http://schemas.microsoft.com/winfx/2006/xaml/presentation"
   xmlns:x = "http://schemas.microsoft.com/winfx/2006/xaml"
   xmlns:local = "using:UWPNavigation"
   xmlns:d = "http://schemas.microsoft.com/expression/blend/2008"
   xmlns:mc = "http://schemas.openxmlformats.org/markup-compatibility/2006"
   mc:Ignorable = "d">

   <Grid Background = "{ThemeResource ApplicationPageBackgroundThemeBrush}">
      <Hub Header = "Hi, this is page 2"/>
      <Button Content = "Go to Main Page" Margin = "64,94,0,514" Click = "Button_Click"/>
   </Grid>

</Page>
下面是空白页 2按钮点击事件的 C# 代码,该事件将导航到主页面。
using Windows.UI.Xaml;
using Windows.UI.Xaml.Controls;

// 空白页项目模板的文档位于
   http://go.microsoft.com/fwlink/?LinkId=234238

namespace UWPNavigation {

   /// <summary>
      /// An empty page that can be used on its own or navigated to within a Frame.
   /// </summary>

   public sealed partial class BlankPage2 : Page {

      public BlankPage2(){
         this.InitializeComponent();
      }

      private void Button_Click(object sender, RoutedEventArgs e) {
         this.Frame.Navigate(typeof(MainPage));
      }

   }
}
编译并执行上述代码后,您将看到以下窗口。
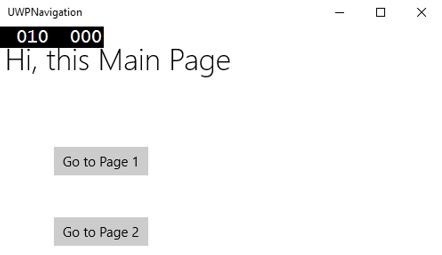
点击任意按钮,系统会将您导航至相应页面。点击转到第 1 页,将显示以下页面。
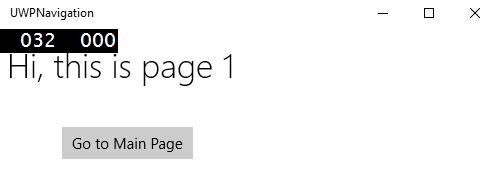
点击"转到主页"按钮,系统会将您导航回主页。
Windows 10 开发 - 网络
如今,您会看到许多应用程序以某种方式与 Web 服务或网络上的其他设备集成。获取在线天气内容、获取最新新闻、聊天或点对点游戏就是一些使用网络服务的示例。这些应用程序使用各种网络 API 构建。在 Windows 10 中,网络 API 在速度和内存性能方面得到了改进,并为开发人员提供了更多功能和灵活性。
功能
为了实现网络连接,您必须在应用清单中添加适当的功能元素。如果您的应用清单中未指定网络功能,则您的应用将不具备联网功能,任何连接网络的尝试都将失败。
以下是最常用的网络功能。
| 序列号 | 功能和说明 |
|---|---|
| 1 | internetClient 在公共场所(如机场和咖啡店)提供互联网和网络的出站访问。大多数需要互联网访问的应用都应使用此功能。 |
| 2 | internetClientServer 为应用提供互联网以及机场、咖啡店等公共场所网络的入站和出站网络访问权限。 |
| 3 | privateNetworkClientServer 为应用提供用户信任地点(例如家中和工作场所)的入站和出站网络访问权限。 |
要在应用清单文件中定义一个或多个功能,请查看下图。
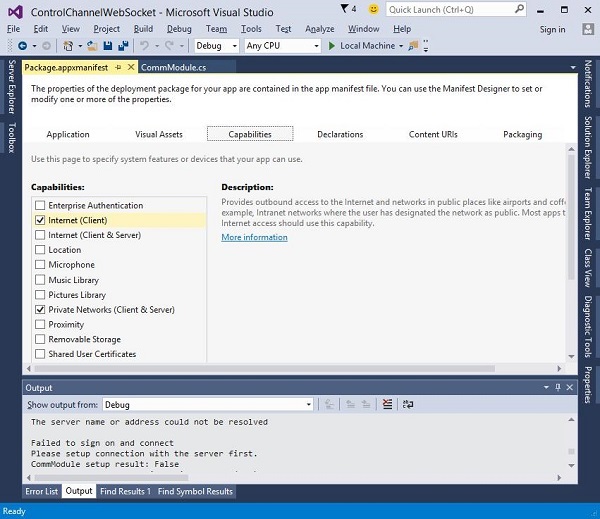
通用 Windows 平台(UWP)包含大量网络 API,针对以下目标 −
- 查询设备的连接状态并连接到对等设备。
- 与 REST Web 服务通信
- 在后台下载大型媒体文件
网络技术
在通用 Windows 平台 (UWP) 中,以下网络技术可供开发者使用,可用于多种不同情况。
套接字
当您想要使用自己的协议与其他设备通信时,可以使用套接字。
作为通用 Windows 平台 (UWP) 应用开发者,您可以同时使用 Windows.Networking.Sockets 和 Winsock 与其他设备通信。
Windows.Networking.Sockets 的优势在于它是一个专为 UWP 使用而设计的现代 API。开发人员。
如果您正在使用跨平台网络库或其他现有的 Winsock 代码,请使用 Winsock API。
以下代码演示如何创建套接字监听器。
try {

//创建一个 StreamSocketListener 以开始监听 TCP 连接。
   Windows.Networking.Sockets.StreamSocketListener socketListener = new
      Windows.Networking.Sockets.StreamSocketListener();

//连接一个事件处理程序,以便在收到连接时调用。
   socketListener.ConnectionReceived += SocketListener_ConnectionReceived;

//开始监听指定端口上的传入 TCP 连接。
   You can specify any port that's not currently in use.

   await socketListener.BindServiceNameAsync("1337");
} catch (Exception e) {
   //Handle exception.
}
以下代码展示了 SocketListener_ConnectionReceived 事件处理程序的实现。
private async void SocketListener_ConnectionReceived(
Windows.Networking.Sockets.StreamSocketListener er sender,
Windows.Networking.Sockets.StreamSocketListenerConnectionReceivedEventArgs args){

    //从远程客户端读取一行。
    Stream inStream = args.Socket.InputStream.AsStreamForRead();
    StreamReader reader = new StreamReader(inStream);
    string request = await reader.ReadLineAsync();

    //将一行发送回远程客户端。
    Stream outStream = args.Socket.OutputStream.AsStreamForWrite();
    StreamWriter writer = new StreamWriter(outStream);

    await writer.WriteLineAsync(request);
    await writer.FlushAsync();
}
WebSocket
WebSockets 协议通过 Web 在客户端和服务器之间提供快速安全的双向通信。通用 Windows 平台 (UWP) 开发者可以使用 MessageWebSocket 和 StreamWebSocket 类连接支持 Websocket 协议的服务器。
重要功能 −
在 WebSocket 协议下,数据通过全双工单套接字连接即时传输。
它允许从两个端点实时发送和接收消息。
WebSocket 非常适合实时游戏,因为即时社交网络通知和最新信息(游戏统计数据)显示需要安全并使用快速数据传输。
以下代码展示了如何在安全连接上发送和接收消息。
MessageWebSocket webSock = new MessageWebSocket();

//在这种情况下,我们将发送/接收一个字符串,因此我们需要
   set the MessageType to Utf8.
webSock.Control.MessageType = SocketMessageType.Utf8;

//添加 MessageReceived 事件处理程序。
webSock.MessageReceived += WebSock_MessageReceived;

//添加 Closed 事件处理程序。
webSock.Closed += WebSock_Closed;

Uri serverUri = new Uri("wss://echo.websocket.org");

try {
    //连接到服务器。
    await webSock.ConnectAsync(serverUri);

    //向服务器发送消息。
   await WebSock_SendMessage(webSock, "Hello, world!");
} catch (Exception ex) {
   //在此处添加代码以处理任何异常
}
以下代码展示了事件实现,它将从已连接的 WebSocket 接收字符串。
//MessageReceived 事件处理程序。
private void WebSock_MessageReceived(MessageWebSocket sender,
   MessageWebSocketMessageReceivedEventArgs args){

   DataReader messageReader = args.GetDataReader();
   messageReader.UnicodeEncoding = UnicodeEncoding.Utf8;
   string messageString = messageReader.ReadString(
      messageReader.UnconsumedBufferLength);
   //在此处添加代码以对接收到的字符串进行某些操作。
}
HttpClient
HttpClient 和 Windows.Web.Http 命名空间 API 使开发者能够使用 HTTP 2.0 和 HTTP 1.1 协议发送和接收信息。
它可用于 −
- 与 Web 服务或 Web 服务器通信。
- 上传或下载多个小文件。
- 通过网络传输内容。
以下代码显示如何使用 Windows.Web.Http.HttpClient 和 Windows.Web.Http.HttpResponseMessage 发送 GET 请求。
//创建 HTTP 客户端对象
Windows.Web.Http.HttpClient httpClient = new Windows.Web.Http.HttpClient();

//向 GET 请求添加用户代理标头。
var headers = httpClient.DefaultRequestHeaders;

//添加标头值的安全方法是使用 TryParseAdd 方法,
并验证返回值是否为 true,

//尤其是当标头值来自用户输入时。
string header = "ie";

if (!headers.UserAgent.TryParseAdd(header)) {
   throw new Exception("Invalid header value: " + header);
}

header = "Mozilla/5.0 (compatible; MSIE 10.0; Windows NT 6.2; WOW64; Trident/6.0)";

if (!headers.UserAgent.TryParseAdd(header)) {
   throw new Exception("Invalid header value: " + header);
}

Uri requestUri = new Uri("http://www.contoso.com");

//异步发送 GET 请求并以字符串形式检索响应。
Windows.Web.Http.HttpResponseMessage httpResponse = new
   Windows.Web.Http.HttpResponseMessage();
string httpResponseBody = "";

try {
   //发送GET请求
   httpResponse = await httpClient.GetAsync(requestUri);
   httpResponse.EnsureSuccessStatusCode();
   httpResponseBody = await httpResponse.Content.ReadAsStringAsync();
} catch (Exception ex) {
   httpResponseBody = "Error: " + ex.HResult.ToString("X") + " Message: " + ex.Message;
}
Windows 10 开发 - 云服务
作为开发者,您可能需要桌面上可用的数据以外的数据。云服务可以帮助您访问这些数据。本章将帮助您更好地理解您可能需要的云服务。
微软提供了一个云计算平台和基础设施,即Microsoft Azure,您可以在其中构建、部署和管理所有应用程序和服务。
Azure 于 2010 年 2 月 1 日首次发布,名为 Windows Azure。后来,它于 2014 年 3 月 25 日更名为 Microsoft Azure。
它同时提供 PaaS 和 IaaS 服务,并支持多种编程语言、工具和框架,包括 Microsoft 专用和第三方软件及系统。
Microsoft 已在 Windows 10 中升级了云服务。Microsoft 帐户集成是在 Windows 8 中引入的,尽管 OneDrive 自 2007 年就已存在。对于 Windows 10,这两项服务都进行了更新,增强了集成度并增加了新功能,从而吸引了更多用户。
Microsoft 帐户
您可以使用 Microsoft 帐户使用 Microsoft 的 Azure 云服务。当然,它不是免费的,但您可以免费试用 30 天。
首次设置 Windows 10 计算机并使用 Microsoft 帐户登录时,您可以使用同一帐户订阅 Microsoft Azure。要注册 Microsoft Azure,请点击此处 https://azure.microsoft.com/
订阅 Microsoft Azure 后,请转到 Azure 门户 https://portal.azure.com/。您将看到以下页面。
您可以将数据存储在数据库中,使用虚拟机等。您还可以构建和托管移动应用的后端。
让我们按照以下步骤通过示例进行尝试。
点击左侧窗格中的新建选项。
选择Web + 移动 >移动应用,并为您的 Web 应用命名。
提交和部署您的应用需要一些时间。此过程完成后,您将看到以下页面。在这里,您可以选择不同类型的移动应用,例如 Windows (C#)、iOS 和 Android 等。
由于我们讨论的是 Windows 10,请选择"Windows (C#)",这将打开以下页面。
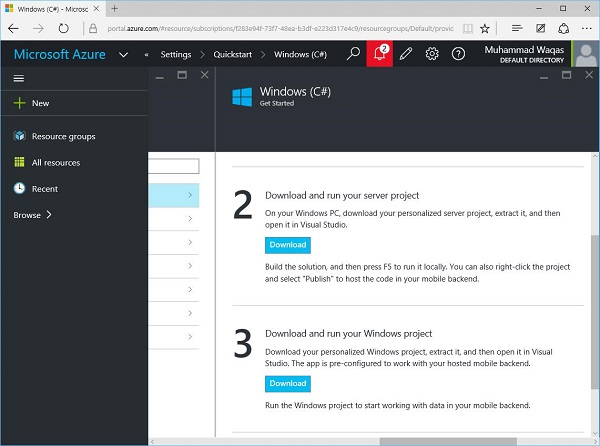
在这里,您可以看到两个下载选项。这些是示例项目,您可以直接下载并在 Visual Studio 中构建,然后轻松发布到 Microsoft Azure。
让我们下载第一个,它是一个服务器项目。它是一个 zip 文件。
下载完成后,解压并在 Visual Studio 中打开。
现在,构建此应用程序。如果出现一些错误,请重新构建。
运行应用程序。您将看到以下网页,该网页现在位于本地主机上。
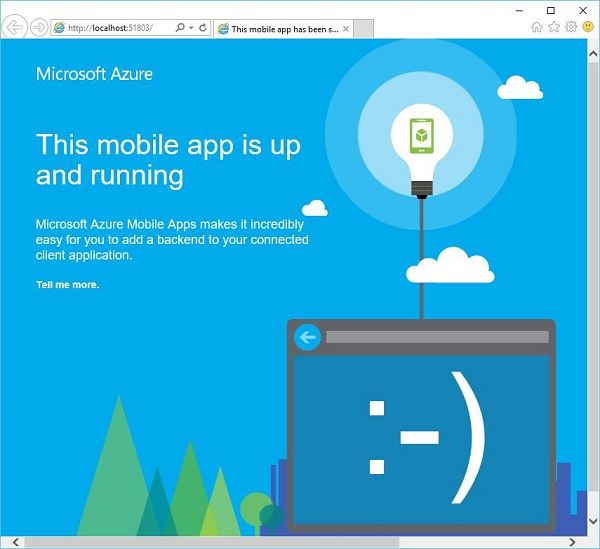
现在,要将此应用程序托管在云端,请在解决方案探索中右键单击项目选项,如下所示。
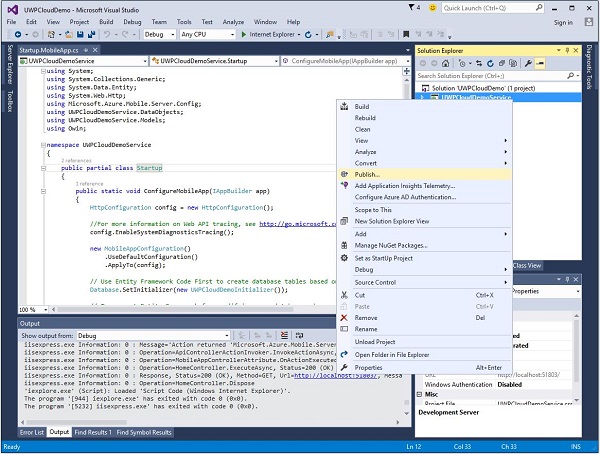
从菜单中选择发布选项。您将看到以下对话框。
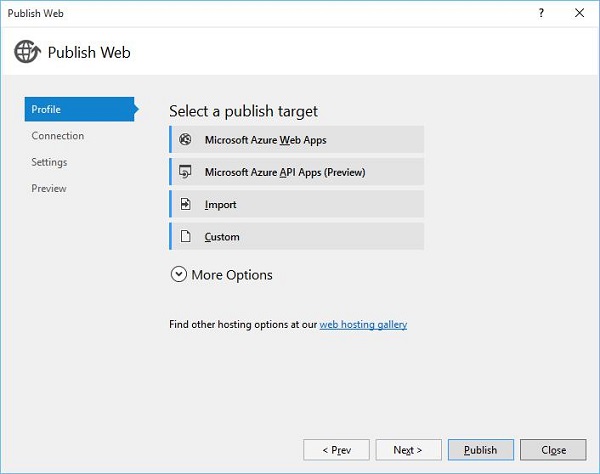
选择第一个选项 − Microsoft Azure Web 应用。将打开以下对话框。
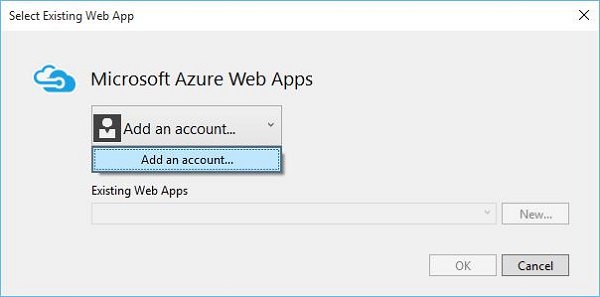
现在,点击菜单中的添加帐户选项以添加 Microsoft Azure 帐户。
指定您的凭据并点击登录。将打开以下对话框。
登录后,从菜单现有 Web 应用中选择您的应用,然后点击确定。
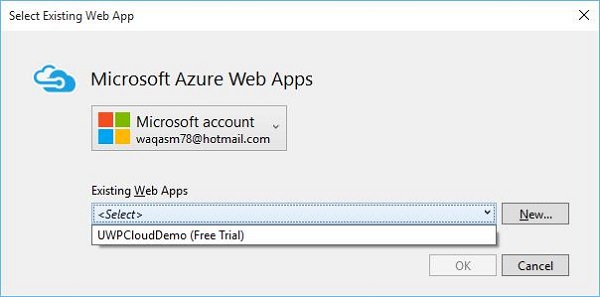
下方对话框显示与您的应用相关的一些信息,例如名称、服务器名称、URL 等。
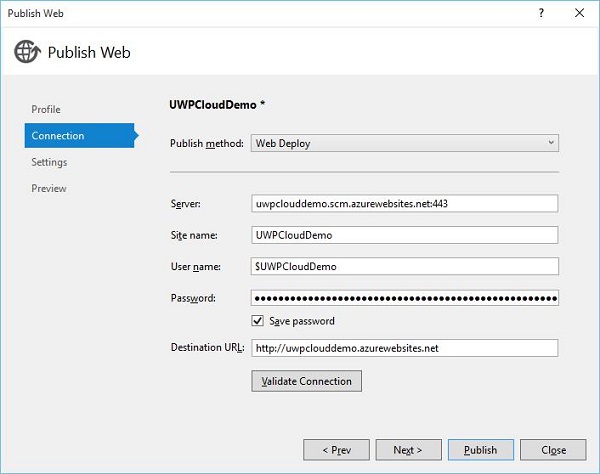
现在,点击验证连接按钮。验证完成后,点击发布按钮,您将看到您的应用程序现已托管在 Microsoft Azure 上。
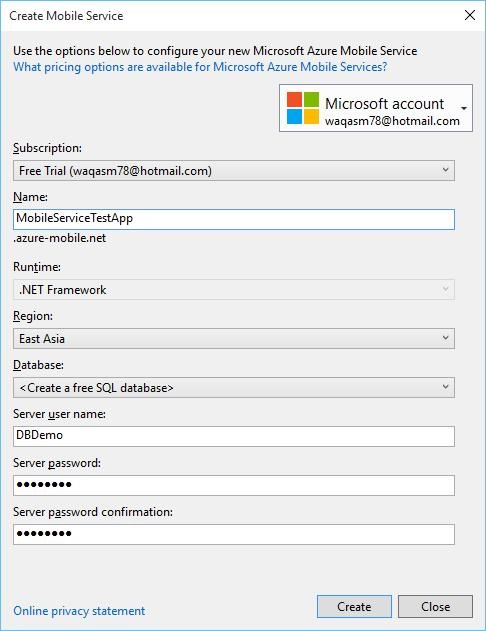
Windows 10 开发 - 动态磁贴
在本章中,我们将讨论如何通过磁贴与用户进行交互。它是 Windows 10 的标志性元素。磁贴显示在开始屏幕以及开始菜单上。换句话说,它是一个应用程序图标资源,在整个 Windows 10 操作系统中以各种形式出现。它们是通用 Windows 平台 (UWP) 应用的名片。
磁贴剖析
磁贴有三种状态。
基本状态 −开始磁贴的基本组件包括背景板、图标和应用标题。
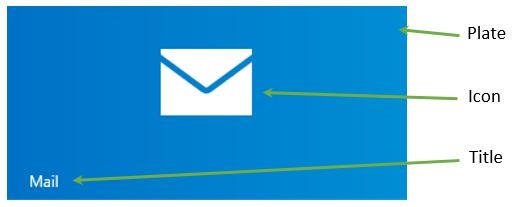
半实时状态 − 它与基本磁贴相同,唯一的区别在于徽章(数字)可以显示 0-99 之间的数字。
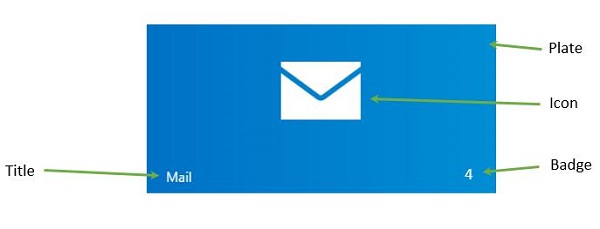
实时状态 −此图块包含半实时状态图块的所有元素,并显示额外的内容面板,您可以在其中放置任何内容,例如照片、文本等。
更新图块
有四种方式可以更新图块。
定期 − 您可以使用 ScheduledTileNotification 设置模板和时间。
定期 − 从 URI 检索信息时,您可以指定在该时间段后提取信息的时间,例如 30 分钟、1 小时、6 小时等。
本地 − 可以从您的应用程序更新本地图块;无论是从前台还是后台应用。
推送 − 通过从服务器推送信息来更新。
要创建图块,请按照给定的代码操作。
var tileXml =
   TileUpdateManager.GetTemplateContent(TileTemplateType.TileSquare150x150Text01);

var tileAttributes = tileXml.GetElementsByTagName("text");
tileAttributes[0].AppendChild(tileXml.CreateTextNode("Hello"));

var tileNotification = new TileNotification(tileXml);
TileUpdateManager.CreateTileUpdaterForApplication().Update(tileNotification);
更新徽章非常简单,因为它只是一个数字,您可以像下面这样设置徽章的值。
var type = BadgeTemplateType.BadgeNumber;
var xml = BadgeUpdateManager.GetTemplateContent(type);

var elements = xml.GetElementsByTagName("badge");
var element = elements[0] as Windows.Data.Xml.Dom.XmlElement;
element.SetAttribute("value", "7");

var updator = BadgeUpdateManager.CreateBadgeUpdaterForApplication();
var notification = new BadgeNotification(xml);
updator.Update(notification);
让我们在 Visual Studio 中创建一个新的 UWP 项目。
您将在解决方案资源管理器中的 Assets 文件夹下看到不同的 png 文件。
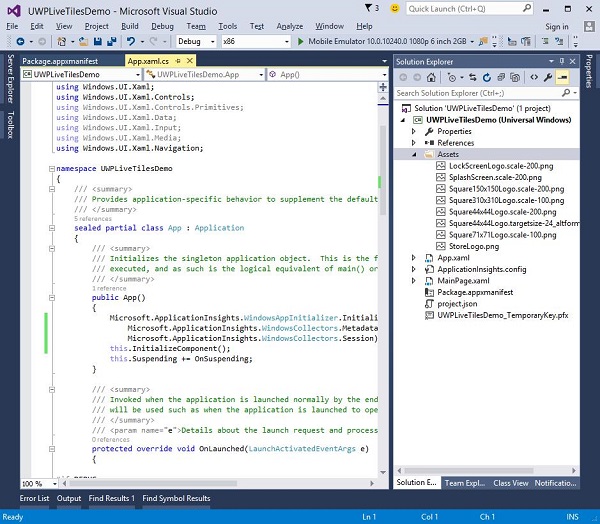
让我们在程序包清单中定义一个默认磁贴及其图像。
双击 package.appxmanifest。这将打开清单编辑器窗口。
选择Visual Assets选项卡。
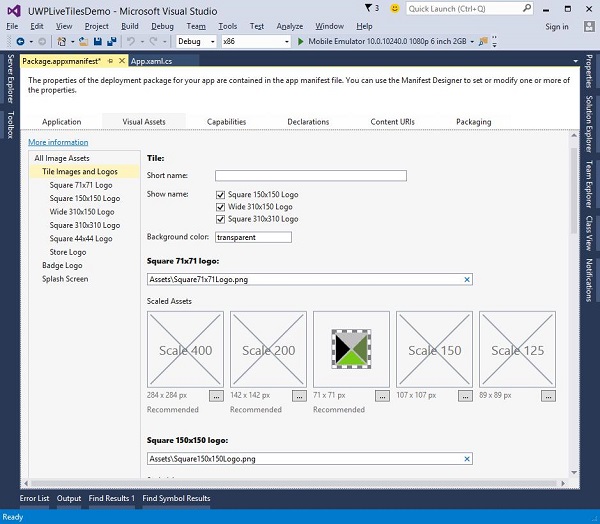
您可以选择任意指定尺寸的应用程序磁贴图片和图标。在磁贴图像和徽标下,所有徽标均提供默认图像,例如
- 71x71 方形徽标
- 150x150 方形徽标
- 310x310 方形徽标
- 商店徽标
当您执行应用程序并转到开始屏幕时,您将看到应用程序的磁贴。
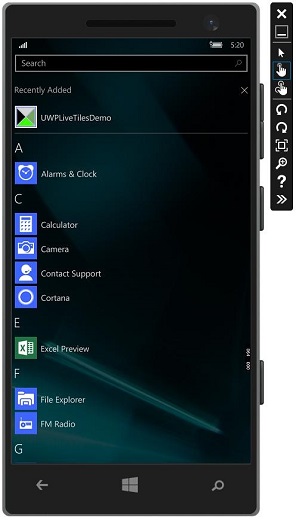
Windows 10 开发 - 共享契约
在本章中,我们将学习如何在应用程序之间共享数据。用户经常会遇到一些他们很想与他人分享或在其他应用程序中使用的信息。如今,用户希望利用科技与他人建立联系并共享数据。
用户可能想要共享 −
- 社交网络链接
- 将图片复制到报告中
- 将文件上传到云存储
如今的应用程序需要确保它们使用的数据也可供用户共享和交换。共享是一项轻量级功能,可以轻松添加到您的 UWP 应用程序中。应用之间可以通过多种方式交换数据。
在 UWP 应用中,可以通过以下方式支持共享功能:
首先,应用可以是提供用户想要共享内容的源应用。
其次,应用可以是用户选择作为共享内容目标的目标应用。
一个应用也可以同时是源应用和目标应用。
共享内容
从作为源应用的应用共享内容非常简单。要执行任何共享操作,您需要 DataPackage 类对象。此对象包含用户想要共享的数据。
以下类型的内容可以包含在 DataPackage 对象中 −
- 纯文本
- 统一资源标识符 (URI)
- HTML
- 格式化文本
- 位图
- 文件
- 开发者定义的数据
共享数据时,您可以包含上述一种或多种格式。为了在您的应用中支持共享,您首先需要获取 DataTransferManager 类的实例。
然后,它将注册一个事件处理程序,每当 DataRequested 事件发生时都会调用该处理程序。
DataTransferManager dataTransferManager = DataTransferManager.GetForCurrentView();
dataTransferManager.DataRequested += new TypedEventHandler<DataTransferManager,
   DataRequestedEventArgs>(this.ShareTextHandler);
当您的应用收到 DataRequest 对象时,您的应用就可以添加用户想要分享的内容了。
private void ShareTextHandler(DataTransferManager sender, DataRequestedEventArgs e){
   DataRequest request = e.Request;

   // The Title is mandatory
   request.Data.Properties.Title = "Share Text Example";
   request.Data.Properties.Description = "A demonstration that shows how to share text.";
   request.Data.SetText("Hello World!");
}
您的应用共享的任何内容都必须包含两个属性 −
- Title 属性,该属性是必需的,必须设置。
- 内容本身。
接收共享内容
如果您希望您的应用能够接收共享内容,那么您需要做的第一件事就是声明它支持 共享合约。声明后,系统将允许您的应用接收内容。
要添加对共享合约 − 的支持
双击 package.appmanifest 文件。
转到 声明 选项卡。从可用声明列表中选择共享目标,然后点击添加按钮。
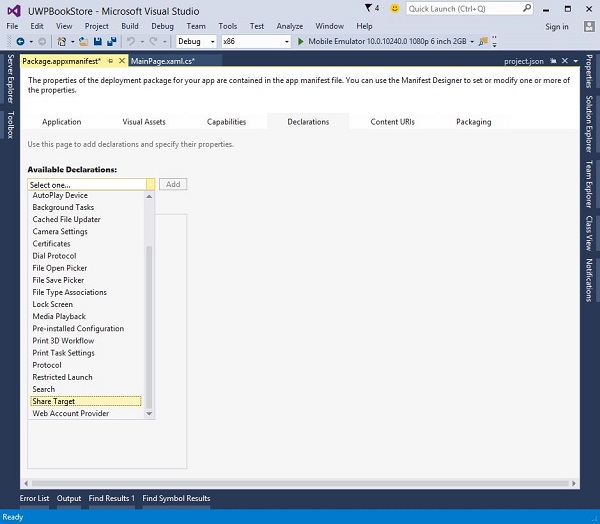
如果您希望您的应用接收任何类型的文件作为共享内容,您可以指定文件类型和数据格式。
要指定您支持的数据格式,请转到声明页面的数据格式部分,然后点击添加新。
输入您支持的数据格式的名称。例如,"文本"。
要指定您支持的文件类型,请在声明页面的支持的文件类型部分中,点击添加新文件。
输入您要支持的文件扩展名,例如,.pdf
如果您想支持所有文件类型,请勾选支持任何文件类型复选框。
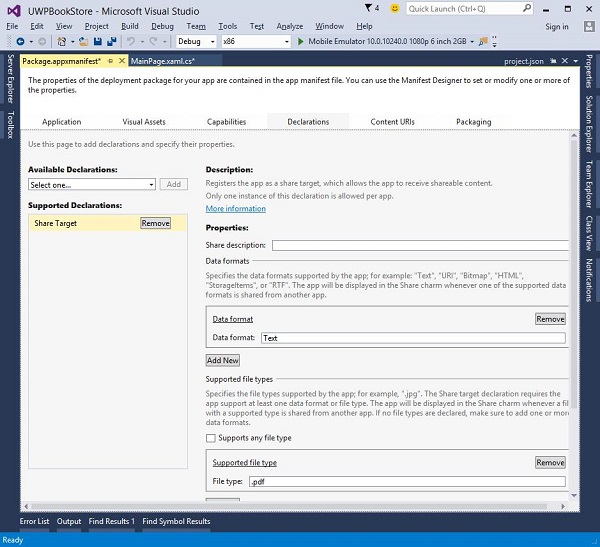
当用户选择您的应用作为共享数据的目标应用时,将触发OnShareTargetActivated事件触发。
您的应用需要处理此事件来处理用户想要共享的数据。
protected override async void OnShareTargetActivated(ShareTargetActivatedEventArgs args) {
   // Code to handle activation goes here.
}
用户想要与任何应用程序共享的所有数据都包含在 ShareOperation 对象中。您还可以检查其所含数据的格式。
以下是处理纯文本格式的共享内容的代码片段。
ShareOperation shareOperation = args.ShareOperation;

if (shareOperation.Data.Contains(StandardDataFormats.Text)) {
   string text = await shareOperation.Data.GetTextAsync();

   // To output the text from this example, you need a TextBlock control
   // with a name of "sharedContent".
   sharedContent.Text = "Text: " + text;
}
我们通过创建一个新的 UWP 项目来看一个简单的示例,该项目将共享一个网页链接。
下面给出了创建按钮并带有一些属性的 XAML 代码。
<Page
   x:Class = "UWPSharingDemo.MainPage"
   xmlns = "http://schemas.microsoft.com/winfx/2006/xaml/presentation"
   xmlns:x = "http://schemas.microsoft.com/winfx/2006/xaml"
   xmlns:local = "using:UWPSharingDemo"
   xmlns:d = "http://schemas.microsoft.com/expression/blend/2008"
   xmlns:mc = "http://schemas.openxmlformats.org/markup-compatibility/2006"
   mc:Ignorable = "d">

   <Grid Background = "{ThemeResource ApplicationPageBackgroundThemeBrush}">

      <StackPanel Orientation = "Vertical">
         <TextBlock Text = "Share Web Link" Style = "{StaticResource
            HeaderTextBlockStyle}" Margin = "30"></TextBlock>

         <Button Content = "Invoke share contract" Margin = "10"
            Name = "InvokeShareContractButton" Click = "InvokeShareContractButton_Click"
            ></Button>
      </StackPanel>

   </Grid>

</Page>
下面给出了实现按钮点击事件和 URI 共享的 C# 代码。
using System;

using Windows.ApplicationModel.DataTransfer;
using Windows.UI.Xaml;
using Windows.UI.Xaml.Controls;

// 空白页项目模板的文档位于
   http://go.microsoft.com/fwlink/?LinkId=402352&clcid=0x409

namespace UWPSharingDemo {

   /// <summary>
      /// An empty page that can be used on its own or navigated to within a Frame.
   /// </summary>

   public sealed partial class MainPage : Page {

      DataTransferManager dataTransferManager;

      public MainPage() {
         this.InitializeComponent();
         dataTransferManager = DataTransferManager.GetForCurrentView();
         dataTransferManager.DataRequested += dataTransferManager_DataRequested;
      }

      void dataTransferManager_DataRequested(DataTransferManager sender,
         DataRequestedEventArgs args) {
            Uri sharedWebLink = new Uri("https://msdn.microsoft.com");

            if (sharedWebLink != null) {
               DataPackage dataPackage = args.Request.Data;
               dataPackage.Properties.Title = "Sharing MSDN link";

               dataPackage.Properties.Description = "The Microsoft Developer Network (MSDN)
                  is designed to help developers write applications using Microsoft
                  products and technologies.";

               dataPackage.SetWebLink(sharedWebLink);
            }
      }

      private void InvokeShareContractButton_Click(object sender, RoutedEventArgs e) {
         DataTransferManager.ShowShareUI();
      }

   }
}
编译并执行上述代码后,您将在模拟器上看到以下页面。
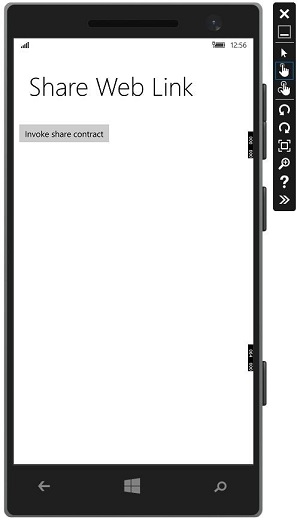
点击按钮后,将显示在哪个应用程序上共享的选项。
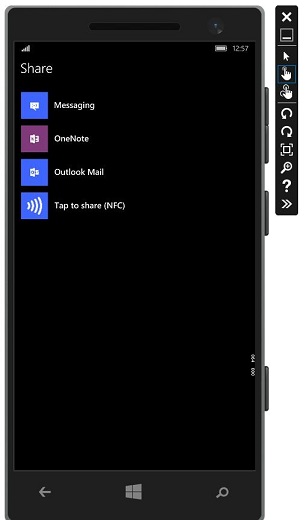
点击"消息传递",将显示以下窗口,您可以从中将链接发送给任何人。
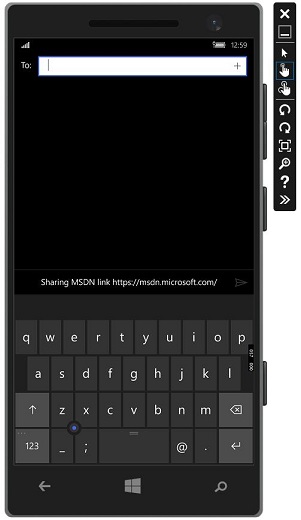
Windows 10 开发 - 移植到 Windows
在本章中,我们将学习如何将现有的 Windows 8.1 应用程序移植到通用 Windows 平台 (UWP)。您可以创建一个单一的 Windows 10 应用包,供您的客户安装到所有类型的设备上。
将您的应用移植到 Windows 10 UWP 后,您的应用将受益于 −
- 令人兴奋的新硬件
- 巨大的盈利机会
- 一套现代化的 API
- 自适应 UI 控件
- 自适应设计和代码
- 多种输入方式,例如鼠标、键盘、触控和语音。
将 Windows 8.x 项目移植到 UWP 项目
有两种方法可以将现有的 Windows 8.x 应用移植到通用 Windows 平台 (UWP)。
方法 1 −一种是在 Visual Studio 中创建一个新的 Windows 10 项目,并将文件复制到其中。
选项 2 (减号) 另一种方法是编辑现有项目文件的副本,包括应用包清单。
以下是使用第一种方法的主要步骤。
启动 Microsoft Visual Studio 2015,并创建一个名为 UWPBookStore 的新空白应用程序(Windows Universal)项目。
您的新项目将构建一个可在所有设备系列上运行的应用包(一个 appx 文件)。
在您的 Universal 8.1 应用项目中,确定您想要重用的所有源代码文件和可视化资源文件。下面显示的是一个包含三个项目的示例应用程序。一个用于 Windows,第二个用于移动设备,第三个是 Windows 和移动设备共享的项目。
在手机上运行此应用程序后,您将看到以下窗口。
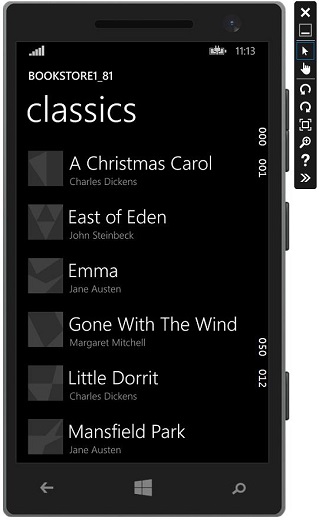
运行 Windows 应用程序后,您将看到以下应用程序。
- 现在,打开新创建的 UWP 项目应用程序
从共享项目中,复制包含书籍封面图片 (.png) 文件的文件夹 Assets\CoverImages。同时复制 ViewModel 文件夹和 MainPage.xaml,并在目标文件夹中替换该文件。
从 Windows 项目中,复制 BookstoreStyles.xaml。此文件中的所有资源键都将在 Windows 10 应用中解析。但等效的 WindowsPhone 文件中的部分资源键将无法解析。
在 解决方案资源管理器 中,确保 显示所有文件 已切换为 开启。
选择您复制的文件,右键单击它们,然后点击包含在项目中,如下所示。
这将自动包含其包含的文件夹。然后,您可以根据需要将显示所有文件"关闭"。
现在,您的项目结构在解决方案资源管理器中将如下所示。
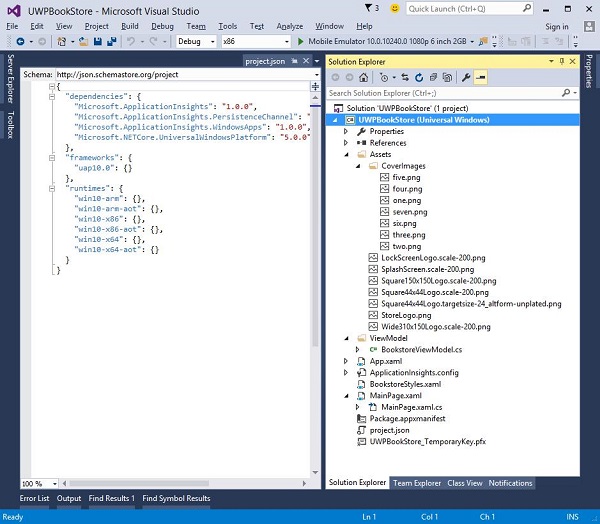
编辑您刚刚复制的源代码和标记文件,并将对Bookstore1_81命名空间的所有引用更改为UWPBookStore命名空间。
最简单的方法是使用在文件中替换功能替换命名空间。视图模型中无需更改代码。
现在,执行上述代码后,您可以在本地计算机和移动设备上运行它,如下所示。
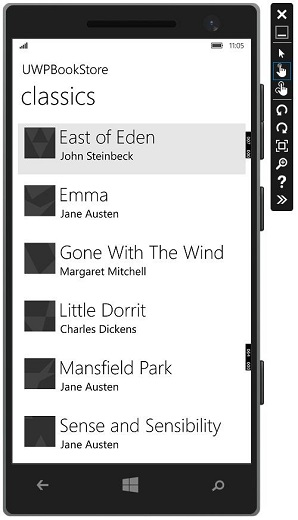
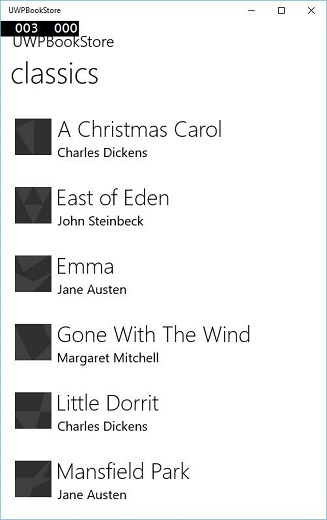
现在,第二个选项是编辑现有项目文件的副本,包括应用包清单。从 Windows/phone 8.x 移植到 Windows 10 时,项目文件和 package.appmanifest 文件需要进行一些修改。
Microsoft 提供了 UWP 项目升级实用程序,这在移植现有应用程序时非常有用。该实用程序可从 github.com 下载。
我们建议您逐步遵循上述示例,以便更好地理解。

