
Google AMP - 基本语法
在本章中,我们将讨论开始使用 Google AMP 页面的基本要求。
示例 Amp 页面
下面显示了 amp 页面的基本示例 −
<!doctype html>
<html amp>
   <head>
      <meta charset = "utf-8">
      <title>Amp Sample Page</title>
      <link rel = "canonical" href = "./regular-html-version.html">
      <meta name = "viewport" content = "width = device-width,
      minimum-scale = 1,initial-scale = 1">
      <style amp-custom>
         h1 {color: red}
      </style>

      <style amp-boilerplate>
         body{
            -webkit-animation:
            -amp-start 8s steps(1,end) 0s 1 normal both;-moz-animation:
            -amp-start 8s steps(1,end) 0s 1 normal both;-ms-animation:
            -amp-start 8s steps(1,end) 0s 1 normal both;animation:
            -amp-start 8s steps(1,end) 0s 1 normal both
         }
         @-webkit-keyframes
         -amp-start{from{visibility:hidden}to{visibility:visible}}@-moz-keyframes
         -amp-start{from{visibility:hidden}to{visibility:visible}}@-ms-keyframes
         -amp-start{from{visibility:hidden}to{visibility:visible}}@-o-keyframes
         -amp-start{from{visibility:hidden}to{visibility:visible}}@keyframes
         -amp-start{from{visibility:hidden}to{visibility:visible}}
      </style>
      <noscript>
         <style amp-boilerplate>
            body{
               -webkit-animation:none;
               -moz-animation:none;
               -ms-animation:none;
               animation:none}
         </style>
      </noscript>
      <script async src = "https://cdn.ampproject.org/v0.js">
      </script>
   </head>
   <body>
      <h1>Amp Sample Page</h1>
      <p>
         <amp-img
            src = "images/christmas1.jpg"
            width = "300"
            height = "300"
            layout = "responsive">
         </amp-img>
      </p>
   </body>
</html>
强制标签
amp 页面中必须包含一些强制标签。本节将详细讨论这些标签 −
我们必须确保将 amp 或 ⚡ 添加到 html 标签中,如下所示
<html amp>
   OR
<html ⚡>
我们应该将 <head> 和 <body> 标签添加到 html 页面。
如果您遗漏任何必需的元标签,Amp 验证可能会失败。此处显示了一些必须添加到页面头部的必需 mets 标签 −
<meta charset="utf-8">
   <meta name  =  "viewport"
      content = "width = device-width,
      minimum-scale = 1,
      initial-scale = 1">
rel="canonical" 的链接将添加到 head 标签内
<link rel = "canonical" href = "./regular-html-version.html">
使用 amp-boilerplate 样式标签 −
<style amp-boilerplate>
   body{
     -webkit-animation:
      -amp-start 8s steps(1,end) 0s 1 normal both;-moz-animation:
      -amp-start 8s steps(1,end) 0s 1 normal both;-ms-animation:
      -amp-start 8s steps(1,end) 0s 1 normal both;animation:
      -amp-start 8s steps(1,end) 0s 1 normal both
   }
   @-webkit-keyframes
   -amp-start{from{visibility:hidden}to{visibility:visible}}@-moz-keyframes
   -amp-start{from{visibility:hidden}to{visibility:visible}}@-ms-keyframes
   -amp-start{from{visibility:hidden}to{visibility:visible}}@-o-keyframes
   -amp-start{from{visibility:hidden}to{visibility:visible}}@keyframes
   -amp-start{from{visibility:hidden}to{visibility:visible}}
</style>
带有 amp-boilerplate 的 Noscript 标签 −
<noscript>
   <style amp-boilerplate>
      body{
         -webkit-animation:none;
         -moz-animation:none;
         -ms-animation:none;
         animation:none}
   </style>
</noscript>
添加了 async 的 amp script 标签如下所示。这是所有标签中最重要的 −
<script async src = "https://cdn.ampproject.org/v0.js">
</script>
如果您想向页面添加自定义 css,则应使用此标签。请注意,我们无法在 amp 页面中调用外部样式表。要添加自定义 css,您的所有 css 都必须放在此处 −
<style amp-custom>
   //all your styles here
</style>
您可以在浏览器中使用页面 URL 末尾的 #developement=1 验证上述页面。
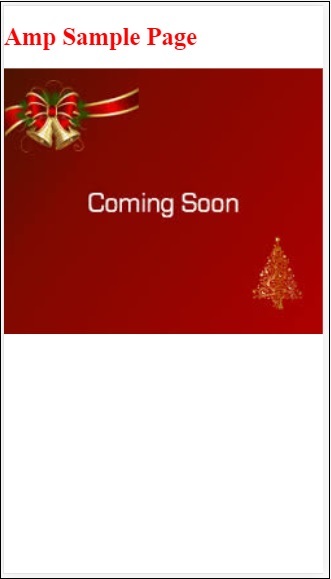
现在,让我们在浏览器中测试一下。我已在本地托管该页面并将其保存为 amppage.html。
要测试的上述 URL 是
http://localhost/googleamp/amppage.html#development=1
示例
<!doctype html>
<html amp>
   <head>
      <meta charset = "utf-8">
      <title>Amp Sample Page</title>
      <link rel = "canonical" href = "./regular-html-version.html">
      <meta name = "viewport" content = "width=device-width,
      minimum-scale = 1,initial-scale = 1">
      <style amp-custom>
         h1 {color: red}
      </style>
      <style amp-boilerplate>
         body{
            -webkit-animation:
            -amp-start 8s steps(1,end) 0s 1 normal both;-moz-animation:
            -amp-start 8s steps(1,end) 0s 1 normal both;-ms-animation:
            -amp-start 8s steps(1,end) 0s 1 normal both;animation:
            -amp-start 8s steps(1,end) 0s 1 normal both
         }
         @-webkit-keyframes
         -amp-start{from{visibility:hidden}to{visibility:visible}}@-moz-keyframes
         -amp-start{from{visibility:hidden}to{visibility:visible}}@-ms-keyframes
         -amp-start{from{visibility:hidden}to{visibility:visible}}@-o-keyframes
         -amp-start{from{visibility:hidden}to{visibility:visible}}@keyframes
         -amp-start{from{visibility:hidden}to{visibility:visible}}
      </style>
      <noscript>
         <style amp-boilerplate>
            body{
               -webkit-animation:none;
               -moz-animation:none;
               -ms-animation:none;
               animation:none}
         </style>
      </noscript>
      <script async src = "https://cdn.ampproject.org/v0.js">
      </script>
   </head>
   <body>
      <h1>Amp Sample Page</h1>
      <p>
         <amp-img
            src = "images/christmas1.jpg"
            width = "300"
            height = "250"
            layout = "responsive">
         </amp-img>
      </p>
   </body>
</html>
输出
您可以在开发者控制台中看到 amp 验证状态,如下所示 −
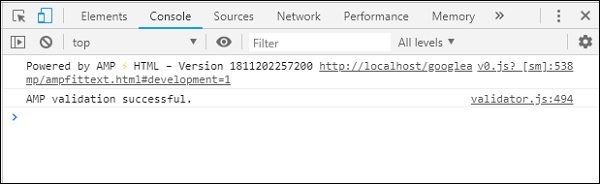
由于我们已为有效 amp 页面添加了所有必需的强制标签,因此它显示 AMP 验证成功。

