Google AMP - 表单
本章介绍如何在 Google AMP 中使用表单。
请注意,表单标签与标准 HTML 中的相同。AMP 对表单的使用增加了特殊限制,因此我们需要添加 amp-form JavaScript 文件才能使用表单。
amp-form 脚本
<script async custom-element = "amp-form"
   src = "https://cdn.ampproject.org/v0/ampform-0.1.js"></script>
要在 AMP 页面中使用表单,我们需要在 .html 文件中包含上述脚本。amp-form JavaScript 文件支持 http 和 xmlhttprequest 表单提交。使用 HTTP 请求会重新加载页面,而使用 xmlhttprequest 则不会重新加载页面,其行为类似于 ajax 请求。
AMP 中的表单标签
For xmlhttprequest :
<form method = "post" class = "p2" action-xhr = "submitform.php" target = "_top">
   //Input fields here
</form>

For http :
<form method = "post" class = "p2" action = "submitform.php" target = "_top">
   //Input fields here
</form>
Amp-form 提供特殊属性,即 submit-error 和 submit-success,用于处理表单提交时的错误和成功。
示例
下面显示了 amp-form 的示例 −
<!doctype html>
<html amp lang = "en">
   <head>
      <meta charset = "utf-8">
      <script async src = "https://cdn.ampproject.org/v0.js"></script>
      <title>Google AMP - Form</title>
      <link rel = "canonical" href = "ampform.html">
      <meta name = "viewport" conten t = "width = device-width,
         minimum-scale = 1,initialscale = 1">

      <style amp-boilerplate>
         body{
            -webkit-animation:
            -amp-start 8s steps(1,end) 0s1 normal both;-moz-animation:
            -amp-start 8s steps(1,end) 0s 1 normal both;-msanimation:
            -amp-start 8s steps(1,end) 0s 1 normal both;animation:
            -amp-start 8s steps(1,end) 0s 1 normal both
         }
         @-webkit-keyframes
         -ampstart{from{visibility:hidden}to{visibility:visible}}@-moz-keyframes
         -ampstart{from{visibility:hidden}to{visibility:visible}}@-ms-keyframes
         -ampstart{from{visibility:hidden}to{visibility:visible}}@-o-keyframes
         -ampstart{from{visibility:hidden}to{visibility:visible}}@keyframes
         -ampstart{from{visibility:hidden}to{visibility:visible}}
      </style>
         <noscript>
            <style amp-boilerplate>
               body{
                  -webkit-animation:none;
                  -moz-animation:none;
                  -msanimation:none;
                  animation:none
               }
            </style>
         </noscript>
      <script async custom-element = "amp-form"
         src = "https://cdn.ampproject.org/v0/amp-form-0.1.js">
      </script>
      <script async custom-template = "amp-mustache"
         src = "https://cdn.ampproject.org/v0/amp-mustache-0.2.js">
      </script>
      <style amp-custom>
         form.amp-form-submit-success [submit-success],
         form.amp-form-submit-error [submit-error]{
            margin-top: 16px;
         }
         form.amp-form-submit-success [submit-success] {
            color: white;
            background-color:gray;
         }
         form.amp-form-submit-error [submit-error] {
            color: red;
         }
         form.amp-form-submit-success.hide-inputs > input {
            display: none;
         }
      </style>
   </head>
   <body>
      <h3>Google AMP - Form</h3>
      <form method = "post"
         class = "p2"
         action-xhr = "submitform.php"
         target = "_top">
         <p>AMP - Form Example</p>
         <div>
            <input type = "text" name = "name" placeholder = "Enter
               Name" required><br/><br/>
            <input type = "email" name = "email"
            placeholder = "Enter Email" required>
            <br/>
            <br/>
         </div>

         <input type = "submit" value = "Submit">
         <div submit-success>
            <template type = "amp-mustache">
               Form Submitted! Thanks {{name}}.
            </template>
         </div>

         <div submit-error>
            <template type = "amp-mustache">
               Error! {{name}}, please try again.
            </template>
         </div>
      </form>
   </body>
</html>
输出
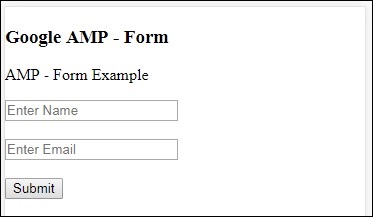
执行上述代码后,您将看到如下所示的结果 −
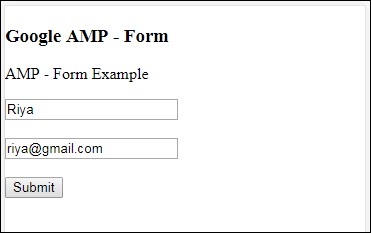
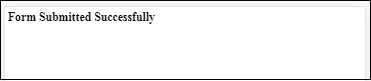
现在,输入详细信息并单击"提交"按钮。显示的输出屏幕如下 −
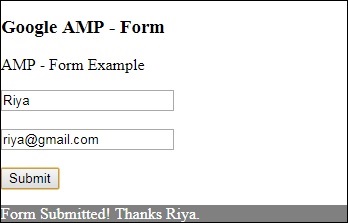
请注意,我们使用 amp-mustache 进行数据绑定。表单使用 action-xhr 即 xmlhttprequest 提交表单。我们使用 submitform.php 文件以 json 格式返回数据。
<form method = "post" class = "p2" action-xhr = "submitform.php"
   target = "_top">
</form>
submitform.php
<?php
   if(!empty($_POST)){
      $domain_url = (isset($_SERVER['HTTPS']) ? "https" : "http") .      "://$_SERVER[HTTP_HOST]";
      header("Content-type: application/json");
      header("AMP-Access-Control-Allow-Source-Origin: " . $domain_url);
      header("Access-Control-Expose-Headers: AMP-Access-Control-Allow-Source-Origin");
      $myJSON = json_encode($_POST);
      echo $myJSON;
   }
?>
为了让表单使用 xmlhttprequest 工作,我们需要根据 CORS 规范添加标头。添加到 submitform.php 的响应标头的详细信息如下所示 −
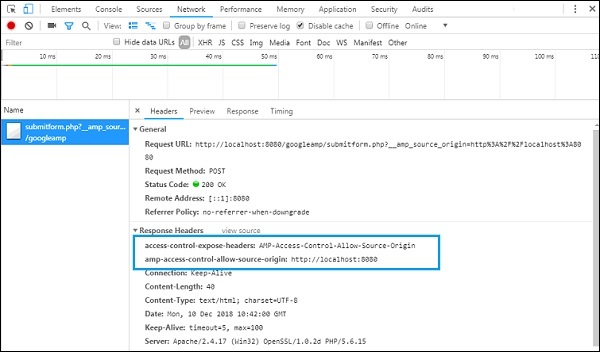
为了让表单工作,我们需要添加标头,例如值为 AMP-Access-Control-Allow-Source-Origin 的 access-control-expose-headers 和 amp-access-controlallow- source-origin −http://localhost:8080。
请注意,我们正在使用 php 文件和 apache 服务器。在 php 文件中,我们已添加所需的标头,如下所示 −
<?php

   if(!empty($_POST)){
      $domain_url = (isset($_SERVER['HTTPS']) ? "https" : "http") .  "://$_SERVER[HTTP_HOST]";
      header("Content-type: application/json");
      header("AMP-Access-Control-Allow-Source-Origin: " . $domain_url);
      header("Access-Control-Expose-Headers: AMP-Access-Control-Allow-Source-Origin");
      $myJSON = json_encode($_POST);
      echo $myJSON;
   }
   ?
?>
如果我们使用正常的 http 请求,页面将重新加载,如下所示 −
对于 http 请求,我们使用了以下表单 −
<form method = "GET" class = "p2" action = "submitform.php"
    target = "_top">
</form>
示例
请观察以下代码以更好地理解 −
<!doctype html>
<html amp lang = "en">
   <head>
      <meta charset = "utf-8">
      <script async src = "https://cdn.ampproject.org/v0.js"></script>
      <title>Google AMP - Form</title>
      <link rel = "canonical" href = "ampform.html">
      <meta name = "viewport" content = "width = device-width,minimum-scale = 1,initialscale = 1">

      <style amp-boilerplate>
         body{
            -webkit-animation:
            -amp-start 8s steps(1,end) 0s1 normal both;-moz-animation:
            -amp-start 8s steps(1,end) 0s 1 normal both;-msanimation:
            -amp-start 8s steps(1,end) 0s 1 normal both;animation:
            -amp-start 8s steps(1,end) 0s 1 normal both
         }
         @-webkit-keyframes
         -ampstart{from{visibility:hidden}to{visibility:visible}}@-moz-keyframes
         -ampstart{from{visibility:hidden}to{visibility:visible}}@-ms-keyframes
         -ampstart{from{visibility:hidden}to{visibility:visible}}@-o-keyframes
         -ampstart{from{visibility:hidden}to{visibility:visible}}@keyframes
         -ampstart{from{visibility:hidden}to{visibility:visible}}
      </style>
      <noscript>
         <style amp-boilerplate>
            body {
               -webkit-animation:none;
               -moz-animation:none;
               -msanimation:none;
               animation:none}
         >/style>
      </noscript>

      <script async custom-element = "amp-form"
         src = "https://cdn.ampproject.org/v0/amp-form-0.1.js">
      </script>
      <script async custom-template = "amp-mustache"
         src = "https://cdn.ampproject.org/v0/amp-mustache-0.2.js">
      </script>

      <style amp-custom>
         form.amp-form-submit-success [submit-success],
         form.amp-form-submit-error [submit-error]{
            margin-top: 16px;
         }
         form.amp-form-submit-success [submit-success] {
            color: white;
            background-color:gray;
         }
         form.amp-form-submit-error [submit-error] {
            color: red;
         }
         form.amp-form-submit-success.hide-inputs >
            input {
            display: none;
         }
      </style>
   </head>
   <body>
      <h3>Google AMP - Form</h3>
      <form method = "GET" class = "p2" action = "submitform.php" target = "_top">
         <p>AMP - Form Example</p>
         <div>
            <input type = "text" name = "name" placeholder = "Enter Name" required>
            <br/>
            <br/>
            <input type = "email" name = "email" placeholder = "Enter Email" required>
            <br/>
            <br/>
         <div>

         <input type = "submit" value = "Submit">
         <div submit-success>
            <template type = "amp-mustache">
               Form Submitted! Thanks {{name}}.
            </template>
         </div>
         <div submit-error>
            <template type = "amp-mustache">
               Error! {{name}}, please try again.
            </template>
         </div>
      </form>
   </body>
</html>
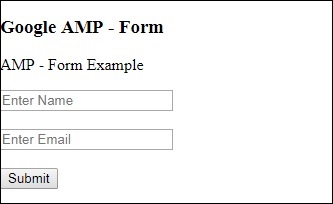
输出
执行上述代码后,您将看到如下所示的结果 −