
Google AMP - 数据绑定
Amp-bind 有助于使用数据绑定和类似 JS 的表达式,根据操作为 amp-components 和 html 标记添加交互性。本章详细讨论了数据绑定。
要使用 amp-bind,我们需要将以下脚本添加到我们的页面 −
<script async custom-element = "amp-bind"
    src = "https://cdn.ampproject.org/v0/amp-bind-0.1.js">
</script>
让我们借助如下所示的工作示例充分理解这一点 −
示例
<!doctype html>
<html amp lang = "en">
   <head>
      <meta charset = "utf-8">
      <script async src = "https://cdn.ampproject.org/v0.js"></script>
      <title>Google AMP - Amp Bind</title>
      <link rel = "canonical" href =
         "http://example.ampproject.org/article-metadata.html">
      <meta name = "viewport" content = "width = device-width,
         minimum-scale = 1,initial-scale = 1">
      <style amp-boilerplate>
         body{
            -webkit-animation:
            -amp-start 8s steps(1,end) 0s 1 normal both;-moz-animation:
            -amp-start 8s steps(1,end) 0s 1 normal both;-ms-animation:
            -amp-start 8s steps(1,end) 0s 1 normal both;animation:
            -amp-start 8s steps(1,end) 0s 1 normal both
         }
         @-webkit-keyframes
         -amp-start{from{visibility:hidden}to{visibility:visible}}@-moz-keyframes
         -amp-start{from{visibility:hidden}to{visibility:visible}}@-ms-keyframes
         -amp-start{from{visibility:hidden}to{visibility:visible}}@-o-keyframes
         -amp-start{from{visibility:hidden}to{visibility:visible}}@keyframes
         -amp-start{from{visibility:hidden}to{visibility:visible}}
      </style>
      <noscript>
         <style amp-boilerplate>
            body{
               -webkit-animation:none;
               -moz-animation:none;
               -ms-animation:none;
               animation:none
            }
         </style>
      </noscript>
      <script async custom-element = "amp-bind"
         src = "https://cdn.ampproject.org/v0/amp-bind-0.1.js"></script>
      <style amp-custom>
         button{
            background-color: #ACAD5C;
            color: white;
            padding: 12px 20px;
            border: none;
            border-radius: 4px;
         }
      </style>
   </head>
   <body>
      <h3>Google AMP - Amp Bind</h3>
      <p [text] = "'Hello ' + world + '.'">
         Click on the button to change the text
      </p>
      <button on = "tap:AMP.setState({world: 'This is amp-bind example'})">
      Click Here
      </button>
   </body>
</html>
输出
单击按钮可查看如下所示的文本变化 −
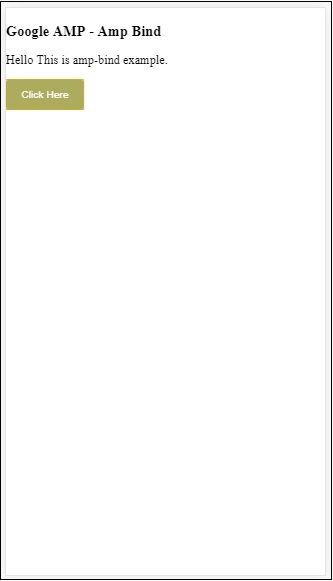
因此,在上面的示例中,我们使用 amp-bind 在单击按钮时更改文本。
Amp-bind 有三个组件 −
状态 − 最初状态为空。单击按钮后,状态就会改变。例如,
<button on = "tap:AMP.setState({world: 'This is amp-bind example'})">
   Click Here
</button>
AMP.setState 方法用于更改状态。变量 world 被赋予值 This is amp-bind example。变量 world 在 html 标记内使用 −
<p [text] = "'Hello ' + world + '.'">
   Click on the button to change the text
</p>
点击按钮后,world 会被分配一个新值:这是 amp-bind 示例。
我们还可以使用 amp-state 进行绑定,如下所示 −
<amp-state id = "myState">
   <script type = "application/json">
      {
         "foo": "bar"
      }
   </script>
</amp-state>
表达式将在绑定期间被赋值 bmyState.foo。
表达式 − amp-bind 工作的表达式如下所示 −
'Hello ' + world
world 被称为 状态变量。
绑定 − 绑定应用于 [attributes] 形式的特殊属性。例如 −
<p [text] = "'Hello ' + world + '.'">
   Click on the button to change the text
</p>
在上面的例子中,[text] 具有用于绑定 p 标签的表达式。
我们可以使用以下属性进行绑定 −
- [text]
- [class]
- [hidden]
- [width]
- [height]
也可以在 amp-components 上进行绑定,并且只允许使用特定属性。以下列表显示了这些组件和属性 −
| Sr.No | Amp 组件 | 属性 &说明 |
|---|---|---|
| 1 | <amp-carousel type=slides> | [slide]*
使用此绑定行为更改幻灯片 |
| 2 | <amp-date-picker> | [min]
min -> 设置最早可选日期 [max]max -> 设置最晚可选日期 |
| 3 | <amp-iframe> | [src]
更改 iframe 的 src |
| 4 | <amp-img> | [alt]
[attribution]
[src]
[srcset]
我们可以更改 alt、attribution、src 和 srcset。如果 src 发生更改,请更改 srcset,因为它用于缓存 |
| 5 | <amp-lightbox> | [open]*
您可以通过以下方式显示/隐藏灯箱绑定到 open |
| 6 | <amp-list> | [src]
如果表达式是字符串,则从字符串 URL 中获取并呈现 JSON。如果表达式是对象或数组,则呈现表达式数据。 |
| 7 | <amp-selector> | [selected]*
[disabled]
更改由其 option 属性值标识的当前选定的子元素。支持以逗号分隔的值列表以供多选 |
使用 Amp-State 进行绑定
我们可以用我们想要在 html 元素或 amp-component 上使用的所有数据来定义 amp-state。
amp-state 中使用的数据必须采用 json 格式,如下所示 −
<amp-state id = "myCarsList">
   <script type = "application/json">
      {
         "currentcar" : "bmw",
         "audi": {
            "imageUrl": "images/audi.jpg"
         },
         "bmw": {
            "imageUrl": "images/bmw.jpg"
         }
      }
   </script>
</amp-state>
因此,我们定义了汽车名称和汽车所用图像的键值对。
文本和 Amp-Image 上的 Amp-bind
下面显示了使用 amp-state 和 amp-bind 的工作示例 −
<!doctype html>
<html amp lang = "en">
   <head>
      <meta charset = "utf-8">
      <script async src = "https://cdn.ampproject.org/v0.js"></script>
      <title>Google AMP - Amp Bind</title>
      <link rel = "canonical" href =
         "http://example.ampproject.org/article-metadata.html">
      <meta name = "viewport" content = "width = device-width,
         minimum-scale = 1,initial-scale = 1">
      <style amp-boilerplate>
         body{
            -webkit-animation:
            -amp-start 8s steps(1,end) 0s 1 normal both;-moz-animation:
            -amp-start 8s steps(1,end) 0s 1 normal both;-ms-animation:
            -amp-start 8s steps(1,end) 0s 1 normal both;animation:
            -amp-start 8s steps(1,end) 0s 1 normal both
         }
         @-webkit-keyframes
         -amp-start{from{visibility:hidden}to{visibility:visible}}@-moz-keyframes
         -amp-start{from{visibility:hidden}to{visibility:visible}}@-ms-keyframes
         -amp-start{from{visibility:hidden}to{visibility:visible}}@-o-keyframes
         -amp-start{from{visibility:hidden}to{visibility:visible}}@keyframes
         -amp-start{from{visibility:hidden}to{visibility:visible}
         }
      </style>
      <noscript>
         <style amp-boilerplate>
            body{
               -webkit-animation:none;
               -moz-animation:none;
               -ms-animation:none;
               animation:none
            }
         </style>
      </noscript>
      <script async custom-element = "amp-bind" src =
         "https://cdn.ampproject.org/v0/amp-bind-0.1.js"></script>
      <style amp-custom>
         button{
            background-color: #ACAD5C;
            color: white;
            padding: 12px 20px;
            border: none;
            border-radius: 4px;
            cursor: pointer;
            float: left;
         }
      </style>
   </head>
   <body>
      <h3>Google AMP - Amp Bind</h3>
      <amp-state id = "myCarsList">
         <script type = "application/json">
            {
               "currentcar" : "bmw",
               "audi": {
               "imageUrl": "images/audi.jpg",
               "style": "greenBackground"
               },
               "bmw": {
               "imageUrl": "images/bmw.jpg",
               "style": "redBackground"
               }
            }
         </script>
      </amp-state>
      <amp-img
         width = "300"
         height = "200"
         src = "images/bmw.jpg"
         [src] = "myCarsList[currentcar].imageUrl">
      </amp-img>
      <p [text] = "'This is a ' + currentcar + '.'">
         This is a BMW.
      </p>
      <br/>
      <button on = "tap:AMP.setState({currentcar: 'audi'})">
         Change Car
      </button>
   </body>
</html>
输出
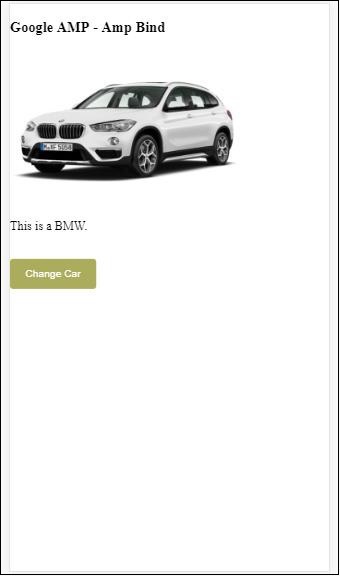
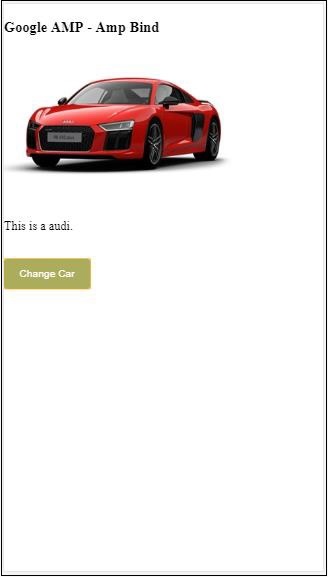
点击按钮可查看汽车图像的变化以及下方的文本。
Video 和 IFrame 上的 Amp-bind
我们现在将看到一个将更改 amp-iframe 和 amp-video src 的工作示例。
<!doctype html>
<html amp lang = "en">
   <head>
      <meta charset = "utf-8">
      <script async src = "https://cdn.ampproject.org/v0.js"></script>
      <title>Google AMP - Amp Bind</title>
      <link rel = "canonical" href =
         "http://example.ampproject.org/article-metadata.html">
      <meta name = "viewport" content = "width = device-width,
         minimum-scale = 1,initial-scale = 1">
      <style amp-boilerplate>
         body{
            -webkit-animation:
            -amp-start 8s steps(1,end) 0s 1 normal both;-moz-animation:
            -amp-start 8s steps(1,end) 0s 1 normal both;-ms-animation:
            -amp-start 8s steps(1,end) 0s 1 normal both;animation:
            -amp-start 8s steps(1,end) 0s 1 normal both
         }
         @-webkit-keyframes
         -amp-start{from{visibility:hidden}to{visibility:visible}}@-moz-keyframes
         -amp-start{from{visibility:hidden}to{visibility:visible}}@-ms-keyframes
         -amp-start{from{visibility:hidden}to{visibility:visible}}@-o-keyframes
         -amp-start{from{visibility:hidden}to{visibility:visible}}@keyframes
         -amp-start{from{visibility:hidden}to{visibility:visible}}
      </style>
      <noscript>
         <style amp-boilerplate>
            body{
               -webkit-animation:none;
               -moz-animation:none;
               -ms-animation:none;
               animation:none
            }
         </style>
      </noscript>
      <script async custom-element = "amp-bind" src =
         "https://cdn.ampproject.org/v0/amp-bind-0.1.js"></script>
      <script async custom-element = "amp-video" src =
         "https://cdn.ampproject.org/v0/amp-video-0.1.js"></script>
      <script async custom-element = "amp-iframe" src =
         "https://cdn.ampproject.org/v0/amp-iframe-0.1.js"></script>
      <style amp-custom>
         button{
            background-color: #ACAD5C;
            color: white;
            padding: 12px 20px;
            border: none;
            border-radius: 4px;
            cursor: pointer;
            float: left;
         }
      </style>
   </head>
   <body>
      <h3>Google AMP - Amp Bind</h3>
      <button on = "tap:AMP.setState({currentlist: 'list1'})">
      Click Here
      </button>
      <br/>
      <br/>
      <amp-state id = "myList">
         <script type = "application/json">
            {
               "currentlist" : "",
               "list1": {
                  "url": "video/m.mp4",
                  "style": "greenBackground",
                  "iframeurl":"https://maps.google.com/maps?q=hyderabad&t=&z=13&ie=UTF8&iwloc=&output=embed"
               }
            }
         </script>
      </amp-state>
      <h3>AMP - IFRAME</h3>
      <amp-iframe
         width = "600"
         title = "Google map"
         height = "400"
         layout = "responsive"
         sandbox = "allow-scripts allow-same-origin allow-popups"
         frameborder = "0"
         src = "https://maps.google.com/maps?q=telangana&t=&z=13&ie=UTF8&iwloc=&output=embed"
         [src] = "myList[currentlist].iframeurl">
         <amp-img
            layout = "fill"
            src = "images/loading.jpg"
            placeholder
            >
         /amp-img>
      </amp-iframe>
      <h3>AMP - VIDEO</h3>
      <amp-video
         id = "amp-video"
         src = "video/samplevideo.mp4"
         layout="responsive"
         [src] = "myList[currentlist].url"
         width = "300"
         height = "170" autoplay controls>
      </amp-video>
   </body>
</html>
Note that here we have used amp-state with iframesrc and video src.
<amp-state id = "myList">
   <script type = "application/json">
      {
         "currentlist" : "",
         "list1": {
            "url": "video/m.mp4",
            "style": "greenBackground",
            "iframeurl":"
            https://maps.google.com/maps?q=hyderabad&t=&z=13&ie=UTF8&iwloc=&output=embed"
         }
      }
   </script>
</amp-state>
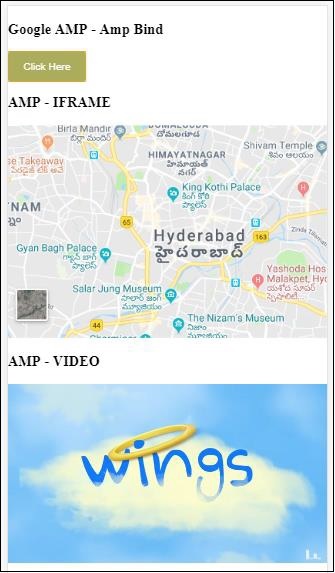
currentlist 设置为空,点击按钮后,它将设置为 list1。currentlist 变量用于 iframe 和视频的 src,如下所示 −
<amp-iframe width="600"
   title = "Google map"
   height = "400"
   layout = "responsive"
   sandbox = "allow-scripts allow-same-origin allow-popups"
   frameborder = "0" src = "https://maps.google.com/maps?q=telangana&t=&z=13&ie=UTF8&iwloc=&output=embed"
   [src] = "myList[currentlist].iframeurl">
      <amp-img layout = "fill" src = "images/loading.jpg" placeholder>
      </amp-img>
</amp-iframe>
<amp-video id = "amp-video" src = "video/samplevideo.mp4"
   layout = "responsive" [src] = "myList[currentlist].url" width = "300"
   height = "170" autoplay controls>
</amp-video>
输出
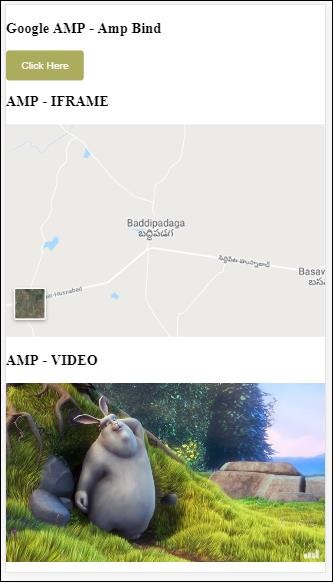
点击按钮查看视频和 iframe src 的变化。
Amp-bind 与 amp-lightbox
现在,让我们看看 binding 和 amp-lightbox 一起使用时的工作原理。
示例
<!doctype html>
<html amp lang = "en">
   <head>
      <meta charset = "utf-8">
      <script async src="https://cdn.ampproject.org/v0.js"></script>
      <title>Google AMP - Amp Bind</title>
      <link rel = "canonical" href =
         "http://example.ampproject.org/article-metadata.html">
      <meta name = "viewport" content = "width = device-width,
         minimum-scale = 1,initial-scale = 1">
      <style amp-boilerplate>
         body{
            -webkit-animation:
            -amp-start 8s steps(1,end) 0s 1 normal both;-moz-animation:
            -amp-start 8s steps(1,end) 0s 1 normal both;-ms-animation:
            -amp-start 8s steps(1,end) 0s 1 normal both;animation:
            -amp-start 8s steps(1,end) 0s 1 normal both
         }
         @-webkit-keyframes
         -amp-start{from{visibility:hidden}to{visibility:visible}}@-moz-keyframes
         -amp-start{from{visibility:hidden}to{visibility:visible}}@-ms-keyframes
         -amp-start{from{visibility:hidden}to{visibility:visible}}@-o-keyframes
         -amp-start{from{visibility:hidden}to{visibility:visible}}@keyframes
         -amp-start{from{visibility:hidden}to{visibility:visible}}
      </style>
      <noscript>
         <style amp-boilerplate>
            body{
               -webkit-animation:none;
               -moz-animation:none;
               -ms-animation:none;
               animation:none
            }
         </style>
      </noscript>
      <script async custom-element = "amp-bind" src =
         "https://cdn.ampproject.org/v0/amp-bind-0.1.js"></script>
      <script async custom-element = "amp-lightbox" src =
         "https://cdn.ampproject.org/v0/amp-lightbox-0.1.js"></script>
      <style amp-custom>
         button{
            background-color: #ACAD5C;
            color: white;
            padding: 12px 20px;
            border: none;
            border-radius: 4px;
            cursor: pointer;
            float: left;
         }
         .lightbox {
            background: rgba(211,211,211,0.8);
            width: 100%;
            height: 100%;
            position: absolute;
            display: flex;
            align-items: center;
            justify-content: center;
         }
      </style>
   </head>
   <body>
      <h3>Google AMP - Amp Bind</h3>
      <button on = "tap:AMP.setState({displaylightbox: true})">
      Click Here
      </button>
      <br/>
      <br/>
      <h3>AMP - Lightbox</h3>
      <amp-lightbox
         id = "my-lightbox"
         [open] = "displaylightbox"
         layout = "nodisplay"
         close-button>
         <div class = "lightbox" on = "tap:AMP.setState({displaylightbox: false})">
            <amp-img alt = "Beautiful Flower"
               src = "images/loreal.gif"
               width = "246"
               height = "205">
            </amp-img>
         </div>
      </amp-lightbox>
   </body>
</html>
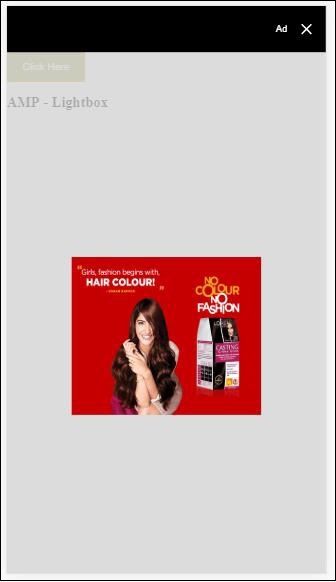
要在 amp-lightbox 上使用绑定,我们在 amp-lightbox 上使用 [open],如下所示 −
<amp-lightbox id = "my-lightbox" [open] = "displaylightbox"
   layout = "nodisplay" close-button>
   <div class = "lightbox" on="tap:AMP.setState({displaylightbox: false})">
      <amp-img alt = "Beautiful Flower"
         src = "images/loreal.gif"
         width = "246"
         height = "205">
      </amp-img>
   </div>
</amp-lightbox>
[open] = "displaylightbox" 是一个变量状态,单击按钮和点击灯箱 div 时会更改为 true/false −
<button on = "tap:AMP.setState({displaylightbox: true})">
   Click Here
</button>

<div class = "lightbox" on = "tap:AMP.setState({displaylightbox: false})">
   <amp-img alt = "Beautiful Flower"
      src = "images/loreal.gif"
      width = "246"
      height = "205">
   </amp-img>
</div>
输出
Amp 绑定到输入元素
让我们借助如图所示的工作示例了解 amp 绑定到输入元素的工作原理 −
<!doctype html>
<html amp lang = "en">
   <head>
      <meta charset = "utf-8">
      <script async src = "https://cdn.ampproject.org/v0.js"></script>
      <title>Google AMP - Amp Bind</title>
      <link rel = "canonical" href=
         "http://example.ampproject.org/article-metadata.html">
      <meta name = "viewport" content = "width = device-width,
         minimum-scale = 1,initial-scale = 1">
      <style amp-boilerplate>
         body{
            -webkit-animation:
            -amp-start 8s steps(1,end) 0s 1 normal both;-moz-animation:
            -amp-start 8s steps(1,end) 0s 1 normal both;-ms-animation:
            -amp-start 8s steps(1,end) 0s 1 normal both;animation:
            -amp-start 8s steps(1,end) 0s 1 normal both
         }
         @-webkit-keyframes
         -amp-start{from{visibility:hidden}to{visibility:visible}}@-moz-keyframes
         -amp-start{from{visibility:hidden}to{visibility:visible}}@-ms-keyframes
         -amp-start{from{visibility:hidden}to{visibility:visible}}@-o-keyframes
         -amp-start{from{visibility:hidden}to{visibility:visible}}@keyframes
         -amp-start{from{visibility:hidden}to{visibility:visible}}
      </style>
      <noscript>
      <style amp-boilerplate>
         body{
            -webkit-animation:none;
            -moz-animation:none;
            -ms-animation:none;
            animation:none
         }
      </style>
      <noscript>
      <script async custom-element = "amp-bind"
         src = "https://cdn.ampproject.org/v0/amp-bind-0.1.js">
         <script>
         <script async custom-element = "amp-lightbox"
            src = "https://cdn.ampproject.org/v0/amp-lightbox-0.1.js">
      </script>
      <style amp-custom>
         button{
            background-color: #ACAD5C;
            color: white;
            padding: 12px 20px;
            border: none;
            border-radius: 4px;
            cursor: pointer;
            float: left;
         }
         .lightbox {
            background: rgba(211,211,211,0.8);
            width: 100%;
            height: 100%;
            position: absolute;
            display: flex;
            align-items: center;
            justify-content: center;
         }
         #txtname{
            width: 100%;
            padding: 12px 20px;
            margin: 8px 0;
            display: inline-block;
            border: 1px solid #ccc;
            border-radius: 4px;
            box-sizing: border-box;
         }
         div {
            font-size:25px;
         }
      </style>
   </head>
   <body>
      <h3>Google AMP - Amp Bind</h3>
      <button on = "tap:AMP.setState({displaylightbox: true})">
         Click Here
      </button>
      <br/>
      <br/>
      <h3>
         AMP - Input Element
      <h3>
      <input id = "txtname" placeholder = "Type here"
         on = "input-throttled:AMP.setState({name: event.value})">
      <div [text] = "name">
      </div>
   </body>
</html>
输出
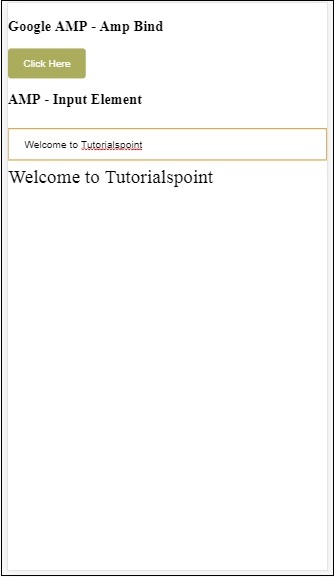
文本框内输入的数据显示在底部。可以通过更改输入事件上的状态变量 name 来实现,如图所示 −
<input id = "txtname" placeholder = "Type here" on =
"input-throttled:AMP.setState({name: event.value})">
<div [text] = "name">
</div>

