Kivy - 设置
"kivy.uix.settings"模块包含一个非常有用的功能,可让您处理 Kivy 安装环境的设置参数。您可以在应用程序窗口上打开"设置"面板并修改任何配置标记。
安装 Kivy 软件时,它会创建一个配置文件,其中包含各种参数标记及其默认值。该文件名为"config.ini",存储在由 KIVY_HOME 环境变量标识的目录中。
在 Windows 机器上 − 该文件存储在 C:\Users\user\.kivy\config.ini。
在 Linux 上 − /home/user/.kivy/config.ini。
在 macOS 上 − /Users/user/.kivy/config.ini。
在Android上 − /data/data/org.kivy.launcher/files/.kivy/config.ini。
在iOS上 − <HOME_DIRECTORY>/Documents/.kivy/config.ini。
要打开设置面板,请调用 App 类的 open_settings() 方法,通常响应 GUI 上的 on_press 事件(或任何其他事件)。
def onpress(self, instance):
    app.open_settings()
我们从一个简单的 Kivy 应用程序开始,该应用程序在窗口上安装了一个按钮。当按下按钮时,它会调用 onpress() 方法来显示 Kivy 设置面板。
class HelloApp(App):
   def onpress(self, instance):
      app.open_settings()
   def build(self):
      b1=Button(
         text='Click Here', font_size=50,
         on_press=self.onpress
      )
      return b1

app = HelloApp()
app.run()
应用程序运行后,点击按钮进入设置面板。
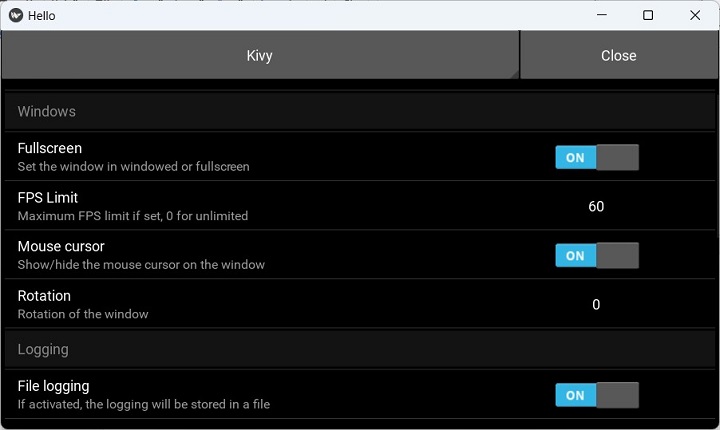
此处显示的设置与您在 config.ini 文件中看到的设置相同。尝试更改任何配置标记的值,您将看到对配置文件所做的更改。
有几种可用的设置面板布局。
Settings − 在左侧显示带有侧边栏的设置,以便在 json 面板之间切换。
SettingsWithSidebar − Settings 的简单子类。
SettingsWithSpinner − 在顶部显示带有微调器的设置,可用于在 json 面板之间切换。这是默认设置。
SettingsWithTabbedPanel − 将 json 面板显示为 TabbedPanel 中的单独选项卡。
SettingsWithNoMenu − 显示单个 json 面板,无法切换到其他面板,也没有关闭按钮。
要使用 SeetingsWithSidebar 布局,请从 kivy.uix.settings 模块导入它,并将其指定为 App 类的 settings_cls 参数的值。
from kivy.uix.settings import SettingsWithSidebar
class HelloApp(App):
   def onpress(self, instance):
      app.open_settings()
   def build(self):
      self.settings_cls = SettingsWithSidebar
      b1=Button(text='Click Here', font_size=50, on_press=self.onpress)
      return b1
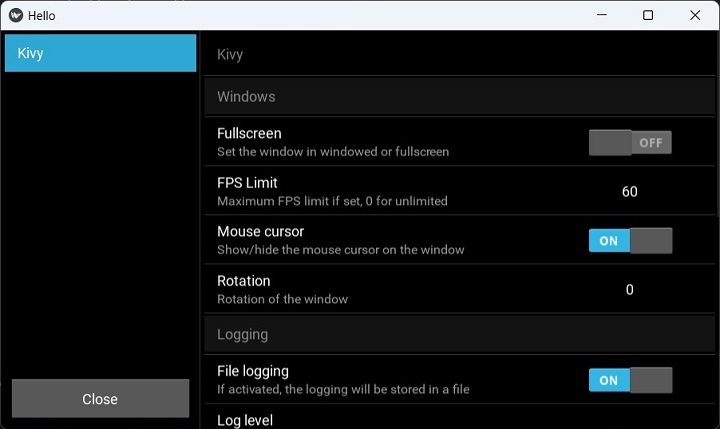
窗口现在提供了一个侧边栏,用于在设置面板之间切换。
创建新面板
现在,您只有一个名为 Kivy 的面板,显示 Kivy 配置的默认设置。您可以添加一个新面板来定义应用程序的设置。您需要两样东西 −
具有默认值的 ConfigParser 实例。
JSON 对象。
您必须创建和处理 ConfigParser 对象,以告诉 kivy 的配置解析器在配置文件中存储哪些设置。SettingsPanel 将从中读取值。这些设置的默认值由 setdefaults 为 JSON 对象中的所有部分/键指定。
让我们添加 build_config 方法,为按钮的文本和 font_size 属性提供默认值。
def build_config(self, config):
	config.setdefaults('My Button', {'text': 'Hello Kivy, 'font_size': 20})
build_settings() 方法从代码中的 JSON 对象在配置中构建一个新面板。
本例中使用的 JSON 对象是 −
json = '''
[
   {
      "type": "string",
      "title": "Button text",
      "desc": "text on the button",
      "section": "My Button",
      "key": "text"
   },
   {
      "type": "numeric",
      "title": "Button font size",
      "desc": "font size",
      "section": "My Button",
      "key": "font_size"
   }
]
要根据此 JSON 对象的定义添加新面板,请定义 build_settings() 方法 −
def build_settings(self, settings):
	settings.add_json_panel('My Button', self.config, data=json)
就这样。打开设置时,您应该会看到添加了一个新的 My Button 面板。
示例
下面给出了完整代码 −
from kivy.app import App
from kivy.uix.button import Button
from kivy.core.window import Window
from kivy.uix.settings import SettingsWithSidebar

Window.size = (720,350)
json = '''
[
   {
      "type": "string",
      "title": "Button text",
      "desc": "text on the button",
      "section": "My Button",
      "key": "text"
   },
   {
      "type": "numeric",
      "title": "Button font size",
      "desc": "font size",
      "section": "My Button",
      "key": "font_size"
   }
]
'''
class MyApp(App):
   def onpress(self, instance):
      app.open_settings()

   def build(self):
      self.settings_cls = SettingsWithSidebar
      self.btn = Button(on_press=self.onpress)
      self.btn.text = self.config.get('My Button', 'text')
      self.btn.font_size = float(self.config.get('My Button', 'font_size'))
      return self.btn

   def build_config(self, config):
      config.setdefaults(
         'My Button', {'text': 'Hello Python', 'font_size': 20}
      )

   def build_settings(self, settings):
      settings.add_json_panel('My Button', self.config, data=json)

   def on_config_change(self, config, section, key, value):
      if section == "My Button":
         if key == "text":
            self.btn.text = value
         elif key == 'font_size':
            self.btn.font_size = float(value)
app=MyApp()
app.run()
输出
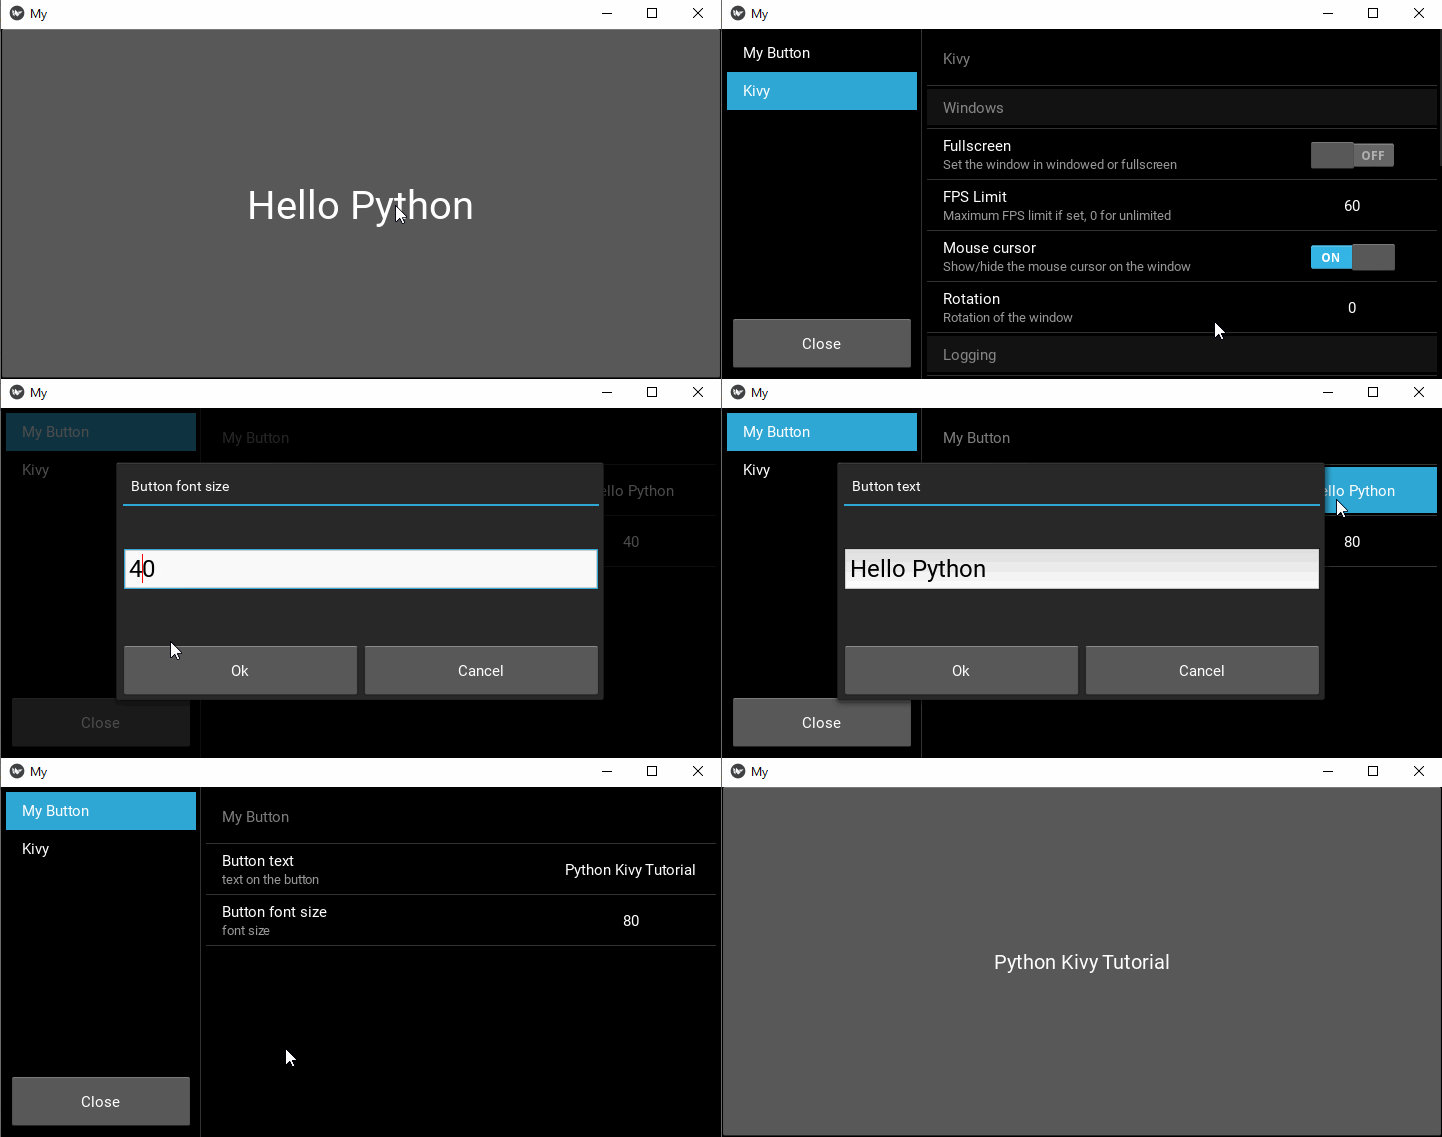
当您打开设置面板时,您现在会看到包含两个设置的"我的按钮面板"。 根据需要修改这些值。 最后,关闭设置对话框,然后返回查看更改。