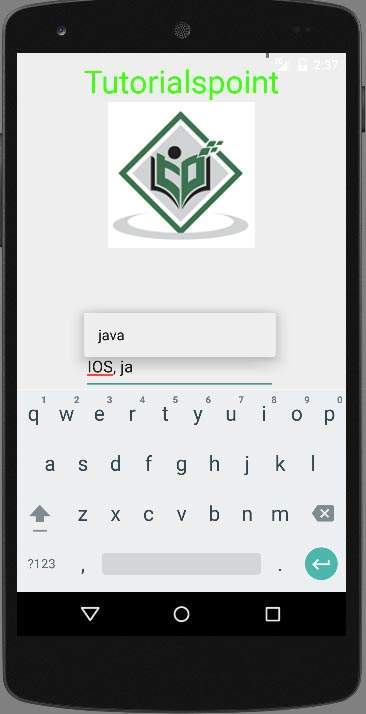
Android - 自动完成
如果你想获得补全建议,当你输入一个可编辑的文本字段时,你可以通过 AutoCompleteTextView 做到这一点。 它会在用户键入时自动提供建议。 建议列表显示在下拉菜单中,用户可以从中选择一个项目来替换编辑框的内容。
为了使用 AutoCompleteTextView,您必须首先在 xml 中创建一个 AutoCompleteTextView 字段。 它的语法如下。
<AutoCompleteTextView
   android:id="@+id/autoCompleteTextView1"
   android:layout_width="wrap_content"
   android:layout_height="wrap_content"
   android:layout_alignParentTop="true"
   android:layout_centerHorizontal="true"
   android:layout_marginTop="65dp"
   android:ems="10" >
之后,您必须在 java 中获取此 textview 的引用。 它的语法如下。
private AutoCompleteTextView actv;
actv = (AutoCompleteTextView) findViewById(R.id.autoCompleteTextView1);
您需要做的下一件事是指定要显示的建议项目列表。 您可以在 java 或 strings.xml 中将列表项指定为字符串数组。 它的语法如下。
String[] countries = getResources().getStringArray(R.array.list_of_countries);
ArrayAdapter<String> adapter = new ArrayAdapter<String>
   (this,android.R.layout.simple_list_item_1,countries);
actv.setAdapter(adapter);
数组适配器类负责在文本字段的建议框中将数据显示为列表。 setAdapter 方法用于设置 autoCompleteTextView 的适配器。 除了这些方法之外,下面列出了自动完成的其他方法。
| 序号 | 方法 & 描述 |
|---|---|
| 1 | getAdapter() 此方法返回用于自动完成的可过滤列表适配器 |
| 2 |
getCompletionHint() 此方法返回显示在匹配列表底部的可选提示文本 |
| 3 | getDropDownAnchor() 此方法返回返回自动完成下拉列表锚定到的视图的 id。 |
| 4 | getListSelection() 此方法返回下拉视图选择的位置,如果有的话 |
| 5 |
isPopupShowing() 此方法指示是否显示弹出菜单 |
| 6 |
setText(CharSequence text, boolean filter) 此方法设置文本,但它可以禁用过滤 |
| 7 |
showDropDown() 此方法在屏幕上显示下拉菜单。 |
示例
下面的示例演示了 AutoCompleteTextView 类的使用。 它创建了一个基本应用程序,允许您输入并在您的设备上显示建议。
要试验此示例,您需要在实际设备或模拟器中运行它。
| 步骤 | 描述 |
|---|---|
| 1 | 您将使用 Android Studio 在包 com.example.sairamkrishna.myapplication 下创建一个 Android 应用程序。 |
| 2 | 修改 src/MainActivity.java 文件添加 AutoCompleteTextView 代码 |
| 3 | 修改布局 XML 文件 res/layout/activity_main.xml 如果需要,添加任何 GUI 组件。 |
| 4 | 运行应用程序并选择一个正在运行的 android 设备并在其上安装应用程序并验证结果。 |
这是src/MainActivity.java的内容
package com.example.sairamkrishna.myapplication;

import android.app.Activity;
import android.content.Context;

import android.media.AudioManager;
import android.media.MediaPlayer;
import android.media.MediaRecorder;

import android.os.Bundle;
import android.os.Environment;

import android.view.Menu;
import android.view.MenuItem;
import android.view.View;
import android.view.animation.Animation;
import android.view.animation.AnimationUtils;

import android.widget.ArrayAdapter;
import android.widget.AutoCompleteTextView;
import android.widget.Button;
import android.widget.EditText;
import android.widget.ImageView;
import android.widget.MultiAutoCompleteTextView;
import android.widget.Toast;
import java.io.IOException;

public class MainActivity extends Activity {
   AutoCompleteTextView text;
   MultiAutoCompleteTextView text1;
   String[] languages={"Android ","java","IOS","SQL","JDBC","Web services"};

   @Override
   protected void onCreate(Bundle savedInstanceState) {
      super.onCreate(savedInstanceState);
      setContentView(R.layout.activity_main);

      text=(AutoCompleteTextView)findViewById(R.id.autoCompleteTextView1);
      text1=(MultiAutoCompleteTextView)findViewById(R.id.multiAutoCompleteTextView1);

      ArrayAdapter adapter = new
         ArrayAdapter(this,android.R.layout.simple_list_item_1,languages);

      text.setAdapter(adapter);
      text.setThreshold(1);

      text1.setAdapter(adapter);
      text1.setTokenizer(new MultiAutoCompleteTextView.CommaTokenizer());
   }
}
这是 activity_main.xml 的内容
这里 abc 表示关于 tutorialspoint 的 logo
<xml version="1.0" encoding="utf-8"?>
<RelativeLayout
   xmlns:android="http://schemas.android.com/apk/res/android"
   xmlns:tools="http://schemas.android.com/tools"
   android:layout_width="match_parent"
   android:layout_height="match_parent"
   android:paddingLeft="@dimen/activity_horizontal_margin"
   android:paddingRight="@dimen/activity_horizontal_margin"
   android:paddingTop="@dimen/activity_vertical_margin"
   android:paddingBottom="@dimen/activity_vertical_margin"
   tools:context=".MainActivity">

   <TextView
      android:layout_width="wrap_content"
      android:layout_height="wrap_content"
      android:text="Android Auto Complete"
      android:id="@+id/textView"
      android:textSize="30dp"
      android:layout_alignParentTop="true"
      android:layout_alignParentRight="true"
      android:layout_alignParentEnd="true" />

   <TextView
      android:layout_width="wrap_content"
      android:layout_height="wrap_content"
      android:text="Tutorialspoint"
      android:id="@+id/textView2"
      android:textColor="#ff3eff0f"
      android:textSize="35dp"
      android:layout_below="@+id/textView"
      android:layout_centerHorizontal="true" />

   <ImageView
      android:layout_width="wrap_content"
      android:layout_height="wrap_content"
      android:id="@+id/imageView"
      android:src="@drawable/logo"
      android:layout_below="@+id/textView2"
      android:layout_alignLeft="@+id/textView2"
      android:layout_alignStart="@+id/textView2"
      android:layout_alignRight="@+id/textView2"
      android:layout_alignEnd="@+id/textView2" />

   <AutoCompleteTextView
      android:id="@+id/autoCompleteTextView1"
      android:layout_width="wrap_content"
      android:layout_height="wrap_content"
      android:ems="10"
      android:layout_below="@+id/imageView"
      android:layout_alignLeft="@+id/imageView"
      android:layout_alignStart="@+id/imageView"
      android:layout_marginTop="72dp"
      android:hint="AutoComplete TextView">
      <requestFocus />
   </AutoCompleteTextView>

   <MultiAutoCompleteTextView
      android:id="@+id/multiAutoCompleteTextView1"
      android:layout_width="wrap_content"
      android:layout_height="wrap_content"
      android:ems="10"
      android:layout_below="@+id/autoCompleteTextView1"
      android:layout_alignLeft="@+id/autoCompleteTextView1"
      android:layout_alignStart="@+id/autoCompleteTextView1"
      android:hint="Multi Auto Complete " />

</RelativeLayout>
这是 Strings.xml 的内容
<resources>
   <string name="app_name">My Application</string>
</resources>
这是 AndroidManifest.xml 的内容
<?xml version="1.0" encoding="utf-8"?>
<manifest xmlns:android="http://schemas.android.com/apk/res/android"
   package="com.example.sairamkrishna.myapplication" >

   <application
      android:allowBackup="true"
      android:icon="@drawable/ic_launcher"
      android:label="@string/app_name"
      android:theme="@style/AppTheme" >

      <activity
         android:name="com.example.sairamkrishna.myapplication.MainActivity"
         android:label="@string/app_name" >

         <intent-filter>
            <action android:name="android.intent.action.MAIN" />
            <category android:name="android.intent.category.LAUNCHER" />
         </intent-filter>

      </activity>

   </application>
</manifest>
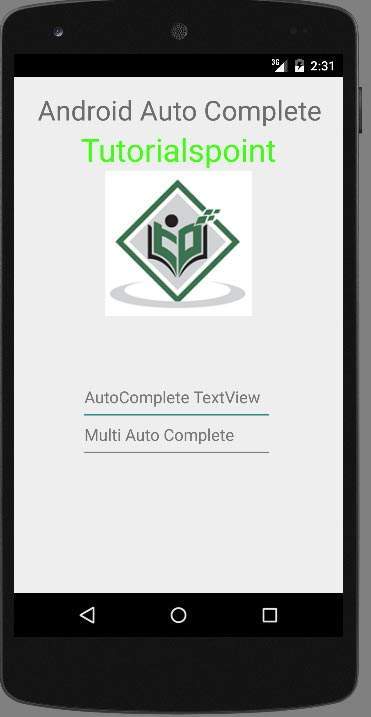
让我们尝试运行您的应用程序。 我假设您在进行环境设置时已经连接了您的 AVD。要从 Android Studio 运行应用程序,请打开项目的一个活动文件,然后单击工具栏中的 Run  图标。Android Studio 将在您的 AVD 中安装此应用程序,您的 AVD 将显示以下屏幕。
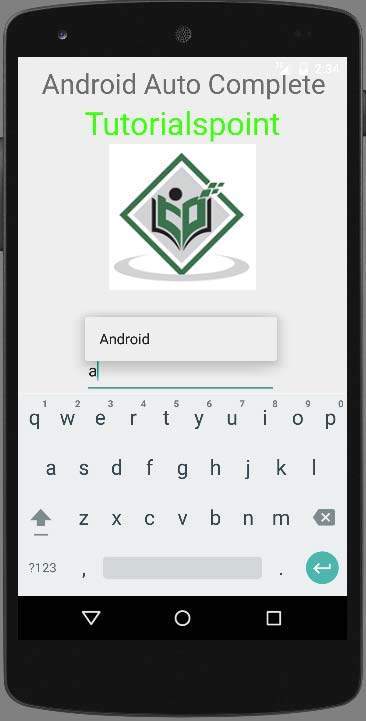
现在只需在文本视图中输入以查看语言的建议。 因为我只输入了一个作为a 的字母,它向我显示了语言的建议。
multiAutoCompleteTextView 不仅展示了一个单词的建议,还展示了整个文本的建议。 写完第一个词后,当我开始写第二个词时,它会向我显示建议。 这可以在下图中显示。