Android - RSS 阅读器
RSS 代表真正简单的联合。 RSS 是一种与用户共享您的网站更新和内容的简单方法,这样用户可能不必每天访问您的网站以获取任何类型的更新。
RSS 示例
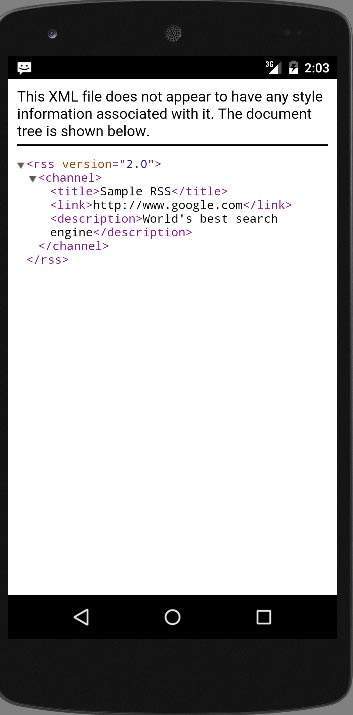
RSS 是由网站创建的带有 .xml 扩展名的文档。 您可以轻松解析此文档并将其显示给应用程序中的用户。 RSS 文档如下所示。
<rss version="2.0">
   <channel>
      <title>Sample RSS</title>
      <link>http://www.google.com</link>
      <description>World's best search engine</description>
   </channel>
</rss>
RSS 元素
如上的 RSS 文档具有以下元素。
| 序号 | 组件 & 描述 |
|---|---|
| 1 |
channel 此元素用于描述 RSS 提要 |
| 2 |
title 定义频道的标题 |
| 3 |
link 定义到频道的超链接 |
| 4 |
description 描述频道 |
解析 RSS
解析 RSS 文档更像是解析 XML。 那么现在让我们看看如何解析 XML 文档。
为此,我们将创建 XMLPullParser 对象,但为了创建它,我们将首先创建 XmlPullParserFactory 对象,然后调用其 newPullParser() 方法来创建 XMLPullParser。 它的语法如下 −
private XmlPullParserFactory xmlFactoryObject = XmlPullParserFactory.newInstance();
private XmlPullParser myparser = xmlFactoryObject.newPullParser();
下一步涉及为包含 XML 的 XmlPullParser 指定文件。 它可以是一个文件,也可以是一个流。 在我们的例子中,它是一个流。它的语法如下所示 −
myparser.setInput(stream, null);
最后一步是解析 XML。 XML 文件由 events 、 Name 、 Text 、 AttributesValue 等组成。 所以 XMLPullParser 有一个单独的函数来解析 XML 文件的每个组件。 它的语法如下 −
int event = myParser.getEventType();
while (event != XmlPullParser.END_DOCUMENT)  {
   String name=myParser.getName();

   switch (event){
      case XmlPullParser.START_TAG:
      break;

      case XmlPullParser.END_TAG:
      if(name.equals("temperature")){
         temperature = myParser.getAttributeValue(null,"value");
      }
      break;
   }
   event = myParser.next();
}
getEventType 方法返回发生的事件类型。 例如:文档开始,标签开始等。getName 方法返回标签的名称,因为我们只对温度感兴趣,所以我们只检查条件语句,如果我们得到温度标签,我们调用方法 getAttributeValue 返回温度标签的值。
除了这些方法之外,该类还提供了其他方法来更好地解析 XML 文件。 下面列出了这些方法 −
| 序号 | 方法 & 描述 |
|---|---|
| 1 |
getAttributeCount() 这个方法只是返回当前开始标签的属性数量。 |
| 2 |
getAttributeName(int index) 此方法返回由索引值指定的属性的名称。 |
| 3 |
getColumnNumber() 此方法返回返回当前列号,从 0 开始。 |
| 4 |
getDepth() 此方法返回返回元素的当前深度。 |
| 5 |
getLineNumber() 返回当前行号,从 1 开始。 |
| 6 |
getNamespace() 此方法返回当前元素的名称空间 URI。 |
| 7 |
getPrefix() 此方法返回当前元素的前缀。 |
| 8 |
getName() 此方法返回标签的名称。 |
| 9 |
getText() 此方法返回该特定元素的文本。 |
| 10 |
isWhitespace() 此方法检查当前 TEXT 事件是否仅包含空白字符。 |
示例
这是一个演示 XMLPullParser 类使用的示例。 它创建了一个基本的 Parsing 应用程序,允许您解析 /android/sampleXML.xml 处的 RSS 文档,然后显示结果。
要试验这个示例,您可以在实际设备或模拟器中运行它。
| 步骤 | 描述 |
|---|---|
| 1 | 您将使用 Android Studio 在 com.example.sairamkrishna.myapplication 包下创建一个 Android 应用程序。 |
| 2 | 修改 src/MainActivity.java 文件添加必要的代码。 |
| 3 | 修改 res/layout/activity_main 以添加相应的 XML 组件。 |
| 4 | 在 src/HandleXML.java 下新建一个 java 文件来获取和解析 XML 数据。 |
| 5 | 在 src/second.java 下新建一个 java 文件,显示 XML 的结果 |
| 5 | 修改 AndroidManifest.xml 以添加必要的 Internet 权限。 |
| 6 | 运行应用程序并选择一个正在运行的 android 设备并在其上安装应用程序并验证结果。 |
以下是修改后的主活动文件src/MainActivity.java的内容。
package com.example.sairamkrishna.myapplication;

import android.app.Activity;
import android.content.Intent;
import android.os.Bundle;
import android.view.View;

import android.widget.Button;
import android.widget.EditText;

public class MainActivity extends Activity {
   EditText title,link,description;
   Button b1,b2;
   private String finalUrl="http://tutorialspoint.com/android/sampleXML.xml";
   private HandleXML obj;

   @Override
   protected void onCreate(Bundle savedInstanceState) {
      super.onCreate(savedInstanceState);
      setContentView(R.layout.activity_main);

      title = (EditText) findViewById(R.id.editText);
      link = (EditText) findViewById(R.id.editText2);
      description = (EditText) findViewById(R.id.editText3);

      b1=(Button)findViewById(R.id.button);
      b2=(Button)findViewById(R.id.button2);
      b1.setOnClickListener(new View.OnClickListener() {
         @Override
         public void onClick(View v) {
            obj = new HandleXML(finalUrl);
            obj.fetchXML();

            while(obj.parsingComplete);
            title.setText(obj.getTitle());
            link.setText(obj.getLink());
            description.setText(obj.getDescription());
         }
      });

      b2.setOnClickListener(new View.OnClickListener() {
         @Override
         public void onClick(View v) {
            Intent in=new Intent(MainActivity.this,second.class);
            startActivity(in);
         }
      });
   }

}
以下是java文件src/HandleXML.java的内容。
package com.example.rssreader;

import java.io.InputStream;
import java.net.HttpURLConnection;
import java.net.URL;

import org.xmlpull.v1.XmlPullParser;
import org.xmlpull.v1.XmlPullParserFactory;

import android.util.Log;

public class HandleXML {
   private String title = "title";
   private String link = "link";
   private String description = "description";
   private String urlString = null;
   private XmlPullParserFactory xmlFactoryObject;
   public volatile boolean parsingComplete = true;

   public HandleXML(String url){
      this.urlString = url;
   }

   public String getTitle(){
      return title;
   }

   public String getLink(){
      return link;
   }

   public String getDescription(){
      return description;
   }

   public void parseXMLAndStoreIt(XmlPullParser myParser) {
      int event;
      String text=null;

      try {
         event = myParser.getEventType();

         while (event != XmlPullParser.END_DOCUMENT) {
         String name=myParser.getName();

         switch (event){
            case XmlPullParser.START_TAG:
            break;

            case XmlPullParser.TEXT:
            text = myParser.getText();
            break;

            case XmlPullParser.END_TAG:

            if(name.equals("title")){
               title = text;
            }

            else if(name.equals("link")){
               link = text;
            }

            else if(name.equals("description")){
               description = text;
            }

            else{
            }

            break;
            }

            event = myParser.next();
            }

            parsingComplete = false;
            }

            catch (Exception e) {
               e.printStackTrace();
            }
         }

         public void fetchXML(){
            Thread thread = new Thread(new Runnable(){
               @Override
               public void run() {

               try {
               URL url = new URL(urlString);
               HttpURLConnection conn = (HttpURLConnection) url.openConnection();

               conn.setReadTimeout(10000 /* milliseconds */);
               conn.setConnectTimeout(15000 /* milliseconds */);
               conn.setRequestMethod("GET");
               conn.setDoInput(true);

               // Starts the query
               conn.connect();
               InputStream stream = conn.getInputStream();

               xmlFactoryObject = XmlPullParserFactory.newInstance();
               XmlPullParser myparser = xmlFactoryObject.newPullParser();

               myparser.setFeature(XmlPullParser.FEATURE_PROCESS_NAMESPACES, false);
               myparser.setInput(stream, null);

               parseXMLAndStoreIt(myparser);
               stream.close();
            }

            catch (Exception e) {
            }
         }
      });
      thread.start();
   }
}
在目录 java/second.java 下创建一个文件并命名为 second.java 文件
package com.example.sairamkrishna.myapplication;

import android.app.Activity;
import android.os.Bundle;
import android.webkit.WebView;

public class second extends Activity {
   @Override
   protected void onCreate(Bundle savedInstanceState) {
      super.onCreate(savedInstanceState);
      setContentView(R.layout.second_activity);
      WebView w1=(WebView)findViewById(R.id.webView);
      w1.loadUrl("http://tutorialspoint.com/android/sampleXML.xml");
   }
}
在 res/layout/second_activity.xml 处创建一个 xml 文件
<?xml version="1.0" encoding="utf-8"?>
<LinearLayout xmlns:android="http://schemas.android.com/apk/res/android"
   android:orientation="vertical" android:layout_width="match_parent"
   android:layout_height="match_parent">

   <WebView
      android:layout_width="match_parent"
      android:layout_height="match_parent"
      android:id="@+id/webView"
      android:layout_gravity="center_horizontal" />
</LinearLayout>
修改res/layout/activity_main.xml的内容如下 −
<?xml version="1.0" encoding="utf-8"?>
<RelativeLayout xmlns:android="http://schemas.android.com/apk/res/android"
   xmlns:tools="http://schemas.android.com/tools" android:layout_width="match_parent"
   android:layout_height="match_parent" android:paddingLeft="@dimen/activity_horizontal_margin"
   android:paddingRight="@dimen/activity_horizontal_margin"
   android:paddingTop="@dimen/activity_vertical_margin"
   android:paddingBottom="@dimen/activity_vertical_margin"
   tools:context=".MainActivity"
   android:transitionGroup="true">

   <TextView android:text="RSS example" android:layout_width="wrap_content"
      android:layout_height="wrap_content"
      android:id="@+id/textview"
      android:textSize="35dp"
      android:layout_alignParentTop="true"
      android:layout_centerHorizontal="true" />

   <TextView
      android:layout_width="wrap_content"
      android:layout_height="wrap_content"
      android:text="Tutorials point"
      android:id="@+id/textView"
      android:layout_below="@+id/textview"
      android:layout_centerHorizontal="true"
      android:textColor="#ff7aff24"
      android:textSize="35dp" />

   <ImageView
      android:layout_width="wrap_content"
      android:layout_height="wrap_content"
      android:id="@+id/imageView"
      android:src="@drawable/abc"
      android:layout_below="@+id/textView"
      android:layout_centerHorizontal="true"
      android:theme="@style/Base.TextAppearance.AppCompat" />

   <EditText
      android:layout_width="wrap_content"
      android:layout_height="wrap_content"
      android:id="@+id/editText"
      android:layout_below="@+id/imageView"
      android:hint="Tittle"
      android:textColorHint="#ff69ff0e"
      android:layout_alignParentRight="true"
      android:layout_alignParentEnd="true"
      android:layout_alignParentLeft="true"
      android:layout_alignParentStart="true" />

   <EditText
      android:layout_width="wrap_content"
      android:layout_height="wrap_content"
      android:id="@+id/editText2"
      android:layout_below="@+id/editText"
      android:layout_alignLeft="@+id/editText"
      android:layout_alignStart="@+id/editText"
      android:textColorHint="#ff21ff11"
      android:hint="Link"
      android:layout_alignRight="@+id/editText"
      android:layout_alignEnd="@+id/editText" />

   <EditText
      android:layout_width="wrap_content"
      android:layout_height="wrap_content"
      android:id="@+id/editText3"
      android:layout_below="@+id/editText2"
      android:layout_alignLeft="@+id/editText2"
      android:layout_alignStart="@+id/editText2"
      android:hint="Description"
      android:textColorHint="#ff33ff20"
      android:layout_alignRight="@+id/editText2"
      android:layout_alignEnd="@+id/editText2" />

   <Button
      android:layout_width="wrap_content"
      android:layout_height="wrap_content"
      android:text="Fetch"
      android:id="@+id/button"
      android:layout_below="@+id/editText3"
      android:layout_alignParentLeft="true"
      android:layout_alignParentStart="true"
      android:layout_toLeftOf="@+id/imageView"
      android:layout_toStartOf="@+id/imageView" />

   <Button
      android:layout_width="wrap_content"
      android:layout_height="wrap_content"
      android:text="Result"
      android:id="@+id/button2"
      android:layout_alignTop="@+id/button"
      android:layout_alignRight="@+id/editText3"
      android:layout_alignEnd="@+id/editText3" />

</RelativeLayout>
将 res/values/string.xml 修改为如下
<resources>
   <string name="app_name">My Application</string>
</resources>
这是默认的 AndroidManifest.xml。
<?xml version="1.0" encoding="utf-8"?>
<manifest xmlns:android="http://schemas.android.com/apk/res/android"
   package="com.example.sairamkrishna.myapplication" >
   <uses-permission android:name="android.permission.INTERNET"/>

   <application
      android:allowBackup="true"
      android:icon="@mipmap/ic_launcher"
      android:label="@string/app_name"
      android:theme="@style/AppTheme" >

      <activity
         android:name=".MainActivity"
         android:label="@string/app_name" >

         <intent-filter>
            <action android:name="android.intent.action.MAIN" />
            <category android:name="android.intent.category.LAUNCHER" />
         </intent-filter>

      </activity>

      <activity android:name=".second"></activity>
   </application>
</manifest>
让我们尝试运行您的应用程序。 我假设您在进行环境设置时已经创建了 AVD。要从 Android Studio 运行应用程序,请打开项目的活动文件之一,然后单击工具栏中的 Run  图标。 Android Studio 在您的 AVD 上安装应用程序并启动它,如果您的设置和应用程序一切正常,它将显示以下 Emulator 窗口 −
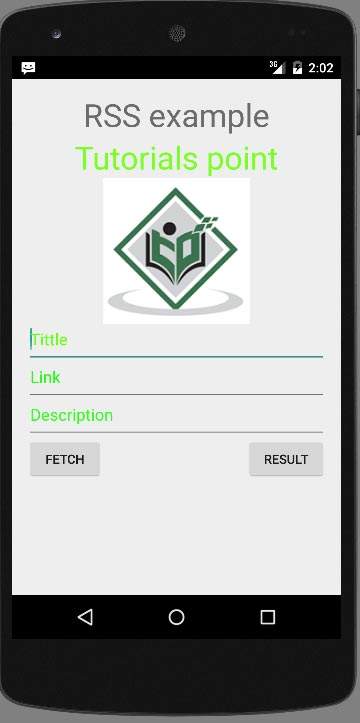
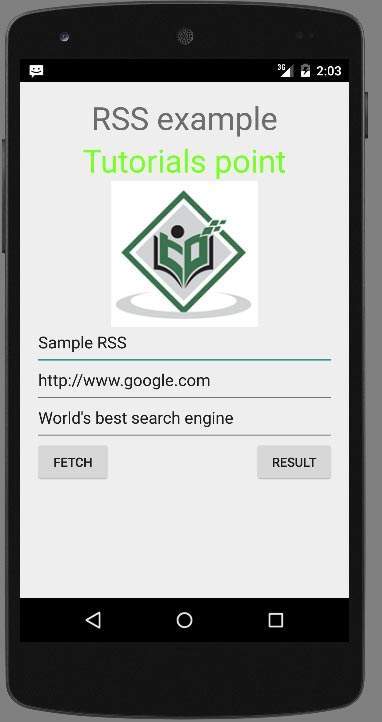
只需按下 Fetch Feed 按钮即可获取 RSS feed。 按下后,将出现以下屏幕,显示 RSS 数据。
只需按下结果按钮即可查看 XML,它位于 /android/sampleXML.xml