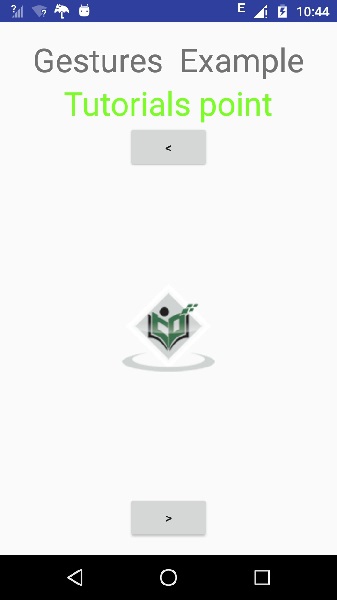
Android - 图像切换器
有时您不希望图像突然出现在屏幕上,而是希望在图像从一个图像转换到另一个图像时对其应用某种动画。 android 以 ImageSwitcher 的形式支持这一点。
图像切换器允许您通过图像在屏幕上的显示方式在图像上添加一些过渡。 为了使用图像切换器,您需要先定义它的 XML 组件。 它的语法如下 −
<ImageSwitcher
   android:id="@+id/imageSwitcher1"
   android:layout_width="wrap_content"
   android:layout_height="wrap_content"
   android:layout_centerHorizontal="true"
   android:layout_centerVertical="true" >
</ImageSwitcher>
现在我们在 java 文件中创建一个 Image Switcher 的实例并获取这个 XML 组件的引用。 它的语法如下 −
private ImageSwitcher imageSwitcher;
imageSwitcher = (ImageSwitcher)findViewById(R.id.imageSwitcher1);
接下来我们需要实现 ViewFactory 接口并实现返回 imageView 的未实现方法。 它的语法如下 −
imageSwitcher.setImageResource(R.drawable.ic_launcher);
imageSwitcher.setFactory(new ViewFactory() {
   public View makeView() {
      ImageView myView = new ImageView(getApplicationContext());
      return myView;
   }
}
您需要做的最后一件事是将动画添加到 ImageSwitcher。 需要通过 AnimationUtilities 类调用静态方法 loadAnimation 来定义 Animation 类的对象。 它的语法如下 −
Animation in = AnimationUtils.loadAnimation(this,android.R.anim.slide_in_left);
imageSwitcher.setInAnimation(in);
imageSwitcher.setOutAnimation(out);
setInAnimaton 方法设置对象在屏幕上的外观动画,而 setOutAnimation 则相反。 loadAnimation() 方法创建了一个动画对象。
除了这些方法之外,ImageSwitcher 类中还定义了其他方法。 它们定义如下 −
| 序号 | 方法 & 描述 |
|---|---|
| 1 |
setImageDrawable(Drawable drawable) 使用图像切换器设置图像。 图像以位图的形式传递 |
| 2 |
setImageResource(int resid) 使用图像切换器设置图像。 图片以整数id的形式传递 |
| 3 |
setImageURI(Uri uri) 使用图像切换器设置图像。 图片以URI的形式传递 |
| 4 |
ImageSwitcher(Context context, AttributeSet attrs) 返回一个图像切换器对象,该对象已经设置了方法中传递的一些属性 |
| 5 |
onInitializeAccessibilityEvent (AccessibilityEvent event) 使用有关作为事件源的此视图的信息初始化 AccessibilityEvent |
| 6 |
onInitializeAccessibilityNodeInfo (AccessibilityNodeInfo info) 使用有关此视图的信息初始化 AccessibilityNodeInfo |
示例
下面的示例演示了位图上的一些图像切换器效果。 它创建了一个基本应用程序,允许您查看图像上的动画效果。
要试验此示例,您需要在实际设备上运行它。
| 步骤 | 描述 |
|---|---|
| 1 | 您将使用 Android Studio IDE 在 com.example.sairamkrishna.myapplication 包下创建一个 Android 应用程序。 |
| 2 | 修改 src/MainActivity.java 文件添加必要的代码。 |
| 3 | 修改 res/layout/activity_main 以添加相应的 XML 组件 |
| 4 | 运行应用程序并选择一个正在运行的 android 设备并在其上安装应用程序并验证结果 |
以下是修改后的主活动文件src/MainActivity.java的内容。
下面代码中的 tp 和 abc 表示 tutorialspoint.com 的标志
package com.example.sairamkrishna.myapplication;

import android.app.Activity;
import android.app.ActionBar.LayoutParams;
import android.os.Bundle;
import android.view.View;

import android.widget.Button;
import android.widget.ImageSwitcher;
import android.widget.ImageView;
import android.widget.Toast;
import android.widget.ViewSwitcher.ViewFactory;

public class MainActivity extends Activity {
   private ImageSwitcher sw;
   private Button b1,b2;

   @Override
   protected void onCreate(Bundle savedInstanceState) {
      super.onCreate(savedInstanceState);
      setContentView(R.layout.activity_main);

      b1 = (Button) findViewById(R.id.button);
      b2 = (Button) findViewById(R.id.button2);

      sw = (ImageSwitcher) findViewById(R.id.imageSwitcher);
      sw.setFactory(new ViewFactory() {
         @Override
         public View makeView() {
            ImageView myView = new ImageView(getApplicationContext());
            myView.setScaleType(ImageView.ScaleType.FIT_CENTER);
            myView.setLayoutParams(new
               ImageSwitcher.LayoutParams(LayoutParams.WRAP_CONTENT,
                  LayoutParams.WRAP_CONTENT));
            return myView;
         }
      });

      b1.setOnClickListener(new View.OnClickListener() {
         @Override
         public void onClick(View v) {
            Toast.makeText(getApplicationContext(), "previous Image",
               Toast.LENGTH_LONG).show();
            sw.setImageResource(R.drawable.abc);
         }
      });

      b2.setOnClickListener(new View.OnClickListener() {
         @Override
         public void onClick(View v) {
            Toast.makeText(getApplicationContext(), "Next Image",
               Toast.LENGTH_LONG).show();
            sw.setImageResource(R.drawable.tp);
         }
      });
   }
}
以下是 res/layout/activity_main.xml 的修改内容。
<?xml version="1.0" encoding="utf-8"?>
<RelativeLayout
   xmlns:android="http://schemas.android.com/apk/res/android"
   xmlns:tools="http://schemas.android.com/tools"
   android:layout_width="match_parent"
   android:layout_height="match_parent"
   android:paddingLeft="@dimen/activity_horizontal_margin"
   android:paddingRight="@dimen/activity_horizontal_margin"
   android:paddingTop="@dimen/activity_vertical_margin"
   android:paddingBottom="@dimen/activity_vertical_margin"
   tools:context=".MainActivity">

   <TextView android:text="Gestures  Example"
      android:layout_width="wrap_content"
      android:layout_height="wrap_content"
      android:id="@+id/textview"
      android:textSize="35dp"
      android:layout_alignParentTop="true"
      android:layout_centerHorizontal="true" />

   <TextView
      android:layout_width="wrap_content"
      android:layout_height="wrap_content"
      android:text="Tutorials point"
      android:id="@+id/textView"
      android:layout_below="@+id/textview"
      android:layout_centerHorizontal="true"
      android:textColor="#ff7aff24"
      android:textSize="35dp" />

   <ImageSwitcher
      android:layout_width="wrap_content"
      android:layout_height="wrap_content"
      android:id="@+id/imageSwitcher"
      android:layout_below="@+id/textView"
      android:layout_centerHorizontal="true"
      android:layout_marginTop="168dp" />

   <Button
        android:layout_width="wrap_content"
        android:layout_height="wrap_content"
        android:text="@string/left"
        android:id="@+id/button"
        android:layout_below="@+id/textView"
        android:layout_centerHorizontal="true" />

   <Button
        android:layout_width="wrap_content"
        android:layout_height="wrap_content"
        android:text="@string/right"
        android:id="@+id/button2"
        android:layout_alignParentBottom="true"
        android:layout_alignLeft="@+id/button"
        android:layout_alignStart="@+id/button" />

</RelativeLayout>
以下是 Strings.xml 文件的内容。
<resources>
    <string name="app_name">My Application</string>
    <string name="left"><![CDATA[<]]></string>
    <string name="right"><![CDATA[>]]></string>
</resources>
以下是 AndroidManifest.xml 文件的内容。
<?xml version="1.0" encoding="utf-8"?>
<manifest xmlns:android="http://schemas.android.com/apk/res/android"
   package="com.example.sairamkrishna.myapplication"

   <application
      android:allowBackup="true"
      android:icon="@drawable/ic_launcher"
      android:label="@string/app_name"
      android:theme="@style/AppTheme" >

      <activity
         android:name="com.example.sairamkrishna.myapplication.MainActivity"
         android:label="@string/app_name" >

         <intent-filter>
            <action android:name="android.intent.action.MAIN" />
            <category android:name="android.intent.category.LAUNCHER" />
         </intent-filter>

      </activity>

   </application>
</manifest>
让我们尝试运行我们刚刚修改的应用程序。 我假设您在进行环境设置时已经创建了 AVD。 要从 Android Studio 运行应用程序,请打开项目的一个活动文件,然后单击工具栏中的 Run  图标。 Android Studio 在您的 AVD 上安装应用程序并启动它,如果您的设置和应用程序一切正常,它将显示以下 Emulator 窗口 −
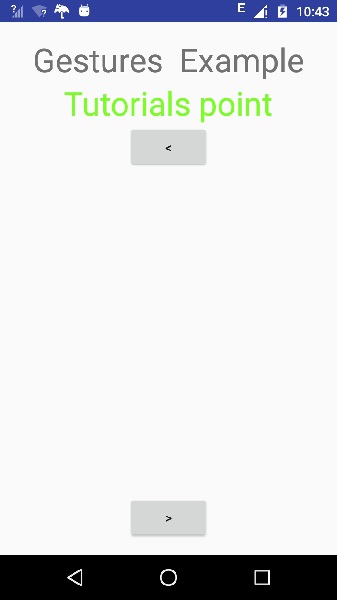
现在,如果您查看设备屏幕,您将看到两个按钮。
现在只需选择右箭头的上部按钮。 图像将从右侧出现并向左移动。 如下图所示 −
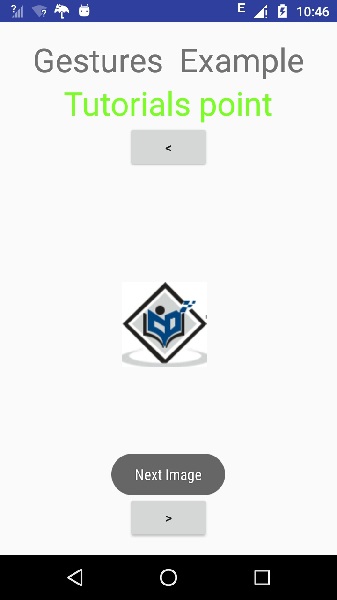
现在点击下面的按钮,这将带回以前的图像并进行一些过渡。 如下图所示 −