Android - 最佳实践
在开发 android 应用程序时,您可以遵循一些实践。 这些是由 android 本身提出的,并且随着时间的推移不断改进。
这些最佳实践包括交互设计功能、性能、安全和隐私、兼容性、测试、分发和货币化技巧。 它们被缩小并列出如下。
最佳实践 - 用户输入
每个文本字段都适用于不同的工作。 例如,一些文本字段用于文本,一些用于数字。 如果它是用于数字,那么最好在该文本字段获得焦点时显示数字小键盘。 它的语法是。
<EditText
   android:layout_width="wrap_content"
   android:layout_height="wrap_content"
   android:id="@+id/editText"
   android:layout_alignParentRight="true"
   android:layout_alignParentEnd="true"
   android:hint="User Name"
   android:layout_below="@+id/imageView"
   android:layout_alignLeft="@+id/imageView"
   android:layout_alignStart="@+id/imageView"
   android:numeric="integer" />
除此之外,如果您的字段用于密码,那么它必须显示密码提示,以便用户可以轻松记住密码。 可以实现为。
<EditText
   android:layout_width="wrap_content"
   android:layout_height="wrap_content"
   android:id="@+id/editText2"
   android:layout_alignLeft="@+id/editText"
   android:layout_alignStart="@+id/editText"
   android:hint="Pass Word"
   android:layout_below="@+id/editText"
   android:layout_alignRight="@+id/editText"
   android:layout_alignEnd="@+id/editText"
   android:password="true" />
最佳实践 - 后台作业
应用程序中的某些作业在应用程序后台运行。 他们的工作可能是从互联网上获取一些东西,播放音乐等。 建议不要在 UI 线程中完成等待已久的任务,而应通过服务或 AsyncTask 在后台完成。
AsyncTask 与服务。
两者都用于执行后台任务,但该服务不受大多数用户界面生命周期事件的影响,因此它会在可能关闭 AsyncTask 的情况下继续运行。
最佳实践 - 性能
您的应用程序性能应该达到标准。 但是当设备连接到电源或充电时,它应该在前端而不是在后端执行不同的操作。 可以通过 USB 和线缆进行充电。
当您的设备自行充电时,建议更新您的应用程序设置(如果有),例如在连接设备时最大化您的刷新率。 可以这样做。
IntentFilter ifilter = new IntentFilter(Intent.ACTION_BATTERY_CHANGED);
Intent batteryStatus = context.registerReceiver(null, ifilter);

// Are we charging / charged? Full or charging.
int status = batteryStatus.getIntExtra(BatteryManager.EXTRA_STATUS, -1);

// How are we charging? From AC or USB.
int chargePlug = batteryStatus.getIntExtra(BatteryManager.EXTRA_PLUGGED, -1);
最佳实践 - 安全和隐私
您的应用程序应该是安全的,不仅是应用程序,而且用户数据和应用程序数据也应该是安全的,这一点非常重要。 可以通过以下因素提高安全性。
使用内部存储而不是外部存储应用程序文件
尽可能使用内容提供者
连接网络时使用 SSl
使用适当的权限访问设备的不同功能
示例
下面的示例演示了开发 android 应用程序时应遵循的一些最佳实践。 它创建了一个基本应用程序,允许您指定如何使用文本字段以及如何通过检查手机的充电状态来提高性能。
要试验这个例子,你需要在实际设备上运行它。
| 步骤 | 描述 |
|---|---|
| 1 | 您将使用 Android Studio IDE 在 com.example.sairamkrishna.myapplication 包下创建一个 Android 应用程序。 |
| 2 | 修改 src/MainActivity.java 文件添加代码 |
| 3 | 修改布局 XML 文件 res/layout/activity_main.xml 如果需要,添加任何 GUI 组件。 |
| 4 | 运行应用程序并选择一个正在运行的 android 设备并在其上安装应用程序并验证结果。 |
这是src/MainActivity.java的内容
package com.example.sairamkrishna.myapplication;

import android.content.Intent;
import android.content.IntentFilter;
import android.os.BatteryManager;
import android.support.v7.app.ActionBarActivity;
import android.os.Bundle;
import android.view.View;
import android.widget.Button;
import android.widget.EditText;
import android.widget.Toast;

public class MainActivity extends ActionBarActivity {
   EditText ed1,ed2;
   Button b1;

   @Override
   protected void onCreate(Bundle savedInstanceState) {
      super.onCreate(savedInstanceState);
      setContentView(R.layout.activity_main);

      ed1=(EditText)findViewById(R.id.editText);
      ed2=(EditText)findViewById(R.id.editText2);
      b1=(Button)findViewById(R.id.button);

      b1.setOnClickListener(new View.OnClickListener() {
         @Override

         public void onClick(View v) {
            IntentFilter ifilter = new IntentFilter(Intent.ACTION_BATTERY_CHANGED);
            Intent batteryStatus = registerReceiver(null, ifilter);

            int status = batteryStatus.getIntExtra(BatteryManager.EXTRA_STATUS, -1);
            boolean isCharging = status == BatteryManager.BATTERY_STATUS_CHARGING ||
            status == BatteryManager.BATTERY_STATUS_FULL;

            int chargePlug = batteryStatus.getIntExtra(BatteryManager.EXTRA_PLUGGED,-1);
            boolean usbCharge = chargePlug == BatteryManager.BATTERY_PLUGGED_USB;
            boolean acCharge = chargePlug == BatteryManager.BATTERY_PLUGGED_AC;

            if(usbCharge){
               Toast.makeText(getApplicationContext(),"Mobile is charging on USB",
                  Toast.LENGTH_LONG).show();
            } else {
               Toast.makeText(getApplicationContext(),"Mobile is charging on AC",
                  Toast.LENGTH_LONG).show();
            }
         }
      });
   }

   @Override
   protected void onDestroy() {
      super.onDestroy();
   }
}
这是 activity_main.xml 的内容
<?xml version="1.0" encoding="utf-8"?>
   <RelativeLayout
   xmlns:android="http://schemas.android.com/apk/res/android"
   xmlns:tools="http://schemas.android.com/tools"
   android:layout_width="match_parent"
   android:layout_height="match_parent"
   android:paddingLeft="@dimen/activity_horizontal_margin"
   android:paddingRight="@dimen/activity_horizontal_margin"
   android:paddingTop="@dimen/activity_vertical_margin"
   android:paddingBottom="@dimen/activity_vertical_margin"
   tools:context=".MainActivity">

   <TextView android:text="Bluetooth Example"
      android:layout_width="wrap_content"
      android:layout_height="wrap_content"
      android:id="@+id/textview"
      android:textSize="35dp"
      android:layout_alignParentTop="true"
      android:layout_centerHorizontal="true" />

   <TextView
      android:layout_width="wrap_content"
      android:layout_height="wrap_content"
      android:text="Tutorials point"
      android:id="@+id/textView"
      android:layout_below="@+id/textview"
      android:layout_centerHorizontal="true"
      android:textColor="#ff7aff24"
      android:textSize="35dp" />

   <ImageView
      android:layout_width="wrap_content"
      android:layout_height="wrap_content"
      android:id="@+id/imageView"
      android:src="@drawable/abc"
      android:layout_below="@+id/textView"
      android:layout_centerHorizontal="true" />

   <EditText
      android:layout_width="wrap_content"
      android:layout_height="wrap_content"
      android:id="@+id/editText"
      android:layout_alignParentRight="true"
      android:layout_alignParentEnd="true"
      android:hint="User Name"
      android:layout_below="@+id/imageView"
      android:layout_alignLeft="@+id/imageView"
      android:layout_alignStart="@+id/imageView"
      android:numeric="integer" />

   <EditText
      android:layout_width="wrap_content"
      android:layout_height="wrap_content"
      android:id="@+id/editText2"
      android:layout_alignLeft="@+id/editText"
      android:layout_alignStart="@+id/editText"
      android:hint="Pass Word"
      android:layout_below="@+id/editText"
      android:layout_alignRight="@+id/editText"
      android:layout_alignEnd="@+id/editText"
      android:password="true" />

   <Button
      android:layout_width="wrap_content"
      android:layout_height="wrap_content"
      android:text="Check"
      android:id="@+id/button"
      android:layout_below="@+id/editText2"
      android:layout_centerHorizontal="true" />

</RelativeLayout>
这是 Strings.xml 的内容
<resources>
    <string name="app_name">My Application</string>
</resources>
这是 AndroidManifest.xml 的内容
<?xml version="1.0" encoding="utf-8"?>
<manifest xmlns:android="http://schemas.android.com/apk/res/android"
   package="com.example.sairamkrishna.myapplication" >

   <application
      android:allowBackup="true"
      android:icon="@drawable/ic_launcher"
      android:label="@string/app_name"
      android:theme="@style/AppTheme" >

      <activity
         android:name="com.example.sairamkrishna.myapplication.MainActivity"
         android:label="@string/app_name" >

         <intent-filter>
            <action android:name="android.intent.action.MAIN" />
            <category android:name="android.intent.category.LAUNCHER" />
         </intent-filter>

      </activity>

   </application>
</manifest>
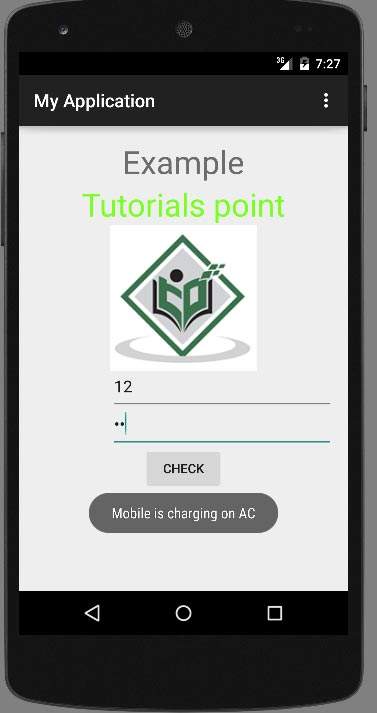
让我们尝试运行您的应用程序。 我假设您已将实际的 Android 移动设备与您的计算机连接起来。 要从 Android Studio 运行应用程序,请打开项目的一个活动文件,然后单击工具栏中的 Run  图标。 Android Studio 将显示以下图片。
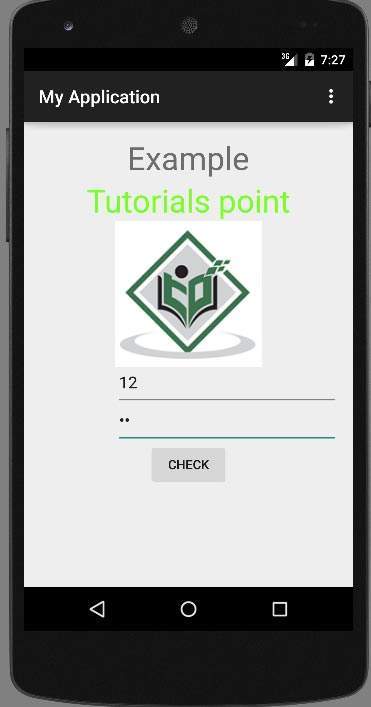
上图显示了应用程序的输出
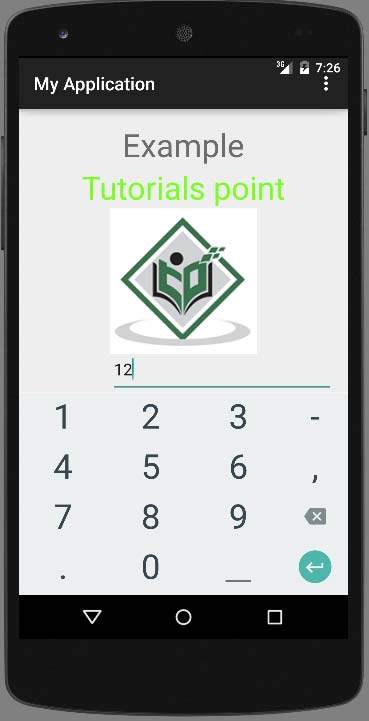
现在只需输入用户名字段,您就会看到字典中的内置 android 建议将开始出现。 如上所示。
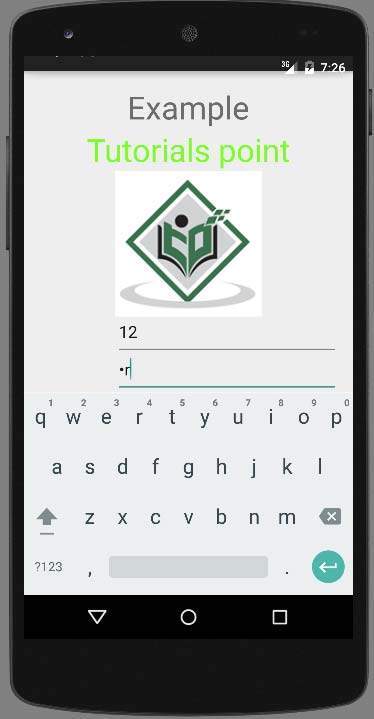
现在您将看到密码字段。 一旦您开始在该字段书写,它就会消失。 如上所示。
最后,只需将您的设备连接到 AC 电缆或 USB 电缆,然后按下充电检查按钮。 就我而言,我连接交流电源,它显示以下消息。