
Android - UI 用户界面测试
Android SDK 提供以下工具来支持对您的应用程序进行自动化的功能性 UI 测试。
- uiautomatorviewer
- uiautomator
uiautomatorviewer
一种用于扫描和分析 Android 应用程序的 UI 组件的 GUI 工具。
uiautomatorviewer 工具提供了一个方便的可视界面来检查布局层次结构并查看测试设备上显示的各个 UI 组件的属性。 使用此信息,您可以稍后使用选择器对象创建 uiautomator 测试,这些选择器对象针对要测试的特定 UI 组件。
要分析您要测试的应用程序的 UI 组件,请在安装示例中给出的应用程序后执行以下步骤。
- 将您的 Android 设备连接到您的开发机器
- 打开一个终端窗口并导航到 <android-sdk>/tools/
- 使用此命令运行工具
uiautomatorviewer
将遵循如下所示的命令
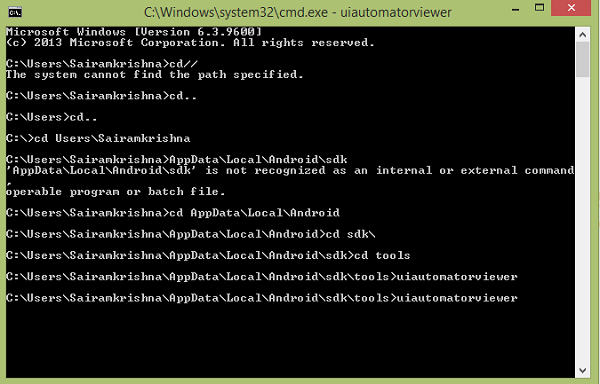
您将看到出现以下窗口。 它是 uiautomatorviewer 的默认窗口。
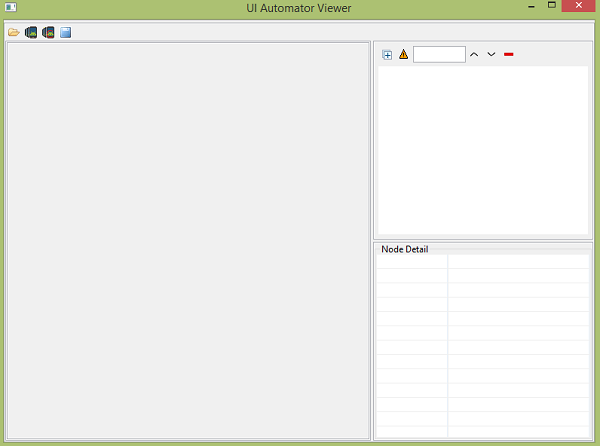
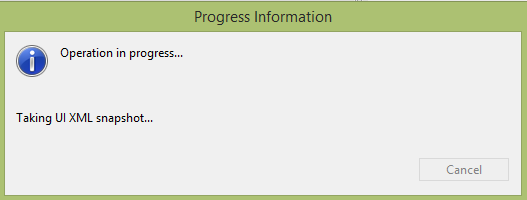
单击右上角的设备图标。 它将开始拍摄设备中当前打开的屏幕的 UI XML 快照。 会是这样的。
之后,您将在 uiautomatorviewer 窗口中看到设备屏幕的快照。
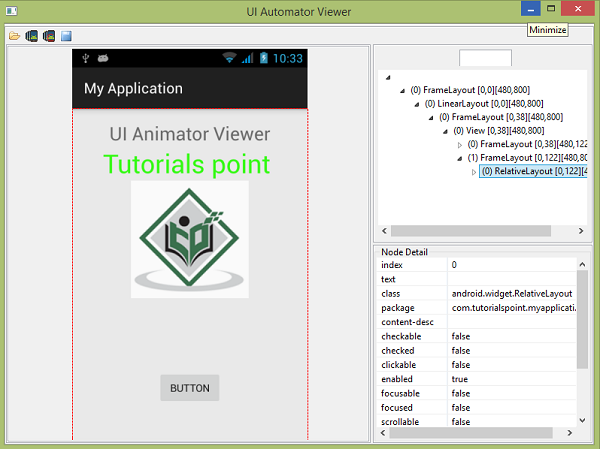
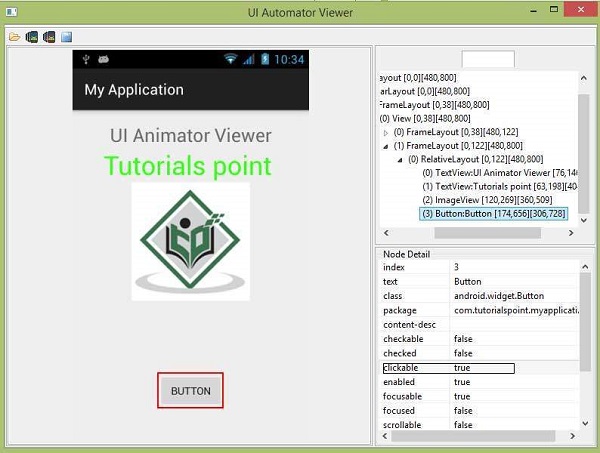
在此窗口的右侧,您将看到两个分区。 上部分解释了节点结构,UI 组件的排列和包含方式。 单击每个节点可在下部分区中提供详细信息。
例如,考虑下图。 当您点击按钮时,您可以在上部分区中看到 Button 被选中,在下部分区中显示其详细信息。 由于这个按钮是可点击的,所以它的可点击属性设置为 true。
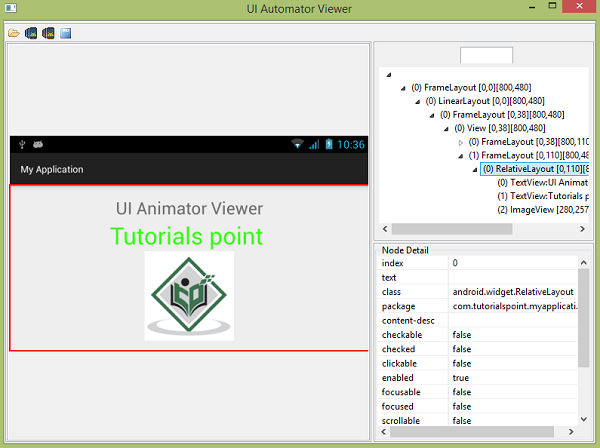
uiautomatorviewer 还可以帮助您检查不同方向的 UI。 例如,只需将您的设备方向更改为横向,然后再次捕获屏幕截图。 如下图所示 −
uiautomator
现在您可以创建自己的测试用例并使用 uiautomatorviewer 运行它来检查它们。 为了创建自己的测试用例,您需要执行以下步骤 −
在 Project Explorer 中,右键单击您创建的新项目,然后选择 Properties > Java Build Path,并执行以下操作 −
单击 Add Library > JUnit 然后选择 JUnit3 以添加 JUnit 支持。
单击 Add External JARs... 并导航到 SDK 目录。 在平台目录下,选择最新的 SDK 版本并添加 uiautomator.jar 和 android.jar 文件。
使用 UiAutomatorTestCase 扩展您的类
对必要的测试用例。
编写测试代码后,请按照以下步骤构建测试 JAR 并将其部署到目标 Android 测试设备。
创建所需的构建配置文件以构建输出 JAR。 要生成构建配置文件,请打开终端并运行以下命令:
<android-sdk>/tools/android create uitest-project -n <name> -t 1 -p <path>
<name> 是包含您的 uiautomator 测试源文件的项目的名称,<path> 是相应项目目录的路径。
从命令行,设置 ANDROID_HOME 变量。
set ANDROID_HOME=<path_to_your_sdk>
- 转到 build.xml 文件所在的项目目录并构建测试 JAR。
ant build
- 使用 adb push 命令将生成的测试 JAR 文件部署到测试设备。
adb push <path_to_output_jar> /data/local/tmp/
- 通过以下命令运行测试 −
adb shell uiautomator runtest LaunchSettings.jar -c com.uia.example.my.LaunchSettings
示例
下面的示例演示了 UI 测试的使用。 它创建了一个可用于 uiautomatorviewer 的基本应用程序。
要试验这个例子,你需要在一个实际的设备上运行它,然后按照开头解释的 uiautomatorviewer 步骤进行操作。
| 步骤 | 描述 |
|---|---|
| 1 | 您将使用 Android Studio 在 com.tutorialspoint.myapplication 包下创建一个 Android 应用程序。 |
| 2 | 修改 src/MainActivity.java 文件添加活动代码。 |
| 3 | 修改布局 XML 文件 res/layout/activity_main.xml 如果需要,添加任何 GUI 组件。 |
| 4 | 创建 src/second.java 文件以添加 Activity 代码。 |
| 5 | 如果需要,修改布局 XML 文件 res/layout/view.xml 添加任何 GUI 组件。 |
| 6 | 运行应用程序并选择一个正在运行的 android 设备并在其上安装应用程序并验证结果。 |
这是MainActivity.java的内容。
package com.tutorialspoint.myapplication;

import android.content.Intent;
import android.support.v7.app.ActionBarActivity;
import android.os.Bundle;
import android.view.View;
import android.widget.Button;

public class MainActivity extends ActionBarActivity {
   Button b1;

   @Override
   protected void onCreate(Bundle savedInstanceState) {
      super.onCreate(savedInstanceState);
      setContentView(R.layout.activity_main);

      b1=(Button)findViewById(R.id.button);
      b1.setOnClickListener(new View.OnClickListener() {
         @Override
         public void onClick(View v) {
            Intent in =new Intent(MainActivity.this,second.class);
            startActivity(in);
         }
      });
   }
}
这是second.java 的内容。
package com.tutorialspoint.myapplication;

import android.app.Activity;
import android.os.Bundle;
import android.view.View;
import android.widget.Button;
import android.widget.Toast;

public class second extends Activity {
   @Override
   protected void onCreate(Bundle savedInstanceState) {
      super.onCreate(savedInstanceState);
      setContentView(R.layout.view);
      Button b1=(Button)findViewById(R.id.button2);

      b1.setOnClickListener(new View.OnClickListener() {
         @Override
         public void onClick(View v) {
            Toast.makeText(second.this,"Thanks",Toast.LENGTH_LONG).show();
         }
      });
   }
}
这是 activity_main.xml 的内容
以下代码中的abc表示tutorialspoint.com的标志
<?xml version="1.0" encoding="utf-8"?>
<RelativeLayout xmlns:android="http://schemas.android.com/apk/res/android"
   xmlns:tools="http://schemas.android.com/tools" android:layout_width="match_parent"
   android:layout_height="match_parent" android:paddingLeft="@dimen/activity_horizontal_margin"
   android:paddingRight="@dimen/activity_horizontal_margin"
   android:paddingTop="@dimen/activity_vertical_margin"
   android:paddingBottom="@dimen/activity_vertical_margin" tools:context=".MainActivity">

   <TextView
      android:layout_width="wrap_content"
      android:layout_height="wrap_content"
      android:text="UI Animator Viewer"
      android:id="@+id/textView"
      android:textSize="25sp"
      android:layout_centerHorizontal="true" />

   <TextView
      android:layout_width="wrap_content"
      android:layout_height="wrap_content"
      android:text="Tutorials point"
      android:id="@+id/textView2"
      android:layout_below="@+id/textView"
      android:layout_alignRight="@+id/textView"
      android:layout_alignEnd="@+id/textView"
      android:textColor="#ff36ff15"
      android:textIsSelectable="false"
      android:textSize="35dp" />

   <ImageView
      android:layout_width="wrap_content"
      android:layout_height="wrap_content"
      android:id="@+id/imageView"
      android:src="@drawable/abc"
      android:layout_below="@+id/textView2"
      android:layout_centerHorizontal="true" />

   <Button
      android:layout_width="wrap_content"
      android:layout_height="wrap_content"
      android:text="Button"
      android:id="@+id/button"
      android:layout_marginTop="98dp"
      android:layout_below="@+id/imageView"
      android:layout_centerHorizontal="true" />

</RelativeLayout>
这是 view.xml 的内容。
<?xml version="1.0" encoding="utf-8"?>
<RelativeLayout xmlns:android="http://schemas.android.com/apk/res/android"
   android:orientation="vertical" android:layout_width="match_parent"
   android:layout_height="match_parent">

   <Button
      android:layout_width="wrap_content"
      android:layout_height="wrap_content"
      android:text=" Button"
      android:id="@+id/button2"
      android:layout_gravity="center_horizontal"
      android:layout_centerVertical="true"
      android:layout_centerHorizontal="true" />
</RelativeLayout>
这是Strings.xml的内容。
<resources>
   <string name="app_name">My Application</string>
</resources>
这是AndroidManifest.xml的内容。
<?xml version="1.0" encoding="utf-8"?>
<manifest xmlns:android="http://schemas.android.com/apk/res/android"
   package="com.tutorialspoint.myapplication" >

   <application
      android:allowBackup="true"
      android:icon="@mipmap/ic_launcher"
      android:label="@string/app_name"
      android:theme="@style/AppTheme" >

      <activity
         android:name=".MainActivity"
         android:label="@string/app_name" >

         <intent-filter>
            <action android:name="android.intent.action.MAIN" />
            <category android:name="android.intent.category.LAUNCHER" />
         </intent-filter>

      </activity>

      <activity android:name=".second"></activity>

   </application>
</manifest>
让我们尝试运行您的 UI 测试应用程序。 我假设您已将实际的 Android 移动设备与您的计算机连接起来。要从 Android Studio 运行应用程序,请打开项目的一个活动文件,然后单击工具栏中的运行  图标。在启动您的应用程序之前,Android Studio 将显示以下窗口以选择您要运行 Android 应用程序的选项。
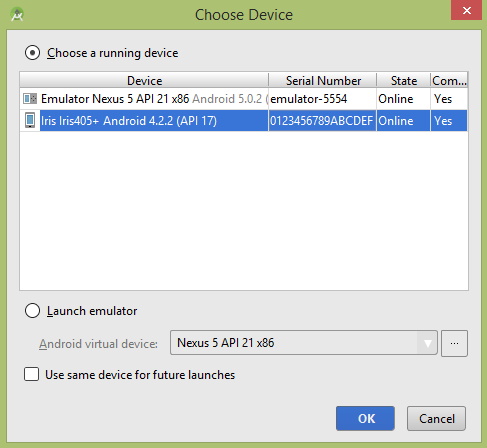
选择您的移动设备作为选项,然后检查将显示应用程序屏幕的移动设备。 现在只需按照顶部在 uiautomatorviewer 部分下提到的步骤来在此应用程序上执行 ui 测试。

